Pz.Kpfw.II Ausf.C (Halinski 2-3/98)

snake7

Well-Known Member
Dec 13, 2004
424
1,165
93
46
Israel
I finished to assemble separate tracks into one strip
and in one evening finished to glue the teeth
Now tracks will wait in box for painting job and I, with relieve, can continue the assembling :)
 

Attachments

  • 77.jpg
    77.jpg
    133.6 KB · Views: 17
  • 78.jpg
    78.jpg
    108.9 KB · Views: 17
  • 79.jpg
    79.jpg
    150 KB · Views: 20

snake7

Well-Known Member
Dec 13, 2004
424
1,165
93
46
Israel
The tracks got paint and lay drying aside
In the meantime I assembled protecting skirting and elevation hooks
The one on rightmost side - gluing place was inverted
Also I glued front towing hooks
 

Attachments

  • 80.jpg
    80.jpg
    152.8 KB · Views: 13
  • 81.jpg
    81.jpg
    186.6 KB · Views: 15
  • 82.jpg
    82.jpg
    153.7 KB · Views: 14

snake7

Well-Known Member
Dec 13, 2004
424
1,165
93
46
Israel
Hello to all
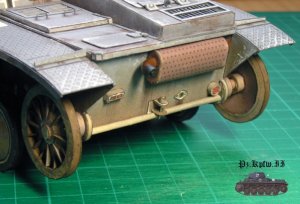
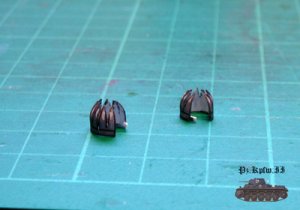
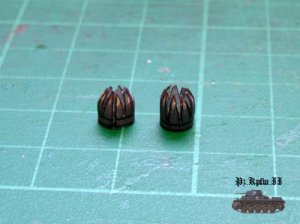
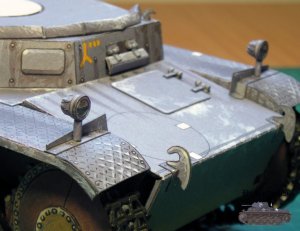
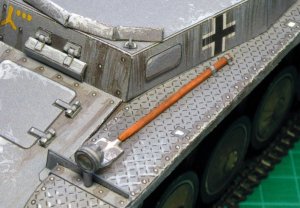
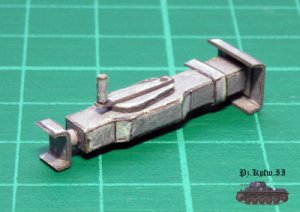
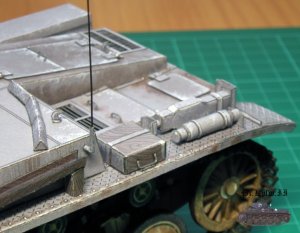
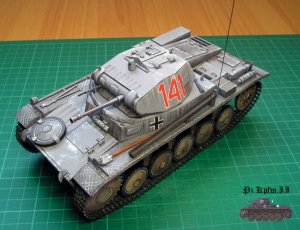
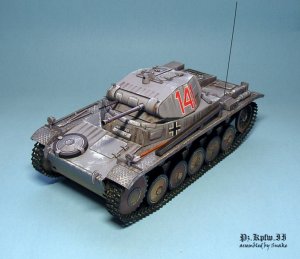
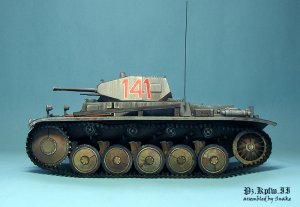
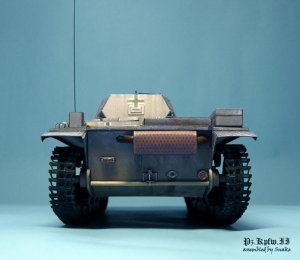
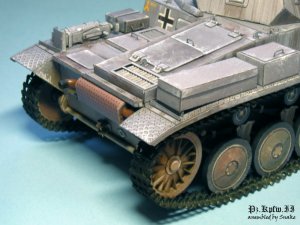
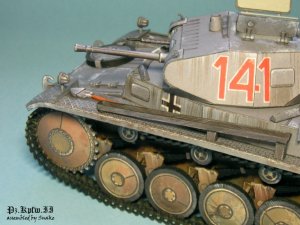
Exhaust pipe assembled and glued in place
I did the tubes from wire with isolation, instead of paper ones
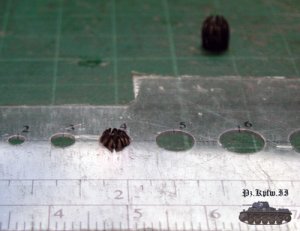
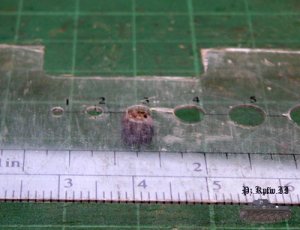
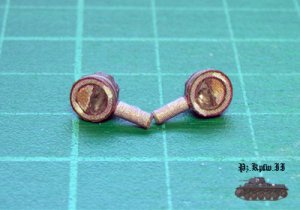
Also assebled towing pin

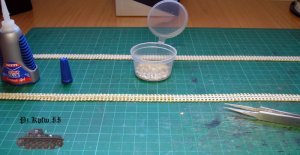
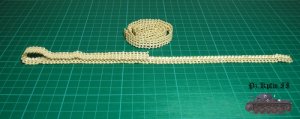
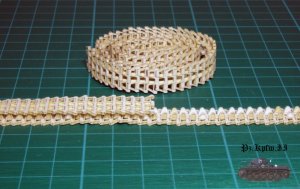
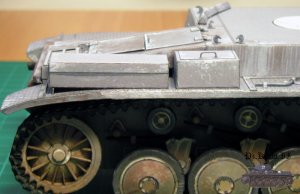
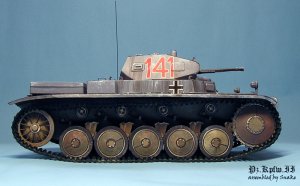
And finally! Tracks are ready, painted and installed
They was painted twice. First time it was metallic steel, but
the color was too bright and shiny. So i did step two and painted over with black matt, very diluted and old paint
For my opinion the result is satisfying
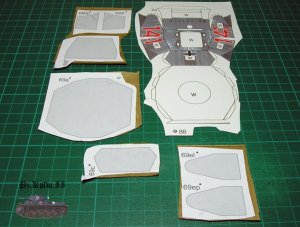
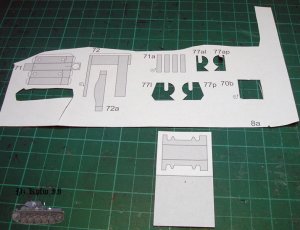
 

Attachments

  • 83.jpg
    83.jpg
    178.6 KB · Views: 11
  • 84.jpg
    84.jpg
    188.6 KB · Views: 12
  • 85.jpg
    85.jpg
    155.2 KB · Views: 12
  • 86.jpg
    86.jpg
    149.8 KB · Views: 16
  • 87.jpg
    87.jpg
    146.4 KB · Views: 12
  • 88.jpg
    88.jpg
    166.1 KB · Views: 11

snake7

Well-Known Member
Dec 13, 2004
424
1,165
93
46
Israel
Thank you Janos

Some more small parts
Lights were made with decreased circle method
 

Attachments

  • 91.jpg
    91.jpg
    57.7 KB · Views: 100
  • 92.jpg
    92.jpg
    66.7 KB · Views: 97
  • 94.jpg
    94.jpg
    67.1 KB · Views: 98
  • 95.jpg
    95.jpg
    76.6 KB · Views: 95
  • 97.jpg
    97.jpg
    70.7 KB · Views: 99
  • 98.jpg
    98.jpg
    141.4 KB · Views: 12

snake7

Well-Known Member
Dec 13, 2004
424
1,165
93
46
Israel
Some others parts on side shelfs. Arm of the shovel was made from toothpick
 

Attachments

  • 99.jpg
    99.jpg
    175.1 KB · Views: 10
  • 100.jpg
    100.jpg
    164.2 KB · Views: 8
  • 101.jpg
    101.jpg
    183.4 KB · Views: 8
  • 102.jpg
    102.jpg
    192.7 KB · Views: 10

snake7

Well-Known Member
Dec 13, 2004
424
1,165
93
46
Israel
Hello
I finished all the instruments on the shelfs
Some instrument boxes, antenna rail and jack rest
 

Attachments

  • 103.jpg
    103.jpg
    78.3 KB · Views: 89
  • 104.jpg
    104.jpg
    82.6 KB · Views: 87
  • 105.jpg
    105.jpg
    65.5 KB · Views: 89
  • 106.jpg
    106.jpg
    59 KB · Views: 90
  • 107.jpg
    107.jpg
    76.2 KB · Views: 89
  • 108.jpg
    108.jpg
    72.8 KB · Views: 88

snake7

Well-Known Member
Dec 13, 2004
424
1,165
93
46
Israel
Jack and extinguisher
 

Attachments

  • 109.jpg
    109.jpg
    79.2 KB · Views: 90
  • 110.jpg
    110.jpg
    67 KB · Views: 88
  • 111.jpg
    111.jpg
    75.2 KB · Views: 87
  • 112.jpg
    112.jpg
    65.7 KB · Views: 88

snake7

Well-Known Member
Dec 13, 2004
424
1,165
93
46
Israel
Everything put in place + antenna
 

Attachments

  • 113.jpg
    113.jpg
    157.9 KB · Views: 9
  • 114.jpg
    114.jpg
    174.8 KB · Views: 8
  • 115.jpg
    115.jpg
    140 KB · Views: 8

snake7

Well-Known Member
Dec 13, 2004
424
1,165
93
46
Israel
Hello!
Last step - turret!
I did it with doors that can be opened so i was in need to glue the reinforcements inside
First the upper and lower, then rear and then side ones.
 

Attachments

  • 116.jpg
    116.jpg
    173.2 KB · Views: 9
  • 117.jpg
    117.jpg
    155.3 KB · Views: 13
  • 118.jpg
    118.jpg
    155.2 KB · Views: 7

snake7

Well-Known Member
Dec 13, 2004
424
1,165
93
46
Israel
Then I assembled barrel, gun, front mask and some hatches
 

Attachments

  • 119.jpg
    119.jpg
    76.7 KB · Views: 123
  • 120.jpg
    120.jpg
    76.4 KB · Views: 124
  • 221.jpg
    221.jpg
    81.8 KB · Views: 124
  • 222.jpg
    222.jpg
    144.7 KB · Views: 13

snake7

Well-Known Member
Dec 13, 2004
424
1,165
93
46
Israel
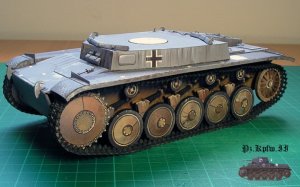
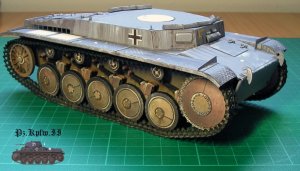
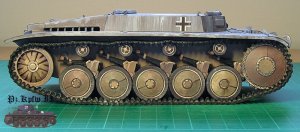
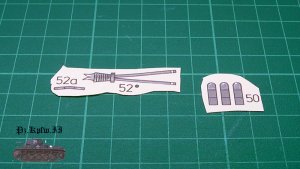
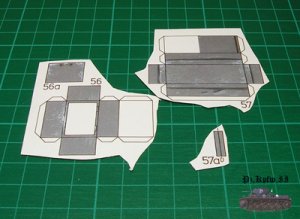
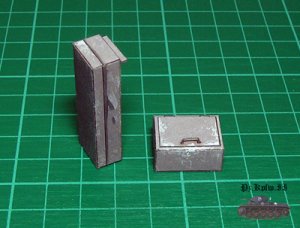
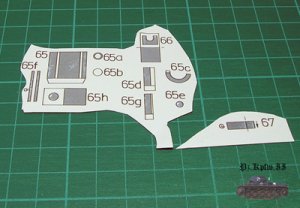
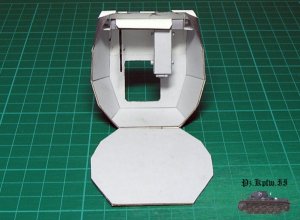
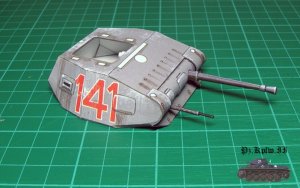
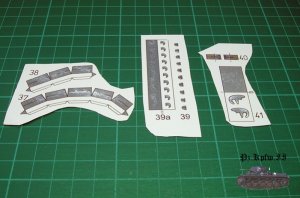
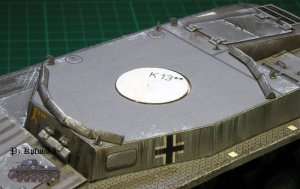
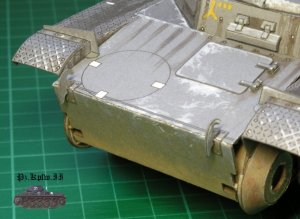
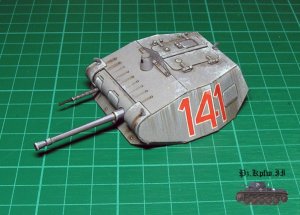
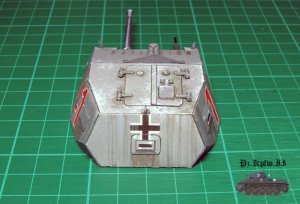
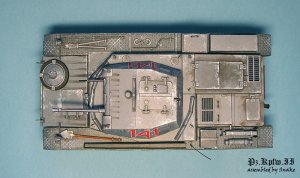
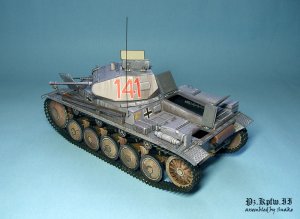
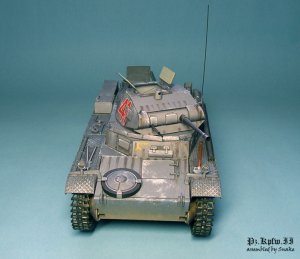
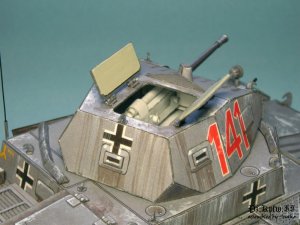
And last thing I did was main hatch doors and commander shield with periscope.
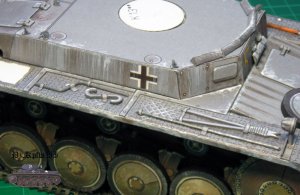
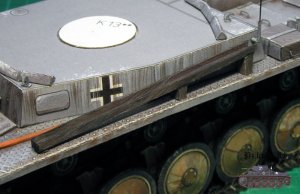
When the turret was finished I glued it into turning basis on the hull...

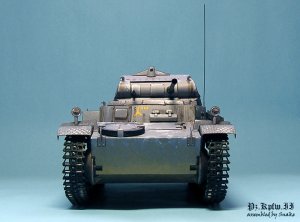
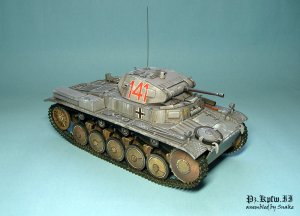
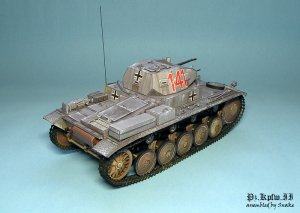
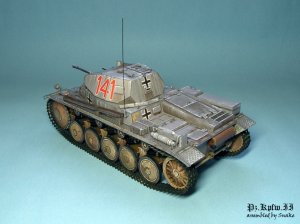
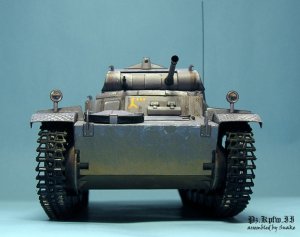
And the model is finished!
 

Attachments

  • 223.jpg
    223.jpg
    164.1 KB · Views: 12
  • 224.jpg
    224.jpg
    70.6 KB · Views: 122
  • 225.jpg
    225.jpg
    52.8 KB · Views: 124
  • 226.jpg
    226.jpg
    167.6 KB · Views: 13
  • 227.jpg
    227.jpg
    150 KB · Views: 13
  • 228.jpg
    228.jpg
    177.2 KB · Views: 14

snake7

Well-Known Member
Dec 13, 2004
424
1,165
93
46
Israel
Final photo-session

...to be continued in next post
 

Attachments

  • f1.jpg
    f1.jpg
    133.7 KB · Views: 16
  • f2.jpg
    f2.jpg
    168.8 KB · Views: 12
  • f3.jpg
    f3.jpg
    175.1 KB · Views: 11
  • f4.jpg
    f4.jpg
    165.8 KB · Views: 12
  • f5.jpg
    f5.jpg
    103 KB · Views: 11
  • f14.jpg
    f14.jpg
    181.1 KB · Views: 12

snake7

Well-Known Member
Dec 13, 2004
424
1,165
93
46
Israel
Continued from previous post

...to be continued in next post
 

Attachments

  • f6.jpg
    f6.jpg
    185.6 KB · Views: 15
  • f7.jpg
    f7.jpg
    180.4 KB · Views: 13
  • f8.jpg
    f8.jpg
    143.6 KB · Views: 10
  • f9.jpg
    f9.jpg
    187.3 KB · Views: 13
  • f10.jpg
    f10.jpg
    121.7 KB · Views: 10

snake7

Well-Known Member
Dec 13, 2004
424
1,165
93
46
Israel
continued from previous post
last picture - a bonus

Thank you all, who followed my thread
 

Attachments

  • f11.jpg
    f11.jpg
    155.3 KB · Views: 12
  • f12.jpg
    f12.jpg
    152.6 KB · Views: 13
  • f13.jpg
    f13.jpg
    162.6 KB · Views: 11
  • f16.jpg
    f16.jpg
    129.1 KB · Views: 13
  • f15.jpg
    f15.jpg
    132 KB · Views: 22

KCStephens

Member
Sep 18, 2007
83
0
16
57
York, PA
Igor,
This is a beautiful model that you have built. I liked it so much that I had to order one for myself. I just love the weathering and textures that are printed on this kit. This will be my next build. I only wish that there was an option in the kit for "band style" tracks...the individual links are killer.
I still may order the laser cut tracks like you did.
 

cgutzmer

Well-Known Member
May 30, 2006
5,242
1
76
55
Sun Prairie WI
www.ecardmodels.com
Magnificent! I am just picking this build up again after 3.5 years on the shelf. I am not at the same skill level as you and I dont use paint but I got lots of good tips out of here already! Question - I am at the mudgaurds and had no idea that one sheet was for the inside of them! did you glue it to the bottom BEFORE you cut and folded the parts or glue them to the inside after the parts were formed up. Seems to me you would get a better result doing it first but I am unsure how well folding would go in that case...
Thanks!
Chris