Pz.Kpfw.II Ausf.C (Halinski 2-3/98)

snake7

Well-Known Member
Dec 13, 2004
424
1,165
93
46
Israel
Hello to all
After a little brake I'am starting a new model
I decided to rest a little after FAMO and to do something for the soul :)
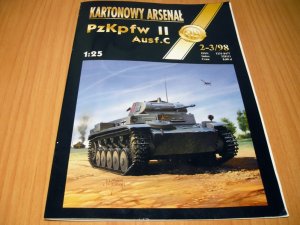
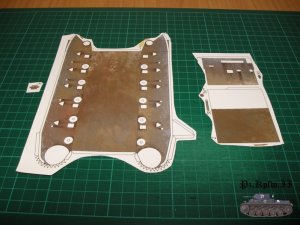
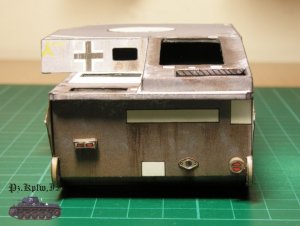
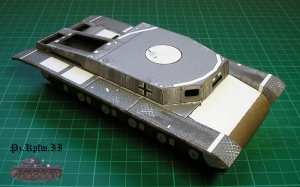
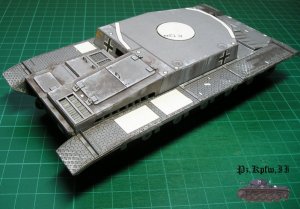
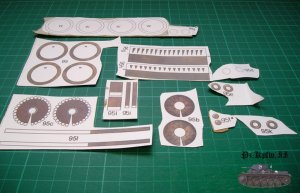
The choice fell on a model of Halinski, the old one , but very beautiful IMHO.
There is wethering and nice colors and the designer is pan Marian Sobel, so I believe this will be a joy build.

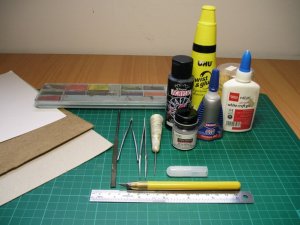
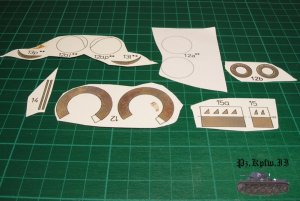
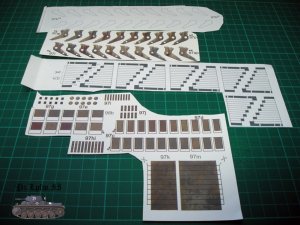
There is only 6 pages and 2 with instructions.
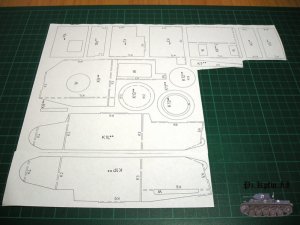
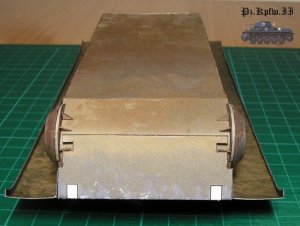
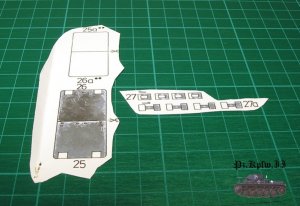
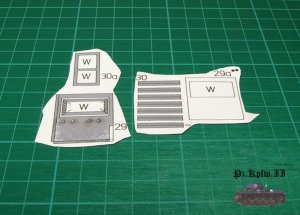
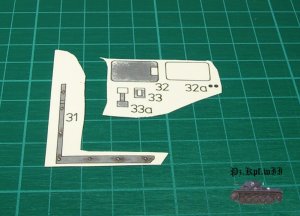
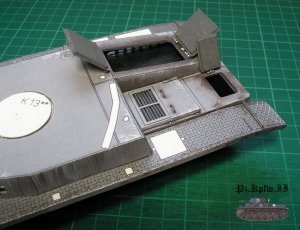
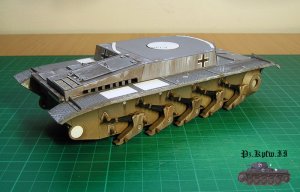
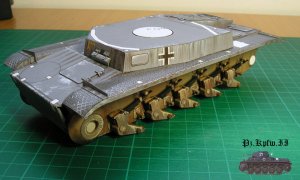
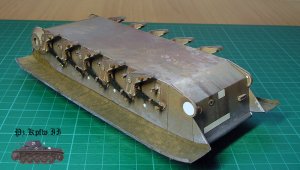
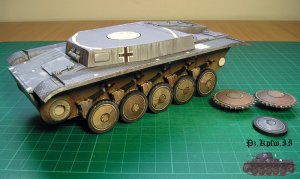
I will build it as is, only painting edges.
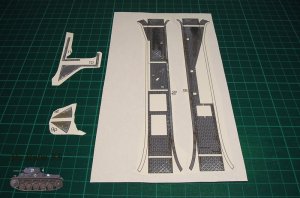
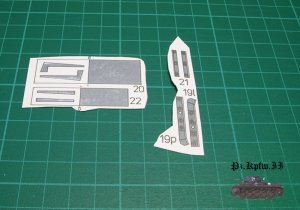
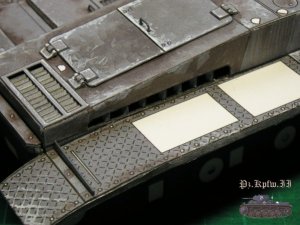
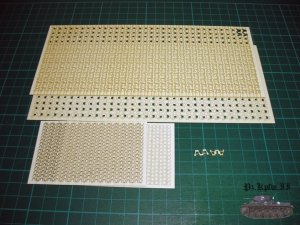
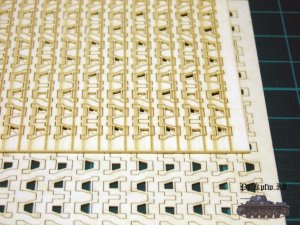
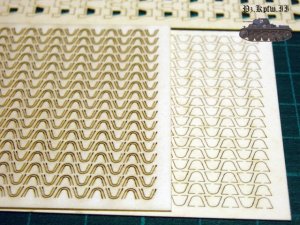
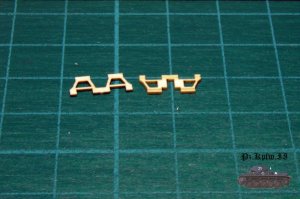
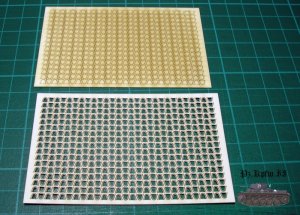
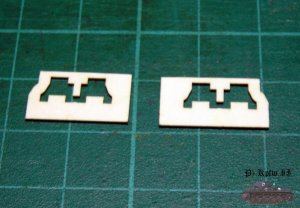
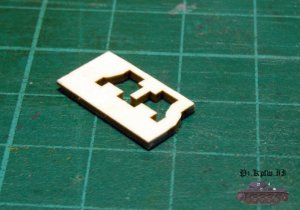
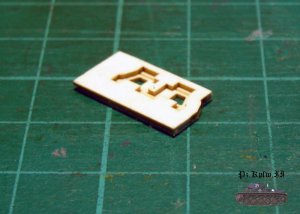
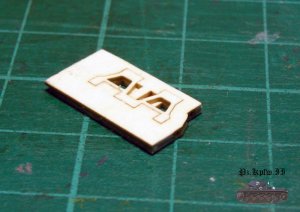
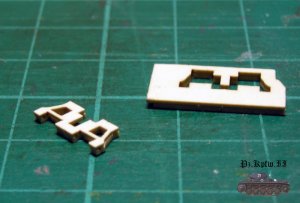
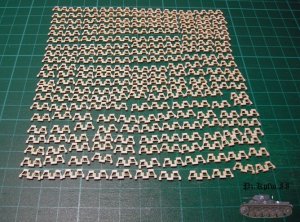
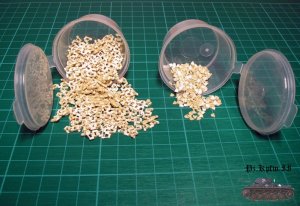
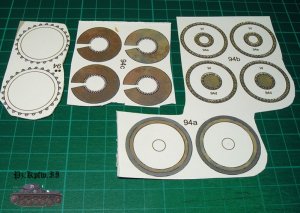
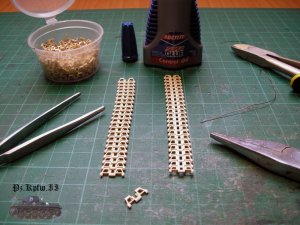
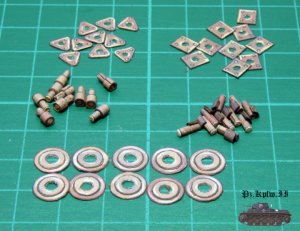
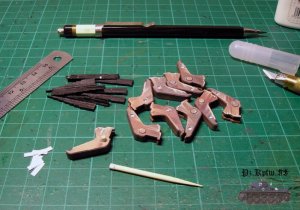
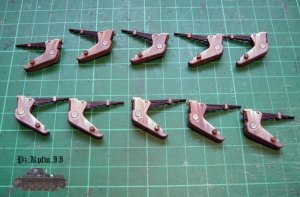
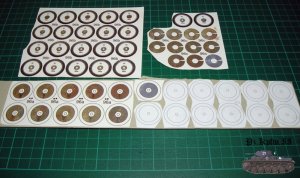
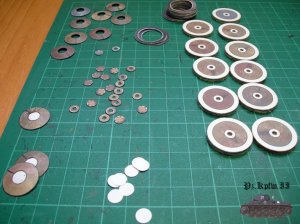
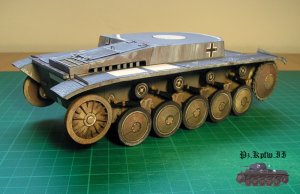
The tracks will be assembled from laser cut design.
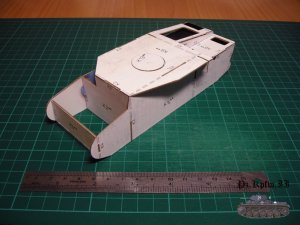
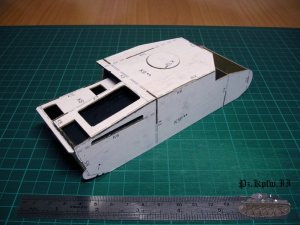
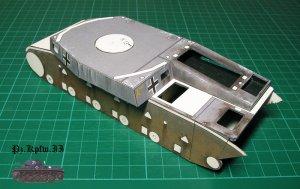
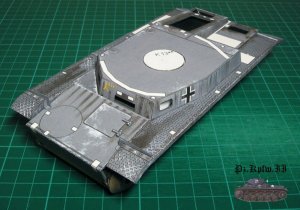
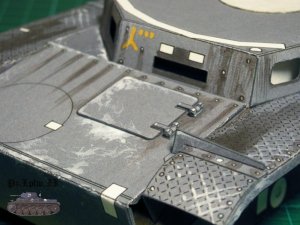
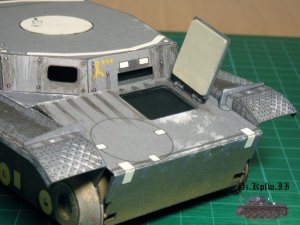
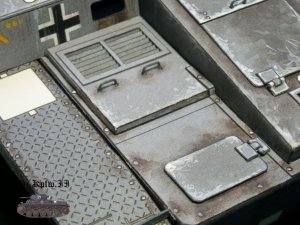
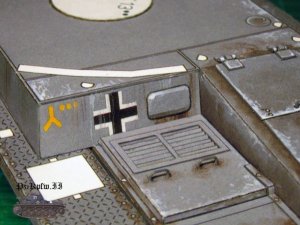
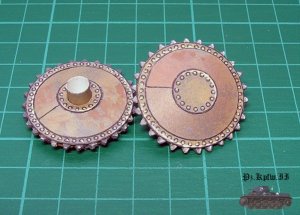
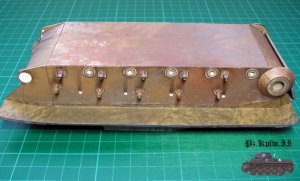
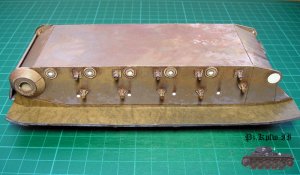
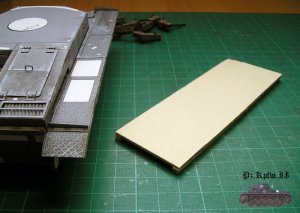
I decided to do all the doors movable, despite that there is almost no interior.
 

Attachments

  • 1.jpg
    1.jpg
    164.3 KB · Views: 27

snake7

Well-Known Member
Dec 13, 2004
424
1,165
93
46
Israel
The numbering is simple and logical so i started from first part.
The frame assembled with no problems, everything is fit well.
The only thing I want to point to:
the circle on which the turret will be placed - need additional 0.5 carton layer, so it will pop up a little from the top.
 

Attachments

  • 2.jpg
    2.jpg
    150.3 KB · Views: 17
  • 3.jpg
    3.jpg
    160.9 KB · Views: 19
  • 4.jpg
    4.jpg
    162.5 KB · Views: 25

snake7

Well-Known Member
Dec 13, 2004
424
1,165
93
46
Israel
And the shell glued on the frame.
There was almost no problems with that, only little adjustments here and there.
It's very surprising that the body almost done. I am regular that, in complicated models, I arrive to this point after a couple of months and not couple of days :D
 

Attachments

  • 5.jpg
    5.jpg
    168.7 KB · Views: 23
  • 6.jpg
    6.jpg
    174 KB · Views: 16
  • 8.jpg
    8.jpg
    146.7 KB · Views: 20
  • 9.jpg
    9.jpg
    192.4 KB · Views: 20
  • 10.jpg
    10.jpg
    134.6 KB · Views: 23

snake7

Well-Known Member
Dec 13, 2004
424
1,165
93
46
Israel
By the way, this is the instruments I will use.
 

Attachments

  • 7.jpg
    7.jpg
    153.9 KB · Views: 32

snake7

Well-Known Member
Dec 13, 2004
424
1,165
93
46
Israel
Thanks Janos

The mudguards are ready
Construction is satisfyingly good.
The inside given as a big part of color on thin paper, so it was no difficult
to band the edges
You need to pay attention to the left side , where is located white gluing place to attach the bulge of a body.
If the shell will be glued too near to the frame , white place will popup.
 

Attachments

  • 11.jpg
    11.jpg
    182.8 KB · Views: 17
  • 12.jpg
    12.jpg
    194.8 KB · Views: 15
  • 13.jpg
    13.jpg
    189.6 KB · Views: 15
  • 14.jpg
    14.jpg
    155.7 KB · Views: 14
  • 15.jpg
    15.jpg
    192.6 KB · Views: 17

snake7

Well-Known Member
Dec 13, 2004
424
1,165
93
46
Israel
Hello to everyone

Asembled: basis for front driving wheel, armor plate with hatch and supportings for mudguards.

The carton circle for the basis was given double, one with gluing lines for the body and one without. Both marked 12a. I've chosen one with gluing lines.
Circle 12b must be glued on 1 mm carton. It's not marked.
 

Attachments

  • 16.jpg
    16.jpg
    156.7 KB · Views: 14
  • 17.JPG
    17.JPG
    188.9 KB · Views: 15
  • 18.jpg
    18.jpg
    150.1 KB · Views: 12
  • 20.jpg
    20.jpg
    155.9 KB · Views: 17

snake7

Well-Known Member
Dec 13, 2004
424
1,165
93
46
Israel
The hatch can be opened.
The hinges are with interesting design, but very easy to build
and they provide good closing of the hatch plate.
The pillow 17a is to big, so it must be cut down to match the hatch opening.
 

Attachments

  • 19.jpg
    19.jpg
    150.3 KB · Views: 13
  • 21.jpg
    21.jpg
    166.4 KB · Views: 14
  • 22.jpg
    22.jpg
    176 KB · Views: 17
  • 23.jpg
    23.jpg
    147.5 KB · Views: 13
  • 24.jpg
    24.jpg
    161.7 KB · Views: 11
  • 25.jpg
    25.jpg
    183.5 KB · Views: 16

snake7

Well-Known Member
Dec 13, 2004
424
1,165
93
46
Israel
Rear side assembled
everything went strait forward

the parts
 

Attachments

  • 26.jpg
    26.jpg
    158.6 KB · Views: 7
  • 27.jpg
    27.jpg
    164 KB · Views: 5
  • 28.jpg
    28.jpg
    163.7 KB · Views: 6
  • 29.jpg
    29.jpg
    151.5 KB · Views: 5

snake7

Well-Known Member
Dec 13, 2004
424
1,165
93
46
Israel
All parts assembled
 

Attachments

  • 30.jpg
    30.jpg
    175.7 KB · Views: 14
  • 31.jpg
    31.jpg
    175.3 KB · Views: 8
  • 32.jpg
    32.jpg
    175.3 KB · Views: 10
  • 33.jpg
    33.jpg
    200.5 KB · Views: 9
  • 34.jpg
    34.jpg
    175.4 KB · Views: 13

snake7

Well-Known Member
Dec 13, 2004
424
1,165
93
46
Israel
Hello
A little update
Some more details, like window coverings and driver site cover, are assembled
 

Attachments

  • 35.jpg
    35.jpg
    153.3 KB · Views: 11
  • 36.jpg
    36.jpg
    143.6 KB · Views: 11
  • 37.jpg
    37.jpg
    178 KB · Views: 11

snake7

Well-Known Member
Dec 13, 2004
424
1,165
93
46
Israel
And here i decided to stop following standard numeration and move to assemble chaises.
I just afraid that other parts that i will glue before i'll move to chaises, would brake apart
So, first of all i started from tracks. As i stated before, i will assemble tracks from laser cut parts by Ortin.
The parts cut out easily and i started to glue 2 halfs together.
Between two pairs, i clean the slots for joining hinge and put it aside
important thing is two center to parts together.
Also i started to prepare pegs
 

Attachments

  • 38.jpg
    38.jpg
    202.7 KB · Views: 15
  • 39.jpg
    39.jpg
    196.7 KB · Views: 12
  • 40.jpg
    40.jpg
    199.6 KB · Views: 16
  • 41.jpg
    41.jpg
    150.8 KB · Views: 12
  • 42.jpg
    42.jpg
    202 KB · Views: 15
  • 43.jpg
    43.jpg
    207.8 KB · Views: 14
Last edited:

snake7

Well-Known Member
Dec 13, 2004
424
1,165
93
46
Israel
The assembling of the tracks slowly moving forward
The difficulty was in centering two parts
So found a solution:
the pages from which i detached the parts have exact shapes of the tracks.
I cut out two shapes of inner part and glued them together. That's it. The centering module is completed.
I put inner part inside and then outer part on top. Let dry a glue for few seconds and take out centered assembled track.

And all parts glued together

to be continued...
 

Attachments

  • 44.jpg
    44.jpg
    148.7 KB · Views: 12
  • 45.jpg
    45.jpg
    146.9 KB · Views: 13
  • 46.JPG
    46.JPG
    187.8 KB · Views: 11
  • 47.JPG
    47.JPG
    194.8 KB · Views: 12
  • 48.JPG
    48.JPG
    167.1 KB · Views: 12
  • 49.jpg
    49.jpg
    213.6 KB · Views: 16

snake7

Well-Known Member
Dec 13, 2004
424
1,165
93
46
Israel
Hello guys
I'am back in line
The work caused me to take a brake for about a month
If only we could all build card models and nothing else... :D

Thank you Dragon

I finished to round the edges of tracks with design knife.
Also i assembled cogs, that took a lot of work and time
I started to glue drive sprocket.
Because the design is old, the cogs on the sprocket didn't match the holes on the tracks... so i was in need to rearrange them.
And the assembling of tracks continue...
 

Attachments

  • 50.jpg
    50.jpg
    193.3 KB · Views: 10
  • 51.jpg
    51.jpg
    188.6 KB · Views: 10
  • 52.jpg
    52.jpg
    181.6 KB · Views: 10
  • 53.jpg
    53.jpg
    172.5 KB · Views: 11
  • 54.jpg
    54.jpg
    198.6 KB · Views: 14

snake7

Well-Known Member
Dec 13, 2004
424
1,165
93
46
Israel
Started to put chaises in place
Front driving wheel is assembled
Also finished spring stoppers and swing arm limiters
 

Attachments

  • 55.jpg
    55.jpg
    189.6 KB · Views: 12
  • 56.jpg
    56.jpg
    168.4 KB · Views: 9
  • 57.jpg
    57.jpg
    176.6 KB · Views: 13
  • 58.jpg
    58.jpg
    144.8 KB · Views: 11
  • 59.jpg
    59.jpg
    191.1 KB · Views: 12

snake7

Well-Known Member
Dec 13, 2004
424
1,165
93
46
Israel
Shalom to all
The chassis is ready

Some points that need attention:
* Springs must be glued on some cardboard, to make right size when collected
* You must pay attention on the angle of springs, when placing them in the wheel leg
* Last spring has different angle, due to special position of spring stopper
* Total length from body to the center of wheel must be 9 mm, according to instructions. I made the axes from toothpicks and visible length of the axes was 2 mm between body and leg and 1 mm between leg and wheel
 

Attachments

  • 60.jpg
    60.jpg
    177.5 KB · Views: 10
  • 61.jpg
    61.jpg
    184.4 KB · Views: 8
  • 62.jpg
    62.jpg
    174.2 KB · Views: 7
  • 63.jpg
    63.jpg
    188.1 KB · Views: 11

snake7

Well-Known Member
Dec 13, 2004
424
1,165
93
46
Israel
For placing legs in right angle, i made some stock to place the body on.
According to drawings, leg must be placed in way, that wheel axes will be exactly under body line
I glued all legs and chassis is finished
 

Attachments

  • 64.jpg
    64.jpg
    189.6 KB · Views: 8
  • 65.jpg
    65.jpg
    190.2 KB · Views: 8
  • 66.jpg
    66.jpg
    180.9 KB · Views: 12
  • 67.jpg
    67.jpg
    176.5 KB · Views: 9

snake7

Well-Known Member
Dec 13, 2004
424
1,165
93
46
Israel
Hi
A little progress.
Main wheels are ready.
I added strip, to cover the perimeter of the wheel, for more aesthetic look.
Also i was in need to solve the problem with hole in the center, being to
big for the little disk. I glued white disks ( as you can see on second picture) that made a basis to glue the little disk on, and painted white places.
After I finished all 10 wheels, I attached them to place.
Everything is centered now and construction is strong
 

Attachments

  • 68.jpg
    68.jpg
    174.8 KB · Views: 7
  • 69.jpg
    69.jpg
    197.7 KB · Views: 6
  • 70.jpg
    70.jpg
    156.6 KB · Views: 9
  • 71.jpg
    71.jpg
    190 KB · Views: 11
  • 72.jpg
    72.jpg
    157.2 KB · Views: 10

snake7

Well-Known Member
Dec 13, 2004
424
1,165
93
46
Israel
Another update
Rear wheel and supporting wheels are ready
Again, here I added strip, to cover the perimeter of rear wheel
All axis must be checked and trimmed at right size to achieve one line of positioning for all wheels
The front driving wheel still isn't glued. I left it for later, when I'll put the tracks on.

On last picture you can see the "device" I use for curving the details. It's a jelly wrist pillow from old mouse pad. Very effective :)
 

Attachments

  • 73.jpg
    73.jpg
    158.2 KB · Views: 9
  • 74.jpg
    74.jpg
    174.3 KB · Views: 8
  • 75.jpg
    75.jpg
    176.3 KB · Views: 8
  • 76.jpg
    76.jpg
    183.2 KB · Views: 8
  • w.jpg
    w.jpg
    156.7 KB · Views: 11