

E
Model Of The Week: Imperial Guard Armour Builds
- Thread starter Tirick
- Start date
You are using an out of date browser. It may not display this or other websites correctly.
You should upgrade or use an alternative browser.
You should upgrade or use an alternative browser.
Model of the Week? Thank you!
A Marauder would indeed be cool, but I don't see one in the links Armorman provided. Are they posted somewhere else?
A Marauder would indeed be cool, but I don't see one in the links Armorman provided. Are they posted somewhere else?
The model is over at flarebaffles warhammer armour on page 37 or here is the link; http://go.zealot.com/?id=673X1262&xs=1&url=http%3A%2F%2Fdepositfiles.com%2Ffiles%2Fzcaozvdot&sref=http%3A%2F%2Fwww.zealot.com%2Fforum%2Fshowthread.php%3Ft%3D155919%26page%3D37
Awesome, thank you for the link!
I might build one of these along with a Thunderbolt. They're both great static models.
I'm very tempted to make up actual pilot models for these. I'll need them anyway if I want scout Sentinels or pilots for the eventual Valkyrie.
I might build one of these along with a Thunderbolt. They're both great static models.
I'm very tempted to make up actual pilot models for these. I'll need them anyway if I want scout Sentinels or pilots for the eventual Valkyrie.
If you are looking for 40k models that aren't part of any thread, as well as most of Patoroch's work. hit http://www.mediafire.com/soulreaperlord it is a 3 part download as I am too cheap to pay for the subscribe to mediafire but its about 700mb of models. sorted by 40k race, and which variant of whatever vehicle/walker/flyer you can imagine. until they are all up on paperhammer40k.com I have them available on the mediafire
Thank you! I'm in the (slow) process of painting them at the moment; the camo pattern is working out quite well. I hope to post pics this week.
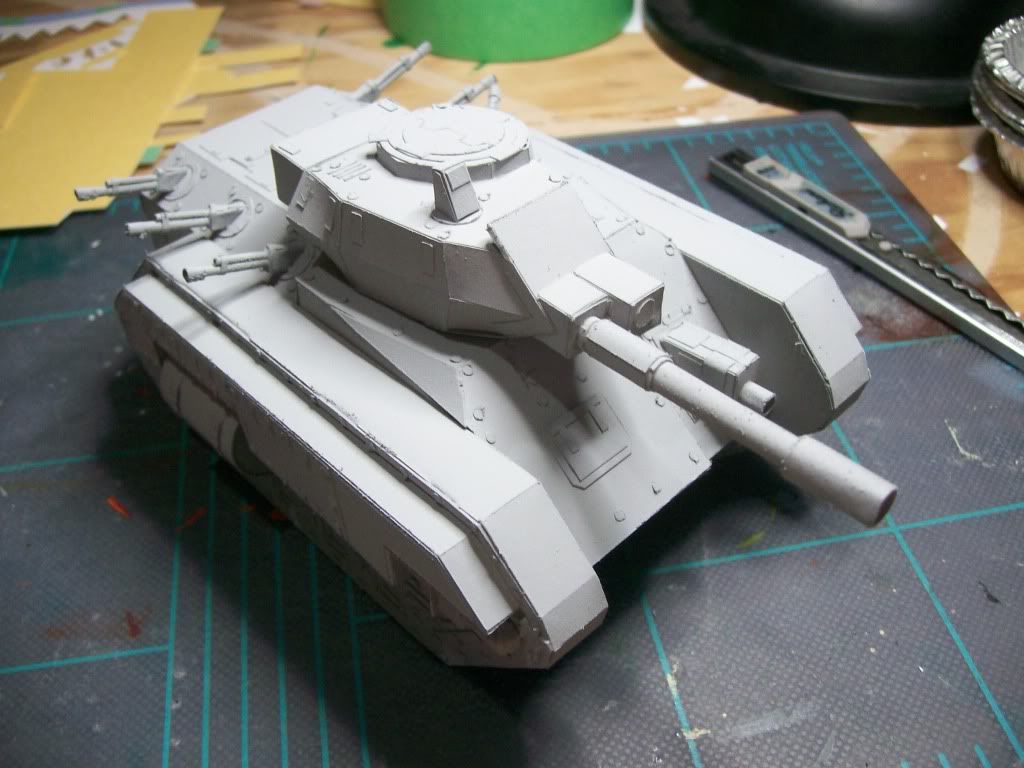
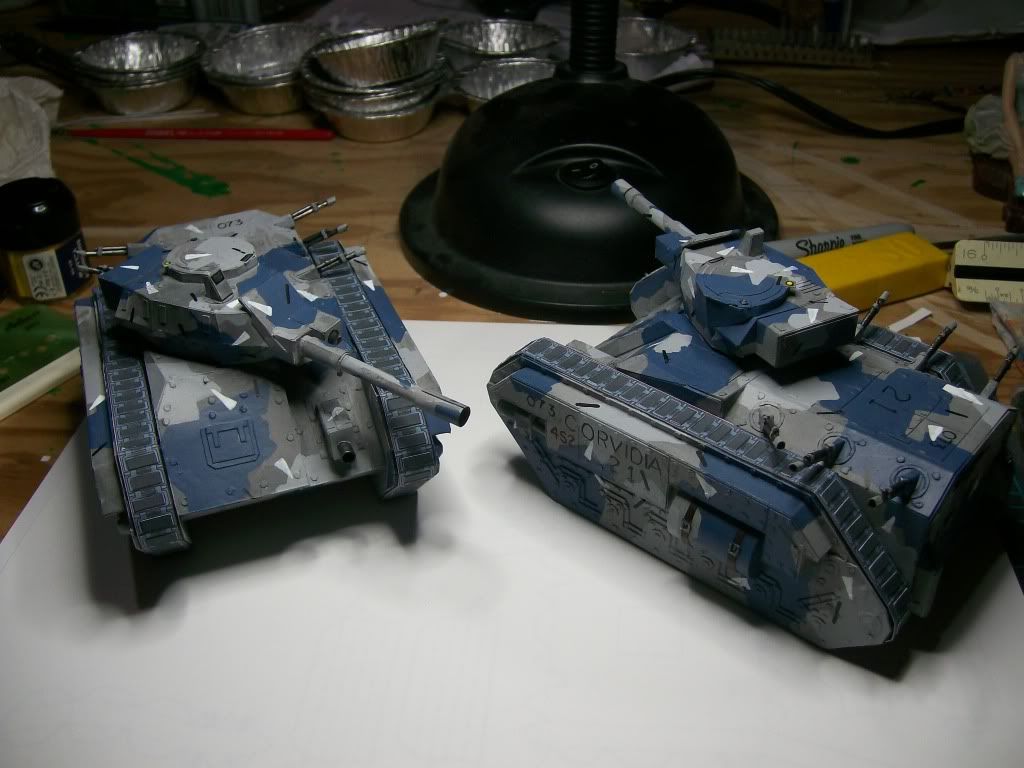
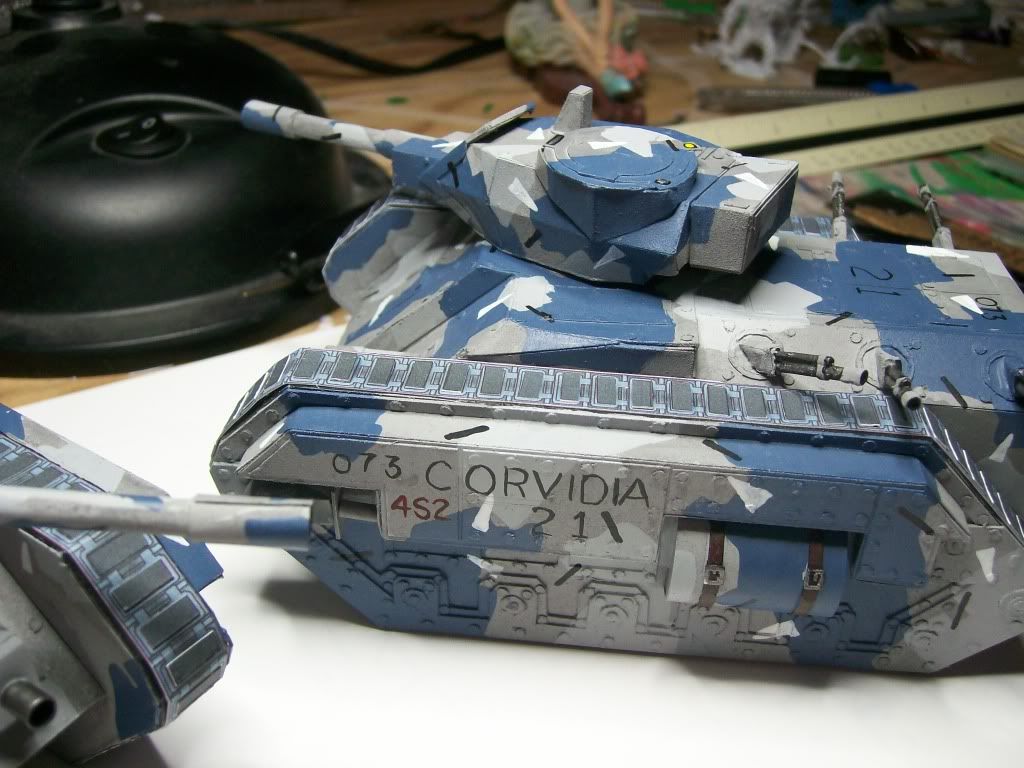
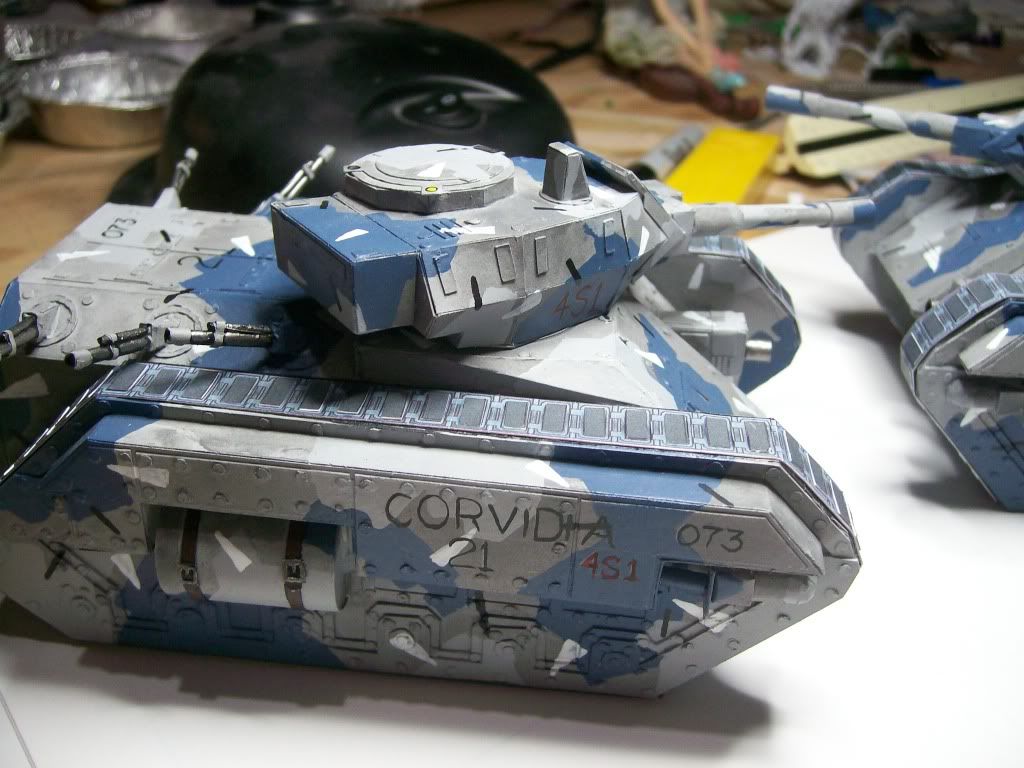
The painting is not finished yet, but here are some progress shots of the scheme. I am painting by hand as I do not (as of yet) have an airbrush, or indeed any skill with one. The intent is to go with a 'rubble' or broken city style camo pattern, to match my troops.
Starting with Automotive Primer (grey). This is very close to Fortress Grey:
Added a 'wash' of Codex Grey mixed with water:
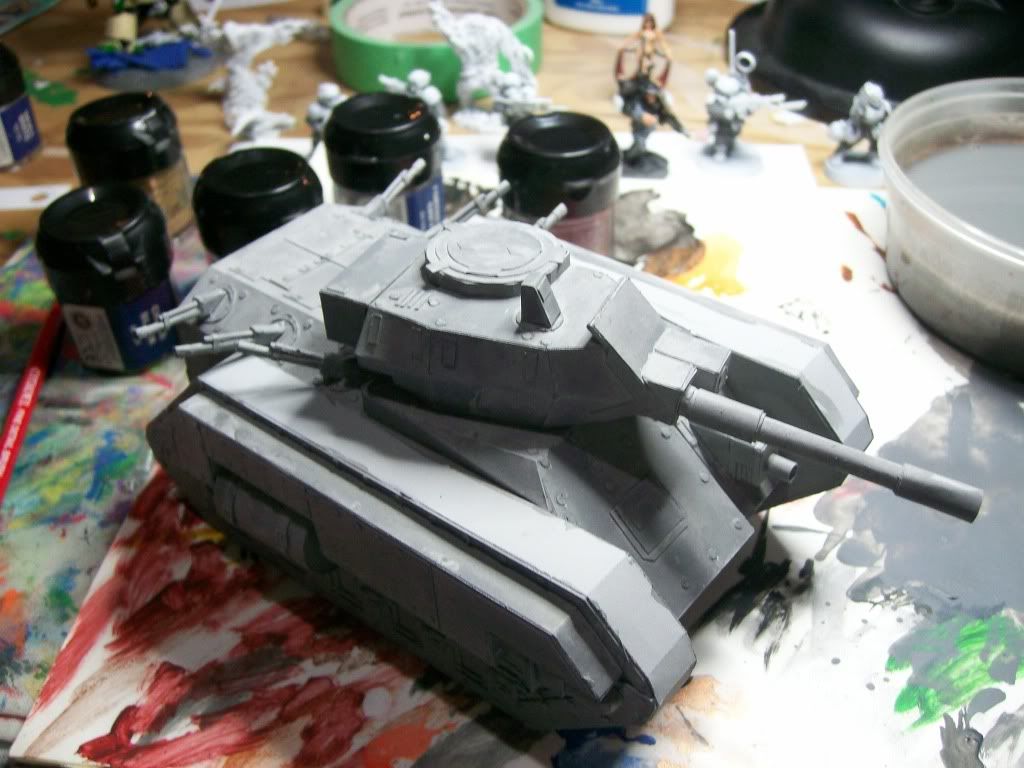
Painted on irregular splashes of Shadow Grey:
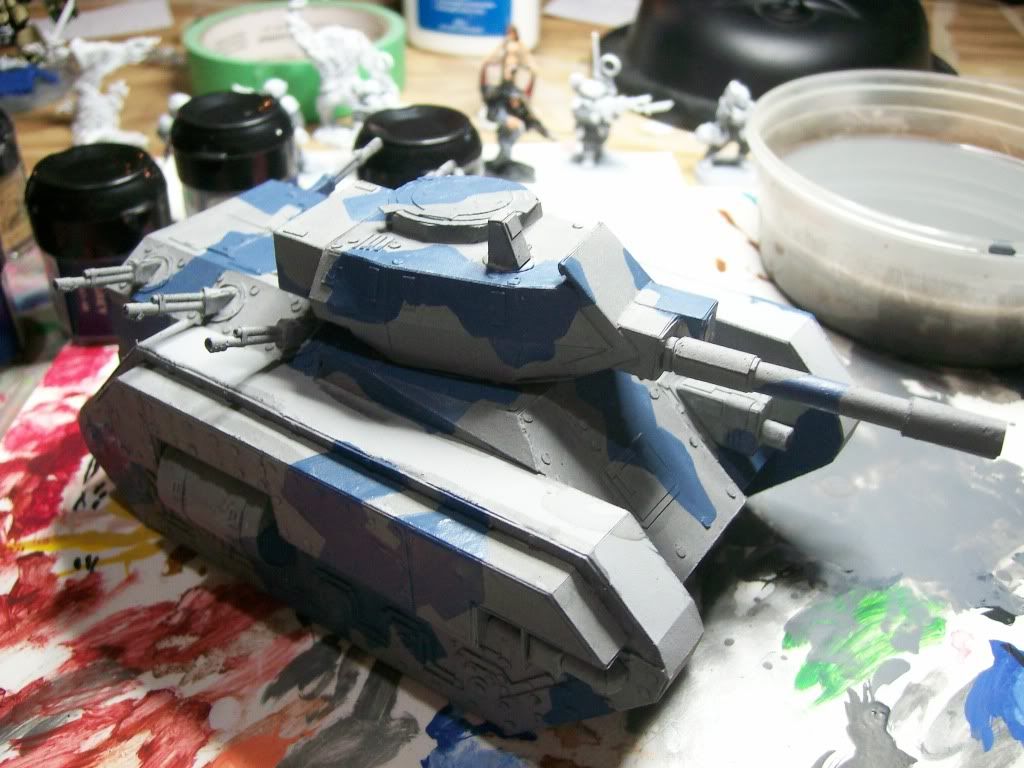
I originally added contrast splotches with Fortress Grey, but the wash was a little too thin, and came too close to the color, so I mixed about 1/3 Skull White in with the Fortress Grey to add the contrast:
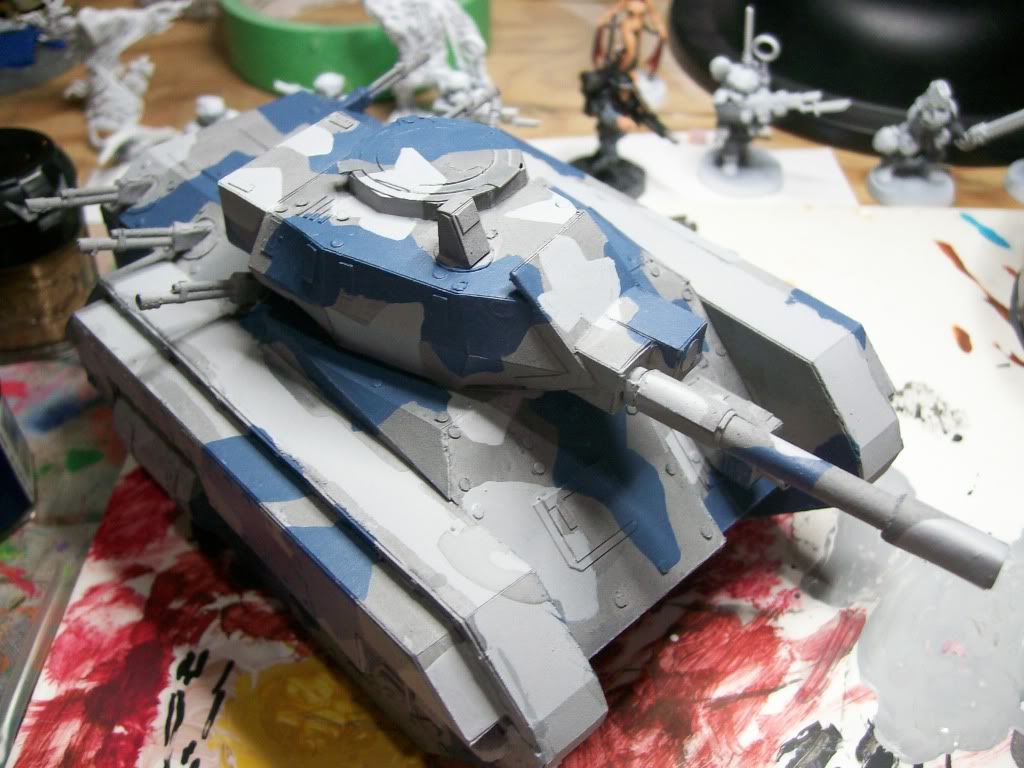
White irregular pattern triangles to break the colors. I will be adding black slashes shortly:
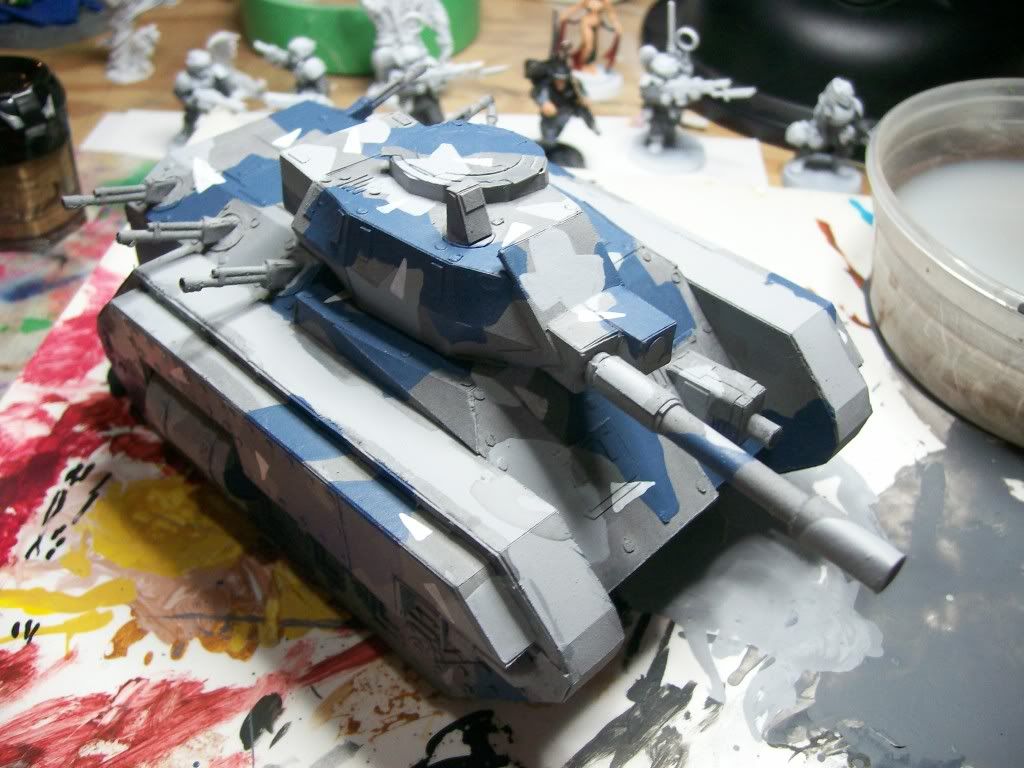
Still a lot of work outstanding, the final pattern break: black slashes, washing around the rivets and joins, drybrushing and touchups, and then adding the tracks, which I pre-printed using the textured tracks provided. I have not yet settled on markings; I have printed templates for world and designation, and will try to make paint-patten blanks with them. If that does not work I'll likely try a steady hand. I may also use a colour pattern on the front side armour, to match with some of the GW coding I've seen.
I've not settled on whether or not to build and use the 'extra' armour over the tracks.
Enjoy!
Sean
Starting with Automotive Primer (grey). This is very close to Fortress Grey:
Added a 'wash' of Codex Grey mixed with water:
Painted on irregular splashes of Shadow Grey:
I originally added contrast splotches with Fortress Grey, but the wash was a little too thin, and came too close to the color, so I mixed about 1/3 Skull White in with the Fortress Grey to add the contrast:
White irregular pattern triangles to break the colors. I will be adding black slashes shortly:
Still a lot of work outstanding, the final pattern break: black slashes, washing around the rivets and joins, drybrushing and touchups, and then adding the tracks, which I pre-printed using the textured tracks provided. I have not yet settled on markings; I have printed templates for world and designation, and will try to make paint-patten blanks with them. If that does not work I'll likely try a steady hand. I may also use a colour pattern on the front side armour, to match with some of the GW coding I've seen.
I've not settled on whether or not to build and use the 'extra' armour over the tracks.
Enjoy!
Sean
Rivets and Bolts
For everyone who is not a member of paperhammer40k.com. I will repost one of my better finds here. The rivet size question comes up all the time. I have found that the sub 1mm size is closest to the scale used by GW. Without getting into a long discussion that could be a thread on its own about scale and GW, here are the two punch and die sets I have found.
This first one here is for the hex punch and die set and comes with 4 sizes of punch and die.
This second one here is for the round punch and die set and covers 8 sizes ranging from I believe .5mm to 2.5mm.
These would work well for augmenting the Patoroch builds with some truly awesome rivets/bolts etc.
I came across an impressive build using these over on the Work In Progress forum here.
Hope this helps everyone out with their builds
Nice...I'm new to this paper building stuff. I want to learn how. I have Autodesk 3D max but barely teaching myself to use it.
Ugh... super long update delay. Started as a paint shortage and slipped into a full-fledged distraction.
Nevertheless, the Chimeras are now painted. With the onset of winter it may be a while before they are coated, and so I might yet add an insignia as well (a silhouette of a raven in flight).
I've started the next units (while painting my squad), it will be a squadron of three scout sentinels. I plan to detail the cab nicely as I intend to make suitable drivers in the style of my Paper Protagonists. I won't likely send a lot of detail pics of them, as Silveroxide has already an incredibly detailed build diary (I am in fact using many of his suggestions).
Enjoy!
Tirick
I like how the las rifles came out for the Chimera. Great start on the engine compartment for the Sentinel. I see that you made the fins individually for the bottom. Take your time with the open cab Sentinel. I laminated the walls for strength and constant handling. If you have a GW Sentinel, use that for reference as well as their built models. Enjoy and see you around the forums.
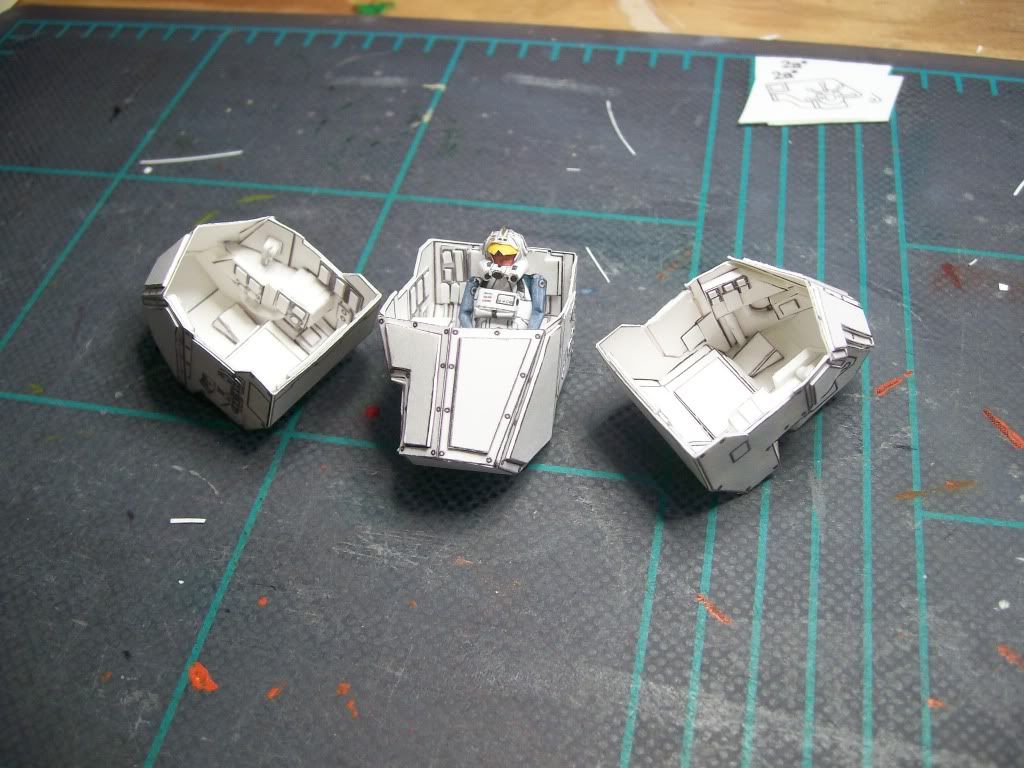
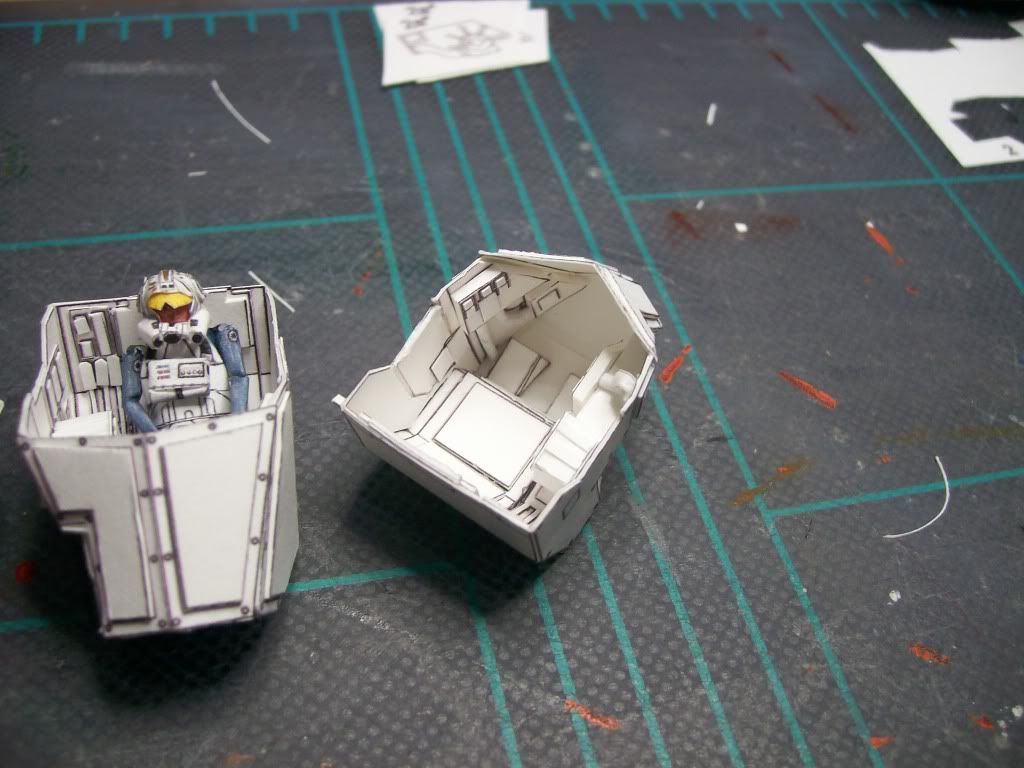
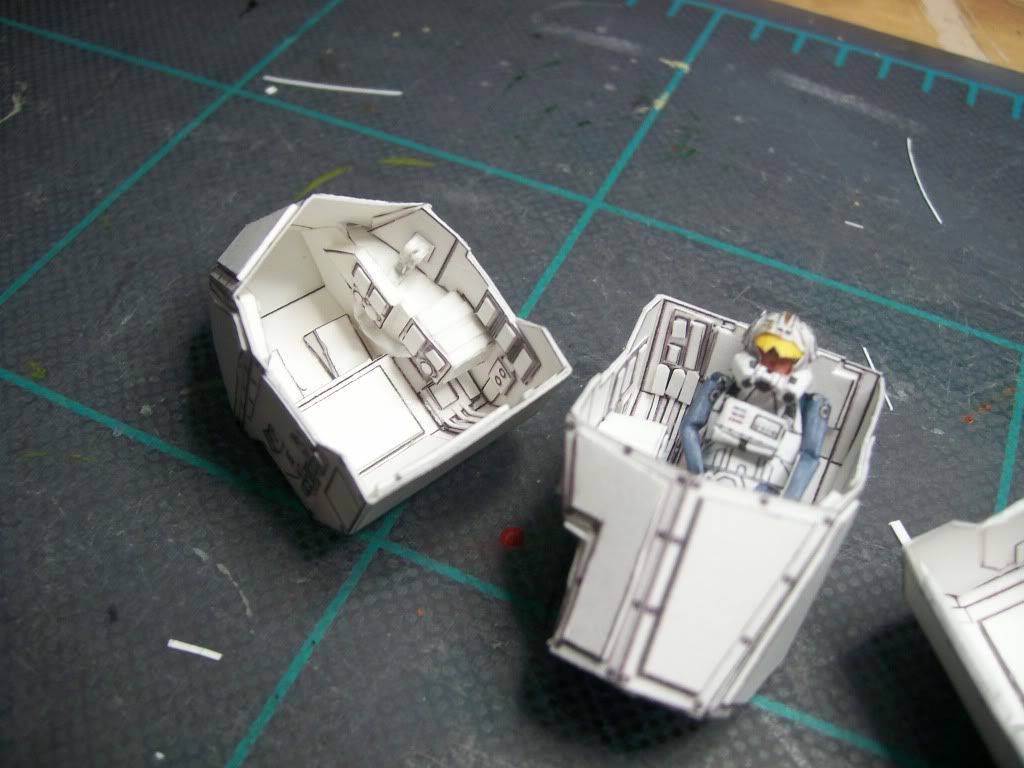
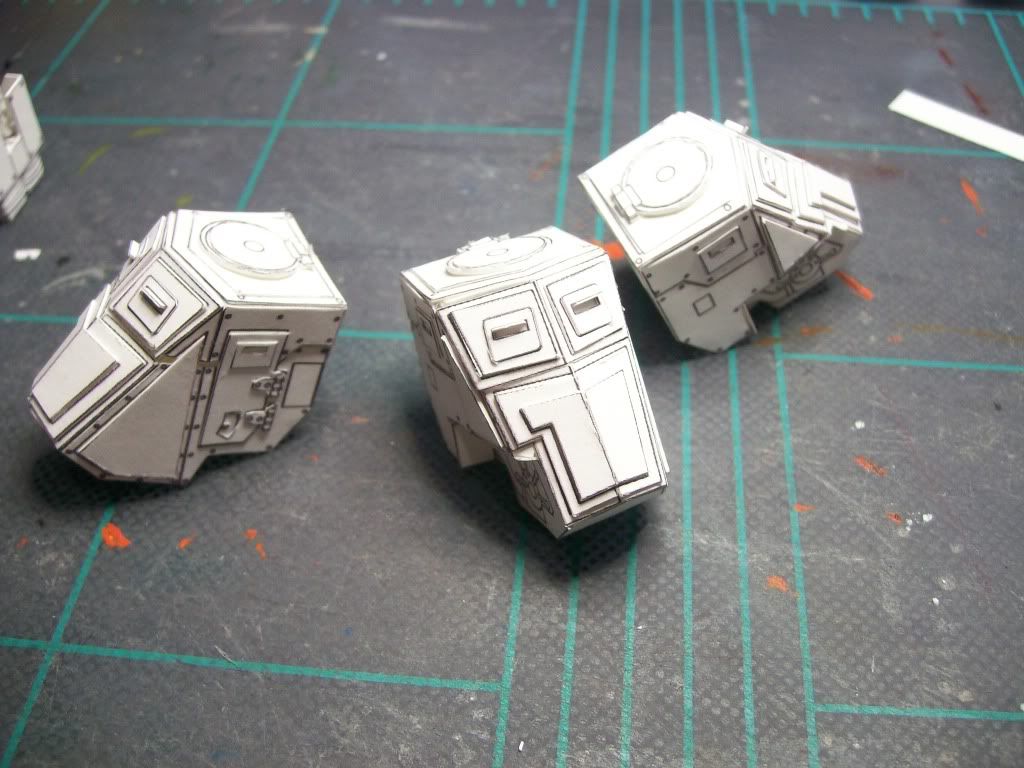
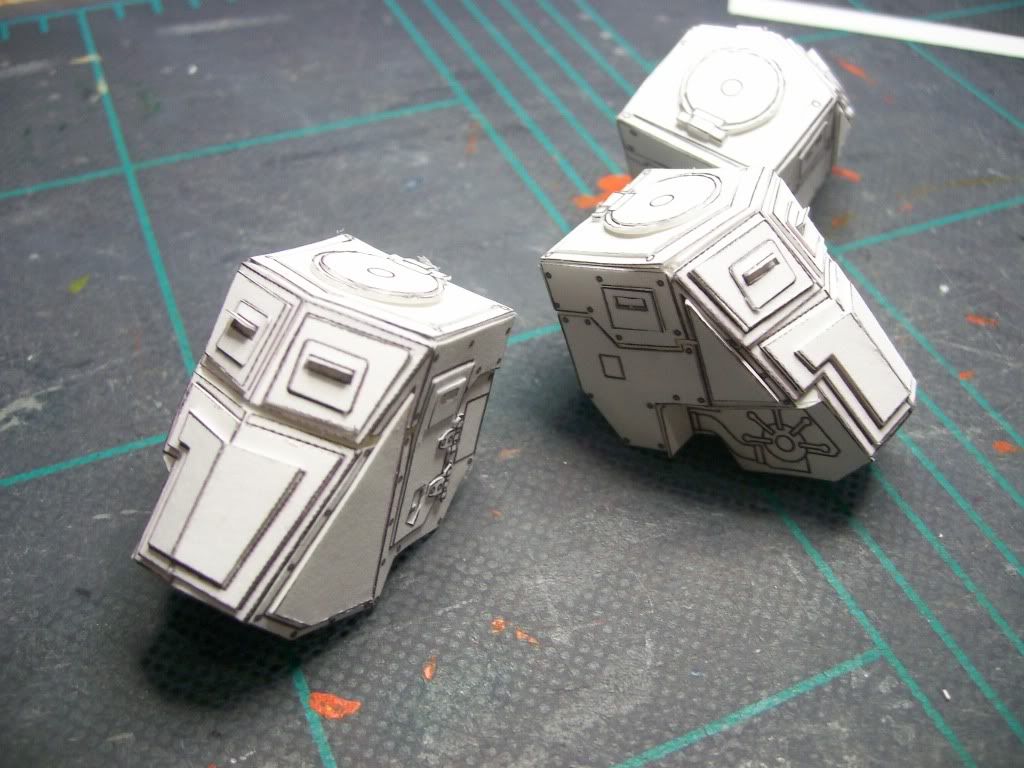
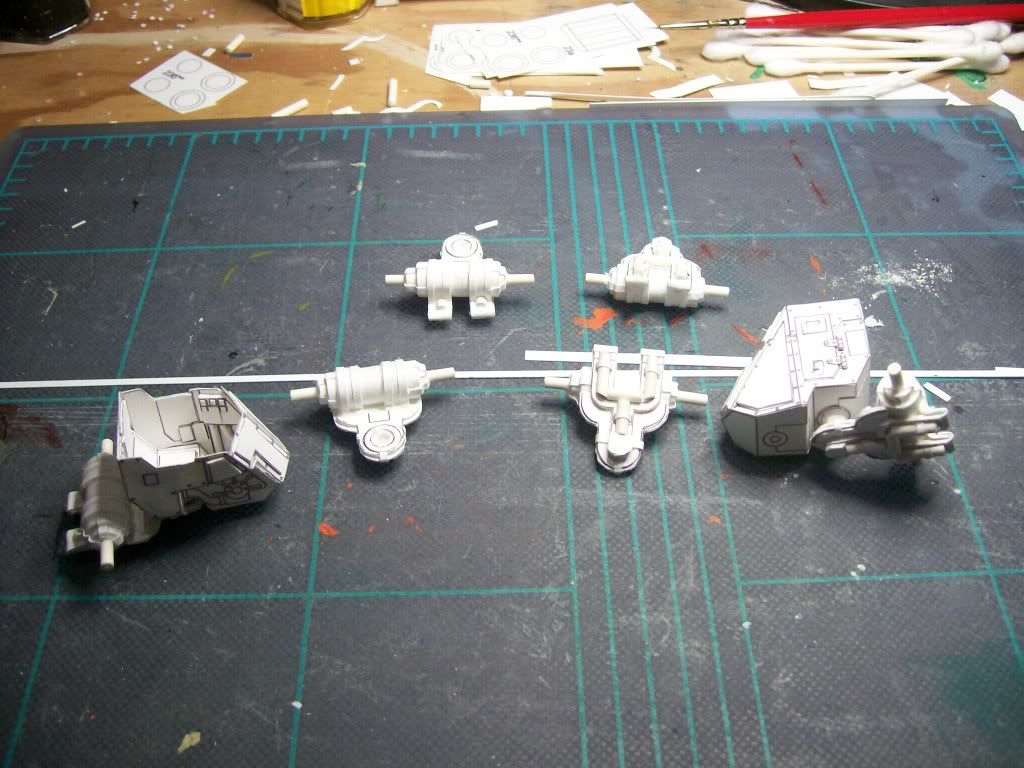
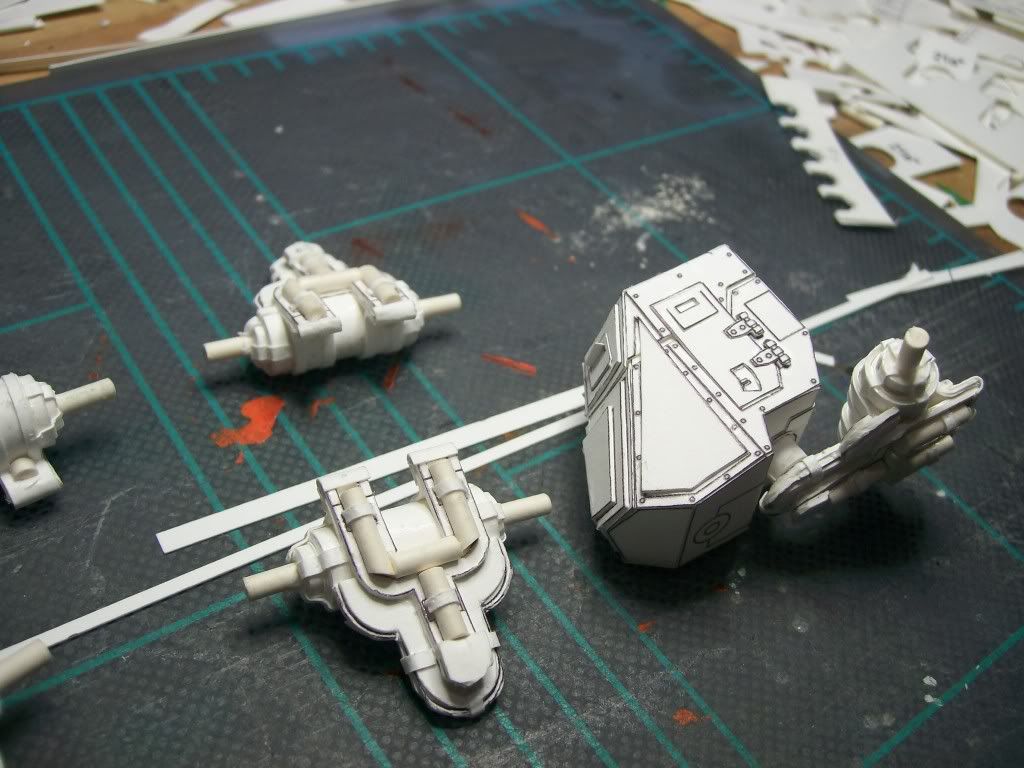
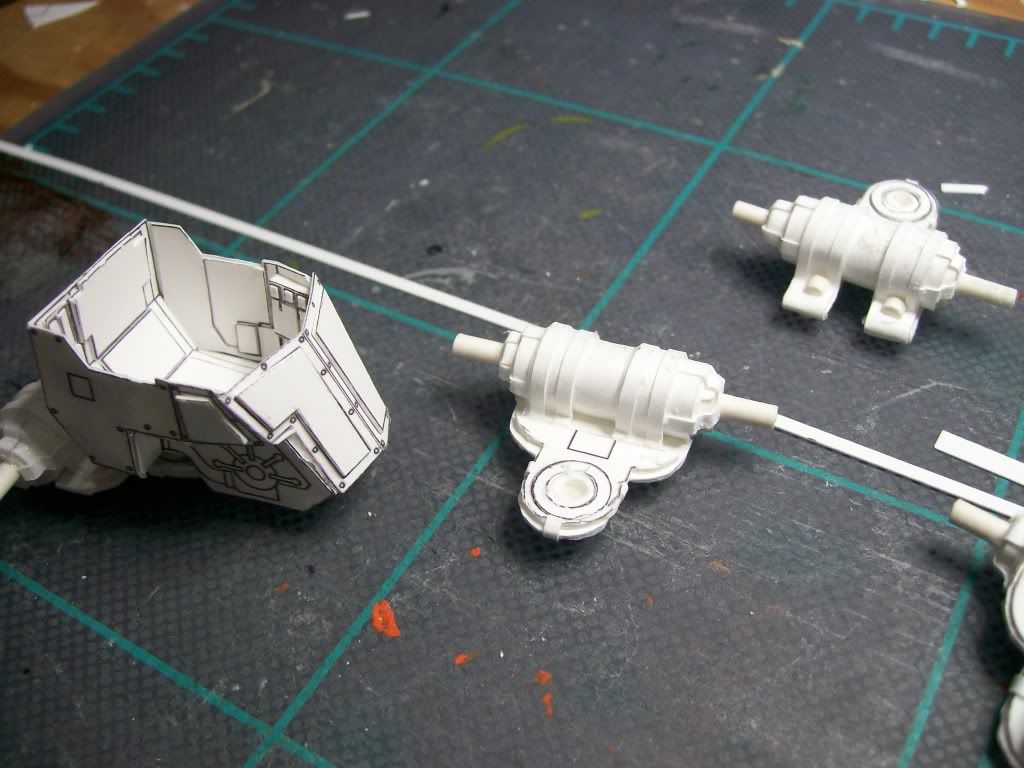
After building the open cab, I realized I had sufficient parts to build three armored Sentinels cabs as well. Once I completed detailing the cab, mostly just using the detail provided (built up of course), I build the extra cabs and printed leg and weapon components to match. I actually separated the upper half of the armored cab before assembly, so that I could more closely show the armor panel separations, as with the GW model. For those building these, be careful with fit-up issues, the section around the weapon mount is particularly finicky, and I laminated a lot in here to cover the gaps.
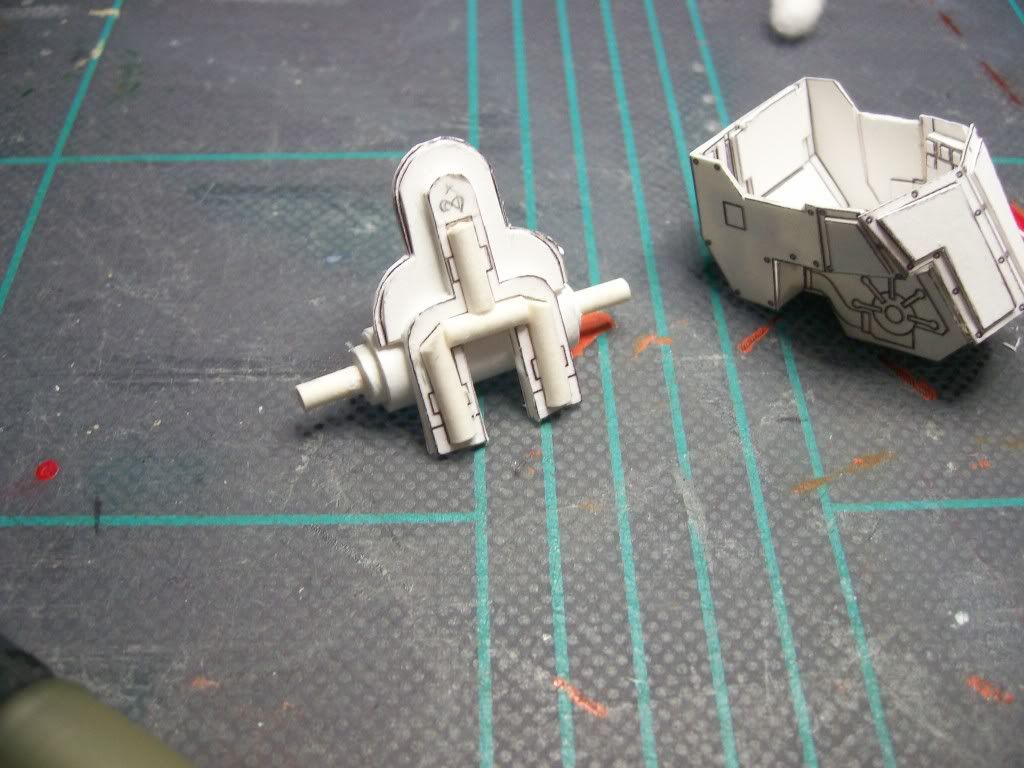
So far I like these little guys. There is a lot of detail to work with, and in a smaller area, so I expect the finished model to look a lot nicer than the Chimeras. I included shots of the Clone Trooper pilot mock-up I used for the Snowspeeder, so that I can get an idea of the modifications required to the Paper Protagonist figure to suit the GW scaling.
Still not certain what I'm going to do with the weapon mounts. Part of me wants to be able to swap options, so I may go with an interference fit ring. I may look into getting tiny magnets instead, but I don't know if they'll hold well enough.
Enjoy!
Tirick
Great work on these. Use the super glue for the magnets and you should not have any swapping problems. Pay special attention to the bottom mount. I made it a solid piece trough lamination. This is a stress point for handling purposes and if you drill a hole in it, it will be stable enough for a swivel point. Can't wait to see that ball joint come out later. That is the weakest link on this model.
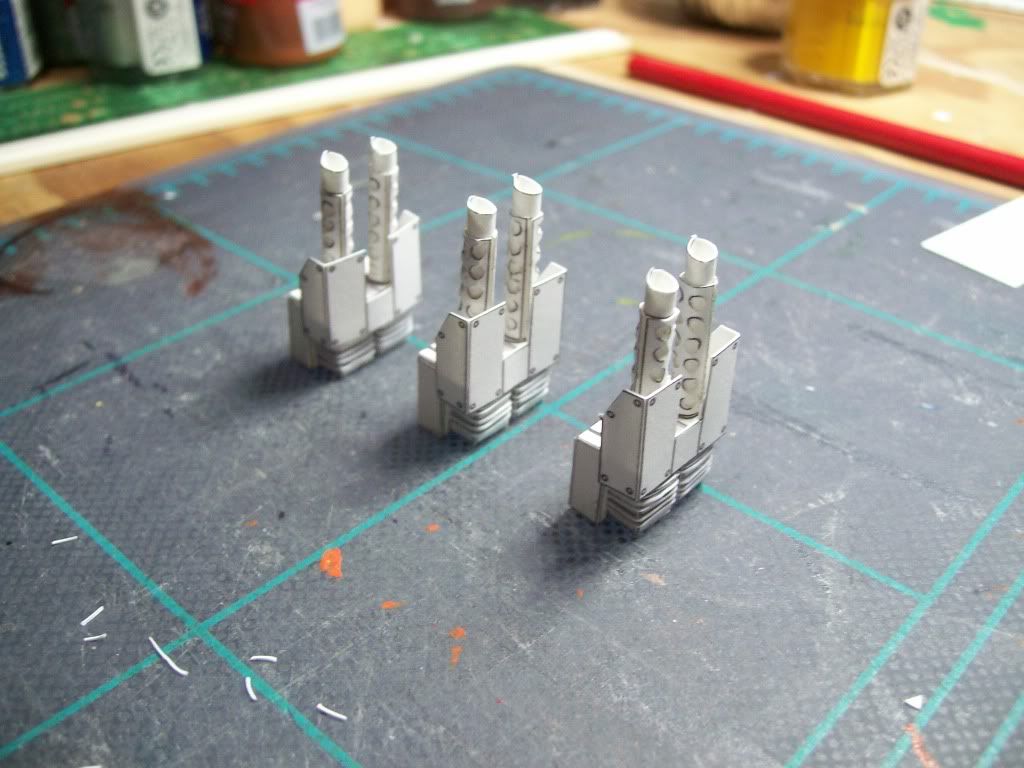
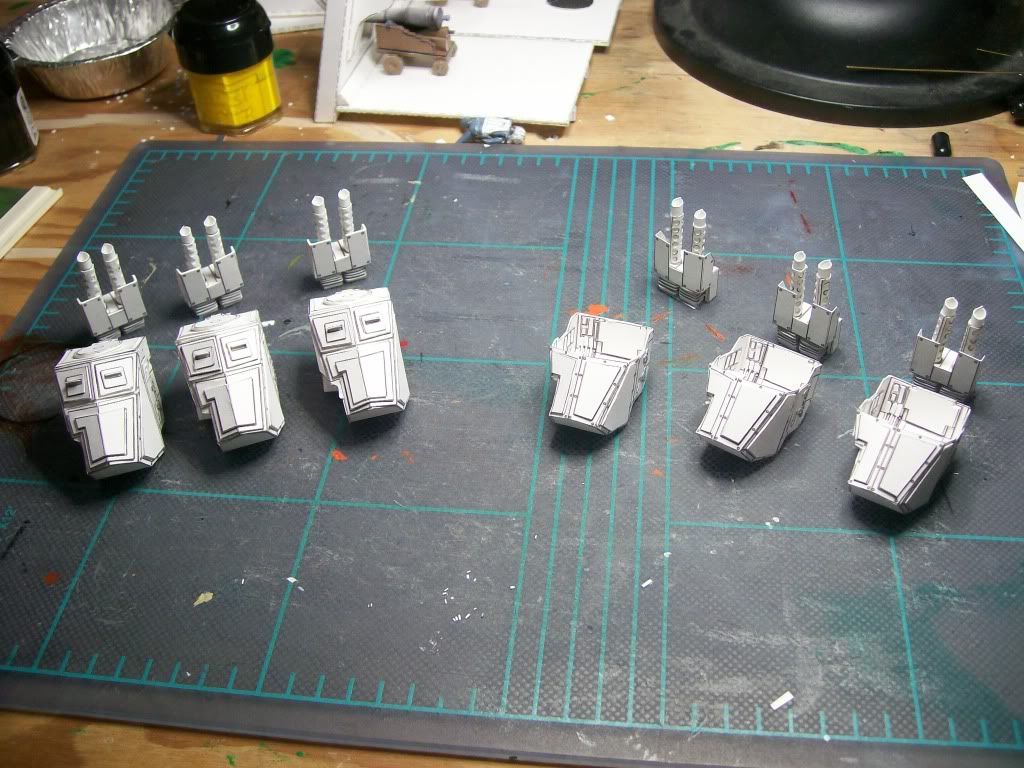
I still have not found magnets to suit. Have to hit some more stores after the holidays. In the meanwhile I'm working on the torso and legs of the model. The torso is now complete, although building six at a time was a bit arduous. I think I clocked somewhere around 12 hours on the lot, so maybe 2 hrs a piece. The end product is close to what I think the plastic kit looks like, although without a physical sample it is hard to know for certain. It looks good to my eye anyway. It differs greatly from the 'stock' design from Patoroch, and involved several q-tip shafts and a lot of lamination.
The legs are likely to be vastly modified from his plans as well, and closer to the plastic kit (I hope). That too will involve several layers of lamination, although I'm only at the planning for now. I have not attached any of the separate assembly components as of yet. I'll likely leave these loose until all of the parts are ready for assembly (including the gun assemblies).
The first two shots are WIP, to give you an idea of the channeling and layers.

Enjoy!
Tirick
The legs are likely to be vastly modified from his plans as well, and closer to the plastic kit (I hope). That too will involve several layers of lamination, although I'm only at the planning for now. I have not attached any of the separate assembly components as of yet. I'll likely leave these loose until all of the parts are ready for assembly (including the gun assemblies).
The first two shots are WIP, to give you an idea of the channeling and layers.
Enjoy!
Tirick