Eastern Tn logging on the DG CC & W RR 1928

Bill Nelson

Well-Known Member
Dec 14, 2008
2,680
467
78
Clarksville Tn
aaacntrpengone.jpg aaarrroomdoorknob.jpg I have removed the last of the benchwork form the center peninsula, the room is a mess; there was 38 square feet of storage space under harlow alone. I will spend some time organizing, and then I can start work in the helix nook, and on the new scnter spline stud wall benchwork,


My wife and I went to an archatectural salvage place in Nashville yeasterday.


Nelson
 
Last edited:

Bill Nelson

Well-Known Member
Dec 14, 2008
2,680
467
78
Clarksville Tn
aa1anwcntrspinea1.jpg aa1anwcntrspinea2.jpg aa1anwcntrspinea3.jpg I have started to add the begginings of the new stud wall center spine stud wall benchwork for my new (and let's hope improved ) center peninsula.


The center spine on this installment of my railroad begins atjust after the helix nook at the North east corner of m RR room. This nook I had originally planned to use as a dispatcher's office. I made a little *****py desk in there, but the space filled up with **** and was never really used as a dispatcher's desk. I have moved a roll top desk, only about 20 years old, desinged to be a computer desk up into the RR room, and that is ny new dispatcher's desk. My old block control pannel was removed with te old center peninsula. The new plan has no room for it, so the new central control pannel has ben built inside the dispatcher's roll top desk.


The shelf benchwork for the top level standard gauge , and the middle level standard gauge levels reach the center spine's attachment to the NE corner. the lowest level gets close.


My next building projct needs to start in the helix nook. I need to start at the bottom level, wnich will have a return loop. I have pieces of the old helix that went down to the Southern Staging level of my old set up. I had thought that that helix was built at a 21 inch radius, snad would be a drop in in the new helix nook, but carefull study hows my old SR staging helix was built at 21 and 5/8 inch radius, and is too large to fit into the helix nook. instead I am going to use it as a bybass on te lowest level; so that when I build the return loop at the botom of the helix nook, It can be hooked directly to the lowest level of the track before I build the lowest level of the center peninsula.


When I pulled a sextion of precut plywood, and saw the note "Save Harlow", i was confused, most fo Harlow is in a burnpile in the yard. then I realized it refered to that particular piece od plywood, wich I should save for use in the new Harlow.
 
Last edited:

gbwdude

General Manager, W.R.Ry.
Jun 14, 2010
377
31
33
Omro, WI
www.facebook.com
Wow, it looks so empty up there. Good to see progress though and hopefully when I get back they're be trains rolling. Before I leave for Texas I'll have enough time to stop in at the club and maybe out there to see all the progress in person.

Keep up the awesome work!
 

Bill Nelson

Well-Known Member
Dec 14, 2008
2,680
467
78
Clarksville Tn
Thanks for the encouragement guys. It is exciting to be making progress after months of work tearing stuff out. I will be trying to lay out the return loop for the lowest level of the helix nook, with a passing/ staging track on the back side, and a removeable section on the front side. using pieces of my old helix, I will cheat it to the lower level east wall shelf, without it having to go around the central peninsula most of which doesn't exixt yet, there it will have about a seventeen foot run till it gets to the south wall, a fifteen foot run down the south wall, eighteen feet up the skinny shelf to Tom's Bend, another eighteen feet through Crooked creek another fifteen feet back across the southern wall's middle shelf, and another ten feet or so into tha Harlow yard area. that is going to give a a pretty big run even before I get . each of the lower two levels of the center peninsula will have about thirty feet of mainline. the top level will have much less, as a lot of it's space will be devoted to narrow gauge, and a small logging branch that , and then another round of shelves, so I'll be looking at a massive run. my rough figure is two hundred and ten feet, not including the return loop at the botttm, or the helix run.


Nelson
 

Bill Nelson

Well-Known Member
Dec 14, 2008
2,680
467
78
Clarksville Tn
aa_drafting1.jpg aa_drafting_2.jpg aa_drafting_3.jpg aaa_ll_helix_nook_.loop_1a.jpg I'm going to try again, last round either zealot, or my browser locked up, and a big post was eaten by the internet monster.

I did not get anything done on the RR on Friday. My Daughter was visiting from Houton TX.; and my senior pet, Cloudy the Great Dane developed a massive nose bleed, and had to go to the vet. An X-ray of her head showed erosion of the bone in her right sinus area, consistent with cancer. There was no way to stot the massive bleeding, and we had to euthenize her.

My daughter left for the Nashville airport this morning. I did some work on my mower to replace a deck belt, only to find that one of the blade shaft bearings was shot, so I will need to get more parts.

I did get around to laying out the lowest level return loop for the helix nook. I have a home made radius rod, made out of a piece of aluminum, with a pivot hole I can run a sheetrock screw through, and holes drilled through it at one inch intervils, so I can draw our precise radiuses. It is easy when the center point of a curve is on the plywood, when it is off the blywood I screw a board to the plywood, sticking off in the needed direction, and fasten the radius tool to the board to get the pescise track center lines I need to produce neat subroadbed, and even curves


Nelson
 
Last edited:

Bill Nelson

Well-Known Member
Dec 14, 2008
2,680
467
78
Clarksville Tn
aaahnookhlevel_1a.jpg aaahnookhlevel_1b.jpg aaahnookhlevel_1c.jpg In the front is the Southern main line that goes down the helix to the Southern staging The switch on the left is to the Southern Cut off, which is part of the return loop for the Southern Mainline in Harlow. the switch on the right is where the DG CC & W RR 's mainline goes south up the helix to the upper level. My plan was to have a nin radius on the main line of 21 inches, but in some places I have used 20 inch radiuses. In the mountains on the top level of the standard gauge I may go as tight as 19 inches. on some sidings I will do 18 inches if I have to. the down helix subroadbed is unsupported and hanging, it won't be anywhere near that steep.


The Harlow station will be considerably farther to the right, off on benchwork that isn't built yet; I just had it here to see how much space would be available behind it (not enough to suit me, but sacrifices must be made all over the place


Here in the lowest level, I am using templates that have a 19 inch radius on one side, and a 20 inch radius on the other to lay down a 20 inch radius center line. Later , when the center peninsula is all in the track from the return loop will go staraigt to the right, and loop all the way around the peninsula. For now it curves over to go directly to the track on the lowest level at Sander's Switch, which will let trains from Crooked Creek get to the return loop, and the staging there before the center aisle is finished,. once I start on the center aisle, I will want to be working on Harlow, and the Southern staging, and the new Ridemont, on the top level of the center aisle once I have the interchange, and the return loop in, I will be able to have some interesting operations.

Nelson
 
Last edited:

Bill Nelson

Well-Known Member
Dec 14, 2008
2,680
467
78
Clarksville Tn
sou_int_and_h_nook_1.jpg sou_int_and_h_nook_2.jpg aaar_dbed_splice.jpg aaa_homabed_and_cork.jpg this is getting exciting

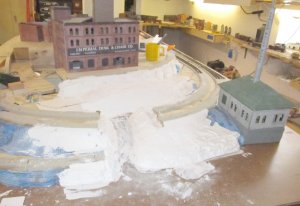
Made some progress with the roadbed, putting in Homabed roadbed for the Harlow block area. I used cork down the long narow shelf across the east wall. cork is faster and easier; the homabed is a little taller, and has a better shoulder profile. The edge of the roadbed is not as steep. The extra height is nice, as it allows the under the tie magnetic uncouplers to fit flush. with the cork road bed, I have to shim the roadbed up slightly, making a very slight hump in the track at the uncoupler's location.


In the top photo, if you look at the bottom of the helix nook, you can see a test fit of the lift out that will allow access into the middle of the helix nook. The lower level is so low getting under it would be near impossible. this liftout will allow me to crawl in there with only minor pain and suffering for construction, repair , cleaning, and other maintenance. I'm going to use cork roadbed, and peco code 100 rail in the return loop on the bottom level, and in the helex itself, as well as the Southern staging, so electrical conductivity will be maximised on the hidden, or rather unseniced track.


I am very satisfied with the look of this so far. with 21 inch radiuses in most places, reduced to 20 on my mainline up the Helix; the roadbed really flows, there seems to be all the room my plans , which were many years in the making, indicate there should be, if anything I seem to have a little more room. I want to work hard to make the track flow,, and make sense , for ease of operation, and the elimination of bottlenecks.


The southern main line crosses the central divider for the center peninsula to form a return loop, which will alow Southern Trains to come and Go in the New Harlow. this will be a big improvement over the old Harlow, where the Southern passenger trains would just back into the station, and the Southern's frieght switcher would Just push cuts of cars into Harlow, and drop them for the Harlow switcher to deal with.


Where the Southern main closes it's return loop, it crosses a lead to an industrial siding, and the DG CC & W RR's main line South, heading up the helix towoard. both of those crossings are likely non standard, so I will be hand laying them, and homabed is the best for hand laying track.


I have closed the gap between the cork road bed extension of Harlow yard, and the new roadbed near the Southern Main; and sanded the Homabed down to make an even transformation. I need to paint the cork roadbed gray, (if the ballast chips off I don't want to see the brown roadbed in the resulting hole); and then I will be ready to start pushing track into the city proper. I'll run out of room real soon, so I am starting work on the next section of stud wall center spine for the center aisle, which should push the center peninsula another six feet some odd inches . due to the wider center peninsula, the next section of Harlow benchwork will be larger than the entire old Harlow, and there is more to come. this is exciting.


Nelson
 
Last edited:

Bill Nelson

Well-Known Member
Dec 14, 2008
2,680
467
78
Clarksville Tn
aaaa_beginning_of_long_passing_siding_in_harlow.jpg aaaa_helix_end_of__harlow_w_dvider.jpg aaaa_hole_in_harlow_divider_.jpg aaa_back_side_of_harlow_with_divider.jpg.jpg I have got the back drops up on the Harlow level of the new central peninsula. I have some sherman williams Brisk day paint A nice sky blue, the same blue as in the rest of the room; to paint the backdrops. it will be darker than the rest of the room blue fades, and the RR room has had 20 years to fade.


I am cutting wood to extend the central peninsula to it's final length. I have three nights off, and will go into the attic, and bring the boxes of Harlow buildings out. have ordered some other buildings, It will be fun to try to set up the new harlow, which won't have many more sidings than the old Harlow did, considering it is three times the size.


The New Harlow will be set up to be easily operable, the Old set up was to tight, too crowded, had too small rail. I could operate it, but everyone else had lots of trouble, and it wasn't much fun for me; so most of the operation took place on the mountain, or in Crooked Creek.

I got no work done on the RR last weekend. I had a new fridge delivered, and the nook in my cabinets was not large enough, so I spent the weekend rebuilding the cabinets on the east wall of my kitchen
 
Last edited:

Bill Nelson

Well-Known Member
Dec 14, 2008
2,680
467
78
Clarksville Tn
aaa_spackling_the_screw_holes_.jpg Slow going on the RR; I have extended the center spine to the full length of the center peninsula, I will be maiking some wing walls for it at the lowest level, to brace the far end to make it rock solid. then I need to make the benchwork for the lowest level at the end of the center peninsula, and make the final design of the Montgomery Iorn works down in Montgomery Furnace on the lowest level. I won't get around to building that for a long time. but two sections of all thread will support the end of the benchwork in Harlow, one will be hidden by a tree on a hillside, and the other will be hidden in a smokestack in the Iron Works, So I have to get the locations right before I can build the ontside corners of Harlow, which will be exciting as it will have have the river front there, larger than the riverfront in old Harlow, with a long siding for loading/ unloading steamboats on the river.

Getting ready to start locating buildings in harlow I am painting the backdrops with some Sherman Williams Brisk day, a very light sky blue, which is the color my RR room was painted with years ago. the room has faded some, but the Brisk day makes a good base to paint backdrops with , as one can add washes of acrylic paints to darken the sky colors.

I used some spacling compound to fill the holes, and to smooth out the 2x4s at the opening. it was frustrating as it took a lot of time, but it will help the fianl apeance greatly. I got paint on the back drop drying now, will get up in the attic and find the box of Harlow buildings soon. will need more as Harlow will be three times the size of old Harlow.

I made a massive order, and have more buildings and track on the way.
 
Last edited:

Bill Nelson

Well-Known Member
Dec 14, 2008
2,680
467
78
Clarksville Tn
aaa_end_of_peninsula.1a.jpg aaa_harlow_station_w_nw_pltfrms.jpg aaa_imp_dsk_and_chair.jpg aaa_abs_1a_.jpg aaa_abs_2.jpg A long time since I have posted. I have the backdrop boards up, and painted sky blue; I have extended the center peninsula all the way to the end, and have the base for the river in. have the subroadbed in for the mainline through Harlow which is shared by my RR and the Southern.


The signature buildings of old Harlow were the Imperial desk and chair Co. which helped hide the end of the backdrop dividing the two halfs of haRLOW. It sersves the same function on this incarnation of Harlow.


I have an opening through the backdrop where the sSouthern's return loopp passes through. I have a Walthers Merchants Row II with a back wall cut out of the center building to help mask the cut out. On the other side I have a Walther's Argosy Booksellers, which will probably be the Bank building. I left the back wall off, and the roof, so it fits over the strud wall backdrop.. Lots more city scenery to do this is going to be fun!
 
Last edited:

Bill Nelson

Well-Known Member
Dec 14, 2008
2,680
467
78
Clarksville Tn
aaa_harlow_station_w_new_shed1.jpg aaaa_harlow_staton_w_shed2.jpg aaaa_courthouse_aa.jpg adding the passenger sheds to the Harlow station. Harlow is due to get a lot more passenger traffic. The old Harlow was the end of the line for my railroad, and also for the southern. The new harlow is in the middle of my RR so My reains will come and go in both directions. Also the southern will have a return loop in Harlow, and another in Southern Staging, so I cna simulate Southern Passenger trains comming and going in both directions.

The old Harlow station had spassenger platfom sticking out of it's right side. I have addend one to the left side, and added a whole nother platform between track #1 and track * 2. the tracks curve some, so the passenger platform coming off the station are at an angle, and the additional one curves. the platforms off the station are Atlas platforms, the ones between tracks 1 and 2 are Walther's. I will need to do some carefull work to splice in some roffing material where the second platform curves.

I lost a section of porch posts for the lower level fo the station. I know wher I was when I dropped them; but that does no good. the RR room is not that bbadly cluttered in that location. Sadly us model railroader's know Gravity only does straight line for scietests in labs. critital model parts have been known to fall sidewas, and even up and then sideways at times.


to the right of the station I am going to build a court house square, a scene I desperately wanted to do building the last Harlow, but had no room for. I have cut a structure in two, on the diagonal, to use half of it as the base for the Gorre County Tn courthouse. I will want to make a tower of some sort, but that will have to wait untill inspiration strikes harder than it has so far.

The court house square will sit on a hill between the Imperial desk and chair co. and the station. It will be above the level of the Imperial desk and Chair co. I'm going to have to lay out the roads very carefully, so they seem to tie portions of this city together . this city is going to be big, in east Tn. I'm thinking only Knoxville and Chatanooga are larger.
 
Last edited:

Bill Nelson

Well-Known Member
Dec 14, 2008
2,680
467
78
Clarksville Tn
aaa_harlow_riverfront_passing_siding_a.jpg aaa_harlow_riverfront_passing_siding_b.jpg.jpg aaa_harlow_riverfront_passing_siding_c.jpg aaa_harlow_riverfront_passing_siding_d.jpg aaa_n_harlow_.jpg I have been working towards compleating the mainline track in Harlow. Slowing me down will be the two bridges on the passing siding at the bend alloong the riverfront. but I have made the templates needed to scratchbuild the bridge decks. the inside trac (the siding, has a 21 inch radius, and the main, the outside track, has a 24 inch Radius.


as a first step I positioned some flex track with the correct curves, and secured them tempoararily with tumb tacks. then I put multiple layers of masking tape across the rails at the line where the roadbed stops.

I put some packing paper over the tracks , and did a crayon rubbing, which showed the locations of the rails clearly and very subtley showed the location of the end of the roadbed.

I took the packing paper, marked the location of the end of the roadbed more clearly, and tacked it to a homasote/cork work board, covered it with wax paper, preparing the work board for the future construction of these curved bridgedecks.

The track in harlow is approaching this area from both siedes, and as soon as the bridge decks are build, and the rails are spiked to them, I can quicly finish the main line through Harlow, and go on to the next phase of my RR rebuild; which as of right now, has not been determined.

Most likely I will work on the lowest level, or the Southern staging, just under Harlow, but we will see.


Nelson
 
Last edited:

Rhaven Blaack

!!!THE MAN BEHIND THE CURTAIN!!!
Staff member
Administrator
Moderator
Jun 12, 2009
12,524
9,907
228
Oregon
www.deviantart.com
I am sorry, but the forum is experiencing some technical problems at the moment.
Yes, they are being worked on at the moment.
Please read this thread: http://www.zealot.com/forum/showthread.php?t=175524

You should be able to post photos (from other sites) using the "Insert Image" button.

If you have any further questions, comments, or concerns, please send me (or Zathros) a PM.
 

Bill Nelson

Well-Known Member
Dec 14, 2008
2,680
467
78
Clarksville Tn
Have gotten some stuff done this weekend, got an old kitchen wall cabinet, which was under Terrapin for many long years eptied out, and moved out of the room to help clear out the aisles. with the lower level being lower, there is no place in my RR room for it to fit under the benchwork.


I have folding a roll around cart I need to go through next. it has a lot of model train magazines with articles flagged with post it notes for future use, it was in the closet nood, that is now the helix nook. I might be able to fit the magazines on the loor under the lower deck. it will be a ******* getting them out to look at them, but that cart needs to go put of there. perhaps I can use it in my downstairs work area.


besides the cabinet and the cart, I have a lot of lumber up there. I need to get that out as well, but I don't think that will happen today, is supposed to start raininning soon, and the temp will drop hard, so we are looking at winter weather this afternoon.

I am wanting to clear out the aisles , so I can have soom room to study the Harlow river front, and the crossing over Crooked Creek down on the Northside of Murray Tn, (lowest level SE corner) so I can start putting in carboard land form shapes looking forward to having my Hydrocal l delivered.
 

Bill Nelson

Well-Known Member
Dec 14, 2008
2,680
467
78
Clarksville Tn
aaa_1_2_14b.jpg I have been working on my Harlow area, at the river front, and on Depot Street. sadly no pictures can be uploaded , won't do the photo bucket route, if I did that I'd contibute to different forums that were less user freindly, and had more traffic.
 
Last edited:

Bill Nelson

Well-Known Member
Dec 14, 2008
2,680
467
78
Clarksville Tn
aaa___working__out__street_retaining__wall__height_a_2.jpg aaa__downtown__harlow__support___1b.jpg aaa__downtown__harlow__support___1c.jpg aaa_mocking__up__gorre__county__courthouse_a.jpg aaa___working__out__street_retaining__wall__height_a_2.jpg aaa__downtown__harlow__support___1b.jpg OK, I was able to upload a photo into my last post on an edit , which is what I have been doing the last weeks to see if the site was up, let me see if I can find my pictures. it is working. I have hydrocal, and have been working on downtown Harlow. I used 2x4s to establish the road height, which I marked with a sharpie. then I cut each block to the highest point marked, and worked it to the needed angle with a belt sander. the blocks were then gorrilla glued and screwed to the heavy plywood base. behind the station you can see some of the filler strips of aardboard I made to fill in between the blocks. when the glue holding the blocks in place was dry, I screwed the thin plywood of the road surface down. I had made several cardboard mock ups of the street shapes, and as each was tested, and the fit approved, I traced the shape on to thin plywood, and cut it out with a saber saw. I loved the old retaining wall in old Harlow, but was not able to save it due to hap hazard construction of the supports underneith it. this should be stout enough to allow the scene to be dissasembled and re used. I have raised the court house up a little more, with what will be a small retaining wall around the lawn. I am working to try to select buildings for the court house square. In the past I bought stuff I liked, built them, and test fitted the. this scene is so large that approach would get expensive, as it seemed to always result in more buildings than I needed, so I have to plan carefully to get the look I want, and keep the expence down, as the rebuild has eaten a lot of my hobby funding.
 
Last edited:

Bill Nelson

Well-Known Member
Dec 14, 2008
2,680
467
78
Clarksville Tn
aaaa___sough_____water_street__2.jpg aaaa___sough_____water_street__2.jpg Have been carving rocks on the riverfront, this is so much fun this is going to look real good soon, and as soon as I have the scenery right under the main line, I can install the bridge, and try to get the Harlow block operational.


oops
 

Attachments

  • aaa__harlow_riverfront___a_1_3.jpg
    aaa__harlow_riverfront___a_1_3.jpg
    328.6 KB · Views: 35

Bill Nelson

Well-Known Member
Dec 14, 2008
2,680
467
78
Clarksville Tn
aaa__river_in__harlow__aaab_1a.jpg aaaa_snag__island__reflection_1a.jpg

I have enough ground cover and other scenery unedrr the bridge so I have installed it. am working on putting the the polyurathane finish on the river. I like the ripples. the bumps I don't like, and I will try to wet sand them off before the final coats. I like the look I get with acrylic gloss medium much better, but the finish is soft, and you can't leave stuff on the surface or it will eventually sink in and stick. I want to leave the river boat and barges on this river, and as big as it is I am sure tools, throttles and drinks will get left on it. Snag Island hides a piece of all thread that will support the upper deck. there will be some trees on snag island, and a big one on top of the rock formation will hide the all thread for another scale 100 feet or so.