Y-WING BUILD - Construction continues...

Thanks @micahrogers - not quite grasping your second comment ''O would wrap thick card thou'' ???

Unless you mean to use thicker card, these are already four layers thick, and will be impregnated with cyanoacrylate... they won't be bending or warping on my watch... :cool:
You got it, but what you did works.
 
  • Like
Reactions: Chuffy70
Engine add-ons

Lots of little boxes, which looked an easy build, but took all day and an evening!!!
How deceptive the world of papercraft can be!

Sixteen parts to add onto the engine pods - the squarer of the two will receive the T-Bars recently constructed and the coffin like shape will be forward of this and the two will be connected via rods (note the holes)

318.jpg

This shows the position of the parts

323.jpg

All the red areas were punched out before cutting the actual part from the sheet - helps keep the part intact.

319.jpg

A couple of hours creasing...

320.jpg

A further amount of hours folding and test fitting...

321.jpg

…and finally, sixteen small boxes.
The fronts, or the parts with the holes, are quite susceptible to warping because there is only a small section connecting the bottom below the hole.
I generously applied super glue to these areas to reinforce them.
There's now an abundance of small parts floating about, I think the next couple of sessions will involve putting some of this bits onto the engines.

322.jpg

THANKS FOR WATCHING...
 
321-jpg.220446


You have nailed it! No wonder if you do test-fitting with a hammer. I like that.

:hammerhead:
 
These are "larger than life" pictures, and they look great! :)
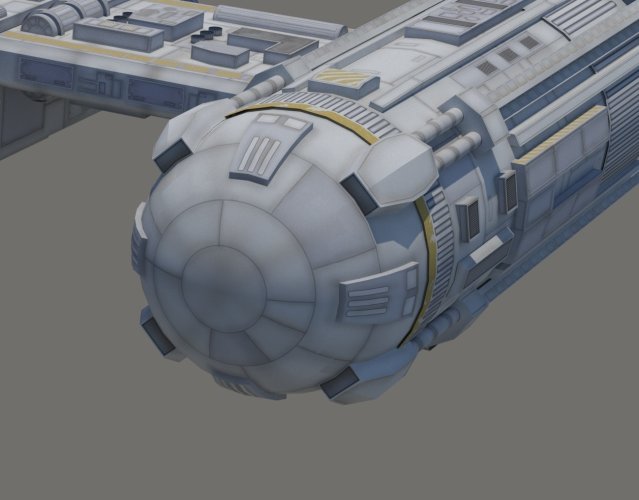
Larger than life...hmmmm... you got me thinking, could I make a Y-Wing out of cardboard 'Lifesize??? Looks at partner, No then... :(
321-jpg.220446


You have nailed it! No wonder if you do test-fitting with a hammer. I like that.

:hammerhead:
Yes, 'The Persuader' is brought into action to really make sure parts fits nice and tight... Or as you saw earlier in the build, to flatten those stubborn pieces!
 
Ahhhh, I see, consider me now 'updated' "I have the conn"
In my time aboard ship, no one ever called it the "Conn" It was always either the "High Chair" or the " Center Seat" FFGs, and DDGs tended to call it the High Chair, while Aegis CGs it was the Center Seat, because it was a revolving chair in the center of C3I. "Conn" is on the bridge...
 
Engine Domes

Time to fit the domes to the front of the engine pods.

Where the white portion of the pod enters the printed part, there is a grey line all the way round to give you a stopping point for the ribbed band to stop at.
324.jpg
333.jpg

A dry fit showed a slightly tight fit - and looking at the base-rim of the dome, there were markings all around.
Whilst creasing these would not increase the fit, it was decided to cut all of them from the lip to the top of the line.

325.jpg

The band was firstly added to the dome, which was challenge. *note I fitted the band away from the engine.
The sloped of the dome did not want a flat piece to be added to it without a fight!
Blue line indicates where I had creased the part beforehand.
Red arrows is where I applied glue only to the orange band - not on the ribbed section.
Upward yellow arrows show I started from the bottom join on the dome and glued around slowly without pushing the dome inwards.
The yellow horizontal arrows is where the top of the band was glued, I placed it just at the top of the slits I cut in the previous photo.

326.jpg

To help the band curve around the dome, cuts where made to allow a little less tension and allow the part some wiggle room.

327.jpg

Test fitting showed there would be a gap around the pod - not the best look!

328.jpg

Tiny strips were cut off some scraps...

329.jpg

…and added to the bottom of the rim.

330.jpg

To keep these firmly on, UHU glue was added to the potion between the lip and the lower dome.

331.jpg

Orientation needs to be correct, thankfully all that needs to be done is align all the joins together from the dome, ribbed band and the engine pod - easy!

332.jpg

As the dome was placed over the end, I sourced some rubber-bands which were just enough to put the slightest amount of pressure on the rim helping it stick down.

334.jpg

The unsightly gap was therefore closed off and looking much tidier.

335.jpg

Before the addition of some of the dome parts, a small amount of paint was added to the inside.

336.jpg

Domes successfully docked - much harder than I thought it would be, but just glad that it's over and done with.
However they do not match the colour of the engines. The parts were printed in batches, rather than in one go and on different machines giving some the parts a more blue-grey look.
Maybe some painting will help blend these areas in, but I'll wait until nearer completion and see what the overall look is giving off.
Hopefully something easier is up next!

337.jpg


THANKS FOR WATCHING...
 

Attachments

  • 324.jpg
    324.jpg
    1.2 MB · Views: 0
  • 323.jpg
    323.jpg
    165.7 KB · Views: 0
This is the post of the day! Great insights and perfect solution of the problem. This reminds me of a build report from someone who mixed and matched several parts of two different Saturn V paper models, one was Ton's from the Hudson Valley gift shop. He had to reinforce and change one ring exactly like you did. :)
 
  • Like
  • Love
Reactions: Chuffy70 and mijob
This is the post of the day! Great insights and perfect solution of the problem. This reminds me of a build report from someone who mixed and matched several parts of two different Saturn V paper models, one was Ton's from the Hudson Valley gift shop. He had to reinforce and change one ring exactly like you did. :)
Post of the Day... I shall hold my head high, and strut like a cockerel... Thanks for the praise, and a fitting comparison, as the engines used on the studio Y-wing models for Star Wars used the Airfix Saturn V if I'm not mistaken
Great work and a great solution. I will keep this one in mind.
Thanks, and it came to me in my sleep, trying to find a solution to a problem, usually needs sleep or a walk-away from the bench.
Great solution to an annoying problem..
A simple, but rather effective fix - better than shoving loads of filler or glue in there
 
  • Like
Reactions: Revell-Fan