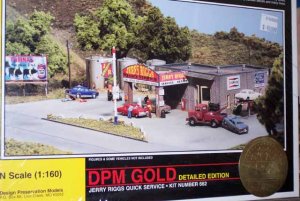
Progress
Allright, well, this is kind of long winded but if your up for it, enjoy my trials and tribulations.
So's I finally cracked open the box and started pawing through the little bags and trees and pieces. The more I checked it out, the more I thought to myself, "Holy Shamoley!!! What'd I just get myself into?" You see, the structure itself will not be that complicated... It's the bunches of microscopic little metal extras that are going to kill me! So, first things first, I decided that I better get myself a good little work light with a magnifying glass built into it.
Allright, now we've got that out of the way, I spread all the little pieces out on paper plates, scraped and filed any burrs and joints away, sprayed grey primer on one side, flipped 'em all over and sprayed the other. I must be absolutely insane. If you can see 'em in the pictures, there is a tractor, a wrecked car, a tow truck, gas pumps, tanks, a forklift, tires, light fixtures, pallettes and too many other little things to mention.


Next up, I took the plastic wall pieces and prepared them. Since it is supposed to be brick, I gave each piece a whitewash with Reefer White and then did some experimenting with the application of the red. At first, I used a red Sharpie. It worked beautifully on the first piece and totally screwed up the second piece. Instead, I ended up coloring all the pieces with a red colored pencil and then smearing them all with a black oil crayon and smudging it with my fingertips. 5 years ago, I had the top of the line camera (4 mp's). Now, I'm realizing that the pictures could be a lot better... time for a new camera... sorry for the quality.

Next, comes the stage where you simply put the walls together. Hmph! I screwed this step up every way possible. Right in the instructions, it says to line the corners up with something with a 90 degree edge for accurate corners. Nah, I didn't need to do that... I could eyeball it and it would be just fine. NOPE! Had to take it apart and do it again as the corners in the kit were not cut at 45 degree angles. Then, of course, I got at least one piece in upside down and two others switched around in the wrong positions.


Yes, the section with the door in it is a little darker than the rest and that was an accident but it turned out okay because that will be underneath a portico and it will actually look shaded. It's not perfect, and believe it or not, that's what I was going for (conveniently so!). I don't want it to look like a nice fresh new building... it should look older and starting to show the age of the years. I can very easily picture a couple of high school kids out for the summer trying to make money by slobbering white paint on the tops of the parapets. So far not too bad but still a ways to go.
Now, comes the introduction of some of the metal pieces and I had to go and get some super glue to proceed.
And of course, good 'ol Murphy came to visit me again during this stage. I was not paying attention and put one of the Jerry Riggs stickers on upside down. Turns out, it was easier to break off the little metal piece, file the other end to a 45 degree angle, flip it over and re glue it than it was to scrape off the little sticker and flip it over... man that super glue works good!!! It's gonna take a while for that other half of finger print to grow back! J/K... sort of.
And, these next couple will show the structure more or less at the stage of completion. Now it's on to all of those little accessorie pieces... oh boy!
It's kind of hard to tell from the picture but the roof took some figuring out. First off, I had to cut it out myself and that was a real challenge but the file brought the crooked lines back straight again. Then, I was not happy with the shiny smooth finish and so then, I cut some sandpaper to go over the top of it. I wasn't happy with that, removed the roof and smeared Elmers glue all over it. Then, I took my sifting screen and sprinkled a consistent layer of dirt on it. After that dried, I removed the excess, took it outside, and painted it flat black... again. Cool. It turned out good. Enough jabber...
Now I just have to figure out where I am going to strategically place this puppy for maximum effect. More to come....


")

