The Mirror Fleet Begins!

bgt01

Exemplary Confidant
Jan 26, 2012
576
843
93
Ohio
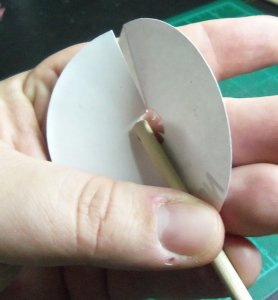
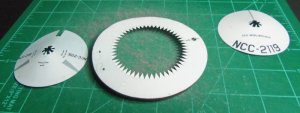
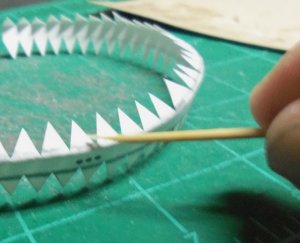
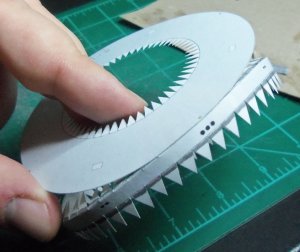
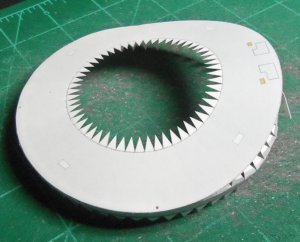
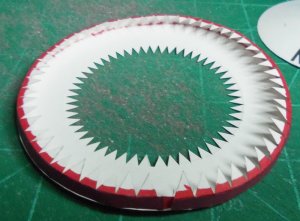
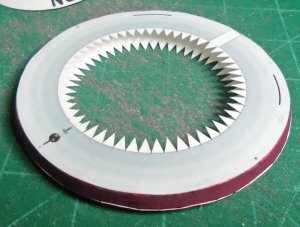
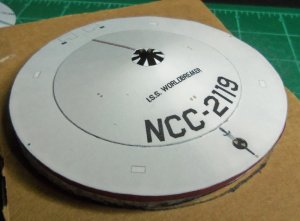
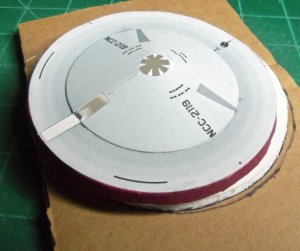
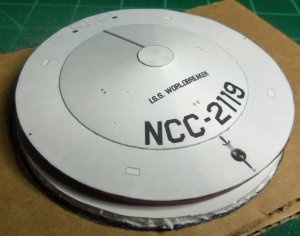
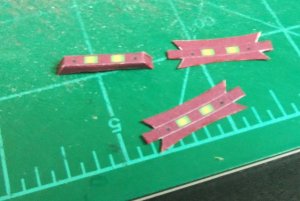
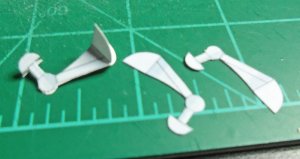
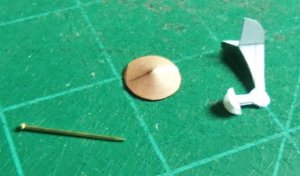
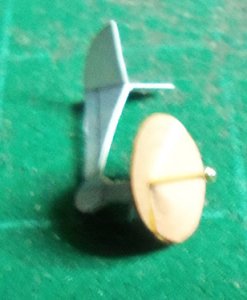
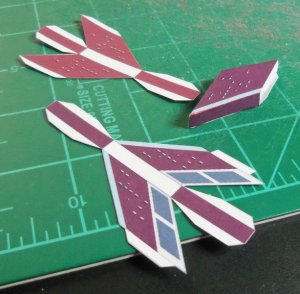
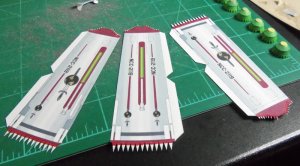
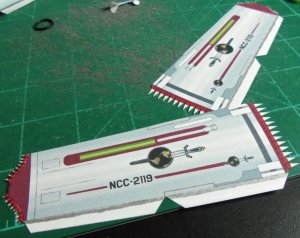
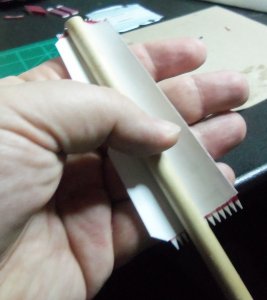
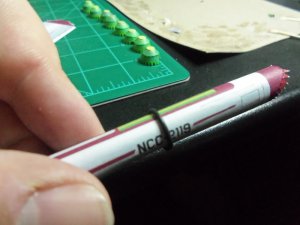
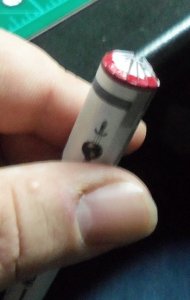
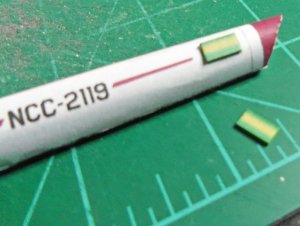
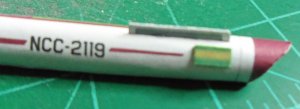
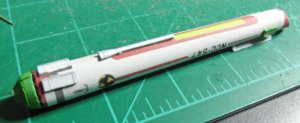
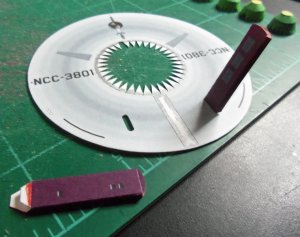
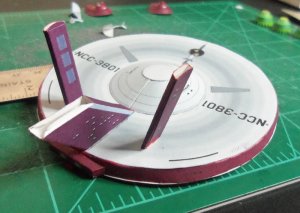
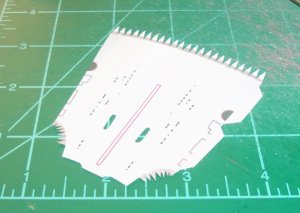
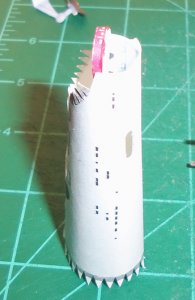
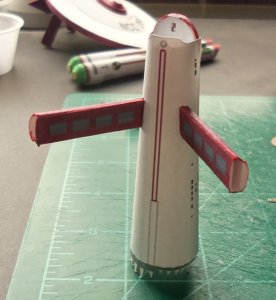
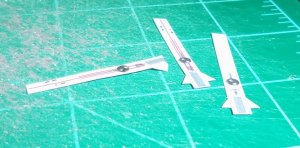
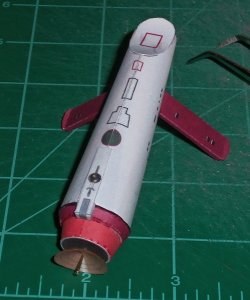
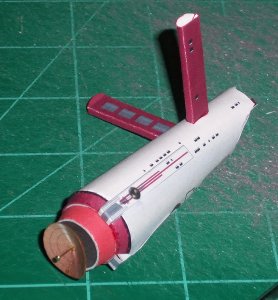
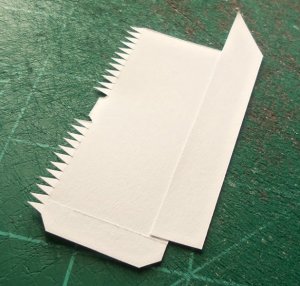
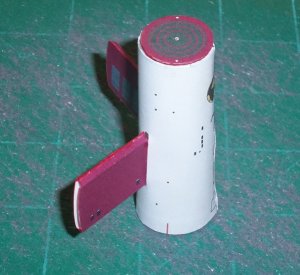
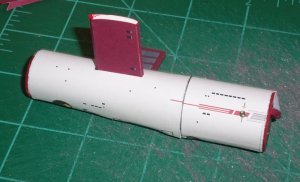
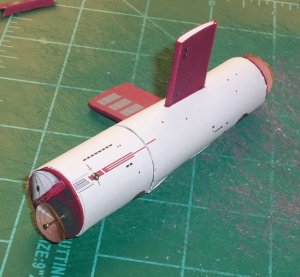
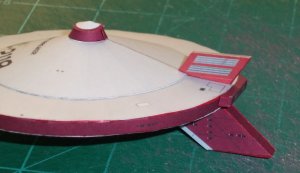
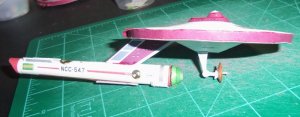
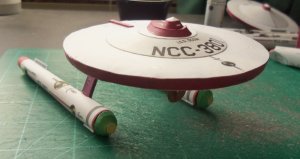
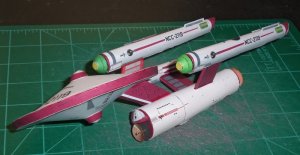
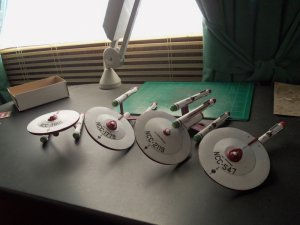
Well, what do you do when you start building a bunch of Starfleet ships? Start building Mirror Universe ships, of course! With all the Connies complete and more Starfleet ships being built, I've decided it's time to add some of my favorite villains. Again, these are my repaints of Rawen's original, fantastic files. I am building my versions of an Empire Heavy Cruiser (I.S.S. Predator), Dreadnought (I.S.S. Worldbreaker), Destroyer (I.S.S. Godhammer) and Tug (I.S.S. Scow).

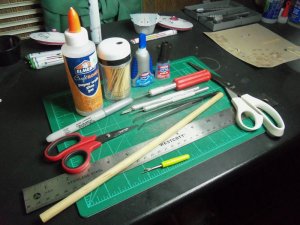
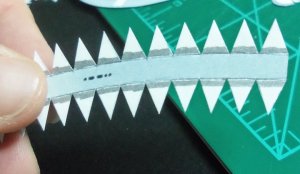
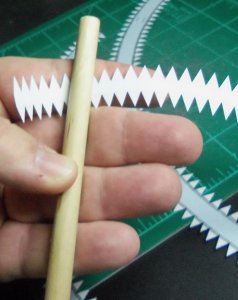
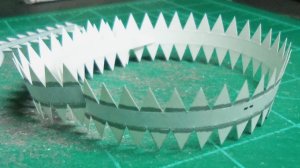
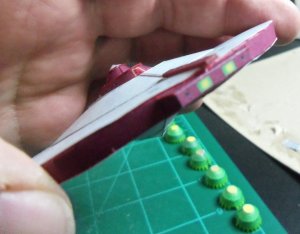
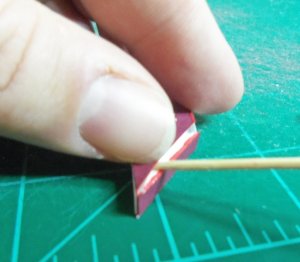
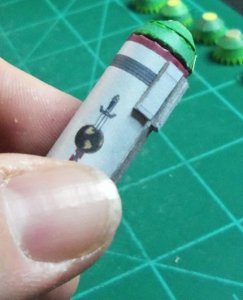
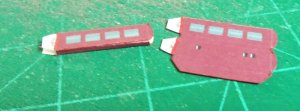
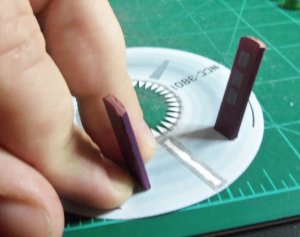
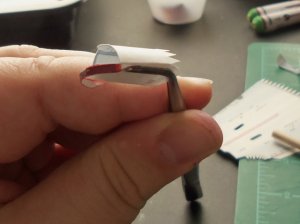
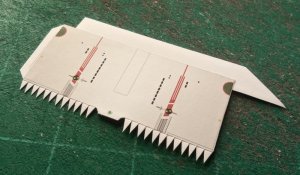
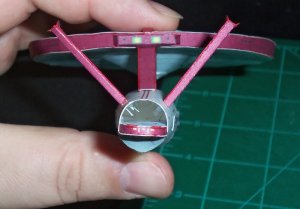
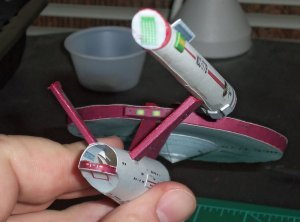
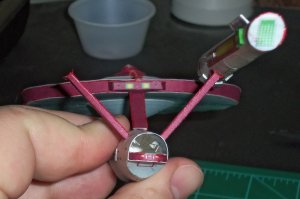
I am building all four ships at once so my post will skip around a little, but my goal is to show a detailed buildup of these Rawen ships for reference. My technique is by no means perfect, but it's worked well for me and may work even better for someone with more steady hands. Sorry if the post gets a little long, but I'm a writer and used to presenting all the data. I'll try to keep it under control.

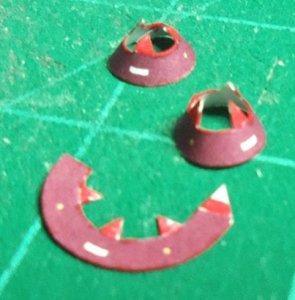
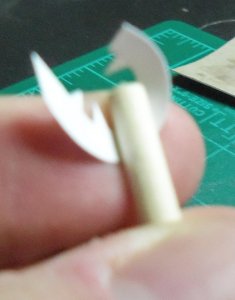
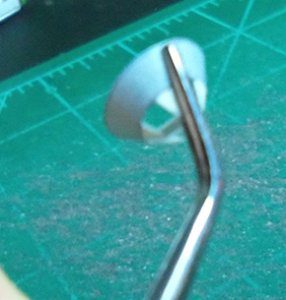
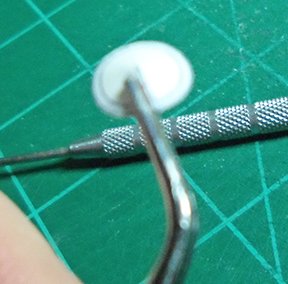
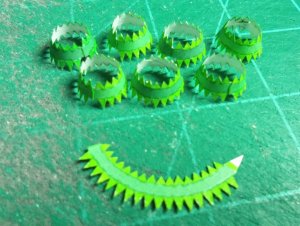
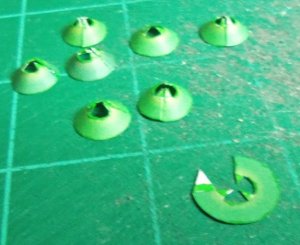
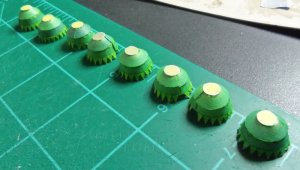
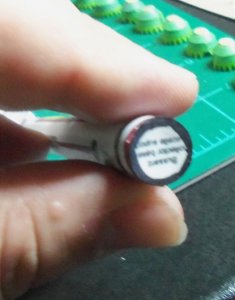
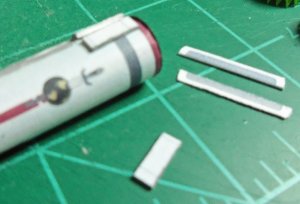
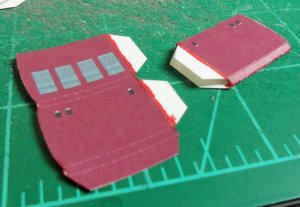
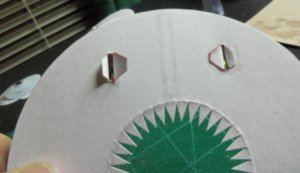
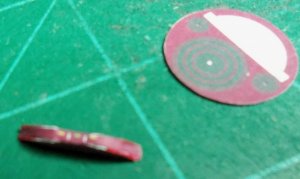
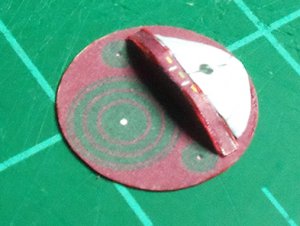
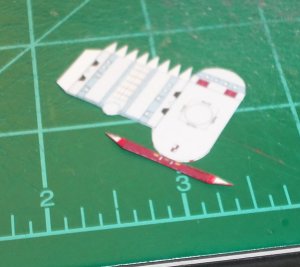
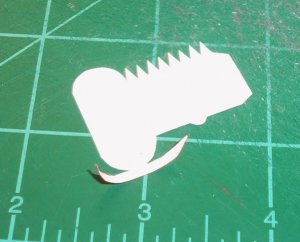
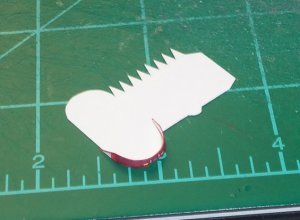
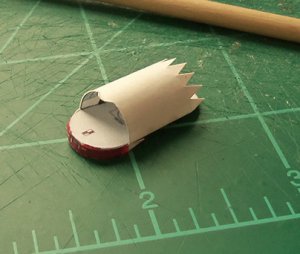
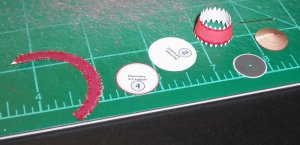
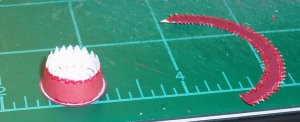
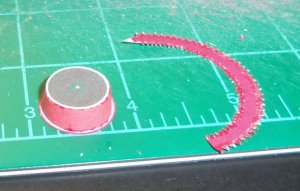
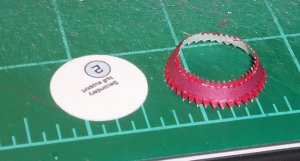
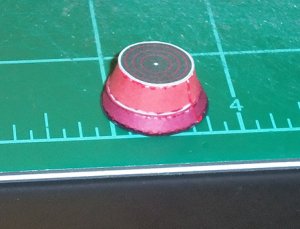
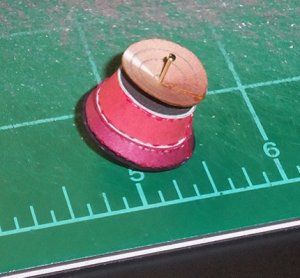
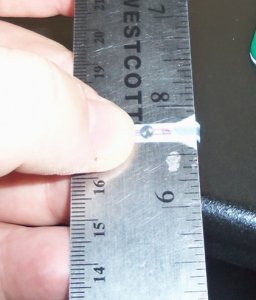
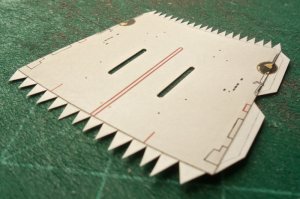
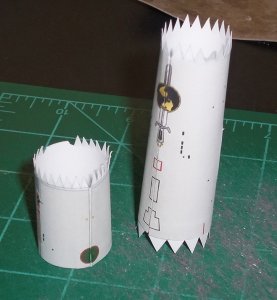
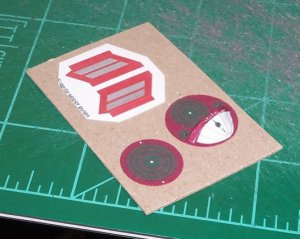
FYI, sometimes I forget to take a pic, so if you see a part change around ignore it since I'm just trying to show my technique.
 

bgt01

Exemplary Confidant
Jan 26, 2012
576
843
93
Ohio
Tools

My tools are standard stuff. X-Acto knifes and Excel knifes with a variety of blades. Number 11 blades are used the most. Standard scissors and Paper Studio non-stick precision tip scissors. These small scissors are great for clean, precise cuts and have great control. I cut all my circles and almost everything else with these and highly recommend them.They are about $7 at Hobby Lobby. Standard metal ruler. Elmer's Paper Craft Gel Glue and Loctite Super Glue - both brushable and gel control. Lots of toothpicks and dowel rods for shaping. Sewing seam ripper for scoring. Markers. Large and small tweezers.
 

Attachments

  • 01.jpg
    01.jpg
    187.6 KB · Views: 6

bgt01

Exemplary Confidant
Jan 26, 2012
576
843
93
Ohio
Saucer

To me, saucer assembly is the easiest part. All parts are scored and cut out. Always score before you cut! Next I edge paint where needed using Sharpies and cheap markers. Edge bleed is a constant battle, but I don't have the patience for paint or watercolors. You can get good results if you are careful. The rounded parts of the saucer are shaped by rolling a dowel rod around the part from the center out.

Roll the edge strip until it curls into shape. Fold down the tabs. Align the center of the edge stripe with the front center of the top of the saucer (center round window should be right below the forward running light). I glue about 3 tabs at a time, keeping the top as flat as possible. Alternate gluing right and left side until you meet up in the back of the saucer. I must admit I haven't done this yet where the ends meet up perfectly, but if I have a gap it is usually small and it will be covered up when the impulse engines go on. Do not glue the edge stripe ends together because you'll need them to flex a little when gluing the bottom on. My glued tops usually look a little warped until the bottom is on, so don't worry too much.

When the glue is set, flip the top over, keep flat against the table, place the bottom in position and repeat the process, only now use your fingers to apply light pressure to where you glue to keep the saucer flat. This is how I get a nice, relatively flat saucer. Now just assemble the rest of the saucer parts in order.

The upper part of the bridge is another score, curl and glue part. The base part I've found to be fussy. My method is to cut off the tabs at the base but leave the top ones, then curl the bottom and glue. The bottom tabs are a pain and not really necessary since the bridge sits flat on the saucer. Now glue the bridge together and glue to the saucer.

I cut all the tabs off the impulse engines. They are just too small to bend without mangling the part and not really necessary. I score and bend all the folds and edge glue. When the fold is straight I line it on my metal ruler and bend at the edge. This helps keep the fold straight. I use the Loctite gel control so I don't have to hold the parts steady for long. Then glue in place on the saucer along with the impulse strip (I glue to 1mm chipboard and edge color) directly above.
 

Attachments

  • a1a.jpg
    a1a.jpg
    107.2 KB · Views: 5
  • a1b.jpg
    a1b.jpg
    85 KB · Views: 6
  • a1c.jpg
    a1c.jpg
    108.3 KB · Views: 6
  • a1d.jpg
    a1d.jpg
    88.7 KB · Views: 8
  • a1e.jpg
    a1e.jpg
    89 KB · Views: 7
  • a2a.jpg
    a2a.jpg
    109.8 KB · Views: 7
  • a2b.jpg
    a2b.jpg
    128.6 KB · Views: 8
  • a2c.jpg
    a2c.jpg
    121.5 KB · Views: 6
  • a2d.jpg
    a2d.jpg
    155.3 KB · Views: 5
  • a3.jpg
    a3.jpg
    155.7 KB · Views: 5

bgt01

Exemplary Confidant
Jan 26, 2012
576
843
93
Ohio
Saucer

More saucer pics
 

Attachments

  • a4.jpg
    a4.jpg
    125.7 KB · Views: 6
  • a5.jpg
    a5.jpg
    136.5 KB · Views: 6
  • a6.jpg
    a6.jpg
    128.3 KB · Views: 8
  • a7.jpg
    a7.jpg
    61.3 KB · Views: 7
  • a7b.JPG
    a7b.JPG
    192.5 KB · Views: 9
  • a7c.JPG
    a7c.JPG
    125.7 KB · Views: 87
  • a7d.JPG
    a7d.JPG
    123.5 KB · Views: 89
  • a8.jpg
    a8.jpg
    161.6 KB · Views: 7
  • a9.jpg
    a9.jpg
    95.1 KB · Views: 6
  • a10.jpg
    a10.jpg
    139.7 KB · Views: 6

bgt01

Exemplary Confidant
Jan 26, 2012
576
843
93
Ohio
Navigational deflector

This is another fussy part. I start by only gluing the area between the top flaps and the round section at the bottom of the base, Next, I edge paint the deflector with a gold marker and put some on the back since these parts don't align perfectly and some of the backs always shows through. Now I roll the deflectors (1 shaped in and 1 shaped out) and glue. Push a pin (I got gold pins from Hobby Lobby) through the center of the deflector SLOWLY until you get it the way you want it. I put a little dab of super glue on the back at the pin to keep its position. Clip the pin so it is in line with the bottom of the base, set the pin between the paper and glue. I use super glue to strengthen the part.
 

Attachments

  • b11.jpg
    b11.jpg
    105.9 KB · Views: 5
  • b12.jpg
    b12.jpg
    84.7 KB · Views: 6
  • b13.JPG
    b13.JPG
    140 KB · Views: 86

bgt01

Exemplary Confidant
Jan 26, 2012
576
843
93
Ohio
Dorsal

These are pretty straightforward. I use the tabs on these. After scoring and edge coloring I cut the tabs extra narrow on the front and back of the dorsal. If you don't they don't close up right. You can't fold the tabs without mangling the ends where they come to points, so those sections I cut off. That helps keep the points sharp. I do this on any parts where needed. After folding the tabs I roll a toothpick along the fold to help even it out and keep the fold from "puckering" up when you glue it.
 

Attachments

  • c14.jpg
    c14.jpg
    140.4 KB · Views: 5
  • c15.jpg
    c15.jpg
    117 KB · Views: 4
  • c16.jpg
    c16.jpg
    103.8 KB · Views: 7

bgt01

Exemplary Confidant
Jan 26, 2012
576
843
93
Ohio
Warp engines

These are the most labor intensive parts on the Rawen models, in my opinion. The bottom of the Bussard collectors is simple score, edge color, curl and glue. Sometimes I cut the bottom tabs off to speed things up. It's up to you. The top Bussard piece is another score, edge color, curl and glue. Glue on the top piece and that's it. I try to keep the seams lined up where the pieces come together for a cleaner look.

The warp engines are also score, edge color, curl and glue, but they can be fussy due to their size and tapered shape. Again, I roll a dowel until the part curls. Once it curls enough to close, I slip a rubber O-ring over it and then start gluing the seam by spreading glue with a toothpick from the rear forward. As I glue I slide the O-ring down to keep the engine from springing apart. Then glue on the end pieces. You need to squeeze the forward end a little to keep it round when gluing the Bussard support because there will be a gap at the seam.

Next I glue the small square (Space Matrix Restoration Balancers), gray rectangle (Pre Stage Flux Tuners) and long, thin gray (Flux Tuners) parts to 1mm chipboard (as marked) cut out and edge color. Cut the Flux Tuners carefully and slowly because they are easy to mangle. The long gray strips (Post Stage Flux Tuners) on the top fold over and glue together. I cut them out leaving a lot good amount of white paper on all sides, then score, fold and glue, pressing hard on a flat surface and holding. Then I cut them to size. This keeps them nice and straight. They are too hard to work with if you cut them to size first. Glue them on as marked and that's it.
 

Attachments

  • d17.jpg
    d17.jpg
    198.6 KB · Views: 5
  • d18.jpg
    d18.jpg
    94.9 KB · Views: 6
  • d19.jpg
    d19.jpg
    142.5 KB · Views: 6
  • d20.jpg
    d20.jpg
    156.2 KB · Views: 4
  • d21.jpg
    d21.jpg
    188.9 KB · Views: 8
  • d22.jpg
    d22.jpg
    86.4 KB · Views: 6
  • d23.jpg
    d23.jpg
    126.8 KB · Views: 4
  • d24.jpg
    d24.jpg
    62.7 KB · Views: 7
  • d25.jpg
    d25.jpg
    64 KB · Views: 7
  • d26.jpg
    d26.jpg
    155.9 KB · Views: 8

bgt01

Exemplary Confidant
Jan 26, 2012
576
843
93
Ohio
Warp engines

More warp engine pics
 

Attachments

  • d27.jpg
    d27.jpg
    129.8 KB · Views: 7
  • d28.jpg
    d28.jpg
    73.2 KB · Views: 7
  • d29.jpg
    d29.jpg
    73.5 KB · Views: 8
  • d29b.jpg
    d29b.jpg
    108.6 KB · Views: 6
  • d30.jpg
    d30.jpg
    117.3 KB · Views: 6
  • d31.jpg
    d31.jpg
    94.1 KB · Views: 7

bgt01

Exemplary Confidant
Jan 26, 2012
576
843
93
Ohio
Pylons

Pretty simple pieces. Score, color, fold and glue. My method for attaching them simple. When attaching to saucers, I insert the marked ends through the hole, fold the ends out and put a little glue on the back and then press them flat against the table. Once they set I put a little brushable super glue over them to seal them down. When attaching to hulls I use the same process except I but a dowel rod through the open hull and hold the tabs and hull against it to get a good seal. Do not glue the warp engines to the pylons until the rest of the model is finished.
 

Attachments

  • e32.jpg
    e32.jpg
    90.2 KB · Views: 7
  • e33.jpg
    e33.jpg
    150.3 KB · Views: 6
  • e34.jpg
    e34.jpg
    169 KB · Views: 8
  • e35.jpg
    e35.jpg
    99.6 KB · Views: 7
  • e36.jpg
    e36.jpg
    132.7 KB · Views: 6
  • e37.jpg
    e37.jpg
    153 KB · Views: 6

Revell-Fan

Co-Administrator
Staff member
Administrator
Moderator
Aug 1, 2009
11,611
12,352
228
Vreden
WOW! I guess this time your beatuy pics will become a bit ... more aggressive! :mrgreen:
 

bgt01

Exemplary Confidant
Jan 26, 2012
576
843
93
Ohio
Shuttlebay

These parts take some time because of number of small parts. The Dreadnought hull has a forward-facing shuttlebay with a small fantail. I remove the fantail tabs and use very small amounts of gel super glue to edge glue it together. It's very small and mine always come out a little wrinkly at best. I think I'm going to try cutting the fantail edge completely off on any future builds so I don't get the crease at the fold.

It's similar for the Cruiser shuttlebay. Cut off the small tabs at the fantail and at the rear wall and only use the one that connects the roof to the floor. I didn't cut the tabs off the rear on the one in the pics because I closed up the shuttlebay and you can't see it. That was a small mistake because they got in the way where the pylons come through the hull. Not a big deal, but definitely cut them off in you aren't using them.
 

Attachments

  • f1.jpg
    f1.jpg
    107.2 KB · Views: 10
  • f2.JPG
    f2.JPG
    150.5 KB · Views: 25
  • f2a.jpg
    f2a.jpg
    90 KB · Views: 7
  • f2b.jpg
    f2b.jpg
    88.9 KB · Views: 6
  • f2c.jpg
    f2c.jpg
    74.2 KB · Views: 6
  • f2d.jpg
    f2d.jpg
    67.7 KB · Views: 5
  • f2e.JPG
    f2e.JPG
    157.9 KB · Views: 23

bgt01

Exemplary Confidant
Jan 26, 2012
576
843
93
Ohio
Navigational deflector

The navigational deflector assembles as shown. You can build it without tabs, which is quicker to cut out but leaves gaps if things don't line up right. For the rear deflector piece for the Dreadnought I glued it to 1mm chipboard to add strength. The small gold pins I got from Hobby Lobby.
 

Attachments

  • f3.jpg
    f3.jpg
    128.2 KB · Views: 6
  • f4.jpg
    f4.jpg
    88 KB · Views: 5
  • f5.jpg
    f5.jpg
    100.8 KB · Views: 6
  • f6.jpg
    f6.jpg
    89.6 KB · Views: 5
  • f7.JPG
    f7.JPG
    175.1 KB · Views: 28
  • f8.jpg
    f8.jpg
    70.5 KB · Views: 5

bgt01

Exemplary Confidant
Jan 26, 2012
576
843
93
Ohio
Secondary hull/cruiser

The main sections of the hull are simple curl and glue. I cut off the tabs at the bottom and glue strips to the back so the seams line up better. Then, I put the pylons through the slots, put glue on the back of the tabs and use a dowel rod to push the tabs against the inside of the hull, keeping pressure on both sides. Make sure you get the pylons on the correct sides - the little windows on the pylons go toward the front. Next I cut the tabs off the 3 pieces for the Cruiser hull and edge glue them with a very small amount of gel super glue. The gel sets fast and make them hold their shape. Then I glue them and the finished navigational deflector to the hull.
 

Attachments

  • f14.jpg
    f14.jpg
    83.3 KB · Views: 7
  • f15.jpg
    f15.jpg
    71.3 KB · Views: 8
  • f16.JPG
    f16.JPG
    178.2 KB · Views: 6
  • f17.jpg
    f17.jpg
    95.9 KB · Views: 7
  • f19.jpg
    f19.jpg
    65.1 KB · Views: 7
  • f20.jpg
    f20.jpg
    109.4 KB · Views: 7
  • f21.jpg
    f21.jpg
    101.9 KB · Views: 6
  • f22.jpg
    f22.jpg
    138.3 KB · Views: 6

bgt01

Exemplary Confidant
Jan 26, 2012
576
843
93
Ohio
Secondary hull/dreadnought

Same basic method at the Cruiser hull. I glued the ends of the Dreadnought hull to 1mm chipboard for support, along with the upper pylon. The upper pylon if very tricky. I don't use the tabs since the chipboard makes it very strong, but you have to experiment with cutting it to final size. If you cut the top and bottom straight it won't match the slope of the saucer and you'll get a top warp engine droops in the rear. I leave some extra at the bottom and trim and test fit until I get the top of the pylon level with the saucer edge. Then I use regular glue to put it in position and brush on super glue around the outside edges for support.
 

Attachments

  • g1.jpg
    g1.jpg
    142.4 KB · Views: 7
  • g2.jpg
    g2.jpg
    146.9 KB · Views: 6
  • g3.jpg
    g3.jpg
    155 KB · Views: 5
  • g4.jpg
    g4.jpg
    101.3 KB · Views: 4
  • g5.jpg
    g5.jpg
    62.1 KB · Views: 6
  • g6.jpg
    g6.jpg
    95.5 KB · Views: 10
  • g7.jpg
    g7.jpg
    137.4 KB · Views: 7
  • g8.jpg
    g8.jpg
    135.8 KB · Views: 9
  • g9.jpg
    g9.jpg
    139.3 KB · Views: 8
  • g10.jpg
    g10.jpg
    104.9 KB · Views: 8

bgt01

Exemplary Confidant
Jan 26, 2012
576
843
93
Ohio
Joining saucers and nacelles

When I glue the saucers to the secondary hull I always sight down the spine of the ship and manipulate the parts around until I get the straightest look possible. Same with the warp engines. Use regular gel glue to mount them on the pylons and check them from all sides to get them as straight and level as possible. Once the glue is set enough to hold them I let go and check again. If I still need to adjust, I do that and once they are in final position I put brush on super glue around the base of the pylon and where the engines and pylon connect. That adds strength and eliminates drooping later.
 

Attachments

  • ha.jpg
    ha.jpg
    120 KB · Views: 5
  • hb.jpg
    hb.jpg
    141.7 KB · Views: 8
  • hc.jpg
    hc.jpg
    123.4 KB · Views: 7

bgt01

Exemplary Confidant
Jan 26, 2012
576
843
93
Ohio
Final

That's it. The ships of the Terran Empire are ready to terrorize the Federation and all worlds that oppose them.
 

Attachments

  • z_godhammer1.jpg
    z_godhammer1.jpg
    103.6 KB · Views: 7
  • z_predator1.jpg
    z_predator1.jpg
    131.5 KB · Views: 5
  • z_scow2.jpg
    z_scow2.jpg
    102 KB · Views: 9
  • z_worldbreaker1.jpg
    z_worldbreaker1.jpg
    123.3 KB · Views: 7
  • z_mirror2.jpg
    z_mirror2.jpg
    125.5 KB · Views: 12