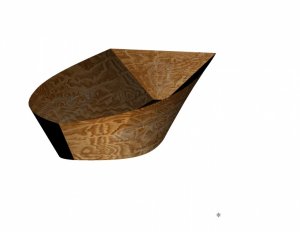
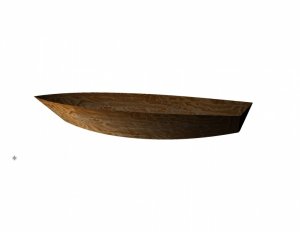
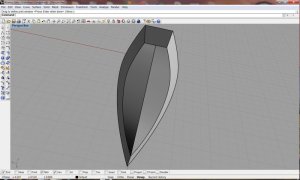
This is the text of how to build the attached boat. The pictures that go with the text are in the following post.
Open Rhino, Select "Small Objects-Inches, click "Open"
Double Click Top to Enlarge the Top Viewing Pane
On the Upper ToolBar, on the Second Icon to the right of the little Red Car, right click the button to enable the object snap toolbar by holding cursor over first icon from drop down menu and clicking "Show Object Snap Toolbar"
A ToolBar will appear on the Bottom. This Toolbar should always be present.
Underneath you will see other words, make sure the word "Ortho" is NOT highlighted ( Ortho makes it easy for you to make straight lines, later on that)
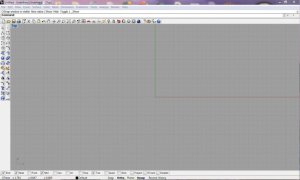
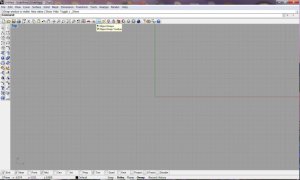
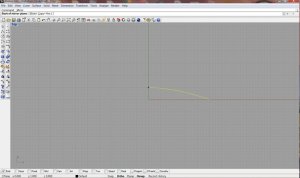
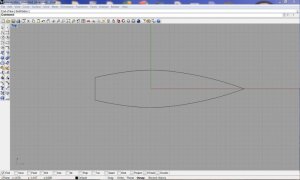
Your screen should look like the picture named "Start" At anytime you can use the "White Hand to move the whole Scene around. it is not moving the part, just your relative view.
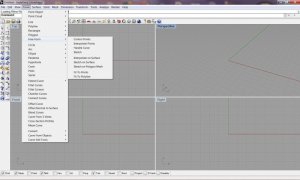
Do the following in this order Click/Curve/Free Form/Control Points/Click Points
Type, 5,0 (zero,zero, not the letter "O")
Type 3,.750 enter
type 1,1 enter
type 0,1 enter, then Right Click to finish
This can be done with out numbers. You can just eyeball where you want the control points to be. I am doing it this way because of the other steps I want to show you.
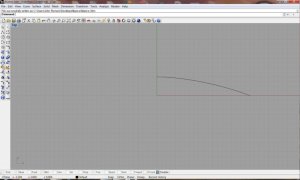
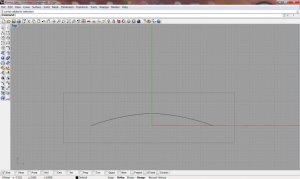
Your screen should look like ClipBoard 5.
Click the curve one time to highlight it.
Go to the bottom of the screen and click "ORTHO".
On top of screen, click "Transform", on the slide down, click "Mirror"
Click the bottom tool bar where it says Enable (if it says Disable, it already is Enabled, this toggles this toolbar on and off). Check the box to the extreme left that says end. Make sure Otho is still highlighted.
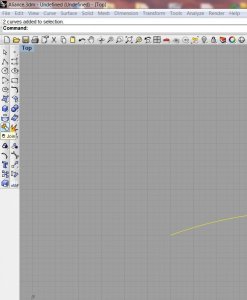
Clipboard 4 shows the cursor "snapped" to the end of the curve. This is what snap does. Click once, and slide the cursor down and you will see the mirrored part appear on the left. Click once to end that step.
It will only go parallel, or perpendicular because Ortho is on.
Just slide the cursor down and it will look like clipboard 6
Click somewhere away from the lines and drag the mouse. This creates a box that can be used for selection. Create a box, and select the two curves.
Both curves should be highlighted yellow, go to the right ad click "Join", it looks like two puzzle pieces. This will join the two curves together.(See clipboard 8).
At this point, I will tell you what to do, reference above commands if you get lost.
Transform/Mirror/,snap to end of curve/bring other end of mirrored part to other end of original curve. Click to finish.
Remember, the point of this is to learn commands, not the fastest way to make a simple boat.
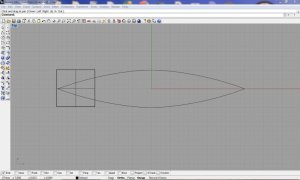
Create a box- Go to "Solid", slide down, slide to "Corner to Corner" Click once.
Place cursor in open area and draw a box 2 by 2 inches and type in 2 for the next dimension.
Position the box so that it looks like clipboard 9. We are chopping off 2 inches. Make sure NOTHING is highlighted, just click an open area, or press ESC.
Go to the right of the screen and find the button that has a "white rectangle, and a triangle going into it" (not the broken rectangle) Click it once, this is the "Split Command, in the Dialog box, it will say "Select Objects to Split, click each Curve that intersects the box. Press "Enter when done, or right Mouse key. The Dialogue box asks for a cutting object, select the box, Press Enter, or right mouse key. Select the Box, and the two curve pieces you just cut but drawing a box around them, they should be highlighted, go to EDIT, and find Delete and press it (Up Top next to File).
In the EDIT commands, you will also find the Join, Explode, etc.
Next, Curve/Line/Single Line Snap the lines to the ends you just cut off. That will be the transom. See Clipboard 10.
Draw a box around the whole drawing to select it. When it is completely highlighted, go to "Transform/Copy, click on the middle of the transom and drag to the right around 1/4 inch.
Now, put ORTHO on and drag the Yellow model so that both transoms line up
Go to "Transform/Scale/Scale 3-D, slide the line to ),) (where the Red and Green line meet) click and drag back the bow 1.25 inches, which is 5 small blocks. Click when finished. Refer to Clipboard-11
Go to EDIT/Groups/Group, carefully select the smaller pieces one at a time, If you select the wrong part, Hold Ctrl Down and click the wrong part again to deselect it. Press Enter when done.
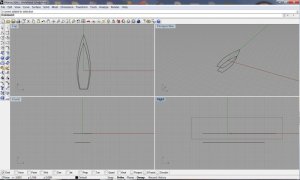
Double click Top to go back to 4 pane view.
Select(Highlight) the smaller drawing and underneath in the Front view, slide it down 1 inch.
At this time, in the Top View, select the whole unit with a box, and go to "Transform/Rotate, put the cursor right over 0,0 and rotate so the box is pointing up. Drag the line to the right, a circle will appear, and just drag the bow up. This will orient the craft correctly in relation to the windows.
Now comes the "Subjective" part.
In the Right (Lower Right) Pane, select the top line you see with a selection box, like you selected above. See Clipboard 12, when you are done in the Pane above that (Perspective, you will see the top shape selected).
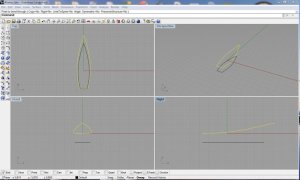
Click "Ortho" off
Go to Transform/Bend, Snap Cursor to Transom end go past the bow an inch and drag upwards to make the curve you wish. Se Clipboard-13.
If you make a mistake, the curved arrow next to the white hand wll take you back on step. When satisfied:
Transform/Rotate snap to the transom and Rotate down till the box is around 1.5 box's (1.375") up from the transom. See clipboard 14.
Now select the small shape with a box
Transform/Bend, but this time start in the middle of the lower shape and bring it up slightly (make it look like a boat!)do the same for the rear. Ref. clipboard-15.
Go to Curve/Line/Single Line...Snap one end of the line to the top of the bow, and the other to the Bottom
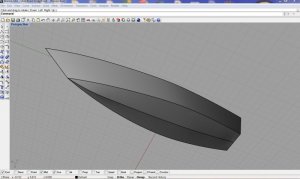
Double Click the Top Pane to Enlarge it. Go to "Surface/Sweep 2 Rails. Select the small curve on right hand side, then the large curve on the right hand side, then the line connecting the bow points, as the profile curve (it does this automatically, just select in the order I told you) Then press Enter, or you Right mouse Key. Click O.K. in the Dialogue box that appears. Do the same thing for the other side. If you feel brave, you can also Mirror it. I wouldn't though, not for this kind of model.
Double click "Top" to get back to the 4 window view. To the right of the "White Hand" is a Global looking Icon, this allows you to rotate the view. Do this in the Perspective box so you can look at the model.
It is easier to do the transom surface in the Perspective view. Double click it. With the rotate button, position the transom so you can see it easily. If it is too small, in large it with the magnifying glass button with the +- in it. Click the button, dragging up make it bigger, down, smaller, use the white hand to position the drawing where you want it.
Surface/Sweep 2 Rails, select the sides and the top line and click O.K. and the surface will form, just like you did on the sides.
A flat bottomed boat, how boring. Let's add a chine.
Double click Top, Enlarge the picture big enough (huge, using the Magnifying glass with +- in it)) so that you can see the line in the middle of the transom. On the Snap ToolBar, Check the Box that has "Mid" written next to it. Running your cursor on what would be the bottom of the transom, you will notice that at the "Midway" point, the cursor locks, at this point, click, to start your line, put ORTHO on. Now, Reduce the size of our picture so you can see the whole boat. Ref. Clipboard-17
Go straight up towards the bottom of the boat till you get to the bow, make around 10 points. Double click Top to get back to 4 way view.
Click the line you just made to highlight it. Turn of the Snap toolbar by pressing Disable. Double click the right window to enlarge it.
Go to EDIT/"Control Points/"Control Points On"/. Ref Clipboard 18.
Turn Ortho On. You are going to pull each dot down to form a smooth line slightly lower than the sides of the boat. Ref. Clipboard 19. That's good enough for me. More chines could be added but not really fitting for this boat.
Edit/ControlPoints/ControlPoints Off.
Now if you go to the Perspective screen, and roll the boat around, you should see your gentle center line for your chine. Just in case anyone hasn't noticed, this can be a tiny sharpie, or the beginning of a fuselage for an amphibious boat? I wonder where we will end up at!
Turn the Snap Toolbar back on.
Curve/Line/Single Line...Snap a line from the bottom Mid point of the transom to the bottom end of the side panels (1 each side)
This is one of those things that is easily done in the Perspective Window.
Surface/Sweep 2 Rails..Select the Center (Keel) line, the bottom of the side panel and the line you just made from the mid point, as your profile curve, click O.K. in the Dialog box and the chine will be made. Remember that when you select Run 2 Rails, you just select the lines, if you look at the line where you type entries, you will see the questions being ask, so try and keep track as to what's going on. Repeat to make the other chine. Right click the perspective Windows box (On the word "Perspective" to get Render options. Ref. Clipboard-20 to see where I left off.
Decking, chairs, who knows what will be next?


")