Hey 88fan... that's a nice looking car.
Ralph... I designed my decals today and printed them earlier this evening, let them dry, then lightly sprayed them with Testors DecalBonder as recommended. Let them dry for a couple of hours, and then did the application on one side of my boxcar. So far, it went well, they look pretty good.
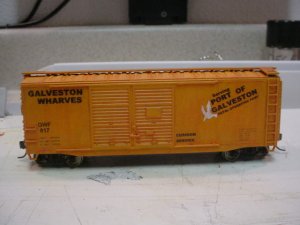
The ink went onto the paper just fine, but for now I have only used black ink and a little bit of orange. What I am doing is a Galveston Wharves scheme on a 40footer, yeah, I know, not prototypical, but what the heck.
My findings:
The decals seem to be a bit more "finicky" than factory made jobs, not as easy to position, but that could be because my paint job was a bit less than glossy.
I used microset to position some, and just water for others. The plain water seemed to be better for positioning the decals.
Right after application, the decals had mini-wrinkles all over them which had me disturbed, and any efforts to smooth them only served to "de-position" the decals.
After they dried for awhile, I put microsol on them, and after 10 minutes or so the decals had pulled down nicely and the wrinkles are gone.
Special efforts have to be made to do white, as was mentioned in a post above, due to the inkjet not printing white ink. Testors makes white decal paper and clear decal paper. I used clear for the black lettering, and white for the seagull logo. To do the white seagull, I basically outlined it in orange, approximately the same color as the car. This was done in Microsoft Photodraw and Microsoft Word. I'll have to use some paint to blend the orange decal outline into the carbody. I'm not sure how this stuff could be used to do a lot of white lettering, except to design the white lettering over a textbox that is the approximate color of the car, and then blend it into the car body with paint.
I'll take some pics sometime soon. So far, I am happy with the results.