

Guess this mech
- Thread starter Getter1
- Start date
You are using an out of date browser. It may not display this or other websites correctly.
You should upgrade or use an alternative browser.
You should upgrade or use an alternative browser.

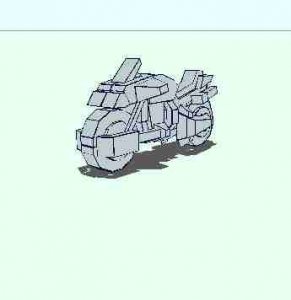
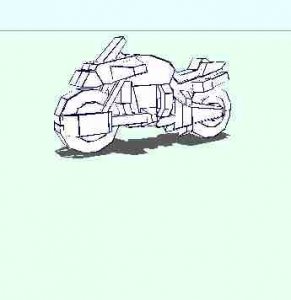
Indeed it is Mospeadea. Yeah the front isn't there yet. This is where I left off last night. Hope to get it done today.
John
John
GyverX said:Do you have a link for the software you are using?
The site and the software are Japanese. Use Google.com's language tools to translate the page.
http://inazuma.jp/
I certainly wouldn't mind beta testing it so I volunteer myself. BTW, it doesn't transform, does it?
I still have one of the old plastic models (Revell I think) of this that were sold under the Go-bots brand as Cy-kill. Of course I've lost the instructions to that long long ago in a galaxy far far away.. ah-hem... anyways, so I still have it unassembled in a box.
I still have one of the old plastic models (Revell I think) of this that were sold under the Go-bots brand as Cy-kill. Of course I've lost the instructions to that long long ago in a galaxy far far away.. ah-hem... anyways, so I still have it unassembled in a box.
Gefahren said:I certainly wouldn't mind beta testing it so I volunteer myself. BTW, it doesn't transform, does it?
I still have one of the old plastic models (Revell I think) of this that were sold under the Go-bots brand as Cy-kill. Of course I've lost the instructions to that long long ago in a galaxy far far away.. ah-hem... anyways, so I still have it unassembled in a box.
Hey Gefahren,
Just PM me your e-mail addy and I'll send you the scans of the Cyclone parts. Sorry I don't think I'll be able to pull off the transformation however with a little modification the parts could probably be assembled in the armor mode (hence I'll have to design the rider eventually). Note the design program doesn't allow curves which isn't a problem for the cyclone except for the wheels.
Go-Bot Cy-kill huh? I had that same kit, long gone now. However I do have the actual Mospeada kit of the same make (Blowsperior). Unfortunatly it currently is in Spokane Washington where I will be moving to at the end of May. If you can wait that long I'll scan the instructions for you when the kit and I reunite
")
John
Florida to Washington............ man one end to the other!
Good luck with the move..........Ummm....... you know that it rains A LOT in Washington.......right ? No good for paper:roll: Lovely for ducks!:grin:
Hey Gef......... your Walker is drawing mucho attention at the display. Kids have come up to me and said "That's my favorite!" Congrats man!:grin: ....... They want us to get a picture made.:twisted: Let me know......ok?
And Getter1 this guy does GREAT work. Believe me!
john
Getter
Sounds like you're going from Eglin to Fairchild 8v) Good luck on the move. Spokane if you haven't been there before, is a nice area. Not as wet as many folks believe. And right on the edge of the northern reaches of the high lava desert and the nice green woodlands. I loved my time there, which was spent at the US Air Force Survival School on the "other side" of Fairchild AFB. But then I retired in southwest of there, so I do like the area.
Sounds like you're going from Eglin to Fairchild 8v) Good luck on the move. Spokane if you haven't been there before, is a nice area. Not as wet as many folks believe. And right on the edge of the northern reaches of the high lava desert and the nice green woodlands. I loved my time there, which was spent at the US Air Force Survival School on the "other side" of Fairchild AFB. But then I retired in southwest of there, so I do like the area.
Bow, Ash,
Thanks for your good luck wishes. My wife's family lives there and that's why it was picked when we came to the decision to leave Floridia. I'm tired of the hurricanes. Not to meantion after working 10 years as a manitenance man at a condo I'm just burnt out and want to do something else
John
Thanks for your good luck wishes. My wife's family lives there and that's why it was picked when we came to the decision to leave Floridia. I'm tired of the hurricanes. Not to meantion after working 10 years as a manitenance man at a condo I'm just burnt out and want to do something else
John
Actually, I'm kinda glad that it doesn't transform at the moment. My head starts hurting at think how to get the paper to do all those little movements.
I would love a scan of those instructions. I actually assembled the kit when I was real young (and the kit was brand new) but of course ended up tearing it up since I couldn't help playing with it. So many years later I just happened to see one and snatched it off the shelf. Apparently I lost the instructions while painting it, since that's the state it's in. (and it proves that I REALLY cannot paint, I prefer printing, heh)
I've sent you a PM.
Ok, this is what I've gotten done tonight.
First the build method is interesting, since they are all box based you can cut out every single part and assemble them each individually. Then go back and match up the number codes on the connection points. Sort of like making your own Lego pieces before stacking them together.
Again, I've only got my Cell phone to take pictures with at the moment, sorry.
Well, first the parts are easy to assemble, since they are all little individual boxlike shapes

Of course with box shapes they tend to warp, so a couple of clamps and a straight edge is all it takes to force them to stay flat while drying. (or after they are dry if you add a little more glue)

The basic parts of the front (or maybe its the rear?) wheel. The little number codes makes it easy to assemble without directions (unlike some other models I've been working on, heh)

And here is the first part all clamped together. The wheel halves don't want to sit quite right, so I convinced them with a clamp and some weight.

Getter1, what is the name of the software you are using again? And could you send me a sample file from it, I was going to see if I could disect it. I know I can pull all the polygons out of a peparka (sp?) file, so maybe I can find a way to convert this file format to something else.
Suprise, suprise, smileys count towards the four image limit per post...
Hey Gefahern,
Lookin good so far. I cut out the pieces of mine today but haven't started assembly yet. I want to finish assembling my Gunstar first. Yeah the box method is pretty intresting. It sure make the models strong and solid feeling.
The program is called (Shiryu Paper-craft). I'll send you the TMO file but I don't know if it can be viewed without the software. If you can crack it let me know how because painting the models would be so much easier if the parts could be imported into paint or some other program. The drawing tools in Shiryu suck. Imagine having ONLY the pencil feature in paint.
Well, no luck with the file so far, it's apparently in Binary format where as Peparka uses a ascii format.
O, and I found the publishers website now,(http://inazuma.jp/paper/) heh it's Siryu that "h" you added in there through me off. Anyways, according to there website they are working on an english version and will be offering a Download version as opposed having to pay shipping costs. Anyways, from looking at there site it seems the software is geared more towards the younger crowd. Now, if I can find the demo version.
O, and I found the publishers website now,(http://inazuma.jp/paper/) heh it's Siryu that "h" you added in there through me off. Anyways, according to there website they are working on an english version and will be offering a Download version as opposed having to pay shipping costs. Anyways, from looking at there site it seems the software is geared more towards the younger crowd. Now, if I can find the demo version.
Not much progress on the cyclone test build, I'm suffering from severe distraction syndrom. Working on converting some of those little radio shack radio controled cars into a WIG aircraft is taking alot of my time.
Well, I have managed to cut out several more parts.

and even assemble some, and score and fold others.

The problem I'm haveing with the box structure of the model is that they tend to warp/twist especially the smaller one's (the bigger ones probably are too, but you can't tell it as much I guess). Tommorrow I will have at least the middle of the bike done, that way you can start to see what it is at least.
Well you've got a lot more done than I have. I've been working on my Gaiking project all day and I still have 1 more page of instructions to draw up. My hand is cramping up bad I was hoping to do some building toady but that went out the window. Perhaps tomorrow.
I was hoping to do some building toady but that went out the window. Perhaps tomorrow.