Gpm sm-42 1:87

M

modelperry

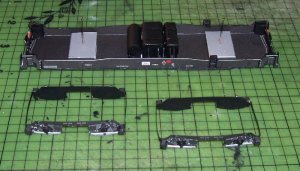
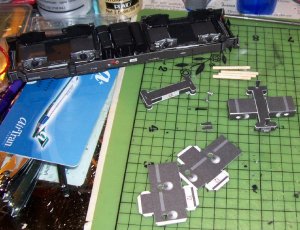
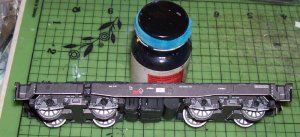
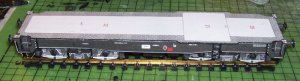
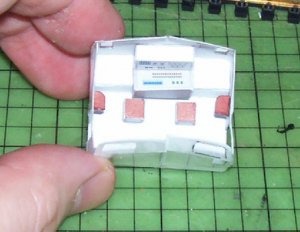
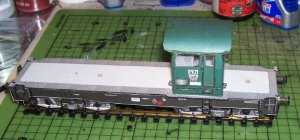
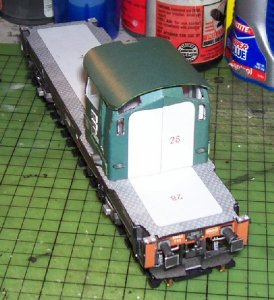
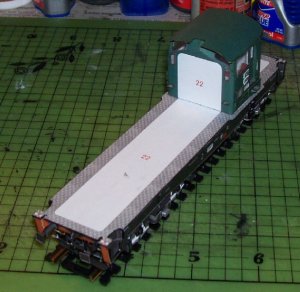
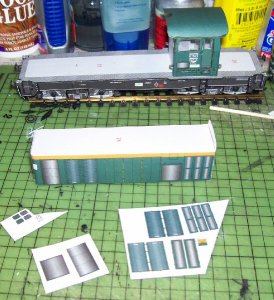
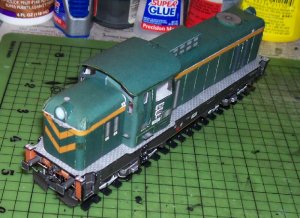
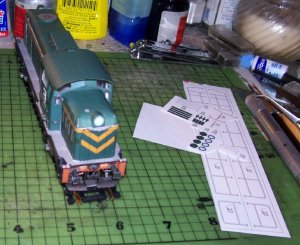
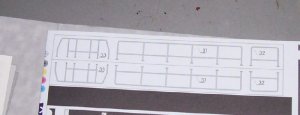
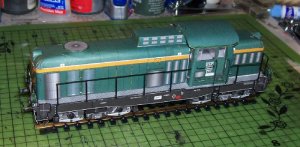
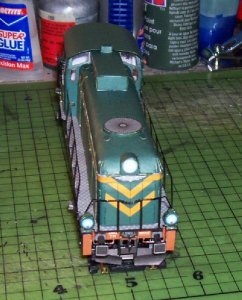
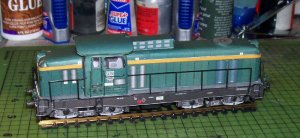
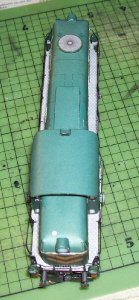
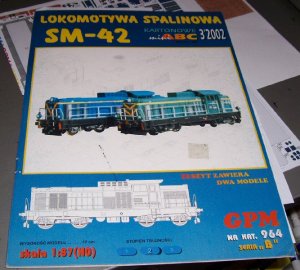
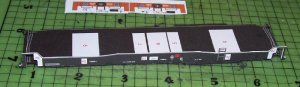
I thought I'd try my hand at a locomotive. I've begun work on a GPM SM-42. There are actually two locomotives in this kit differing only on the color scheme, one green and one blue. This thread will focus on the green version. I have started the frame. Laminated parts are marked with one or two asterisks. Since there are no cardboard thickness call outs in the Polish instructions, I have assumed that one star is equal to one layer of bristol board while two is equal to a double thickness of bristol. This assumption seems to be correct so far.

Greg
 

Attachments

  • SM42 cover.jpg
    SM42 cover.jpg
    156.2 KB · Views: 26
  • SM42 frame 1.jpg
    SM42 frame 1.jpg
    71 KB · Views: 25
M

modelperry

I read over your thread, redhorse, and noticed how similar they are. I was looking at the trucks on mine and am inclined to use your pin method to attach the trucks.:mrgreen:

The handrails on mine are printed, so I may do that part differently than you. I'm also inclined to visit my local train shop to see if they have any railing in a "different media" that would work. :twisted:

Greg
 
M

modelperry

Here are some photos of the frame and trucks assembly. No real issues here other than a lot of small detail parts on the trucks. I used dowel rod for the axles instead of the paper ones that were provided in the kit.

Enjoy,

Greg
 

Attachments

  • SM42 frame 2.jpg
    SM42 frame 2.jpg
    136.1 KB · Views: 27
  • SM42 frame 3.jpg
    SM42 frame 3.jpg
    189.7 KB · Views: 20
  • SM42 frame 4.jpg
    SM42 frame 4.jpg
    119.9 KB · Views: 27
M

modelperry

I finished the frame and truck assembly last night. I'm not completely thrilled with the "cowcatcher" (?) parts at each end. They rub the rails. Overall, though I really like the look of this model so far.

Enjoy,

Greg
 

Attachments

  • SM42 frame 5.jpg
    SM42 frame 5.jpg
    70.1 KB · Views: 20
M

modelperry

I have finished the cab and am now working on the front hood. The cab interior wall piece seems to be a little larger than necessary. Also would have been nice to have some fold lines on it to match with the exterior wall piece.

I also thought it odd that there was no matching interior piece for either of the doors.

The edge coloring I did on the cab exterior matches better for my eye than the camera's.

So far the hood is coming along nicely.

Greg
 

Attachments

  • SM42 interior 1.jpg
    SM42 interior 1.jpg
    134.9 KB · Views: 24
  • SM42 cab 1.jpg
    SM42 cab 1.jpg
    116.4 KB · Views: 13
  • SM42 cab 2.jpg
    SM42 cab 2.jpg
    135.7 KB · Views: 12
  • SM42 cab 3.jpg
    SM42 cab 3.jpg
    130.8 KB · Views: 13
  • SM42 long hood 1.jpg
    SM42 long hood 1.jpg
    152.8 KB · Views: 20

redhorse

Member
Dec 28, 2007
104
0
16
McKinney, TX
I like those angles on the cab and I'm curious about those printed railings. The wire ones were a bear to make I remember.

Also, I assume you have a Fit, how do you like it? We've got one too and I absolutely love the little thing!
 
M

modelperry

Redhorse, I'll post a picture of the railings as soon as I'm able. I'm considering going to a train shop to see if I can find some photoetched or plastic railing that would work. If I use the printed ones, I think I'll laminate them with some card stock to thicken them first.

I finished the front hood last night while at a build session with some of my IPMS Tristate buddys. Didn't have my camera. I have some catch up to do with my posts.

By the way, I found out that the SM-42 was the predecessor to the locomotive you built.

I got my Fit in Spring 2006. It's my little go-cart. It's my daily driver and my autocross car. I've had it to the dragstrip (18.5 sec) and drove it on the "tail of the Dragon" (318 turns in 11 miles) in the smoky mountains. I've attached a photo.

Greg
 

Attachments

  • fit when new.jpg
    fit when new.jpg
    107.4 KB · Views: 12

David H

Member
Nov 2, 2005
171
0
16
56
I live in North Yorkshire
How "fine" are the railings?

I found laminating and / soaking in cyano works fine. Only snags:

1. you have to be able to cut the little beggars out first. That can be a bit tricky.

2. you will have to paint them (but you probably will anyway).

3. They look a little bit 2D. But I bet they could be cunningly painted to look more solid.

Otherwise absolutely fantastic!

Best

D
 
M

modelperry

Catching up:

The long front hood wasn't to difficult to build. The fan on the top isn't well defined on fit, but I figured out something that looks right. I had thought about replacing the shroud with an aftermarket piece so the insides were visible, but didn't in the end. The box on top of the hood required trimming to allow the hood assembly to fit flush against the cab.

I had no problems with the short rear hood.

Greg
 

Attachments

  • SM42 hoods 1.jpg
    SM42 hoods 1.jpg
    171.9 KB · Views: 27
M

modelperry

Still catching up:

The paper railings look like they should be folded and glued to double their thickness. If you do that you then only have half of the needed railings. I had started to cut them out but quickly became frustrated. I did use aftermarket railings and preformed grab rails.

After installing these, I declared the model finished.

Enjoy,

Greg
 

Attachments

  • SM42 railings 1.jpg
    SM42 railings 1.jpg
    165.9 KB · Views: 15
  • SM42 railings 2.jpg
    SM42 railings 2.jpg
    66.8 KB · Views: 14
  • SM42 finish1.jpg
    SM42 finish1.jpg
    123.7 KB · Views: 25
  • SM42 finish2.jpg
    SM42 finish2.jpg
    131.3 KB · Views: 19
  • SM42 finish3.jpg
    SM42 finish3.jpg
    116.7 KB · Views: 24
  • SM42 finish5.jpg
    SM42 finish5.jpg
    88.4 KB · Views: 18

redhorse

Member
Dec 28, 2007
104
0
16
McKinney, TX
It looks really good! I should have gone with after market railings, they look good and the wire ones were a major pain.

Drag racing in a Fit? Now that's cool!
 
M

modelperry

I just got 2nd place in the miscellaneous category with my locomotive at an IPMS contest in Baltimore. Yippee.

I even found a few JSC ship models for sale there as well.

Greg