bashin'

sumpter250

multiscale modelbuilder
Jan 19, 2002
3,073
0
36
80
Vernon Hills, Illinois
Visit site
On the modules, I tried to keep to commercially available plastic kits for the structures. Here's the Bachmann HO coal tower kit, with "Central Valley steps and ladders" stairs, a Tichy coal chute, and, though the picture doesn't show it well, individual shingles.
The whole thing was airbrushed with Floquil "Grimy Black", and dry brush weathered.
 

Attachments

  • coaltower.jpg
    coaltower.jpg
    47.2 KB · Views: 313

sumpter250

multiscale modelbuilder
Jan 19, 2002
3,073
0
36
80
Vernon Hills, Illinois
Visit site
Rory,
Drybrushing:
I use a short bristle brush, about 1/4" wide. Pick up a little paint on the tip and brush it out on a pallet until the brush is almost dry. The color is then "scrubbed" on to the model. In this manner, only the raised edges( corners,rivet detail, ribs, etc.) get color on them. With a little extra pressure, some color can be transferred to the flat surfaces.
This is a good method of rusting, or adding dirt to a model. The overall weathering,fading,or dusting, can be done with an airbrush.
Pete
 

Vic

Active Member
Feb 1, 2002
1,699
0
36
79
Columbus GA
Visit site
Very Nice Sumpter!.... A lot of people often overlook the plastic kits as they think that they are too toy like but with the addition of just a few details and great paint work like yours they make fine additions to any layout.
 
P

philip

here's a great picture and model

Pete, Here's that dang coal chute, and some great modeling. Your real good.


philip:D
 

shamus

Registered Member
Dec 17, 2000
3,489
0
36
87
UK
Hi Pete, very nice work indeed, love the photo.

Shamus
waver.gif


sumpter250

multiscale modelbuilder
Jan 19, 2002
3,073
0
36
80
Vernon Hills, Illinois
Visit site
Shawn,
Shingles:
1. Start with a sheet of 20# bond paper.
2. Choose the colors you want the shingles to be. Mine are dark
gray, with similar tones, maybe three or four colors.
3. I use cotton balls to hold the paint, and streak the page from
top to bottom, with the colors.(yeah, I use rubber gloves for
this part)
4. When the page is colored, set aside to dry thoroughly.
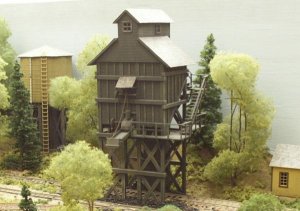
5. On the Bachmann tower, I had to sand the raised ribs down to
a smooth surface.
6. Take the dry page, and cut strips, 18 scale inches wide , across
the streaks. then cut the strips into scale width, 6"-12",
shingles.
7. The shingles are attached to the roof with carpenters glue.
Start the course at the bottom edge of the roof, by using a strip
that is the full width of the roof, then lay in the first of the
individual shingles on that strip. From that point on it's just
like the prorotype, except glue replaces the nails.
8. At the peak of the roof, the cap shingles can be folded, and
layed on top of the last courses. Start at each end, and work
to the center, overlapping the shingles, the final piece should
be in the center of the roof, on top of the last cap shingles.

Pete