Back Lit Signs

F

Fred_M

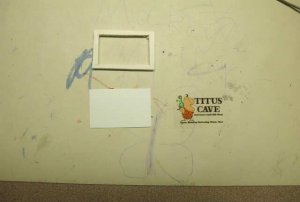
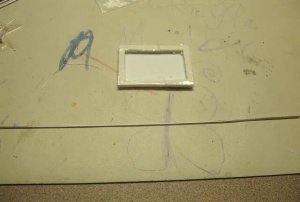
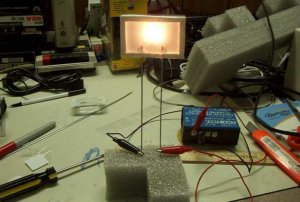
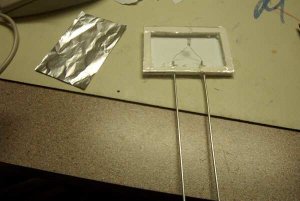
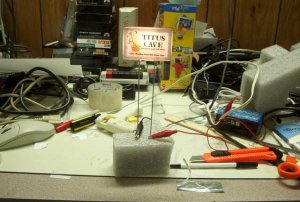
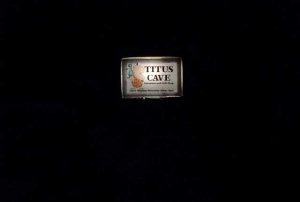
Back Lit signs can be made with a printer and overhead projector film. First you need to make your sign in the correct size to print and make it. This was made with a greeting card program and measures a shade under 3 by 2 inches. Smaller than this and they get too hard for my fat fingers. Also cut out a piece of white plastic (.030 or so) a piece of foamcore. Cut the foamcore as shown.
 

Attachments

  • sign1.jpg
    sign1.jpg
    15.7 KB · Views: 197
F

Fred_M

step2

Next tape it all together into a sandwich as shown with box tape. Then cut the opening in the foamcore back open with a knife. You will also need a piece of metal tube and a small 12v lamp. I used K&S 8100 Aluminum and a Radio Shack 7219 bulb
 

Attachments

  • sign2.jpg
    sign2.jpg
    19.4 KB · Views: 195
F

Fred_M

step3

I next cut the tube in ½ and mounted them into the foamcore with hotmelt. The bulb then just pushes in the tube and friction holds it and allows it to glow. Bend the bulb slightly towards the back so it doesn’t touch the plastic so it will not melt nor show as a real bright spot.
 

Attachments

  • sign3.jpg
    sign3.jpg
    37.4 KB · Views: 194
F

Fred_M

step4

Next cut and tape a piece of Aluminum foil to the back and band the sign with a strip of tag glued on with hotmelt. Paint and make it as nice as you want.
 

Attachments

  • sign4.jpg
    sign4.jpg
    25.4 KB · Views: 190
F

Fred_M

Done

Here’s a lights on view.
 

Attachments

  • sign5.jpg
    sign5.jpg
    42.6 KB · Views: 191
F

Fred_M

Beacon in the Night

Here’s a night view. Feel free to ask any questions…DASH
 

Attachments

  • sign6.jpg
    sign6.jpg
    7.3 KB · Views: 187

Arlaghan

Member
Sep 9, 2003
658
0
16
50
S. FL
This is almost exactly how I plan to make my Chevron street sign. (the one with the pricing) except instead of using a piece of styrene, I was thinking to paint the backside instead. A light coat with an airbrush should allow a decent amount of light through... I still haven't gotten to that part yet, I'll let you know how it turns out. At least I know I have this as an option. :D
 

rockislandmike

Active Member
Nov 6, 2001
1,257
0
36
56
Edmonton AB
dayfornight.qazam.com
I did the same as you're suggesting, Arlaghan. I just painted two coats (with a brush) of white on the back of the transparency. Should work even better with an airbrush.

I think I might try something different next time just to compare the results, but I was very pleased with the end result.
 
F

Fred_M

Just watch what you use for paint. Last time I painted on this stuff with spray paint it shrivelled up. DASH
 
F

Fred_M

Originally posted by Clerk
Very neat. Wonder how hard it would be to make signs in N scale. Robin?
In the past I have made some really small signs for HO. After a certain point you hit a snag with the resolution of your printer and/or software. An example is, with the Print Artist program I use the smallest font it's capable of rendering is about a foot tall in N. It just won't go any smaller. A hint is to do small signs as address lables as this gives you a bigger screen to work on in the printing software. DASH
 

George D

Member
Aug 28, 2003
229
0
16
86
Yorktown, VA
Visit site
A couple of years ago I picked up QuickCAD for designing structures. I discovered I could make great signs with it. You can scale the lettering down to any size you want. I can print words so small I need my reading glasses to read them - OK, a bad example since I use reading glasses to see anything up close.

Here's a sign I did, the bottom rows of lettering are 0.11" tall, and I could have easily made them smaller.

George
 
F

Fred_M

Your sign looks good. But .11 is about 18 inches in N. Here is an example of the smallest I can print with a HP 660C on #94 Brightness paper. The caracters are aprox .060 which is around 10 inches in N and are not really acceptable to me. DASH
 

Attachments

  • small.jpg
    small.jpg
    1.4 KB · Views: 74

aartwmich

Member
Nov 30, 2002
383
0
16
65
SW Michigan
www.angelfire.com
Dash..so glad you joined the forum, you have much to contribute.

1 question:

Is the aluminum tube the conductor for the light or do the wires go all the way thru it?

OK 2 Q's-- If the alum. is the conductor, how did you attach the wires the the alum.?
 
F

Fred_M

The tube is the conductor. The bulb I used has aprox. 2 inch tinned solid wire leads. I bent a small hook in the end and shoved them into the tube. The tubes then press through the roof in drilled holes into a piece of foam glued to the "floor". They are then connected to the wallpack with alligator leads. I use those small plug in wall packs to power my lights. I have a source where I get them used for a dollar each. One could use brass tubes and solder, but that's more work with solder and painting and all. DASH