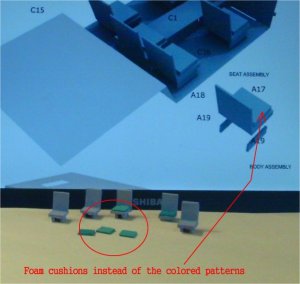
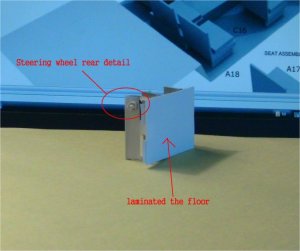
I decided to do a fast build, and picked the Marine Recon vehicle which can be found at paperhobby: vehicle Like the Zobel, it still lacks a bit more detail info but it does have a semi detailed interior. As usual, I tend to laminated my builds for strength and handling.
Marines RST-V Light Hybrid Light Recon
- Thread starter silveroxide
- Start date
You are using an out of date browser. It may not display this or other websites correctly.
You should upgrade or use an alternative browser.
You should upgrade or use an alternative browser.

marines RST-V
The model is finished, it is only a matter of upgrading the photos and uploading them. Here are a few more pics.
The model is finished, it is only a matter of upgrading the photos and uploading them. Here are a few more pics.
Attachments
marines RST-V
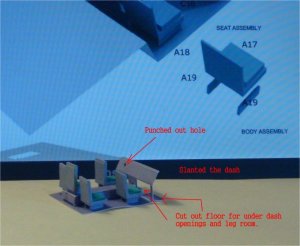
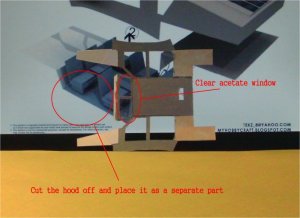
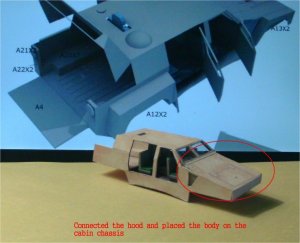
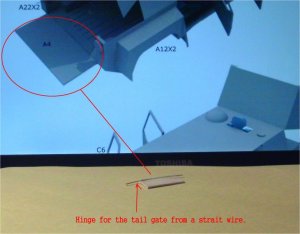
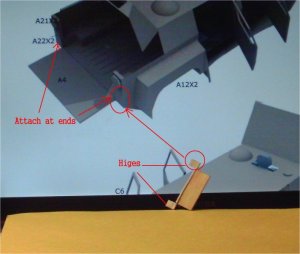
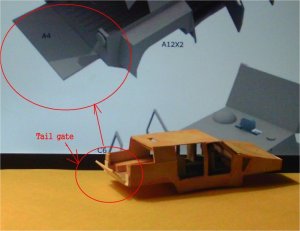
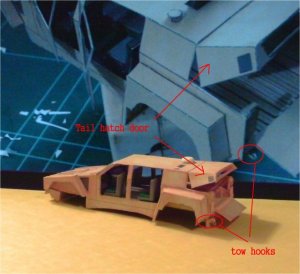
For the body, I trimmed off the hood so as to be able to connect the inner dash to the windshield frame. The inside was laminated for strength and handling, also to give the body some depth. The body was attached to the chassis and the hood is then placed. With this method, if you have the details, you can scratch build the engine and place it into the hood cavity at this time. The tail gate is functional. I used a straight wire and made the hinges.
For the body, I trimmed off the hood so as to be able to connect the inner dash to the windshield frame. The inside was laminated for strength and handling, also to give the body some depth. The body was attached to the chassis and the hood is then placed. With this method, if you have the details, you can scratch build the engine and place it into the hood cavity at this time. The tail gate is functional. I used a straight wire and made the hinges.
Attachments
marines RST-V
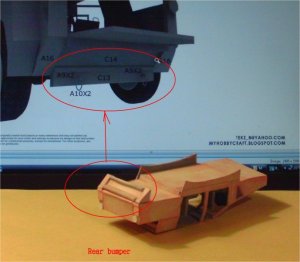
Here is the next batch on the tail ramp. The front and rear bumpers are attached and some more surface details. The Tail lights are on and cover the hinge plate. See you all next posting.
Here is the next batch on the tail ramp. The front and rear bumpers are attached and some more surface details. The Tail lights are on and cover the hinge plate. See you all next posting.
Attachments
marines RST-V
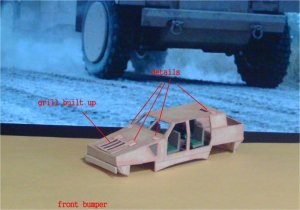
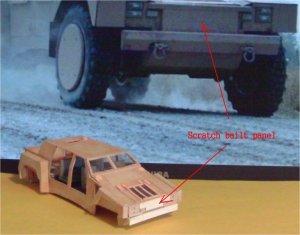
I ran in to a slight problem of warping, I glued the body to the chassis and there is a slight warp in the frontal area but not too noticeable in the photos. The parts set too fast and I did not want to tear it apart to fix it, but when I get around to the next one, I will know what to look for.

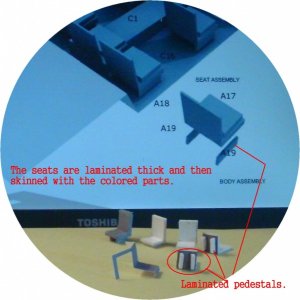
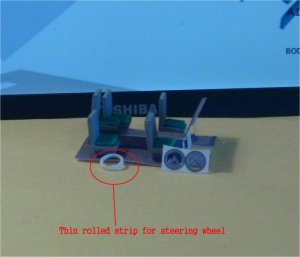
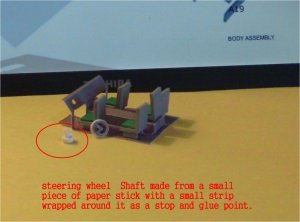
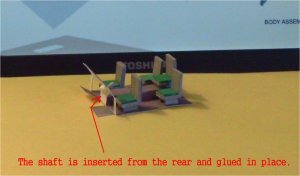
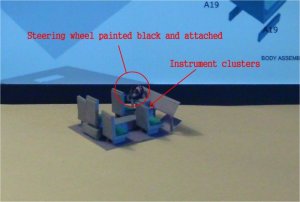
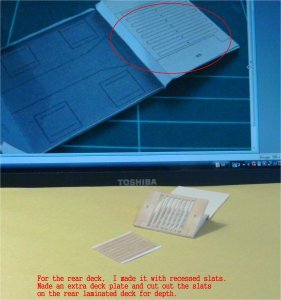
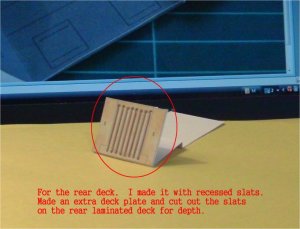
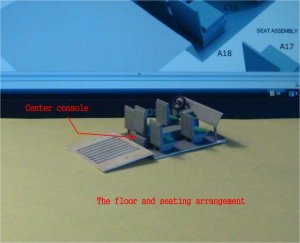
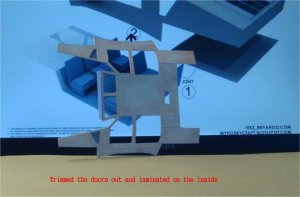
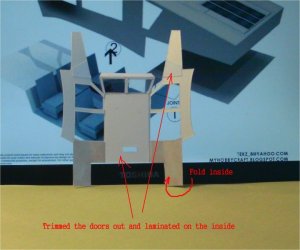
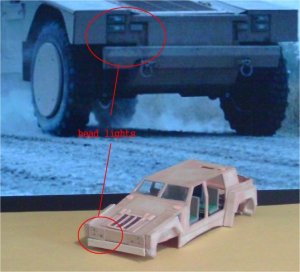
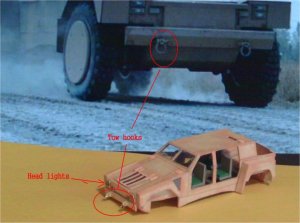
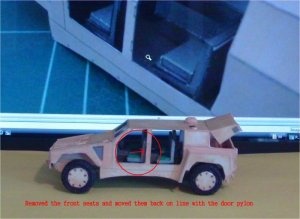
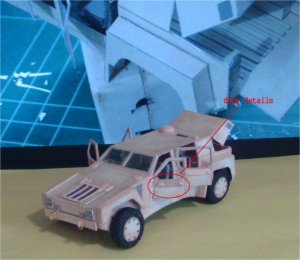
The headlights section are placed and a front panel is added to the front of the vehicle. The tow hooks are made from bent paper clip pieces. The rear hatch is laminated at the back end where the opening is. I did not glue clear acetate here but it will also help in maintaining its form. That small thin section has a tendency to warp inwards, that is what the lamination is for. On the top are two round parts. Those were scratched built. The bigger one is a stack of laminated circles. When the glue set, The edges were rounded with sand paper to give the rounded top look. The seats are too far forward, removed them and relocated the front seats back on line with the center door pylon. The doors are laminated and I did not place the clear acetate on them. On the outside, I placed that lower window panel and the lock pins. On the inside I placed small strips for the door handles and the window crank. I believe the windows should be a bit thicker but I could not get any more details on the vehicle.
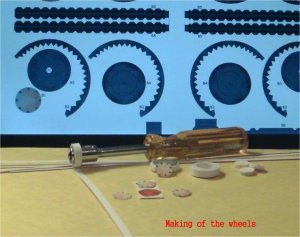
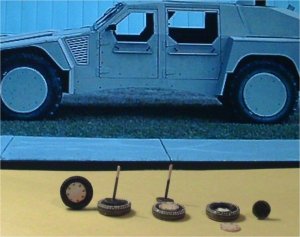
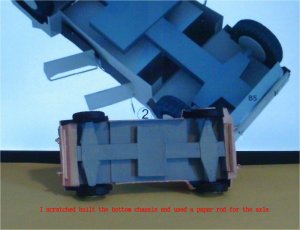
The wheels are done my way by rolling strips to the thickness and rounding the edges. For the threads, I made a strip laminated and cut the ridges out and wrapped it around the wheels. The centers where laminated disks and if the wheels did not have the covers, they would serve the purpose of the wheel drums. The bottom chassis and axles where scratched build but the ones in the plans are ok to use. I just wanted an axle that would be more sturdy that gluing the piece on the ends. The paper stick axle gives it more strength. It is just about done, only a few more tweaks here and there. Enjoy and see you around the forums.
I ran in to a slight problem of warping, I glued the body to the chassis and there is a slight warp in the frontal area but not too noticeable in the photos. The parts set too fast and I did not want to tear it apart to fix it, but when I get around to the next one, I will know what to look for.
The headlights section are placed and a front panel is added to the front of the vehicle. The tow hooks are made from bent paper clip pieces. The rear hatch is laminated at the back end where the opening is. I did not glue clear acetate here but it will also help in maintaining its form. That small thin section has a tendency to warp inwards, that is what the lamination is for. On the top are two round parts. Those were scratched built. The bigger one is a stack of laminated circles. When the glue set, The edges were rounded with sand paper to give the rounded top look. The seats are too far forward, removed them and relocated the front seats back on line with the center door pylon. The doors are laminated and I did not place the clear acetate on them. On the outside, I placed that lower window panel and the lock pins. On the inside I placed small strips for the door handles and the window crank. I believe the windows should be a bit thicker but I could not get any more details on the vehicle.
The wheels are done my way by rolling strips to the thickness and rounding the edges. For the threads, I made a strip laminated and cut the ridges out and wrapped it around the wheels. The centers where laminated disks and if the wheels did not have the covers, they would serve the purpose of the wheel drums. The bottom chassis and axles where scratched build but the ones in the plans are ok to use. I just wanted an axle that would be more sturdy that gluing the piece on the ends. The paper stick axle gives it more strength. It is just about done, only a few more tweaks here and there. Enjoy and see you around the forums.
Attachments
marines RST-V
Approximately, close to 1/35 scale.
Hi! You know in what scale this build is? Thank you
Approximately, close to 1/35 scale.
marines RST-V
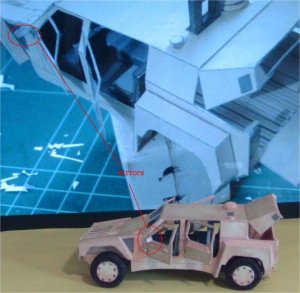
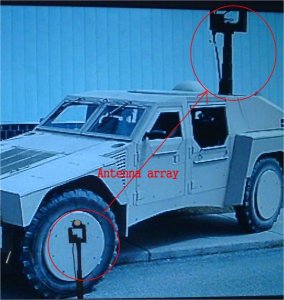
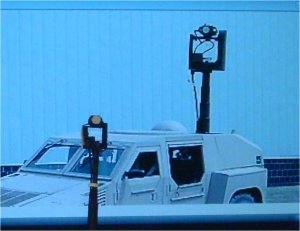
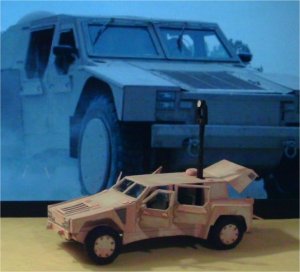
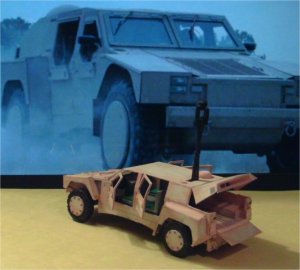
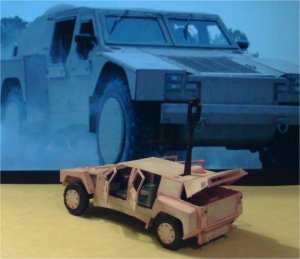
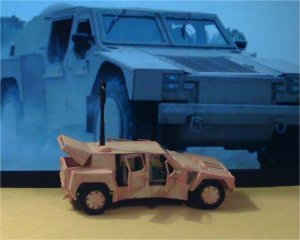
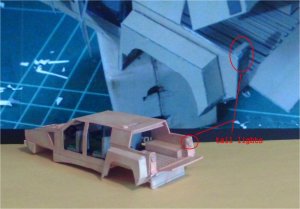
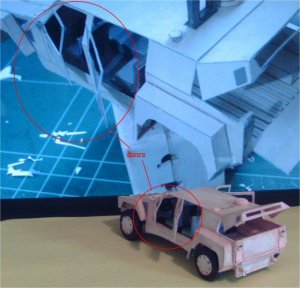
Well this project is at an end. the antenna array is built, the side mirrors are attached. The tail gate is operational and the doors are semi operational. It was a quick build and it can be done in one day, unless you should decide to embellish it. It fits in with the 1/35 scale Tamiya figures and you can add the extra stuff like ammo cans, Weapons and other small stuff that makes a model stand out. I hope that you enjoyed the build and I will sit back for a while and start to browse some builds and start to make some comments. Thanks to Tekzo for his design and See you all around the forums.
Well this project is at an end. the antenna array is built, the side mirrors are attached. The tail gate is operational and the doors are semi operational. It was a quick build and it can be done in one day, unless you should decide to embellish it. It fits in with the 1/35 scale Tamiya figures and you can add the extra stuff like ammo cans, Weapons and other small stuff that makes a model stand out. I hope that you enjoyed the build and I will sit back for a while and start to browse some builds and start to make some comments. Thanks to Tekzo for his design and See you all around the forums.