R5-D4 black edition

mijob

Tie designer
Staff member
Moderator
Jul 5, 2020
3,563
6,124
95
55
Netherlands
RB made a test build from RF's design of the R5-D4.


I dont know how I got it but I have found a black edition of it.
I guess that I found it in the dark caves of the internet.
Any ways I need a small break from building the Marauder so I start to build this lovely droid using the instruction from RF's R5-D4.
So lets kick of the build.

First I will start with the head.
These parts are for building the head.
20240903_204127_resultaat.jpg
First I scored and fold the glue tabs and preformed the head.
20240903_205205_resultaat.jpg
20240903_205846_resultaat.jpg
Glue the top part.
20240903_210916_resultaat.jpg
Next up is the bottom plate and neck ring.
Score and form the tabs of the neck ring.
20240903_205523_resultaat.jpg20240903_210038_resultaat.jpg
Next glue the bottom plate and the neck ring.
20240903_212300_resultaat.jpg
Next up the eye's its a layered part.
20240903_213140_resultaat.jpg
After folding the parts it will look like this.
20240903_213851_resultaat.jpg
Now you can carefully cut the eye's.
20240903_215131_resultaat.jpg
Combine the parts and you will end up with this.
20240903_215341_resultaat.jpg
Now lets give the head a face....
20240903_215813_resultaat.jpg
And doome for today or was it yesterday....
 
Every head need some kind of body so here it is.
Parts needed to build the body.
20240904_202829_resultaat.jpg
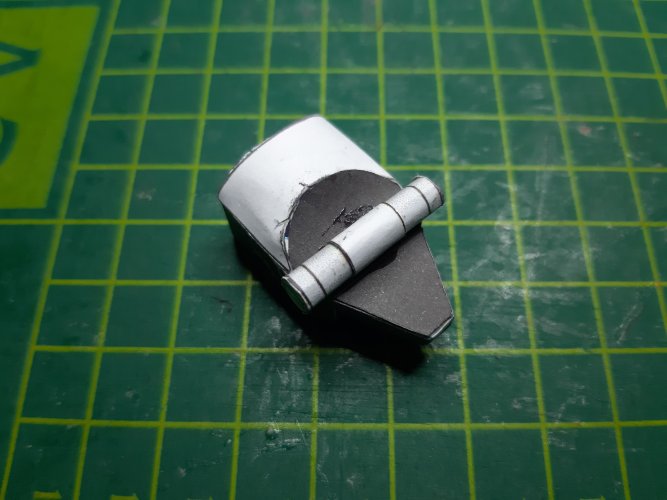
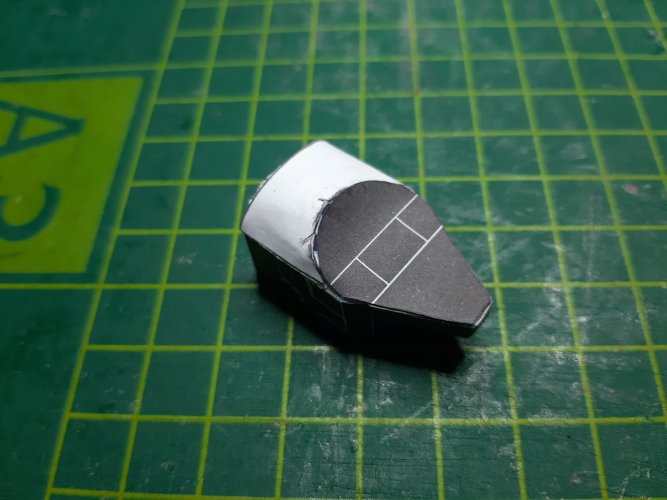
Score the tabs and the preform the body. And glue the body together.
20240904_212854_resultaat.jpg
Next is the bottom part.
20240904_213746_resultaat.jpg
Glue this part on the bottom of the body.
20240904_214331_resultaat.jpg
And to finish the body glue the neck ring on the top plate. Dont forget to score the tab and preform the ring.
Then you can glue the plate on top of the body.
20240904_214403_resultaat.jpg
O boy now we can look at the fitting of the head on the body.
Don't glue the head other wise you cant rotate it.
20240904_214903_resultaat.jpg
That doesn't look that bad but it is missing something...yep next up are the arms or legs.
 
darth_vader_halloween__2_by_sostitanic1912_dgbsueb-fullview.jpg


This is not the BLACK edition, this is the BLACK AND WHITE edition!!!

:animated:
 
"I wish we all could just get along". I don't think I've ever seen anyone do the Black R2 unit before. You're breaking down all the walls and barriers. :)
 
"I wish we all could just get along". I don't think I've ever seen anyone do the Black R2 unit before. You're breaking down all the walls and barriers. :)
Thanks Zathros.

Lets continue with the arms or legs or what you call those things at the side of a droid.
Here are the parts needed for the top.
20240916_185610_resultaat.jpg
Score the tabs and form the center part. Use clips to glue the tabs.
20240916_190601_resultaat.jpg20240916_191215_resultaat.jpg
You will end up with something similar.
20240916_195350_resultaat.jpg
After closing the lid of the tomb...
20240916_201904_resultaat.jpg
Next adding some details on it. Use clamps to glue and hold the tabs. From now on we call this part the horse shoe.
20240916_193937_resultaat.jpg20240916_195015_resultaat.jpg20240916_195025_resultaat.jpg
Glue the tabs inside the horse shoe.
20240916_202932_resultaat.jpg20240916_204117_resultaat.jpg

And we need more parts form and glue.
20240916_195816_resultaat.jpg20240916_200720_resultaat.jpg20240916_200813_resultaat.jpg
Last part before we can assemble the arms / legs.
20240916_202105_resultaat.jpg20240916_202538_resultaat.jpg
Final shot of the parts before assembling.
20240916_202609_resultaat.jpg
Time to assemble.
20240916_204508_resultaat.jpg20240916_204700_resultaat.jpg20240916_204845_resultaat.jpg
To remind you, you need two of these..
 
So this is called part 3.
PArts needed.
20240921_095436_resultaat.jpg20240921_100001_resultaat.jpg20240921_100414_resultaat.jpg20240921_100551_resultaat.jpg20240921_100635_resultaat.jpg20240921_100813_resultaat.jpg20240921_101005_resultaat.jpg20240921_102302_resultaat.jpg20240921_103118_resultaat.jpg20240921_103421_resultaat.jpg20240921_103513_resultaat.jpg20240921_103653_resultaat.jpg20240921_103659_resultaat.jpg
If correct you will end up with the following parts.
20240921_105643_resultaat.jpg
20240921_105835_resultaat.jpg20240921_134605_resultaat.jpg
20240921_134647_resultaat.jpg
As a reminder don't glue these parts the need to be flexible..... And yes you need two of these.
Tomorrow I will start start with the center leg.
 

Attachments

  • 20240921_105525_resultaat.jpg
    20240921_105525_resultaat.jpg
    452.4 KB · Views: 0
  • 20240921_104235_resultaat.jpg
    20240921_104235_resultaat.jpg
    527.4 KB · Views: 0