Working with Cork Roadbed

Arlaghan

Member
Sep 9, 2003
658
0
16
50
S. FL
As promised, I documented my process of laying cork roadbed where turnouts are concerned. I will try to explain to the best of my ability. But, before we begin, here are a couple of tips:

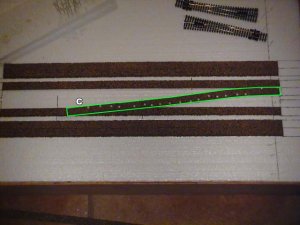
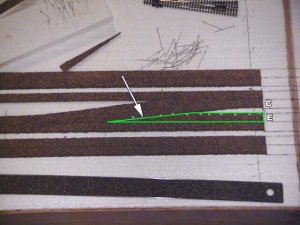
One, when you split the cork apart, you will notice that one side comes out pristine, while the other side has a jagged edge. This is quick and easy to remedy: Just lay that piece along the edge of a 2x4 or other edge and, using a sanding drum on your dremel, just sand it off! Works like a charm and is quick to do.

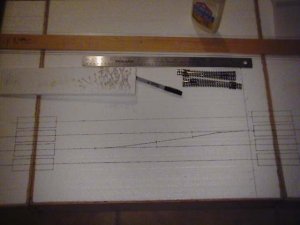
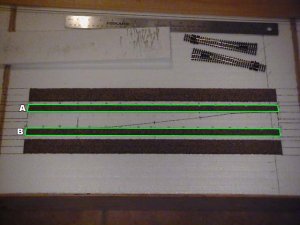
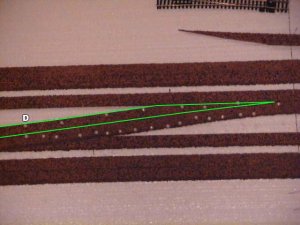
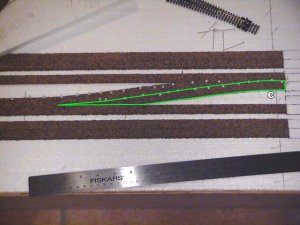
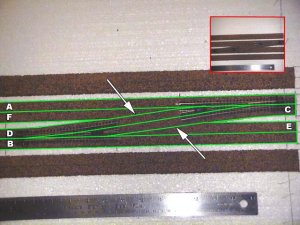
Two, draw the centerline of your tracks on your surface before you begin "corking." This makes life much easier. For my demonstration, I will be laying the roadbed on part of my NTRAK module for the 2004 BBQ. This contains a crossover using Peco #8 turnouts:
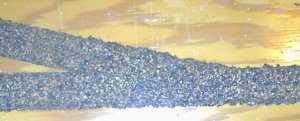
 

Attachments

  • 01-draw trackplan.jpg
    01-draw trackplan.jpg
    28.9 KB · Views: 273

Arlaghan

Member
Sep 9, 2003
658
0
16
50
S. FL
Easy part...

Next is the easy part: Lay cork pieces A and B and glue them down. There's nothing that needs to be done to these parts, so its good to start here and let them dry.
 

Attachments

  • 02-lay the easy pieces.jpg
    02-lay the easy pieces.jpg
    38.6 KB · Views: 260

Arlaghan

Member
Sep 9, 2003
658
0
16
50
S. FL
Temporarily pin down a diagonal...

Using pushpins, lay piece C along the track line and let it overlap on top of piece B. Use pins to secure it firmly, but DO NOT GLUE it yet.
 

Attachments

  • 03-lay first diagonal.jpg
    03-lay first diagonal.jpg
    39.3 KB · Views: 260

Arlaghan

Member
Sep 9, 2003
658
0
16
50
S. FL
Place, Cut, and Glue opposite piece...

With piece C pinned in place, take piece D and place it the same way you did piece C. Let it overhang over the top of A and pin it down securely. Now, taking your metal straight edge, cut it along the line where it meets part A and then glue it down.
 

Attachments

  • 04-glue opposite diagonal.jpg
    04-glue opposite diagonal.jpg
    41.8 KB · Views: 253

Arlaghan

Member
Sep 9, 2003
658
0
16
50
S. FL
Now go back and glue the first piece...

With D glued down, go back to part C and cut it along the line where it meets part B. You should have a nice pointy end like you did for D. Glue it down and wedge it between D and B.
 

Attachments

  • 05-go back and glue first piece.jpg
    05-go back and glue first piece.jpg
    45.6 KB · Views: 246

Arlaghan

Member
Sep 9, 2003
658
0
16
50
S. FL
Remove Bevel, Cut and Glue...

Now, place part E along the edge of part A and let it overlap over piece C. Note where it overlaps part C and taking your X-acto knife, go along the edge of C and remove the beveled edge where E meets it (the white arrow).

Next, cut piece E along the diagonal where it meets the newly cut edge on piece C and then glue it down and wedge the pointy end between C and B.

Repeat this step with the piece alongside part A. Don't forget to remove the beveled edge on part D.
 

Attachments

  • 06-remove bevel - glue straight piece.jpg
    06-remove bevel - glue straight piece.jpg
    48.4 KB · Views: 244

Arlaghan

Member
Sep 9, 2003
658
0
16
50
S. FL
Finished product...

Here you see the completed crossover with all the parts labeled for your reference. The two white arrows point to the edges of C and D that you need to remove the beveled edges from.

Thanks and enjoy!
Alex
:D :D :D
 

Attachments

  • 07-final product.jpg
    07-final product.jpg
    57.9 KB · Views: 258

shamus

Registered Member
Dec 17, 2000
3,489
0
36
87
UK
Hi Arlaghan,
Very nice way of showing how to lay cork for crossovers.
If you are posting any more photos in this thread, it will soon go to the Academy/archives;)

Shamus
 

NScale

New Member
Nov 8, 2003
39
0
6
Visit site
Hi Arlaghan
Thanks for sharing this with us. Makes a neat looking job of it and looks very easy to do. Can't wait to get started on my own again. :)
 

Arlaghan

Member
Sep 9, 2003
658
0
16
50
S. FL
"Corking" regular turnouts...

Thanks guys! Just returning the favor of all the fine help and good advice I've received over the months. To think I used to do this a different way and it would take four times as long to do! I'm glad I started doing it this way! :D

If this thread is to be submitted to the "reference library" then there really is only this to add: On the original thread asking how this was done, I posted this on how to do a regular turnout:

---------------------------------------
(To make this easier to explain, I have labeled the 4 pieces of cork A, B, C, and D in the picture, and outlined them in green.)

Here's what I do:

You should have your track plan drawn out already, it makes this a lot easier. First I lay the easy complete sections (A and B).

Next, I take a strip of cork, and lay it along C. I let it overhang completely over the top of piece B. I tack it down with pins, then, along where it meets B, I cut it with an X-acto knife. Should have a nice pointy end. Glue it down.

After C is down, I take piece D and do the same thing - let it overhang completely over C and pin it down. Taking my X-acto knife, I cut piece C removing the beveled edge where piece D covers it (the big white arrow). When that is removed, I then cut piece D along where it meets piece C and glue it down.

If you follow these steps, its pretty easy and you can cork your entire layout fairly quickly. The trick is to have LOTS of pins handy. I bought two packs of 100 and found that is not enough! :D :D
 

Attachments

  • cork-results[1].jpg
    cork-results[1].jpg
    66 KB · Views: 210

Arlaghan

Member
Sep 9, 2003
658
0
16
50
S. FL
Originally posted by 60103
Are you using white or carpenter's glue to stick the cork down?

I use yellow carpenter's glue to put the cork onto the foam, and white glue to glue the track to the cork... this allows you to lift up the track should you need to, without ruining the roadbed. :)
 

cpNscale

Member
Nov 13, 2003
103
0
16
54
Victoria BC
www.trainweb.org
Gave your meathod a whirl

Arlaghan

I used your meathod for my last 2 turn outs and it was so much simplier and faster than the book meathod.I'm not going to redo the few i have already laid but i will use this meathod from now on.Tell me what you think?

Thanks again for the help!!!!
 

Attachments

  • 9.jpg
    9.jpg
    57.6 KB · Views: 147

Arlaghan

Member
Sep 9, 2003
658
0
16
50
S. FL
Very Apt Pupil!

Very well done, cpNscale! Nice joints, don't see any gaps. :)

The ultimate test is to place the turnout over it and check the spacing on either side.

Glad I was able to help. :)