well guys, i think this is about it........

Steve,

You can have a super layout in that space. Just cool it until the TrainClown gets back to you. :thumb:

Take it easy and don't let your wife become a "railroad widow". Let her know that this is just a hobby and she's not. :eek:ops:

I've been messing around with my layout for over 2 years now...I may never finish. We all get frustrated sometimes but that's usually because we let our priorities get out of line. The MRR will come eventually.

:)
 

Pitchwife

Dreamer
Apr 23, 2001
1,728
0
36
71
The middle of nowhere Oregon
Visit site
Steve. I tried to block out your shelving out but ran into a problem with your dimensions, Just for clarification would you give the lengths indicated by letters?

bench%20work%20layout%20002.jpg
 
Jun 18, 2004
487
0
16
55
barboursville, wv
sorry clark, here they are.....

A----> 14 1/4"
B ----> 4'
C-----> 24 3/4"
D-----> 100"
E------> 24 3/4"
F------> 25"
G------> 16"
H------> 26 1/4"
I-------> 8'
sorry for not including them before, but here they are. thanks!
 
Jun 18, 2004
487
0
16
55
barboursville, wv
this is sorta what i was trying to do. i forgot to upload it last night. its from a 1952 issue of MR, i think it is part of the test layout they were useing back then. i like the way the lines are elevated and the one track crosses under the other. anyways, just thought i would share it with you guys, maybe it will give someone else some ideas.
 

Attachments

  • idea i like.jpg
    idea i like.jpg
    60.8 KB · Views: 212

TrainClown

Member
Apr 17, 2003
861
0
16
66
Saskatchewan, Canada
Visit site
Work is progressing............and..........at least I like what I see. ;)

I'm going to use the natural light from the windows to accent the sceans

By the way TrainSteve, what do you see out those windows? (just thought I'de ask, not important)

TrainClown
 

Allstate81140

New Member
Feb 19, 2004
52
0
6
85
Visalia, CA.
Visit site
Hi Steve and all. Well, here is the first piece of one-cent advice from a totally 'been out of it for 50 years' novice.

First of all, it is a hobby. Don't let it be a job or a dreaded task. Work a while, quit a while. When I work on my scooters, sometimes it can be very frustrating, and my wife gets upset over the same thing. "We spent all that money, and you still have to do a lot on it?" Ha ha. Wives just see the financial end of it, and that is understandable, especially if they don't particularly like the hobby. Just like my scooters though, when I got through with the first one, it is "wow, I never envisioned that coming from what you started with". Ha ha.

Besides, think about it. Course you have to watch a lot of westerns like I have over the years to acquire all this knowledge. Ha ha. The real railroads in those days probably didn't have a clue either. If they couldn't go this way, they might dynamite their way through a mountain. They didn't really know where the h--l they were going either half the time until they got there. Ha ha.

Now, as many have said, try out the basics and go from there. You always can see ahead once you have the foundation laid.

I can give you a real instance of exactly where you are, without being there. Sorry guys, looks like another chapter of my book coming up. Ha ha. Every Christmas, I set up a town. Okay, a town you say, that is a piece of cake. Ten years ago, I started with one of those Target basic Christmas towns with three buildings and a few trees and figurines. That all went on a one foot x three foot shelf. Then, after buying two more buildings the following year, I moved to my tv entertainment center, which is about four feet wide x one and one half feet deep. Then, after buying two more buildings, figures, etc., and since my entertainment center was across a corner of the room, I expanded to a four x eight sheet of plywood. I now have extenders on that, and am planning on expanding. Am up to twenty buildings, and don't have any intention of slowing down. A Christmas nut? A train nut? A scooter nut? You bet.

Every year, I have trouble figuring out how to start it out, so that it is somewhat different from the preceeding year. I mean I build mountains out of cotton, have this one house (solid ceramic with no light provisions) where I have put very, very tiny lights on the outside of the eaves that actually light up, town trees with the same mini lights that light up, a train in the middle, sidewalks, and on and on.

Point being Steve, is that every year, I just pop a few buildings up there, a few trees up there, a few people and sleds up there, etc., and shuffle them around for a day or so, until I have something that resembles what I actually want.

This year I am thinking about adding a ski-lift, made out of barbecue rotor parts.

You have to start at the very beginning, and get a basic layout, and trust me and all the others on here when we say you will start getting multitudes of ideas after you have your basics laid out.

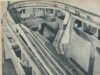
I used to hand make trestles after building mountains and realizing the train had to have a way across. Necessity makes for inventiveness.

Wow! I rambled again. Have a nice day all. Jack.
 

Ralph

Remember...it's for fun!
Jun 18, 2002
5,134
0
36
64
St. Paul, MN
Visit site
Lots of good advice here Steve! Your benchwork is looking good and makes a great foundation for whatever plan you finally decided on. Yep, hobbies are supposed to be fun! :) Don't sweat it when it becomes a problem; take a step back and return to it when you're ready. My interest in my layout waxes and wanes depending on the weather, season, other activites, and whether or not I like that last bit of scenary I just put in! :) Remember that is OK to change everything!
Best wishes!
Ralph
 

davidvd59

New Member
Jun 26, 2004
5
0
1
64
wisconsin
There is no better way than to make some plan and start building. I have never made a layout yet, that at some point I couldn't improve upon it later. When you first start running trains, ideas will come to mind of what you will like to do. There is no perfect plan. My motto is I will finish building train layouts when I die! I can always make one better!


My dream is to have about a 20'x40' space for making a large layout. Some day yet it may happen!
 
Jun 18, 2004
487
0
16
55
barboursville, wv
hey guys, thanks for all the suggestions, they all help. TrainClown, sorry for not getting back to you before, been working. if your asking what i see out the windows of my layout room, well, i live in a nice quiet little neihborhood. i can see trees, streets and the main lines of the CSX. i live in a town house, and my train room is on the second level over looking everything. really nice view. im glad to hear it going well with the track plan, cant hardly wait to see a glimpse of it. many thanks for your effort!
 

Mastiffdog

Member
Sep 7, 2003
137
0
16
68
Wow, now I see some skill here! That's some wonderful bench work. Why quit now? This is when the real fun begins. Get some track laid and run some trains.

Get your room cleaned up and well organized, ask yourself: "I am looking at this tool in my train area, why is it here?" If it shouldn't be there, get it put away. In my opinion, organization is the foundation for success and satisfaction in most hobbies.

There are dozens of track plans that will work very well for that benchwork. One thing we learned on our first layout is that nearly any mistake you make can be repaired. Rip that sucker out and do it over - do it better.

Remember, model railroading is a process, not an event. Enjoy the journey!

DOG
 

Lighthorseman

Active Member
Jul 24, 2002
1,240
0
36
57
Out in the sticks
Visit site
Don't Give Up!

Hang in there, Steve! I also have an almost impossible time envisioning a workable trackplan on paper, and I wound up doing almost exactly what everyone here suggests. After a number of frustrating efforts, I simply tacked down some track, and ran trains.

While trains were running, I'd then eyeball different areas for possible scenic features, height differences, and operational possibilities, such as industries, passing sidings, etc. Somehow, it was so much easier to visualize things this way.

If nothing else, you'll have the enjoyment of just watching trains run for a while. It's refreshing. Give it a go. :thumb:
 

davera

New Member
Jul 8, 2004
18
0
1
57
www.ofoto.com
hang in there. i actually am still building mine. it is a modification of an atlas plan central midland which required too much space. i tried to use train software and that did not go very far so in the end, i just started laying track. i did not run everything yet because it was 3 levels but i tested here and there. i spent close to 3-4 months designing the layout, once my wife agreed to the allowable dimensions :). at this point I am laying plywood on my open grid benchwork. i still plan to put cork roadbed down before nailing my track and before then I will still have to do my electrical design. the part i like a lot about my layout was a lot of switching in my yard.

follow this link to see pics on ofoto.....

lots of patience...
http://www.ofoto.com/I.jsp?c=rqke9zr.25vtvki7&x=1&y=6zpziz
 
Jun 18, 2004
487
0
16
55
barboursville, wv
hello everyone, hope all is well. just wanted to thank all of you for all your encouragement and suggestions, they really helped. i have laid a big loop of track just to run trains on until trainclown finishes with a track plan, cant wait to see it. the big loop really helped me regain my sanity. i will keep you guys updated, and thanks again!:wave:
 

Allstate81140

New Member
Feb 19, 2004
52
0
6
85
Visalia, CA.
Visit site
Hi all. What Davera said brought back memories. I hope it is okay to kind of "clamp" on to a part of another original topic.

When a kid I was grade nuts. I would make hills, and then my Lionel (without the "Magna-traction" I think it was called) would get up about half way and start spinning it's wheels. Well, I got the bright idea that if I put (what used to be called adhesive tape-cloth stuff) tape on the wheels on one side, it would help traction. It did. I would make it, and then when it went downhill, I had to completely cut off the throttle and let it coast, usually dumping over at the bottom curve. Decided to change to a lesser grade, but then, just after doing that, the armature burned out. Probably from all my abuse. Ha ha.

Weird too, when you realize you could take those Louis/Marx trains and beat the holy h--l out of them and they would still run. Didn't matter what you did to them. I used to like to take the motors out, and run them by themselves. They would go like bats out of h--l. Ha ha.

I didn't realize armature was burned out at first, as all I knew was the Lionel steamer engine wouldn't go forward or reverse. Just buzzed. But, one time, I had it wide open with no cars, and it decided to briefly run. It ran okay. Right off the table and on to the concrete floor. Hardly hurt it at all. If that happened today, I would probably cry. Ha ha.

All have a nice weekend. Jack.
 

dsfraser

New Member
May 13, 2004
71
0
6
I don't see a TV. Gotta have a TV on while you're working on your train table. (You don't need it on whle you're running trains.) A stereo is a good substitute.

Get some track down, pinned, not nailed. While you're watching the trains go round and round, ask yourself where you want them to stor. Put in a siding. Use a cardboard milk carton for a station, at least until you get into building structures. Use a pile of crumpled newspapers for your mountains, until you get to doing scenery. Play around. Add stuff. Move stuff. Remove stuff. Eventually you'll get a feel for what you want where.

A project like this can be overwhelming, and I have the sense that you are overwhelmed. One of the beauties of modules is that they are small, i.e. doable. The whole is greater than the sum of the parts, in this instance, and that is what is overwhelming. Break your layout down into small sections, and work on one "model" at a time. Start with your mainline. Add your secondary line (you're doing two?) and/or your passing siding. Read and re-read John Armstrong's book "Track Planning for Realistic Operations" many times. (Keep it in the bathroom.) Your coal mine belongs in a corner. Your yard belongs on a side. Your mountains/water/bridge probably belong on the opposite side. Stick a town between them, and use the remaining side for different scenery (perhaps a grain elevator?). Using cardboard or paper cutouts to mark building footprints is a good idea. It helps to get a picture of the outcome fixed in your imagination. Become friends with a sketchpad, and while you're sitting on the bus on the way to work, do some doodling. It will come together.

My room is teh same size as yours. For logistical reasons, I have to keep one side open to allow access to the laundry room and the kids' computer room. I'm looking at a 'G' layout eventually. I've been staring at teh same 4x8 sheet of plywood for 18 months, and for the last year have been drawing the layout it will evolve into. I feel your pain, although I have a pretty good idea by this point what I want to do. (The devil is in the details . . .)

Most important, it is a hobby. Don't get in a knot over it. Your wife will only appreciate it if she sees value for money, i.e. if you're enjoying it. So enjoy it! (Make sure there's a comfortable chair for her, too. Even if she only watches TV with you there, you will both enjoy the company and she won't feel like a "train widow". She will also enjoy seeing you enjoy your time in teh train room, and it might even become a hobby for her, too. Stranger things have happened.) And have fun.

Cheers
Scott Fraser
Calgary, Alberta
 

TrainClown

Member
Apr 17, 2003
861
0
16
66
Saskatchewan, Canada
Visit site
Update on plan

Well...................................I like it! :thumb:

I just have to get some of the tracks in the staging yard sorted out and then I'll post the plan. I was hoping to get all the scenery mocked up ........ but ........... I just don't have the time it requires right now to sit a fiddle with it (as much as I would like that. I can see it all in my head). But if you like the plan, then I'll keep working on it to help give you some inspiration and direction. Last time I checked the plan (before I noticed a problem) there was just under 400 feet of track, including the staging yard. I wanted to make the staging yard at least 1 foot below the main line to give you ease of maintenance and stuff and this left a very small staging yard indeed. So I made the yard go around the corner and this turns out to be a much better idea. gives you better entrance and exit ramps and much longer individual staging tracks, I managed to squeeze in 8.

It wont be long now. :rolleyes: ;)

TrainClown :wave:
 

tunatx

New Member
Jul 10, 2004
1
0
1
76
trainsteve2435 said:
. . . if anyone has any words of advice, nows the time because i am really at my witts end. thanks for all the help in the past.:confused:

First off, try http://appalachianrailroadmodeling.com/trackplans.html for some ideas. The plans they have are quite operational - particularly from a coal field perspective.

Second - what's your space? what benchwork is built? etc. And how do you want to work the plan - island, around the room, both etc. I might be able to help in some areas.

Good luck

larry
 

TrainClown

Member
Apr 17, 2003
861
0
16
66
Saskatchewan, Canada
Visit site
Note to trainsteve

Well the track work is all done and I like it. I was wrong when I told you the track length was almost 400' (don't have a heart attack now) :eek:

The total track, the way it is right now, is 297.3 feet. But you don't have to put all the staging yard track down to start.

I think you got some of yer measurements wrong. I copied the dimensions of the inside parameter, like you posted for Pitchwife and I set it on my grid and it don't add up. Maybe you are guessing the rooms dimensions and I think your out by 1 foot. Is it really 11 feet wide (or there abouts) and not 10'?

It really doesn't matter because the plan I made is just a guide. If you were to build it, you would build it to fit, but it would be nice to have it exact. Then you could print it out and glue it to the bench and lay your track on top of it. Like what I'm doing with my hand laid switching yard, only bigger.

I'm going to add a simple bench top so you can get a feel for the elevations better. Then you can see it. :)

The plan should be up tonight.......so hang on to your hat!!!!

Here is a pic of my switching yard so far. (with an old camera)

TrainClown :wave:
 

Attachments

  • switch whole yard.jpg
    switch whole yard.jpg
    32.1 KB · Views: 166
Jun 18, 2004
487
0
16
55
barboursville, wv
wow trainclown, very nice yard. i really like it, it looks like you really put a lot of time into this, i wish i could hand lay track, maybe one of these days! anyway, i love it, it looks great, keep up the good work!:wave: