Visby WIP

dhanners

Active Member
Mar 16, 2004
142
93
31
st. paul, mn, usa
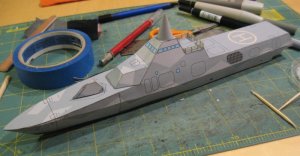
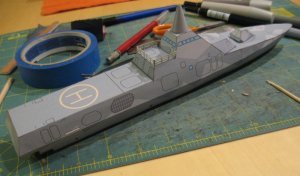
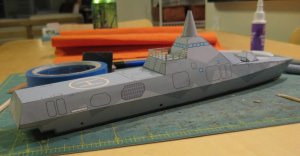
I'm usually a rocket guy, but I decided for a change of pace to try a ship. So here are some work-in-progress photos of my latest, the Swedish stealth corvette Visby. I've only ever before tried one other ship -- Digital Navy's Admirable, which sits in a box, unfinished. And this is my second attempt at Visby, as my first try wound up in the trash because things went horribly wrong along the way.

I chose Zarkov's Visby because I thought it looked cool and figured that since it was a stealth ship and had ultra-clean lines, it would have a low parts count. I foolishly equated "low parts count" with "quick, easy build."

My first attempt was the full-hull model, and after it crashed and burned (or, more appropriately for a ship, burned and sank) I decided to try a waterline model. Zarkov includes a couple of parts to make a waterline model, but he doesn't include any instructions for how to use them, at least that I could find. And since following the instructions led me to ruin on my first attempt, I basically ditched his instructions and built it in the order I thought would make sense.

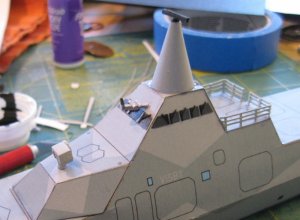
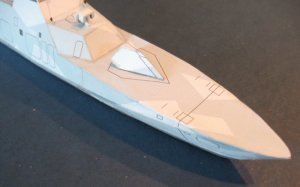
Zarkov's model is from 2004, and Visby have had a few external modifications since then. I'm trying to incorporate them. The most noticeable is the radome atop the superstructure. I made this using a shroud calculator. Fortunately, the prominent seam line you see now will be hidden when I add a cable raceway (I think that's what it is) that appears on the real thing. I have yet to add the rotating radar thingie on top of it. There's also a director I'll scratchbuild and add just forward of the bridge. There aren't too many little bits and pieces because the outside of these ships are kept relatively clean for stealth purposes.

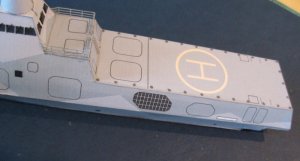
I've seen photos of Visby with safety netting around the flight deck, I've seen photos of the ship with railings around the flight deck and I've seen photos that show nothing around the flight deck. So, for simplicity's sake, I went the latter route.

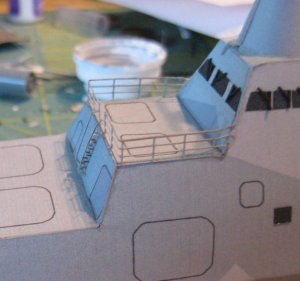
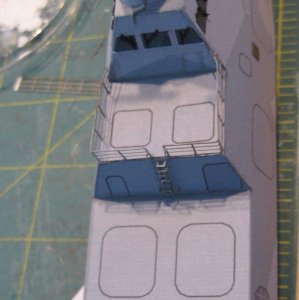
I scratchbuilt the railing that goes just behind the bridge with really thin strips of gray cardstock. Zarkov includes a photo-ready plan if you want to make photo-etched railings and antennas, so I just taped some wax paper over that, laid my strips down atop it and glued the railings on, did some trimming and in a few minutes I had railings.

There are some things I won't be able to fix, though. Visby and her sister ship now have hull numbers, which aren't on Zarkov's model. Also, the front and rear of the bridge each have three windows, not the four that Zarkov has.

I'll post more photos as the situation warrants....
 

Attachments

  • visby1.jpg
    visby1.jpg
    125.7 KB · Views: 17
  • visby2.jpg
    visby2.jpg
    132.1 KB · Views: 18
  • visby3.jpg
    visby3.jpg
    101.5 KB · Views: 17

dhanners

Active Member
Mar 16, 2004
142
93
31
st. paul, mn, usa
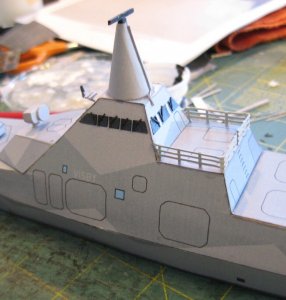
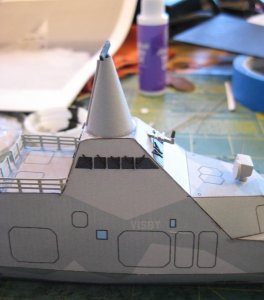
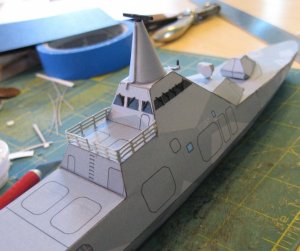
Still puttering along. I've added the director forward of the bridge, some little arm thingie that sticks out from the front of the bridge, re-done the windows and added window wipers and the radar(?) mast atop the radome.

The director is made out of laminations of matte board. This one was my third attempt; the first two seemed too big or the wrong shape. Still don't know if I got it right, but it looks close according to the reference photos I have.

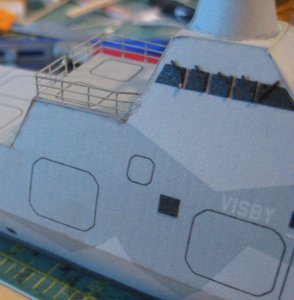
The window arrangement on the fore and aft of the bridge is incorrect on the model. The model has four windows on each end, and there should only be three. That started to bug me, so I decided to cover the windows with a dark metallic paper. At the same time, the paper covered the gaudy light blue color of the windows that are there. The five-window arrangement on each side of the bridge is correct, so I covered them, too.

The wipers show up prominently in photos so I figured they'd show up in 1/200th scale, too. I replicated them with thin strips of black paper. I also added that arm thingie on the front of the bridge. No idea what it is, but it shows up in photos so I figured I better add it.

Still need to add the two whip antennas forward of the bridge. I'm thinking I may use guitar string for that. (I play guitar, but play acoustic so I use medium strings. I'm going to have to head to the guitar shop to get an electric light-gauge string.)

My plan is to wait until I get the laser-cut railings I ordered before adding the steps and railing that lead from the flight deck to the bridge section. I will probably wind up replacing the railing I built at the same time.

Once done, I'll overspray it with a matte spray made for paper and ink to remove the glossy sheen of the glued seams.
 

Attachments

  • visby20.jpg
    visby20.jpg
    127.5 KB · Views: 15
  • visby21.jpg
    visby21.jpg
    98.4 KB · Views: 14
  • visby22.jpg
    visby22.jpg
    88.3 KB · Views: 12
  • visby23.jpg
    visby23.jpg
    132.7 KB · Views: 14

goodduck

Well-Known Member
Jul 25, 2010
700
664
93
That looking to be a nice model. :thumb: Think I'm going have to build my too. What is the problem you run into building the full hull that I should look out for? Actually, any head up you can give before I attempt my? I like your windows update. But I do think your front and rear windows are bit over size tho. The railing too. Making the ship looks a lot smaller then it is. As is now, railing looks like a 8' fence, but should be waist height. Maybe scale down 30~40% lower? I guess not much good following the Zarkop's plan. I recall when I first looking at the page. I was thinking either the railing too big or the safety nets are too small. Something not right. And now I see it in application..... :mrgreen:
 

dhanners

Active Member
Mar 16, 2004
142
93
31
st. paul, mn, usa
That looking to be a nice model. :thumb: Think I'm going have to build my too. What is the problem you run into building the full hull that I should look out for? Actually, any head up you can give before I attempt my? I like your windows update. But I do think your front and rear windows are bit over size tho. The railing too. Making the ship looks a lot smaller then it is. As is now, railing looks like a 8' fence, but should be waist height. Maybe scale down 30~40% lower? I guess not much good following the Zarkop's plan. I recall when I first looking at the page. I was thinking either the railing too big or the safety nets are too small. Something not right. And now I see it in application..... :mrgreen:

I plan to replace the railings when the laser-cut ones I ordered from AvantCard arrive in the mail. They should look better. I will add, however, that the railings I built are the same height as the ones that Zarkov provides for in his photo-etch template. I literally built mine on top of his and cut it to the same dimensions. Yeah, the width of the posts and railings is wider -- I'm not a micro-surgeon, after all -- but otherwise, it is the same dimension as Zarkov designed. Hopefully, the thinner AvantCard railings will look more in-scale.

Were I to try building this as a full-hull model, I'd cut out the main hull piece, line up the edges of the top, and then fold the thing down until I had my keel crease. I think having the keel crease ever-so-slightly off-center was a big problem for me when I tried to line things up later. I think it'd be better to line things up, then crease the keel. If that makes any sense.

Also, were I building it again, I would attach parts 8 and 9 -- those long curving triangular pieces between the forward hull sides and the forward deck -- to the main hull first. That way, I would be assured of a smooth joint between the rear hull and parts 8 and 9.

I'd also probably find some way to beef up the forward deck piece. Mine started sinking in the middle, so I wound up cutting a hole in the bottom of the model directly under the turret and inserting a cut-off toothpick through the hole to prop up the middle of the deck. I then super-glued the toothpick in the hole and cut it flush with the bottom. (It's kind of the same structural concept as a violin sound post, for those of you familiar with violins.) I had glued a piece of matte board underneath the flight deck to keep it flat (and it worked great) but I didn't think to do anything similar to the forward part of the deck.

Naturally, I say all this as someone who spends virtually all of his modeling time building rockets and spacecraft. I will be the first to admit that boats really are not my specialty, and I'm trying to learn as I go along. As such, I've probably made quite a few mistakes....
 

goodduck

Well-Known Member
Jul 25, 2010
700
664
93
Hey, thank you for the tips. I'll be sure to look out for all that.

About the railing. I know you following Zarkop's plan, and that where it goes wrong. Zarkop's railing is too tall. If you look at the door next to the railing. Zarkop's railing height is up at the top of the door. The railing should be about 1/2 way down the door height, roughly a person waist height. Your rail posts width don't bug me at all. One can only cut so small by hand. It is just the railing height. Looking at your build. When I ready to build my. I would at least cut off the top 1/3 section. So it would only have two levels, not three. But even that, I think it still too tall. I think visual goes for scale. I would build my rail, still using Zarkop's plan, but only build roughly 1/2 way up. Wonder if the AvantCard railing corrected the scale height or is it the mirror images of the Zarkop. If it is. It going to have the same scale height problem. The 8' fence will just looks thinner :mrgreen:
 

dhanners

Active Member
Mar 16, 2004
142
93
31
st. paul, mn, usa
The problem with using that door as a scale reference is that it's not really there. Or at least it isn't in any photos I can find of Visby. Maybe it is and it just doesn't show up in photos, but of the ones I've been able to dig up on the Tubes of the Internets, I don't see it. And the height of the railing is something I eyeballed. I haven't taken out the ruler to see how tall it would scale out to be, but looking at the real thing in photos, my new ones aren't off by much.

The AvantCard railings arrived yesterday. In a word, they're really cool. So here are some photos of the installed versions. I ripped small bits of paper cutting off the old railings, so I printed out the piece that has the top of the helicopter bunker on it on plain paper, then cut it out and glued it over the old piece.

I cut out small sections of railing for the seven steps that lead from the flight deck up to the roof of the helicopter bunker. This is work you need a magnifier for. Unfortunately, I don't have one....

(And the white globs you see in the photos is the glue, which is still drying.)

And yes, in retrospect, I made the rear windows too big. So I cut a piece of paper (from the same piece I'd printed out for the roof of the helicopter bunker) and covered up the lower portion of the windows. It isn't perfect, but it looks better than it did.
 

Attachments

  • visby30.jpg
    visby30.jpg
    103.3 KB · Views: 12
  • visby31.jpg
    visby31.jpg
    107.2 KB · Views: 12
  • visby32.jpg
    visby32.jpg
    95.2 KB · Views: 15

dhanners

Active Member
Mar 16, 2004
142
93
31
st. paul, mn, usa
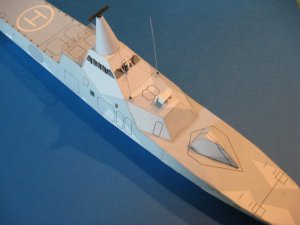
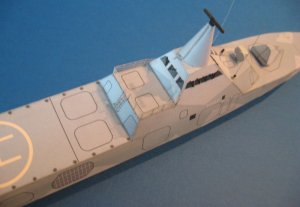
I think I'm done, except for making a base of some sort. It was a fun build. The final bits on were the little dot thingies that line the outer perimeter of the flight deck. I've no clue what they are, but I'm wondering if they are coverings for the holes that hold the railings and/or safety net used during flight operations.

I had a good time and learned a thing or two that should be useful in my next build. There are some imperfections, but hey, it's my first completed ship model ever.

(And yes, I used two different background colors when I photographed the model. I was trying to see which one was the "best" blue that I might be able to use for a base.)
 

Attachments

  • visby46.jpg
    visby46.jpg
    134.1 KB · Views: 10
  • visby45.jpg
    visby45.jpg
    107.7 KB · Views: 11
  • visby42.jpg
    visby42.jpg
    96.9 KB · Views: 13
  • visby40.jpg
    visby40.jpg
    95.2 KB · Views: 15