

M
You are using an out of date browser. It may not display this or other websites correctly.
You should upgrade or use an alternative browser.
You should upgrade or use an alternative browser.
- Status
- Not open for further replies.
M
modelperry
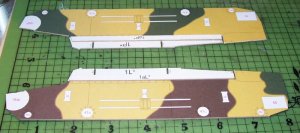
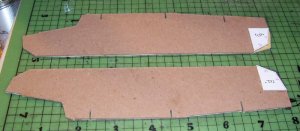
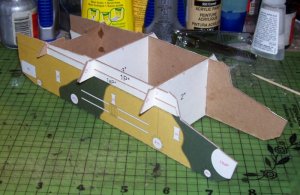
Hull frame work was constructed first. The fit was so tight in places, I had to trim a little to get these parts together. The result is very sturdy.
Greg
Greg
Attachments
Good work! I'll follow your thread, too bad only on tuesdays... (my PC can't open this site, now I'm writing during IT lesson  )
)
)
M
modelperry
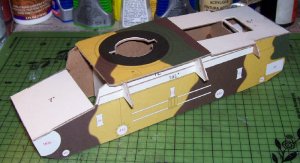
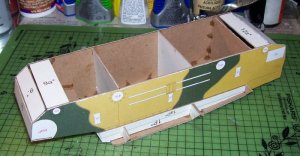
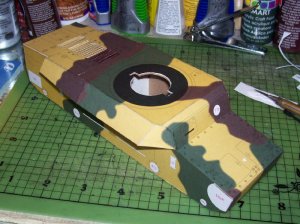
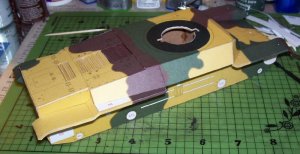
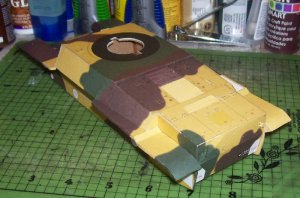
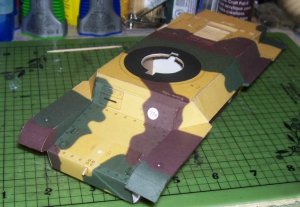
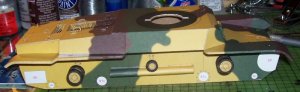
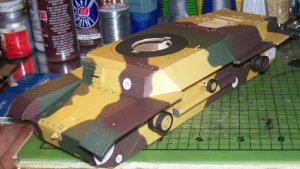
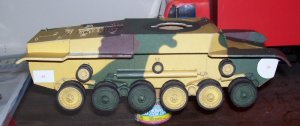
The hull skins went on very nicely. all the camo color edges line up correctly. I had to trim the rear fender ends just a touch and reattach the end pieces as the side bends didn't quite make it to the ends. Not sure if this makes sense, but it will if you try and build this one.
The vents at the top were a little bit tedious and are optional, so builders not wanting to tackle them do not have to. the hatch and hinge parts are also optional. I used brass rod on most of the hinges to provide support and a little extra detail.
So far this is really, really, good for a maly kit!:mrgreen:
Greg
Attachments
T
Tim Crowe
M
modelperry
Right now I have a stockpile of cardboard (.5 & 1 mm) that I bought from the papermodelstore. Once I work through this pile, I'll switch to illustration board that I can get locally at an art supply store. While it would sure be less expensive to use food packaging boxes, I prefer the consistency of buying my laminating stock at the correct thickness to start with. Then, I can laminate once instead of having to laminate several layers to get to the right thickness.
Greg
Greg
M
modelperry
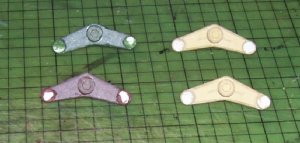
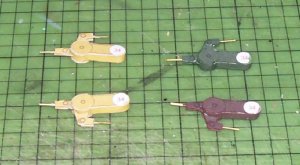
Here are a couple of pictures of the upper idler wheels. The tread on these were a little short, so I filled the gap with glue, painted it black and tried to orient the wheels so the gapped area would be hidden by tracks later on.
You can also see the grab handles I made from bead wire and installed. I've found that bead wire is a little softer than brass and cheaper too. It comes it thread-like spools in various gauges at craft stores like Michael's and A C Moore's.
Greg
You can also see the grab handles I made from bead wire and installed. I've found that bead wire is a little softer than brass and cheaper too. It comes it thread-like spools in various gauges at craft stores like Michael's and A C Moore's.
Greg
Attachments
Starting to look pretty good.
You might also like to try florist's wire for handles and stuff - it's nearly pure Iron and quite soft.
Regards,
Charlie
You might also like to try florist's wire for handles and stuff - it's nearly pure Iron and quite soft.
Regards,
Charlie
i may have to get this kit i have a few maly kits all all good fits and good models just the printing and paper is always dire ..this seems an exeption
It seems to me that most Maly kits from about 2001 onwards are equal to most of the other Polish commercial kits. I haven't seen the PT-91 tank model but the Cromwell is similar to the Chi-He. The real fun with the Chi-He hasn't started yet - the suspension looks seriously fiddly to put together.
Regards,
Charlie
Regards,
Charlie
M
modelperry
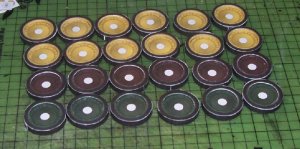
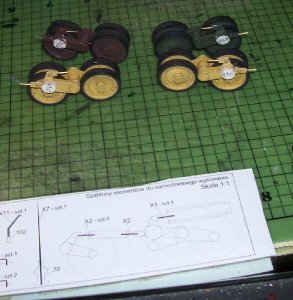
I muddled through the road wheels and suspension. It was a little challenging, but with careful planning and proper use of the templates provided, assembly was not as bad as it could have been.
The pictures show a little bit of the build progression and the template used.
The springs are held in place by the geometry of the parts. I did not glue them in place.
Enjoy,
Greg
The pictures show a little bit of the build progression and the template used.
The springs are held in place by the geometry of the parts. I did not glue them in place.
Enjoy,
Greg
Attachments
Nice work with the roadwheels. The band tracks would seem to lend themselves to do something like the scheme I used on the Pz 1F (see other forum).
Regards,
Charlie
Regards,
Charlie
M
modelperry
M
modelperry
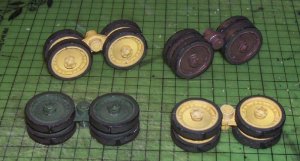
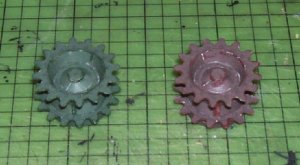
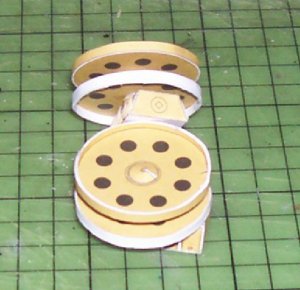
Here is a picture of the tensioning wheels. I have found a mistake here that was easily fixed. There are only two sets of rim parts provided when there needs to be four. I just made two more sets for the inner wheel parts. These are the white pieces in the photo.
Greg
Greg
Attachments
M
modelperry
Thanks for the compliment josve. When people such as yourself and charliec take notice of my work, it always gives me a boost of confidence.
Next up: Working on some tracks.
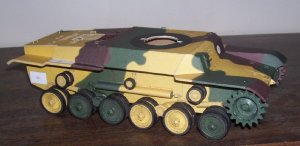
I shortened the track bands to fit better. I noticed that most photo's I've seen of Japanese tanks show loose track links at the top. However, I didn't think they should be as loose as they would have been, if I hadn't trimmed these. At least it's better than being too short.
Greg
Next up: Working on some tracks.
I shortened the track bands to fit better. I noticed that most photo's I've seen of Japanese tanks show loose track links at the top. However, I didn't think they should be as loose as they would have been, if I hadn't trimmed these. At least it's better than being too short.
Greg
Attachments

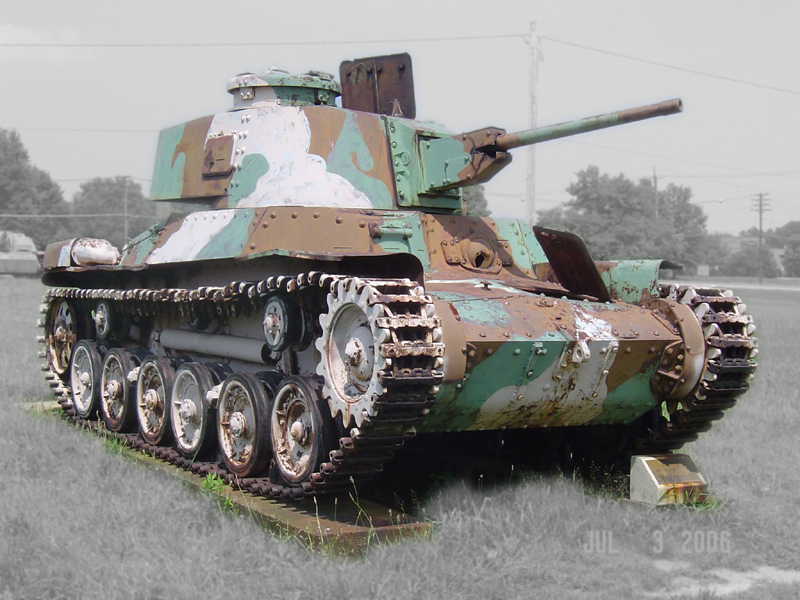
The real pics I have of the ChiHe does have both loose and tight tracks!
Most pics does show tanks with tight tracks
As you can see from the added pic
So I think you are on the right track!
Most pics does show tanks with tight tracks
As you can see from the added pic
So I think you are on the right track!
I think you'll find it quite hard to get the band tracks to drape over the return rollers so it looks realistic. One way to help this is to score across the track on the hinge lines so the track can bend easily - don't be concerned if the track is floppy after you've done the scoring - this is exactly the effect you're trying to achieve.
There is something to be said for tracks built up link by link - at least these tend to look realistic - although you might be quite insane after building a couple of hundred links.
Regards,
Charlie
There is something to be said for tracks built up link by link - at least these tend to look realistic - although you might be quite insane after building a couple of hundred links.
Regards,
Charlie
- Status
- Not open for further replies.