Trees the hard way!

Status
Not open for further replies.

Tyson Rayles

Active Member
Sep 25, 2001
4,310
0
36
Poverty Acres, North Carolina
Visit site
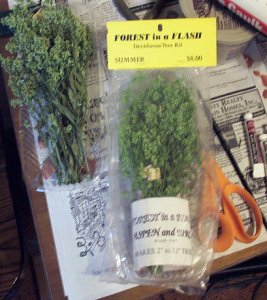
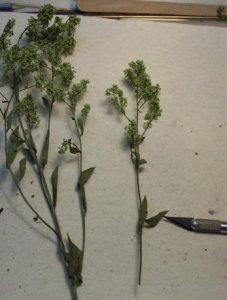
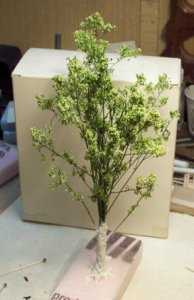
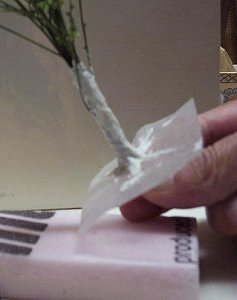
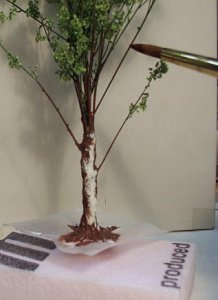
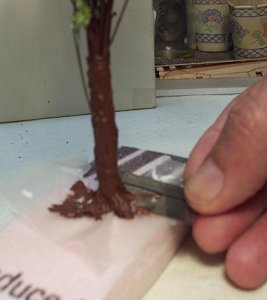
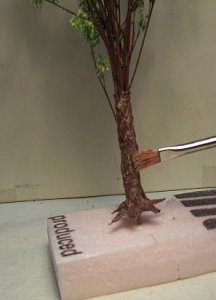
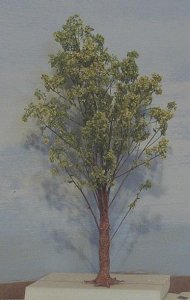
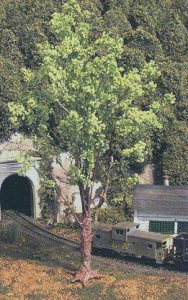
First off there will be 10 posts so please hold off on a response till it's done if you can. These are too large for N or Z, the smaller ones are O.K. for HO and the medium and large are excellent for S, O and G. These are not cheap ( by my standards :p :D ), I can here Pete or Mike or Vic saying that guy ain't never had no standards! :D :rolleyes: :D . The cost is about $3 each when you get used to making em'.The main parts are "Forest in a Flash" and caulking (any kind that's not 100% silicone).
 

Attachments

  • forest in a flash.jpg
    forest in a flash.jpg
    58.7 KB · Views: 959

Tyson Rayles

Active Member
Sep 25, 2001
4,310
0
36
Poverty Acres, North Carolina
Visit site
You are good for 3-5 trees outta that package, depending on what size you want, The next thing to do is to remove the regular leaves, be sure to get as many of the smaller ones on higher up as you can.
 

Attachments

  • removing leaves.jpg
    removing leaves.jpg
    34.2 KB · Views: 931

Tyson Rayles

Active Member
Sep 25, 2001
4,310
0
36
Poverty Acres, North Carolina
Visit site
After you get a half dozen or so (depending on the size tree you want) cleaned, bunch em' together with a toothpick sticking down lower than the stalks and wire em' together with thin wire, thread or floral tape. Then take a caulking gun and apply up and down the trunk. Take a toothpick and do the final speading around. This will leave the caulking somewhat rough which is good cause it resembles bark somewhat. After it has cured for a few hours you can use the back of a exacto blade to carve on it some more if you want more bark detail.
 

Attachments

  • tree with caulking.jpg
    tree with caulking.jpg
    34.3 KB · Views: 928

Tyson Rayles

Active Member
Sep 25, 2001
4,310
0
36
Poverty Acres, North Carolina
Visit site
After it has cured overnite paint the base coat on it ( use water based paints as the other will attack the caulk ), making sure to also paint the branches that are the most noticeable. Let dry for at least 1 hour.
 

Attachments

  • painting branches.jpg
    painting branches.jpg
    30.4 KB · Views: 898

Tyson Rayles

Active Member
Sep 25, 2001
4,310
0
36
Poverty Acres, North Carolina
Visit site
At this point take a single edge razor blade (be very careful here folks, hard to model if you are missing fingers :D ) and carfully cut between the roots and the wax paper. Yes some wax paper willend up on the bottom of the tree and vice versa, but it won't be enough to matter. The reason you do this now is so if you end up exposing any of the snow white caulk you can paint over it when you do the highlighting. Also when you are done get you will probably need a fresh square of wax paper.
 

Attachments

  • razor.jpg
    razor.jpg
    29.6 KB · Views: 888

Tyson Rayles

Active Member
Sep 25, 2001
4,310
0
36
Poverty Acres, North Carolina
Visit site
When you were appying the caulking with the toothpick you can drag some out onto the wax paper from the trunk to create roots. This is where the caulk is handy cause it doesn't harden anytime soon so the roots are flexible, which lets you mold em' to the terrain when you plant em'.
 

Attachments

  • roots.jpg
    roots.jpg
    20.1 KB · Views: 880

Tyson Rayles

Active Member
Sep 25, 2001
4,310
0
36
Poverty Acres, North Carolina
Visit site
Now you can put on the final paint. I usually mix some burnt sennia and sepia and cadium orange to make a med. reddish orangeish color which using the dry brush technique I "dab" onto the trunk, kinda splocthing it on. Be careful you can overdo this you want the effect to be subtle. If you over do it don't fret. Just paint the base coat on again and start over. After that is done give it at least 1 hour to dry. Then using a med. gray dry brush all the tops of the ridges etc.
 

Attachments

  • highlite.jpg
    highlite.jpg
    24 KB · Views: 894

Tyson Rayles

Active Member
Sep 25, 2001
4,310
0
36
Poverty Acres, North Carolina
Visit site
You can "fluff" up the tree by putting the branches where you want em' to a certain extent. The branches have a certain amount of memory. Don't kill yourself trying to make the perfect tree. Once its on the layout you will be able to see it from only a couple of angles so if it has a "bad" side put it towards the back! :D
 

Attachments

  • tree4.jpg
    tree4.jpg
    48.8 KB · Views: 811

Tyson Rayles

Active Member
Sep 25, 2001
4,310
0
36
Poverty Acres, North Carolina
Visit site
They tend to be a spring green, if you want you can spray a med. dark green (flat of course) straight down from the top to darken em' if you want. Not counting time for caulk or paint to dry the actual working time when you get used to doing em' is about 30 min. per tree. O.K. I'm done now, everybody have a good laugh? :D
 
Status
Not open for further replies.