

S
TOS Tricorder
- Thread starter crimson
- Start date
You are using an out of date browser. It may not display this or other websites correctly.
You should upgrade or use an alternative browser.
You should upgrade or use an alternative browser.
- Status
- Not open for further replies.
Thanks for the suggestion Starship Builder, but I had the same issues with Pepakura2.
Altogether I had three problems:
1. With one version of the file I had an extra 400 or so faces generated between two seperate parts after some boolean hole cutting in Blender. I recut the holes and most of this went away apart from....
2. The boolean opeartion to cut the holes resulted in some very long thin faces and some loose 'flaps' which were only visible at extreme zoom. These had to be manually removed/ refaced.
3. two parts would not transfer to Pepakura. Even if I added new clean parts, they would not transfer. I eventually got around it by deleting the parts, then copying and modifying two similar existing parts.
However, what I can do is export the mesh from blender to an stl file; import it back to blender (seperate and re-texture it) and then re-export as 3ds to pepakura. Then the file is OK and I can add whatever I want. So, it could be something to do with the existing texture mapping (I know pepakura takes stl files too, but you lose the texture mapping).
Anyway I am almost ready for a proper pepakura layout.
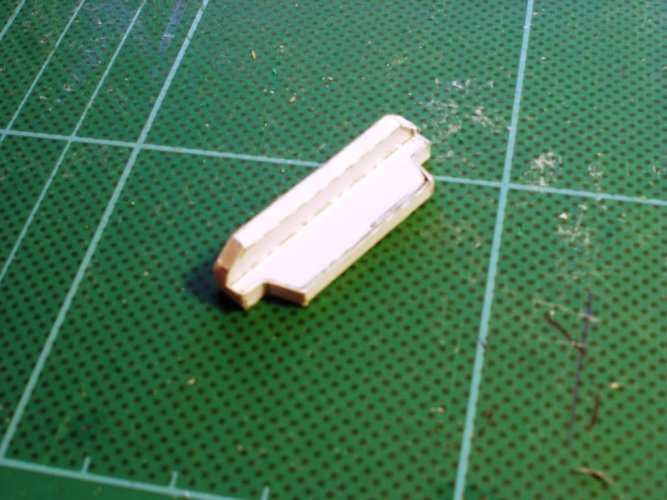
After three weeks, I thought I ought to start cutting some paper:


This is not my best build effort as the side piece ended up twisted. The other side has a slightly different layout, so hopefully it will build better.
This is not my best build effort as the side piece ended up twisted. The other side has a slightly different layout, so hopefully it will build better.
Last edited by a moderator:
wellmy pep 3 is working just fine. but once i upgraded to 3 pep 2 wont work very well at all. looking fantastic cant wait for more!
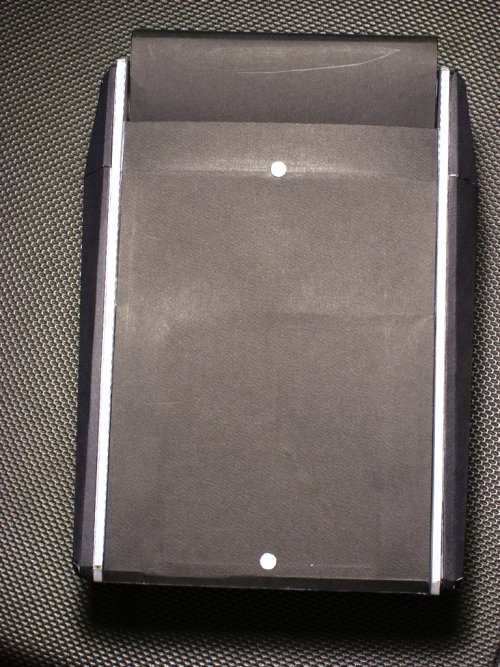
I have finished the first test build and overall, I am quite happy with it. Remaining issues are:
1. I need to laminate more parts than I originally intended (moire bezel; handles; spacer between disks and moire panel; buttons and lights).
2. I need a minor pepakura re-layout to allow the parts to be cut out in such a way that it is easier to laminate them
3. The side panels are difficult to build as they end up twisted and are not very robust (they tend to 'pop' in with very little pressure) so I need to add some internal structure to them.
Apart from that, very nearly there.
Meanwhile, here are some pictures...
Last edited by a moderator:
S
Starship Builder
Thanks for the compliments guys.
Building with textures in progress...


Building with textures in progress...
Last edited by a moderator:
Update for the last couple of days:
1. Finish the side pieces:

2. Moire Disk


3. Moire Disk Panel

4. Divider

5. data Disks

6. Data Disk Holder

7. The main Body


Put it all together:


8. Monitor panel:


Progress so far:

Tomorrow: The doors
1. Finish the side pieces:
2. Moire Disk
3. Moire Disk Panel
4. Divider
5. data Disks
6. Data Disk Holder
7. The main Body
Put it all together:
8. Monitor panel:
Progress so far:
Tomorrow: The doors
Last edited by a moderator:
Door handle


Top door and delta


Bottom door and delta


Assembling


I still have the top door handle and the buttons/lights to do, then it's done.

Top door and delta
Bottom door and delta
Assembling
I still have the top door handle and the buttons/lights to do, then it's done.
Attachments
Last edited by a moderator:
Once again I am both stunned, and humbled by the talent of the members of this forum. Great Job Crimson. :thumb:
Thanks for the kind words guys :mrgreen:
here's the final lap...
Upper door handle


Buttons and lights


DONE!!


Here's the zipped pdf:
http://homepage.ntlworld.com/candida.r/papercraft/tricorder/TOS Tricorder V2 pdf.zip
and here's an untextured version of the pdo:
http://homepage.ntlworld.com/candida.r/papercraft/tricorder/TOS Tricorder V2 no textures.zip
The textured version of the pdo is also on its way.
Steve
_________________________________________________
EDIT by admin: links are dead; get the model from our Resources!")
here's the final lap...
Upper door handle
Buttons and lights
DONE!!
Here's the zipped pdf:
http://homepage.ntlworld.com/candida.r/papercraft/tricorder/TOS Tricorder V2 pdf.zip
and here's an untextured version of the pdo:
http://homepage.ntlworld.com/candida.r/papercraft/tricorder/TOS Tricorder V2 no textures.zip
The textured version of the pdo is also on its way.
Steve
_________________________________________________
EDIT by admin: links are dead; get the model from our Resources!
Attachments
Last edited by a moderator:
steve great build :thumb:im about a third thru the build m8 sorryfor no update im on double shifts at work at the mo !!:thumb:
col.Kurtz: I would love to see some build pictures when you get time :thumb:
Thanks to CGutzmer, The file is now available in the "Downloads section".
I will put together some instructions in time, but hopefully the verbose output above, will help anyone who wishes to build this in the meantime.
Now then; what next.....?
Thanks to CGutzmer, The file is now available in the "Downloads section".
I will put together some instructions in time, but hopefully the verbose output above, will help anyone who wishes to build this in the meantime.
Now then; what next.....?
steve thanks m8 will do at work at the mo busy days at the hospital:curse:
how about the communicator next mate ?

how about the communicator next mate ?
Last edited by a moderator:
WOW! You have created a very detailed and excellent model. Thank you for sharing this with rest of us! This will definetly go as a prop for my TOS Star Trek uniform for Halloween.
- Status
- Not open for further replies.