The Blossom

silveroxide

Senior Member
Aug 22, 2007
2,036
525
113
Fayetteville NC
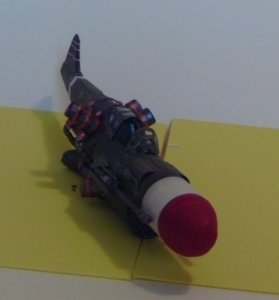
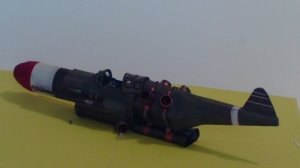
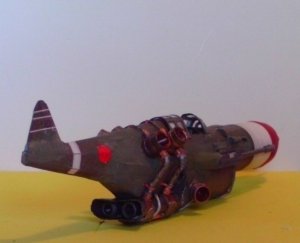
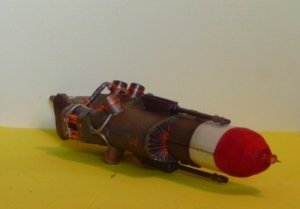
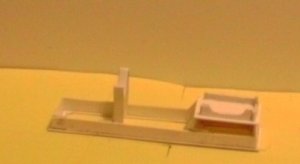
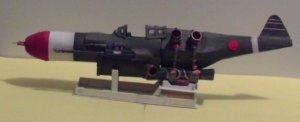
Thanks to Tekzo, who did the hard part, I will build the Atomic Blossom, which I will refer to as the Cherry Blossom. This based on a concept by Keith Thompson. You can find the download here http://myhobbycraft.blogspot.com

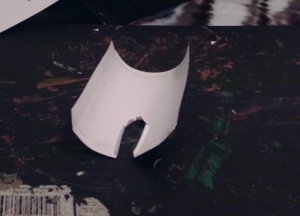
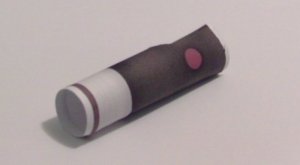
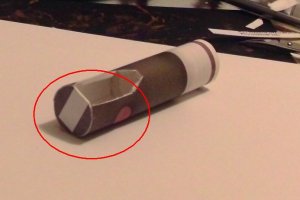
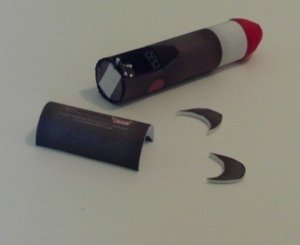
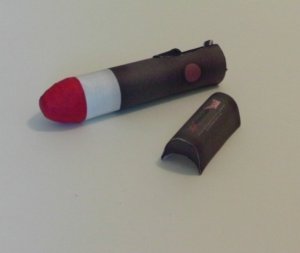
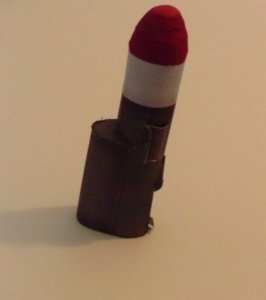
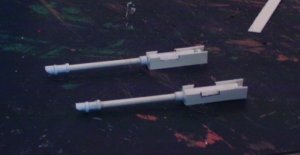
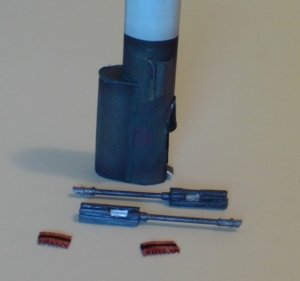
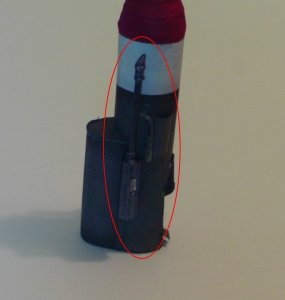
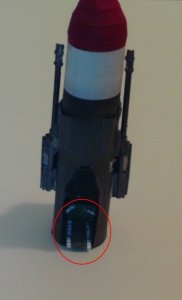
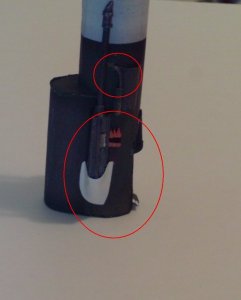
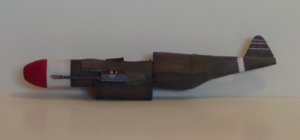
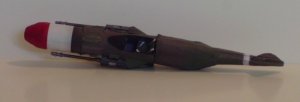
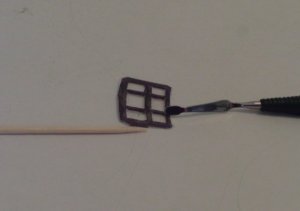
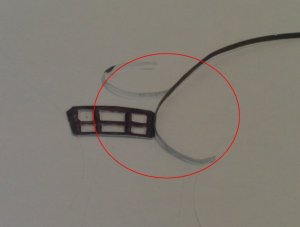
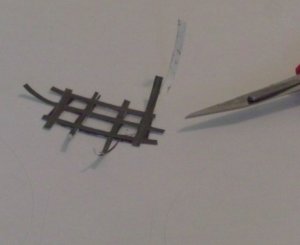
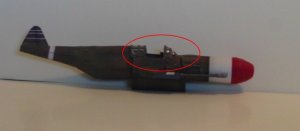
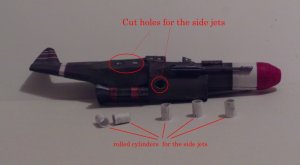
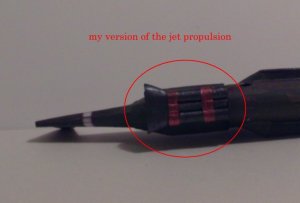
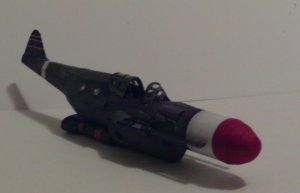
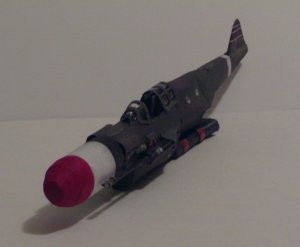
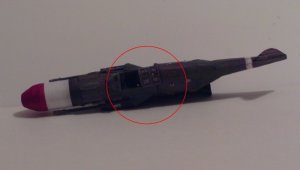
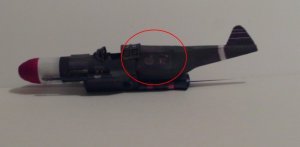
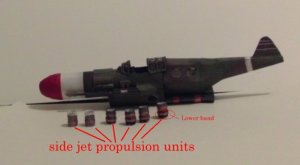
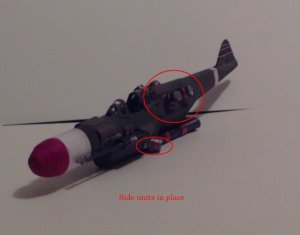
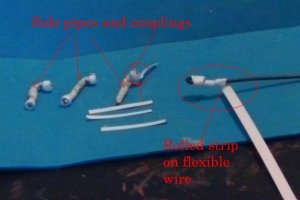
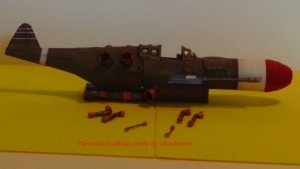
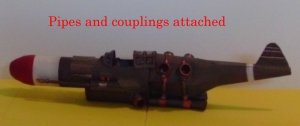
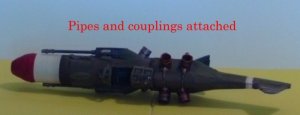
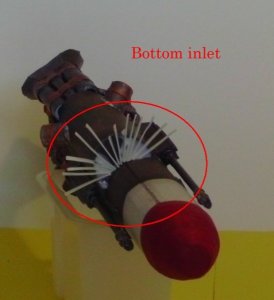
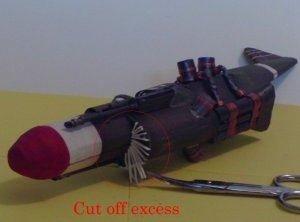
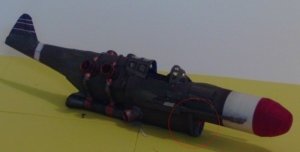
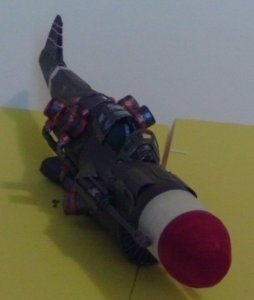
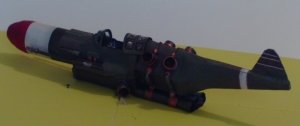
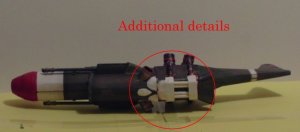
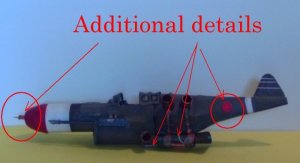
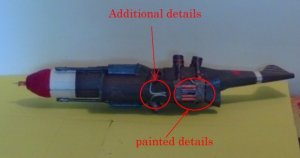
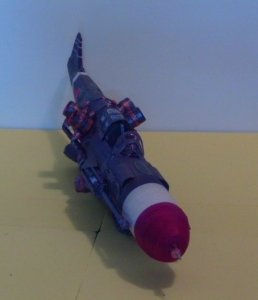
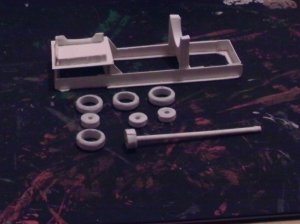
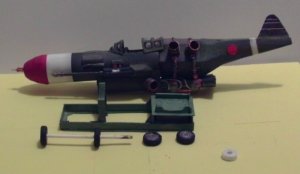
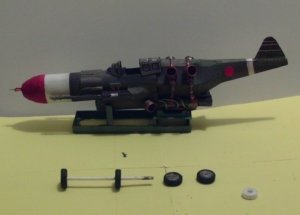
This will be a semi build thread and there are no templates for my additions. I just built it as I went along. Here are a few tease pics to peak your interest.:wave::wave::wave:
 

Attachments

  • 035.jpg
    035.jpg
    60.3 KB · Views: 19
  • 036.jpg
    036.jpg
    65 KB · Views: 12
  • IMAG0076.jpg
    IMAG0076.jpg
    51 KB · Views: 14

silveroxide

Senior Member
Aug 22, 2007
2,036
525
113
Fayetteville NC
Cherry Blossom

And so the beginning is here again. For the cockpit, I did not cut it on the edge but left some of the white on and made them into and inside tab for the cockpit tub later on.

I got rid of the pesky tabs and made my own out of a strip of paper. The front also has three bulkheads of laminated poster board.

I made/scratch built the instrument panel and for the bottom bulge piece, I again eliminated the pesky tabs and made two thick bulkheads. I painted the nose to simulated the Japanese rising sun symbol (meatball).

This thread is not going to be too detailed since the build thread has already been done. Once the fuselage is done, there will be a lot of ad lib add on. :wave::wave::wave::wave:
 

Attachments

  • 001.jpg
    001.jpg
    95.7 KB · Views: 4
  • 002.jpg
    002.jpg
    80.3 KB · Views: 5
  • 003.jpg
    003.jpg
    55.4 KB · Views: 5
  • 004.jpg
    004.jpg
    36.9 KB · Views: 4
  • 005.jpg
    005.jpg
    70.2 KB · Views: 6
  • 006.jpg
    006.jpg
    68.4 KB · Views: 5

silveroxide

Senior Member
Aug 22, 2007
2,036
525
113
Fayetteville NC
Cherry Blossom

Thanks Ekuth.

On with the build. I rolled a piece of paper and made the front cables and when I put the scoops on the nose, I left the front open.

I scratch built a couple of guns out of card stock and a paper dowel from a Q-tip. and a ammo belt. painted the items gun metal and the belt copper tone with a black stripe. Scratched a rear cover for the guns and placed them on both sides but a little higher than on the plans. Made a generic seat and put some belts in it.

I also placed a cover over the instrument cluster and covered the front cockpit gap with it, and painted it black.:wave::wave::wave:
 

Attachments

  • 008.jpg
    008.jpg
    53.2 KB · Views: 5
  • 009.jpg
    009.jpg
    71.7 KB · Views: 4
  • 010.jpg
    010.jpg
    68 KB · Views: 5
  • 011.jpg
    011.jpg
    59.9 KB · Views: 4
  • 012.jpg
    012.jpg
    42.1 KB · Views: 8
  • 013.jpg
    013.jpg
    57 KB · Views: 6

silveroxide

Senior Member
Aug 22, 2007
2,036
525
113
Fayetteville NC
Cherry Blossom

A few more details scratched built on the frame.

Here are the twin cannons in place. I used the cellophane tape technique for the canopy. I placed the tape on both sides and with a dull instrument or a toothpick, I went around the edges to take out as much of the air in between the tape. I used the outline of the canopy and then I went over it again with my sticky paper method. That is the use of avery address labels painted OD green and cut into small strips and going around the edges of the frame, inside and outside of the template. The strips are peeled, stuck on and The excess was trimmed off. This method allows for the paper to adhere to the fuselage and the curved frame will retain its shape and does not need for additional metal shape formers.

My version will be with the canopy open and it will be displayed on the ground/tarmac prior to it being deployed. I am planning on making a wheeled sled to go under the Blossom with a tow bar. :wave::wave::wave:
 

Attachments

  • 014.jpg
    014.jpg
    50.6 KB · Views: 5
  • 015.jpg
    015.jpg
    40.3 KB · Views: 6
  • 016.jpg
    016.jpg
    72.3 KB · Views: 6
  • 017.jpg
    017.jpg
    82.4 KB · Views: 6
  • 018.jpg
    018.jpg
    69.1 KB · Views: 8
  • 019.jpg
    019.jpg
    50.7 KB · Views: 7

Elliott

Senior Member
Jul 18, 2006
645
1
36
The extras you added really bring this model to life. The completed model is gonna really look good!
 

silveroxide

Senior Member
Aug 22, 2007
2,036
525
113
Fayetteville NC
Cherry Blossom

Thanks for the comments Elliot;

Here are some more pics of the Blossom with the canopy in the open position. I cut the holes in the sides for the side propulsion units. The cylinders were made by rolling around a round object.

The main jets were also done by rolling long cylinders and the exhaust cover were formed into a bell shape to direct the exhaust.:wave::wave::wave:
 

Attachments

  • 020.jpg
    020.jpg
    74.5 KB · Views: 4
  • 021.jpg
    021.jpg
    80.1 KB · Views: 5
  • 022.jpg
    022.jpg
    71.6 KB · Views: 4
  • 023.jpg
    023.jpg
    75.7 KB · Views: 6
  • 024.jpg
    024.jpg
    65.1 KB · Views: 4
  • 025.jpg
    025.jpg
    57.3 KB · Views: 6

silveroxide

Senior Member
Aug 22, 2007
2,036
525
113
Fayetteville NC
Cherry Blossom

More details on the blossom. Rolled cylinder for the side exhausts. Placed a band retainer for the four top exhaust jets and another smaller band for the top. Constructed the conduit pipes, cables and connecting couplings. Placed the lower exhaust pies at an angle to the rear.:wave::wave::wave:
 

Attachments

  • 026.jpg
    026.jpg
    66.2 KB · Views: 7
  • 027.jpg
    027.jpg
    83.4 KB · Views: 5
  • 028.jpg
    028.jpg
    32.2 KB · Views: 4
  • 029.jpg
    029.jpg
    72.3 KB · Views: 5
  • 030.jpg
    030.jpg
    28.7 KB · Views: 5
  • 031.jpg
    031.jpg
    50 KB · Views: 4

silveroxide

Senior Member
Aug 22, 2007
2,036
525
113
Fayetteville NC
Cherry Blossom

The Blossom itself is almost done. Working on the extras at this time. Now to continue with the build.

Cut strips for the front under fuselage intake. Waited for the glue to set and cut off the extra strips. The I took a strip and cover the edges of the strips with a thin strip/band of scrap paper.

Continued with the rear engine adding extra details.:wave::wave::wave:
 

Attachments

  • 032.jpg
    032.jpg
    70.1 KB · Views: 8
  • 033.jpg
    033.jpg
    99 KB · Views: 5
  • 034.jpg
    034.jpg
    61.3 KB · Views: 5
  • 035.jpg
    035.jpg
    55.1 KB · Views: 5
  • 036.jpg
    036.jpg
    53.9 KB · Views: 5
  • 037.jpg
    037.jpg
    62.3 KB · Views: 5

silveroxide

Senior Member
Aug 22, 2007
2,036
525
113
Fayetteville NC
Cherry Blossom

More details for the Blossom The blossom for all practical purposes is finished. Now to work on that display.:wave::wave::wave:
 

Attachments

  • 039.jpg
    039.jpg
    79.5 KB · Views: 5
  • 041.jpg
    041.jpg
    67.4 KB · Views: 4
  • 042.jpg
    042.jpg
    59.6 KB · Views: 5
  • 044.jpg
    044.jpg
    81 KB · Views: 4
  • 045.jpg
    045.jpg
    77.3 KB · Views: 8

silveroxide

Senior Member
Aug 22, 2007
2,036
525
113
Fayetteville NC
Cherry Blossom

Getting near the end of this project. For some reason the second picture keeps getting placed as last. Here is the stand, waiting for the wheels and a mule to pull it.
 

Attachments

  • 046.jpg
    046.jpg
    19.1 KB · Views: 5
  • 047.jpg
    047.jpg
    12.8 KB · Views: 40
  • 048.jpg
    048.jpg
    50.4 KB · Views: 6
  • 049.jpg
    049.jpg
    105.2 KB · Views: 5
  • 050.jpg
    050.jpg
    74.9 KB · Views: 4
  • 051.jpg
    051.jpg
    87 KB · Views: 6