Tetter's Layout Progress and Other Pics.

TruckLover

Mack CH613 & 53' Trailer
Apr 14, 2006
4,073
0
36
34
Rancho Santa Margarita, Cali.
WOW you did an AWESOME job on the scenery and details in that last pic!!!! I love the Bumper, the good old rusty weathered rail, that sweet looking rock and all the grass and ground cover. :thumb: :thumb: :thumb: :cool:


Way to go, keep it up, we all wanna see some more pics!!! :thumb: :thumb: :mrgreen:
 

tetters

Rail Spiking Fool!
Jan 21, 2005
879
0
16
50
Toronto, Ontario, Canada
Thanks Josh. The big rock(s) was placed there last year by by youngest daughter. It sits at the end of the yard lead. She put it there and said, "This will help to keep your trains from falling off the track Daddy." So there it sits. I cemented it in place with some smaller stones she also put there overtime. It felt fitting to keep them there and add them to the scene.
 

tetters

Rail Spiking Fool!
Jan 21, 2005
879
0
16
50
Toronto, Ontario, Canada
I'm having some issues uploading photos to Zealot so forgive me posting them on Photobucket instead.

A quick update.

I've been doing some re-tooling if you will. Trying to clean things up and fix mistakes I made or things that were just plain bugging the crap outta me! :rolleyes:

DSC02370.jpg


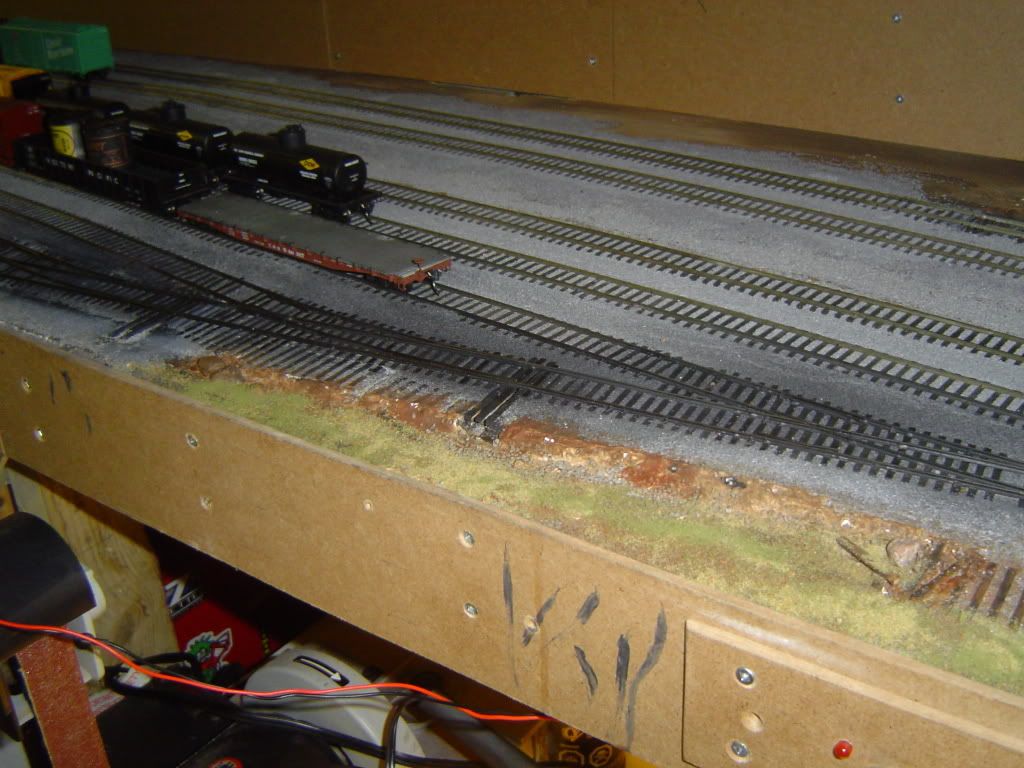
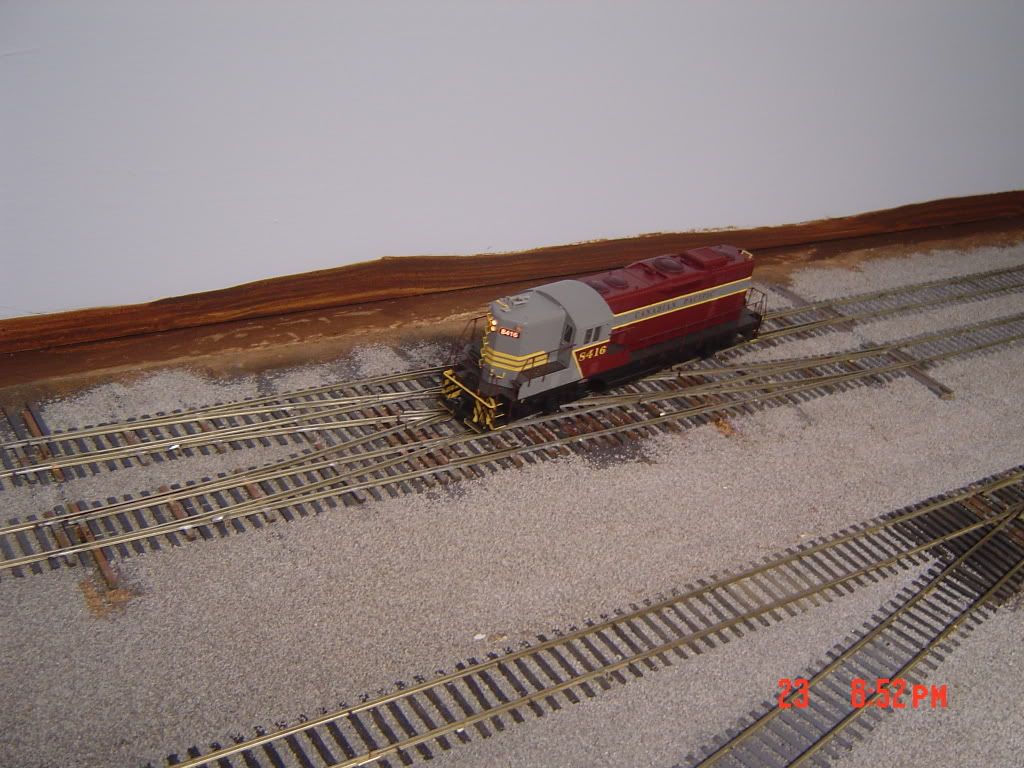
First off...the double slip is gone. I know, I know, I was all stoked about this in the spring, however as I got used to playing around with the layout, I realized how silly it looked in the location that it was. Finally, a couple of days ago I manned up, took it out snd replaced it with a # 5 t.o. Sadly, I ended up destroying it for the most part. wall1 However, it gave me an idea for a scene and practical application as well.

DSC02372.jpg


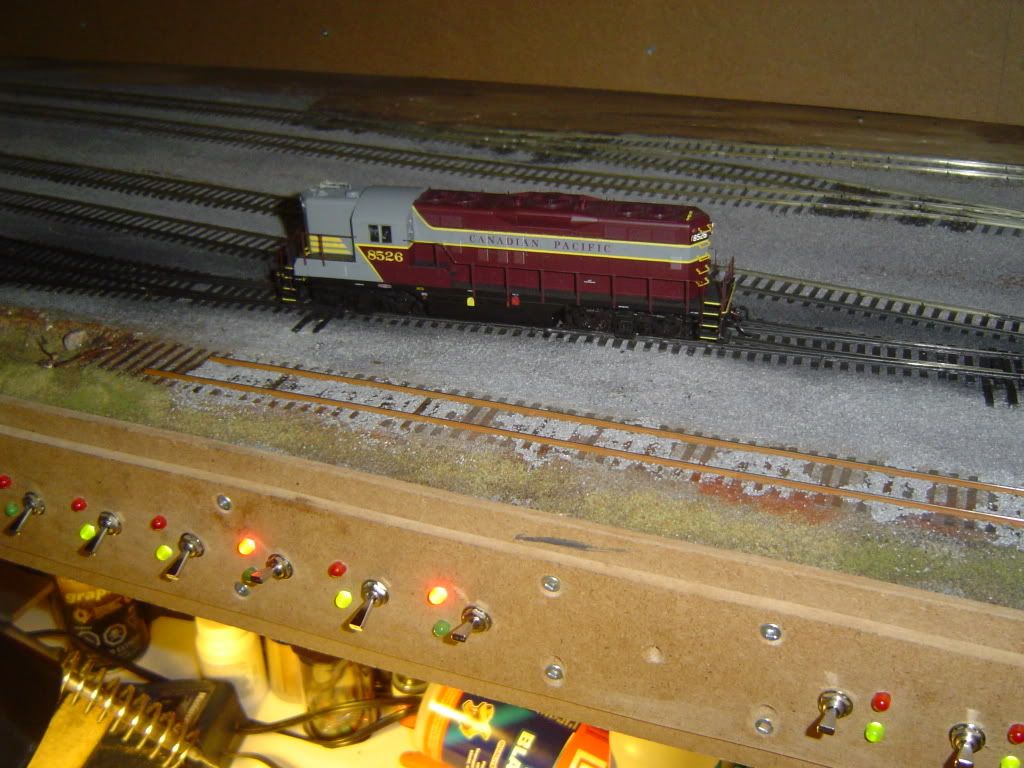
The RR for some odd reason left a small section of the old abandoned stub in place. :twisted: Actually...what was left in place, I have set up as a programming track. I provides me with a scenic element as well. I still need to touch up some areas, however I think I can get it to blend in well. (Aside from the shiny railtops...can't be helped.) Also the dead switch in the bottom left corner was for one of the ends of the points on the d-slip. Another plus was I "recovered" a Tortoise when I decided to finally remove it. :thumb:

DSC02371.jpg


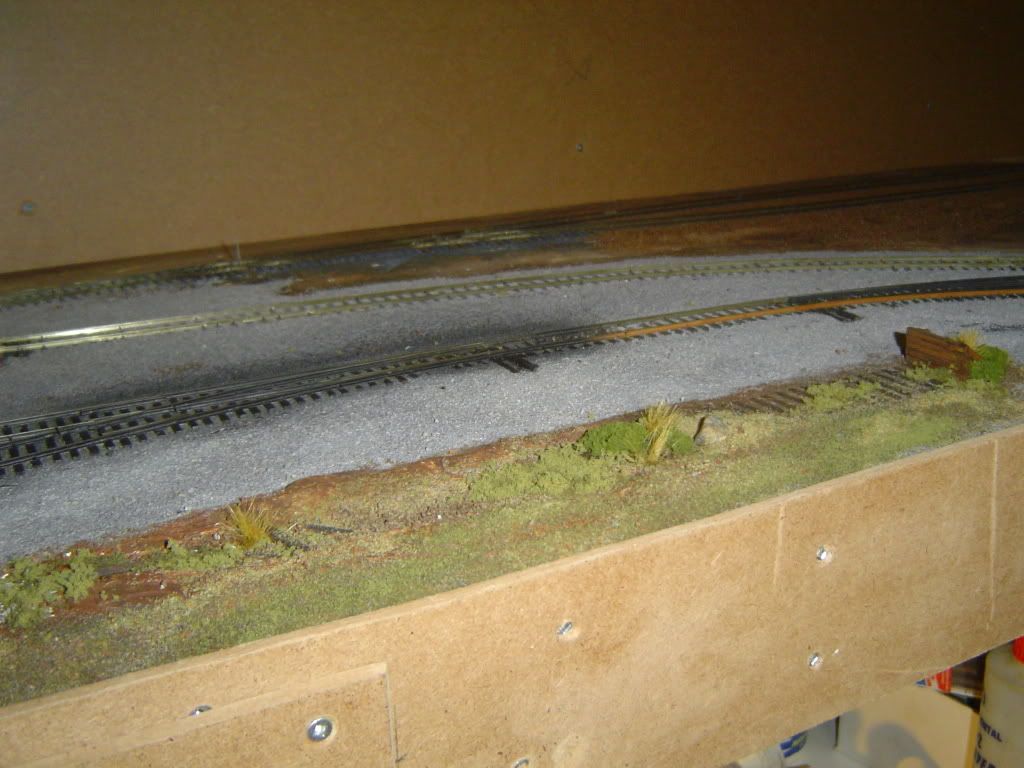
Here is the end of the stub. All overgrown. I buried some ties in the "mud" and added some overgrowth. Still a work in progress...:p

DSC02373.jpg


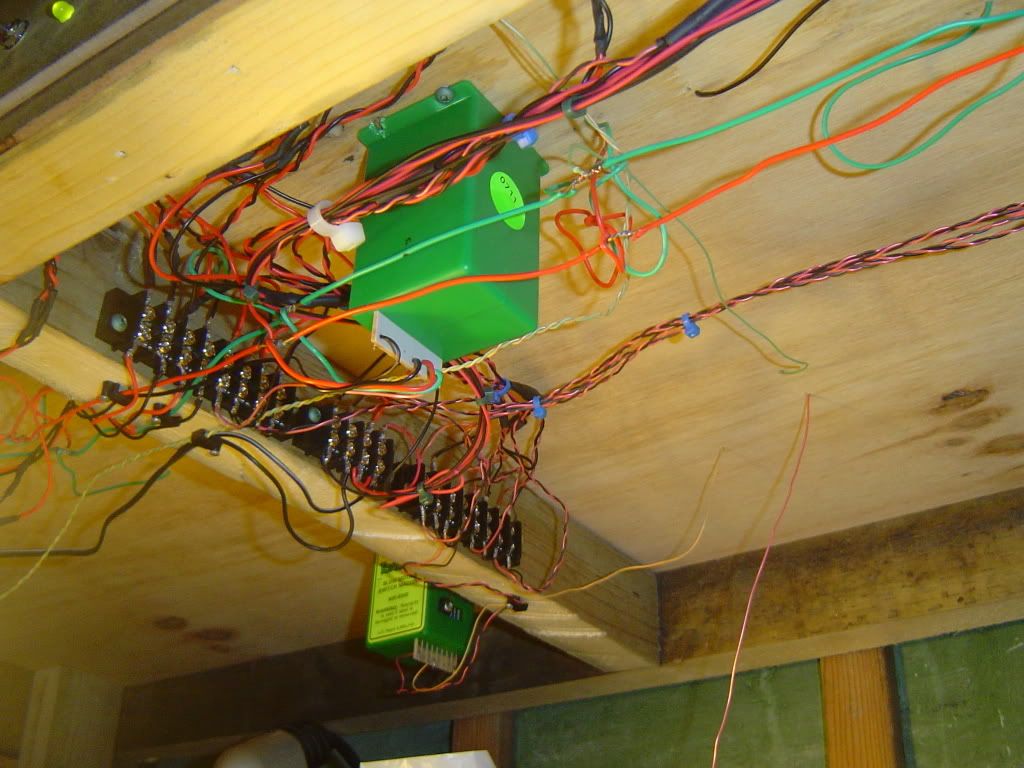
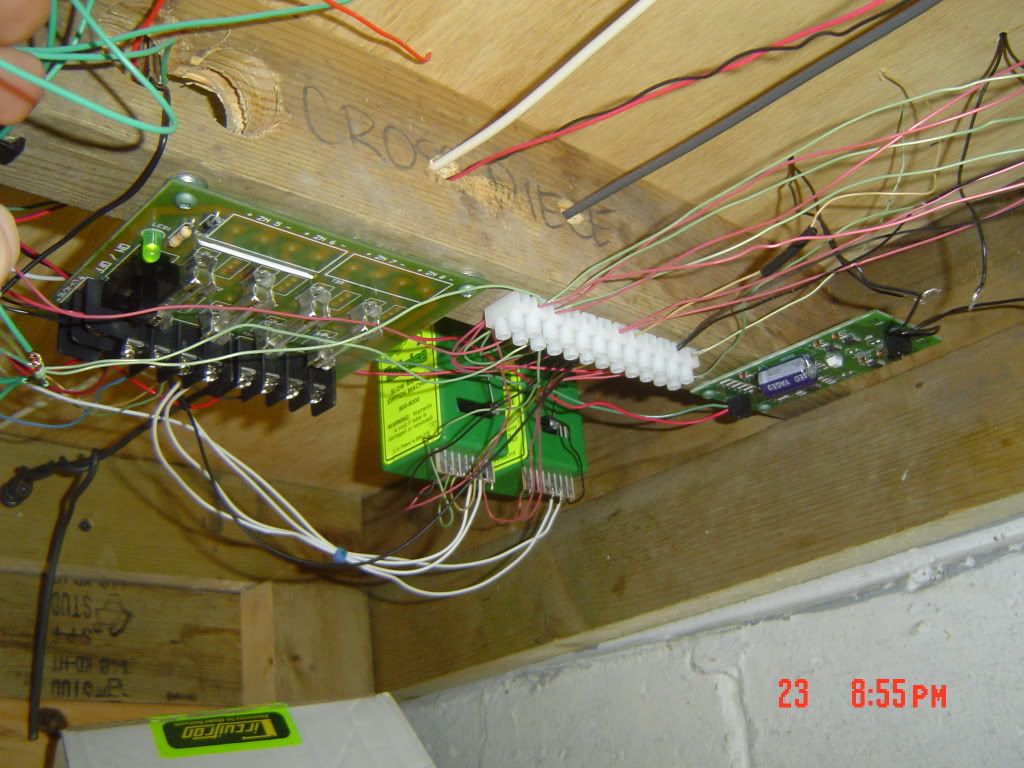
Lastly a quick shot at the "guts". I am no electrician, in fact its probably the one area of this hobby I scratch my head over more then anything. wall1 But, before this, and for what its worth, I had just soldered everything together and had a rats nest of wires underneath this particular section of the layout. :eek:

Yesterday and this evening I added some terminal blocks and organized (or at least attempted to) the wiring underneath. So Basically, the large terminal strips can accommodate up to four switches and tortoise machines. The two black and red wires going into top are from the switches, meanwhile the bottom corresponding feeds go to the Tortoise. Eventually, I'm going to set it up so I can remove a tortoise without having to unsolder or cut any wires...at least that is the plan. The 4 position (or smaller) block is from the power pack to the switch panels. Right now I have three switching panels fed into this block (15 Tortoise on an 11 volt DC power supply). I have sets of switches on each panel grouped together. I may eventually get around to isolating each switch to make maintenance and repair easier, however right now that gives me a headache thinking about it.

That's all for now. Have a good night everyone! :wave:

PS...I plan to use Plasti-dip to insulate the bare track feeds connected to red and green bus lines. I just haven't finished hooking up my feeders yet..:mrgreen:
 

TrainNut

Ditat Deus
Sep 15, 2004
1,731
0
36
54
AZ
That's a heart breaker to see that double slip gone after all the time you put into it. That's one of the neat things about MRR'ing... something bugs ya' rip it out and do it again. I also like the abandoned track. It's a common site in the real world but yet not very many model it.
 

puddlejumper

Member
Dec 7, 2007
254
0
16
Southern Maryland
While it is a shame to see such a beautiful piece of trackwork get removed I have to agree with you it really didn't belong there. Plus the abandoned track looks great! Nice work on the scenery, also on the tightening up that wiring, looks nice! :thumb:

Dave
 

MadHatter

Charging at full tilt.
Jan 27, 2007
1,034
2
36
37
Centurion, South Africa
Hi Tetters

On my portable layout I did a similar thing. Broken tracks/ sleepers buried. Some large bushes and even an old and rusted pump trolley (That thing the Gandy Dancers ride).

I plan on doing the same thing on my permanent layout when I eventually build it.

Bring on more pics- I love this thread!
 

tetters

Rail Spiking Fool!
Jan 21, 2005
879
0
16
50
Toronto, Ontario, Canada
Giddy Up!

I finally received my Auto Reversing Unit in the mail today and without hesitation installed it for the double x-over. I must say though that it was not without some technical difficulties. In fact I will freely confess that out of all of the gaps required to isolate the different frogs on this sucker...I still missed one. Once I found it (or rather where I should have found it) which quickly solved any shorting issues and we were off to the races.

I wonder, should I had been a bit more careful, if I would have found it and not had to purchase the AR Unit at all and been able to stick with the DC wiring? Meh...I have DCC I might as well take full advantage of it, right?

First off a quick shot of the wiring...its a mess. I plan to go back in the future and properly mount all of the hardware to a piece of 1/2 ply and then mount it all to the bench work. But it should give everyone an idea as to what it took. And yep...I used one of those power distribution boards I liberated from work. Below is also the simple schematic which I posted over in the N-Scale forum.

DSC02407.jpg


file.php


file.php


A shot of 8416 on the crossing...

DSC02400.jpg


In case anyone doesn't believe it, here is a short video (45 sec.) of 8416 making the crossing. Very slowly, without any hesitation.


steamhead

Active Member
Apr 16, 2005
2,360
0
36
75
Brownsville, TX
WoW...Where's this thread been all my life..!?!?! I've spent over an hour reading through it and I'm speechless...!!! This is fantastic work..!! And for a "raw" beginner to do handlaid track like that is simply amazing...!!! Way to go..!!
The whole layout is terrific...The part I like best..?? Your daughter's stone...You'll think of her every time you see it....Great..!! and she'll ALWAYS be the little girl that placed it there....:thumb:
 

tetters

Rail Spiking Fool!
Jan 21, 2005
879
0
16
50
Toronto, Ontario, Canada
Thanks for the kind words gents. They are very much appreciated. Next step is the planning of and starting to building some structures. I'm going to try scratch building or kit bashing most of them.

I picked up an air compressor at Crappy Tire the other day for like 90 bucks. Seemed like a good deal and it wasn't one of those "house brands" you see in stores a lot lately. Going to give the Airbrush thread a good read and make a decision soon. However I've begun to realize how a small paint booth with a proper duct vent may come in handy now. hmm....just where to put it?
 

nkp174

Active Member
Oct 10, 2006
1,455
0
36
41
Cincinnati, O.
I'd highly recommend getting a plain white mask to wear when painting, prior to getting a fully functional paint booth. I'd also recommend looking around on the web regarding air brushes...there is good stuff out there.
 

tetters

Rail Spiking Fool!
Jan 21, 2005
879
0
16
50
Toronto, Ontario, Canada
Hey Tetters:wave:
Do you have any problem with the point rails coming loose from the throw bar?
I have had to resolder 3 of them so far.:confused:

Loren

Hmm....only if I've been excessively "rough" with them. Today for instance, I didn't back the caboose completely through the turnout and threw the points. The pressure of the flange getting caught inbetween the rail and the point caused the copper cladding to shear off the fibre glass. Otherwise, I've got about 20 turnouts almost a year old now and have only had to resolder 3 of them. Which I just figure as regular track maintenance.

The only advice I can give you is to run a mill file over the copper cladding of the PCB tie to get a clean shiney surface. I also use an Acid Based Flux which is really agressive and wicks the solder underneath the rail and gives it a really clean and solid bond. I just make sure I neutralize the soldered joint with some rubbing alcohol so the flux doesn't weaken the joint. :thumb:
 

Squidbait

Recovering ALCO-holic
Jan 27, 2007
1,219
0
36
58
Paris, ON
I gave up on PC board throwbars after the copper cladding kept separating from the board. I went to a wood or styrene throwbar with a lug between the point rails to pull them into the stock rails.
 

Squidbait

Recovering ALCO-holic
Jan 27, 2007
1,219
0
36
58
Paris, ON
What did you do? Super glue the rails to the throwbar?

Loren

No, the point rails are solid from frog to point. They're spiked in place up to an inch or so from the throwbar. They just float over the throwbar. The widget is chamfered so it grabs the foot of the point rail and holds it down as it presses against the stock rail.
 

Attachments

  • throwbar.jpg
    throwbar.jpg
    8.4 KB · Views: 115