Star Trek type 17 Shuttle Pod by Homespun Magixx

ltzealot

New Member
Nov 12, 2013
31
1
8
New Zealand
Hi,
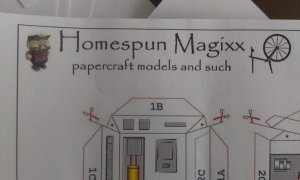
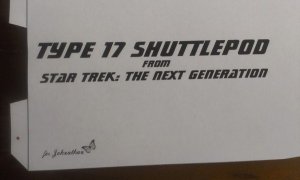
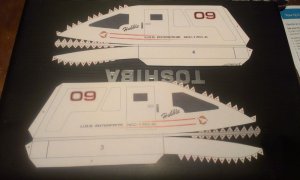
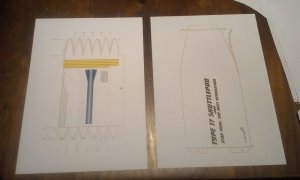
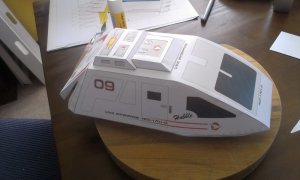
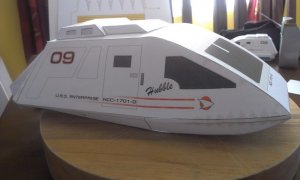
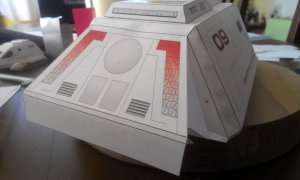
Saturday, I started building an enlarged version of Homespun Magixx Star Trek Type 17 Shuttle Pod. There are a lot of great models to build on their site.
Home
http://www.homespunmagixx.com
License
http://www.homespunmagixx.com/tou.html
Download
http://www.homespunmagixx.com/scifi.asp#type17
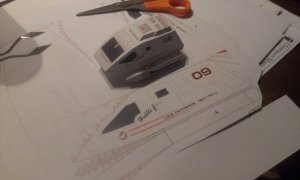
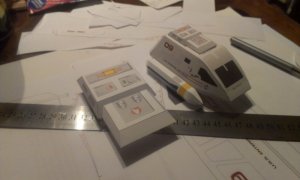
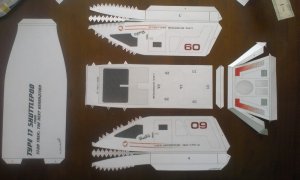
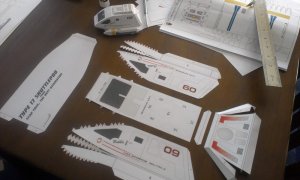
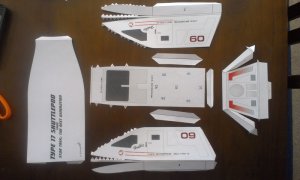
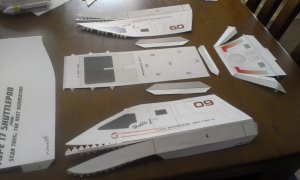
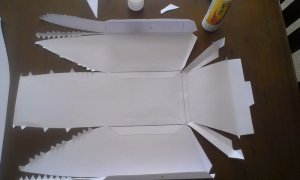
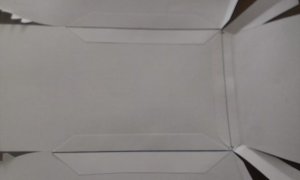
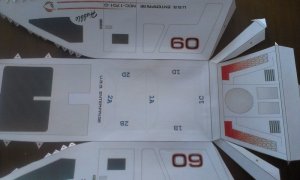
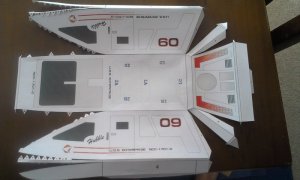
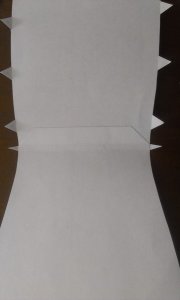
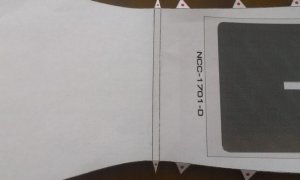
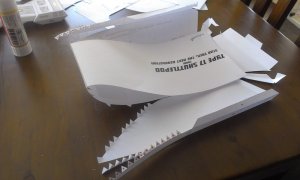
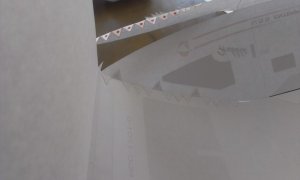
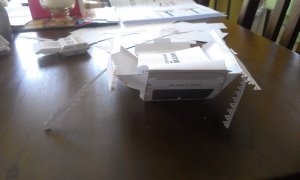
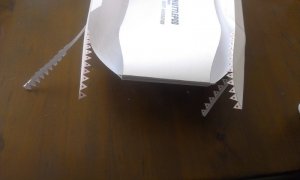
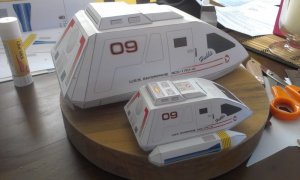
I quite like this model for it's simple layout on a single sheet and the ease of build. Made it easy for me to resize the sheet. I also used Windows build in mspaint to print sections of the page on single sheets to build the following model. It's not complete yet. I'm yet to complete and attache the nacels. The follow pics show the gradual construction.
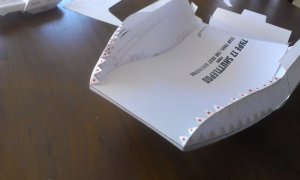
Saturday I cut and folded the pieces in between doing household chores, playing with my 20 month old daughter and general family stuff.
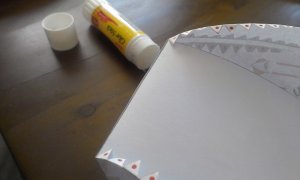
Sunday I finshed cutting the rest of the parts except one the nacels and glued all but the nacel together.
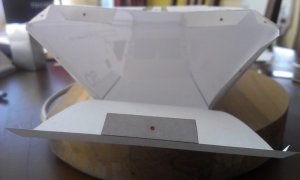
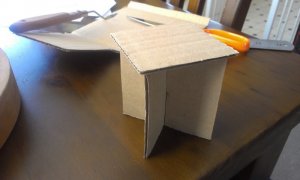
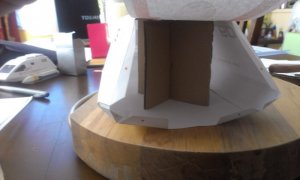
Because the whole thing is paper, I had to create a support for the inside.
In some of the shots you can see the original single page model I built.
 

Attachments

  • IMAG0873.jpg
    IMAG0873.jpg
    76.3 KB · Views: 27
  • IMAG0874.jpg
    IMAG0874.jpg
    59.8 KB · Views: 22
  • IMAG0865.jpg
    IMAG0865.jpg
    93.4 KB · Views: 24
  • IMAG0864.jpg
    IMAG0864.jpg
    87.2 KB · Views: 22
  • IMAG0867.jpg
    IMAG0867.jpg
    91.4 KB · Views: 18
  • IMAG0868.jpg
    IMAG0868.jpg
    90.5 KB · Views: 17
  • IMAG0869.jpg
    IMAG0869.jpg
    113.7 KB · Views: 30
  • IMAG0870.jpg
    IMAG0870.jpg
    81 KB · Views: 15
  • IMAG0871.jpg
    IMAG0871.jpg
    112.2 KB · Views: 25
  • IMAG0872.jpg
    IMAG0872.jpg
    130.4 KB · Views: 17

ltzealot

New Member
Nov 12, 2013
31
1
8
New Zealand
I had to create joins, because I printed the pieces on different sheets. Plus, I had to make a tab for the side panel that's normally attached to the base.

Hm...Is there a limit to the number of attachments?
 

Attachments

  • IMAG0876.jpg
    IMAG0876.jpg
    111.6 KB · Views: 17
  • IMAG0877.jpg
    IMAG0877.jpg
    113.8 KB · Views: 19
  • IMAG0878.jpg
    IMAG0878.jpg
    83.3 KB · Views: 20
  • IMAG0879.jpg
    IMAG0879.jpg
    33.1 KB · Views: 16
  • IMAG0881.jpg
    IMAG0881.jpg
    105.6 KB · Views: 17
  • IMAG0882.jpg
    IMAG0882.jpg
    119 KB · Views: 22

ltzealot

New Member
Nov 12, 2013
31
1
8
New Zealand
I found something interesting in this process. If I attach the base from the front of the craft, it was easier to assemble than the original model. I worked my way from front to rear.

Oh and something else I discovered was, the tabs on the side panels helped with the glueing of the top/side panels at the window curve. Very handy for keeping to pressure on without me holding or positioning it with something.
 

Attachments

  • IMAG0884.jpg
    IMAG0884.jpg
    40.4 KB · Views: 19
  • IMAG0885.jpg
    IMAG0885.jpg
    78.6 KB · Views: 15
  • IMAG0886.jpg
    IMAG0886.jpg
    94.2 KB · Views: 17
  • IMAG0887.jpg
    IMAG0887.jpg
    53.8 KB · Views: 15
  • IMAG0888.jpg
    IMAG0888.jpg
    101.7 KB · Views: 15
  • IMAG0889.jpg
    IMAG0889.jpg
    71.8 KB · Views: 15
  • IMAG0890.jpg
    IMAG0890.jpg
    85.8 KB · Views: 19
  • IMAG0892.jpg
    IMAG0892.jpg
    76.9 KB · Views: 22

ltzealot

New Member
Nov 12, 2013
31
1
8
New Zealand
I continued with the build until I only had the rear to close off, but I notice a little sagging due to the thin paper and larger scale. So, this is where I had to figure out a support for the inside. I thought of different ways, like using some of the scrap paper rolled or folder into tubes, then I thought maybe a toilet roll and finally I just found some packing cardboard and cut it into and X type support. Don't know what you call it. Anyway, I glued a flat piece on top and the glued it into the base of the model and sealed it up.

All I need to do now is complete the nacels and attach and I'm all done.
 

Attachments

  • IMAG0894.jpg
    IMAG0894.jpg
    112.8 KB · Views: 18
  • IMAG0895.jpg
    IMAG0895.jpg
    97.9 KB · Views: 20
  • IMAG0896.jpg
    IMAG0896.jpg
    104.5 KB · Views: 18
  • IMAG0897.jpg
    IMAG0897.jpg
    74.1 KB · Views: 19
  • IMAG0898.jpg
    IMAG0898.jpg
    99.9 KB · Views: 19
  • IMAG0899.jpg
    IMAG0899.jpg
    102 KB · Views: 16
  • IMAG0900.jpg
    IMAG0900.jpg
    92 KB · Views: 18
  • IMAG0901.jpg
    IMAG0901.jpg
    90.1 KB · Views: 19
  • IMAG0902.jpg
    IMAG0902.jpg
    88.5 KB · Views: 23
  • IMAG0903.jpg
    IMAG0903.jpg
    121.8 KB · Views: 20

bgt01

Exemplary Confidant
Jan 26, 2012
576
843
93
Ohio
Print some "Away Team" members out to scale and you'll have a nice little diorama. I've made this shuttle also and it's a fun little build. You've done a nice job.
 

ltzealot

New Member
Nov 12, 2013
31
1
8
New Zealand
Interesting idea bgt01. I was thinking of making a shuttle bay diorama, but didn't really think about people. I'm thinking of printing the same thing on A3 paper or if I can find some A3 cardboard, but I might have to print it then glue it to cardboard.

This might be big enough for the plastic figurines. Hmm, I may have to hunt some down since I don't own any.

Thanks ASC Mclaren. I like large scale to. I'd build a full size model and park it in the front yard if I could, but I think my wife not so much. :)

On that note, I use to belong to a New Zealand Star Trek Glub and we build Type 6 ish shuttle for the 1996 Christmas Parade. I have photo's somewhere. Now that was a fun project. Sorry for rambling.
 

Rhaven Blaack

!!!THE MAN BEHIND THE CURTAIN!!!
Staff member
Administrator
Moderator
Jun 12, 2009
12,516
9,891
228
Oregon
www.deviantart.com
You are doing a GREAT JOB on this project.
All of the lines look clean and crisp!

Do you have plans of detailing it out and making an interior for it?
 

zathros

*****SENIOR ADMINISTRATOR*****
Staff member
Administrator
Moderator
Apr 5, 2013
13,498
9,549
228
Nice job, great links!! :)
 

ltzealot

New Member
Nov 12, 2013
31
1
8
New Zealand
Sorry, what was that Zathros? ;-)

Thanks for the kind words. I thought I better credit the creator of the model in my post. Sad that it was not used in the series.
 

ltzealot

New Member
Nov 12, 2013
31
1
8
New Zealand
Thanks redwolf28386.
It is tricky working with the small parts, but oh so satisfying when it's done. :)

Tonight, I finally found the time to finish my Nacels and attach.
I think I should have strengthened them internally, but they seem to be holding up ok. I think the hexigon is a pretty stable shape.

I forgot to take photo's of me attaching the nacels, but the last nacel was just attached where you can see where the shuttle is on it's side.
 

ltzealot

New Member
Nov 12, 2013
31
1
8
New Zealand
Thanks Rhaven Blaack.

By the way, I didn't think of detailing the interrior until you mentioned it. I've been looking for my old details on the Type 6, that I could use. I will build another shuttle this size, but this time I'll use a thicker card for more stability. I bought such card to print my phaser rifle on, and it's pretty sturdy stuff.

I'll let you know how I get on.
 

bgt01

Exemplary Confidant
Jan 26, 2012
576
843
93
Ohio
You need a set of these collectors items next to that shuttle. I got these new when the show came out. They are still complete with their "purse-like" Tricorders and their "We come in peace" phasers molded into their hands. Ah, memories.
 

Attachments

  • 100_1964.jpg
    100_1964.jpg
    103.1 KB · Views: 18