Star Trek: TNG:- Wolf 359 Diorama - micro build log
- Thread starter linweseregon
- Start date
You are using an out of date browser. It may not display this or other websites correctly.
You should upgrade or use an alternative browser.
You should upgrade or use an alternative browser.
It looks like my progress has been better than I thought - the Princeton should be finished tomorrow!
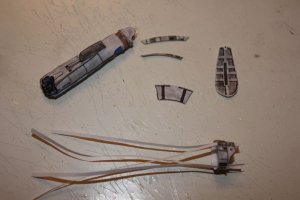
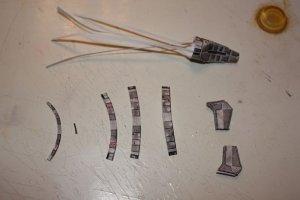
The bit that looks like a windsock which fell foul of a tornado is the beginning of the secondary hull. I find it easier to use thin strips of paper rather than sitting cutting endless tiny triangles. The paper strips are ~1mm wide btw.
The secondary hull suffered major damage at each end so many of the strips weren't used and the deflector didn't have to be built.
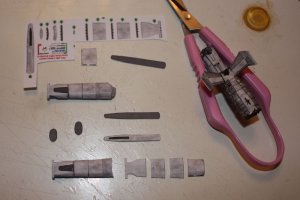
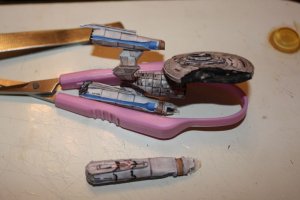
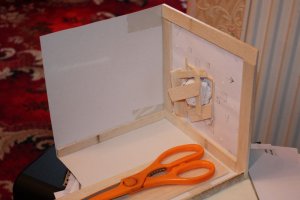
I've used the paper sheet of battle damage that I printed. Before I glue the rim of the missing chunks, I scrunch up a cut section of damage, unfold it and then push it into any nooks and crannies in the cut out chunks with a fingernail. When the glue is almost dry I cut around the edges of the paper at an angle so that the cuts are not clean, but look kind of ripped, and then blacken the edges and try to leach black into the surround of the holes. The scissors shown only cut cleanly if the blades are perpendicular to the surface being cut, and the frayed edges produced by angling the blades is particularly effective at this scale.
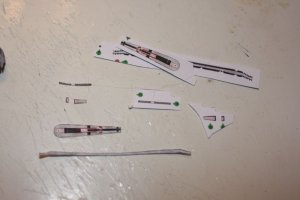
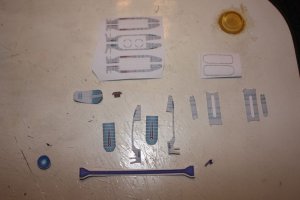
These are the last pieces that need to be cut from the original design; they are additional detailing for the upper nacelles. I've filled the damage holes of each of the major sections (primary and secondary hulls and the three nacelles) before joining them and now I'm only left with one nacelle's detailing to shred a bit at the back, and the other nacelle waiting to have a substantial hole torn out before it is attached.
I'll have to construct some type of base before making any more ships. We have five crazy dogs and I don't like to have any ships lying around waiting to be mounted as the youngest dog (aka The Doomsday Machine) has a tendency to flatten stuff!
fantastic!!! I put my stuff in a shoe box with rubber bands around it. I cant believe how small these are. what great work!
@spaceagent-9 Thanks Jim  My Doomsday Machine is a big lad, he could demolish a shoe box as easily as a matchbox
  . Maybe a reinforced concrete bunker would.... lol.
You are doing a FANTASTIC JOB!!!
I like the battle damage! It looks GREAT!!!
I am really looking forward to seeing how the diorama turns out.
KEEP UP THE GREAT WORK!!!
I like the battle damage! It looks GREAT!!!
I am really looking forward to seeing how the diorama turns out.
KEEP UP THE GREAT WORK!!!
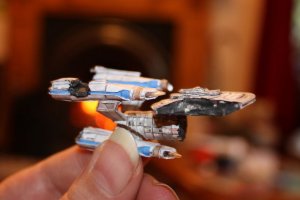
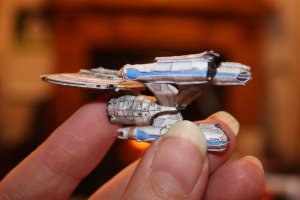
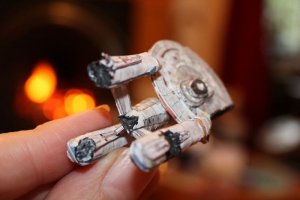
The four sheets for the backdrop are attached and I'm ready to build some kind of support. The USS Princeton is now finished - woohoo!
Oops! Spot the deliberate mistake! I've now filled the hole at the rear of the starboard nacelle.
The finished model ended up bigger than I would have liked at 2 1/2", meaning that the Yamaguchi will have to be almost double the length I wanted it to be . It also means that the Borg cube will be nowhere near in scale at 8x8x8"
  ops:. It' a good job that I can fall back on artistic license
  .
.
Oops! Spot the deliberate mistake! I've now filled the hole at the rear of the starboard nacelle.
The finished model ended up bigger than I would have liked at 2 1/2", meaning that the Yamaguchi will have to be almost double the length I wanted it to be
I still think that I looks awesome!! it could be use I front for a depth perception forced perspective kind of thingy.
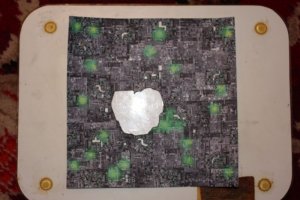
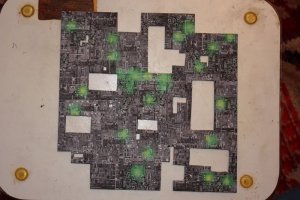
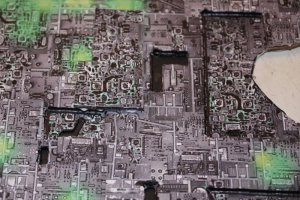
There's one face of the Borg cube which has more going on in it than the others so I'll show the log for it. Most of the Federation/Klingon fire seems to be concentrated in one place and I've cut out a large hole for this:-
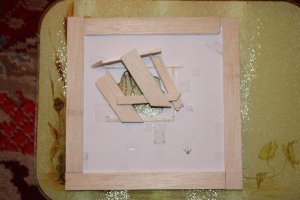
I've also cut some smaller areas which are black on the surface to try to have a more 3D effect. With the other sides I just stuck a black square to the back, but I used smaller black sections with this face. Some balsa strips were glued around the edges for extra stability since the cube will be supporting the weight of batteries, switches, etc. An additional 'frame' was built up to give three depths of damage from phaser fire.
An additional layer with the darker sections removed was added, again to try giving additional depth. I was going to add more layers to bring out the lighter areas, but it would just take much more time than I'm prepared to spend for an effect which is actually almost negligible with 200gsm card:-
Instead I'll concentrate on areas which naturally draw the eye to them:-
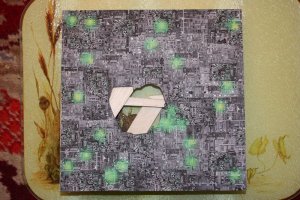
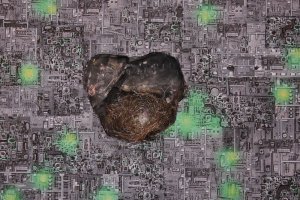
I've used a production photo of the Enterprise A which had extensive damage and moulded this into the three layers of the hole. The rim was then blackened with a marker pen. I've reached the stage of gluing a nest of wire wool in the deepest part of the hole with a huge glob (very technical term) of PVA which I'm leaving to dry overnight before I cut and sculpt filaments. I have some other ideas for this area and I'm going to keep everybody in suspense about them . If at first you don't succeed... destroy all the evidence of ever trying in the first place - lol. Or in other words, if my ideas work I'll share them and if they don't...
I've also cut some smaller areas which are black on the surface to try to have a more 3D effect. With the other sides I just stuck a black square to the back, but I used smaller black sections with this face. Some balsa strips were glued around the edges for extra stability since the cube will be supporting the weight of batteries, switches, etc. An additional 'frame' was built up to give three depths of damage from phaser fire.
An additional layer with the darker sections removed was added, again to try giving additional depth. I was going to add more layers to bring out the lighter areas, but it would just take much more time than I'm prepared to spend for an effect which is actually almost negligible with 200gsm card:-
Instead I'll concentrate on areas which naturally draw the eye to them:-
I've used a production photo of the Enterprise A which had extensive damage and moulded this into the three layers of the hole. The rim was then blackened with a marker pen. I've reached the stage of gluing a nest of wire wool in the deepest part of the hole with a huge glob (very technical term) of PVA which I'm leaving to dry overnight before I cut and sculpt filaments. I have some other ideas for this area and I'm going to keep everybody in suspense about them
The Borg cube has been assimilating more of my balsa supply today:-
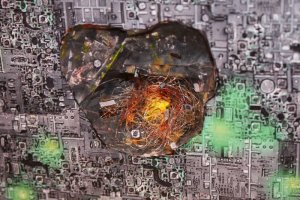
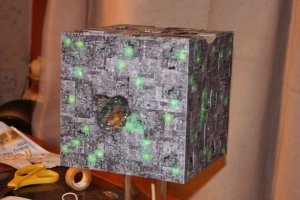
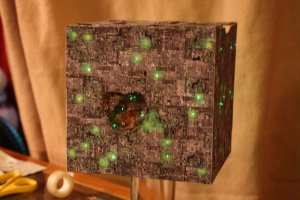
I've been building the frame inside the cube as I add more faces. Additional beams will be needed for mounting it and for holding batteries. The main damage hole has been completed. I pulled out filaments of the wire wool then added paint graded from red to yellow. As a finishing touch I cut out some very small pieces, blackened the backs and glued them around the hole to give an additional feeling of debris being blasted out.
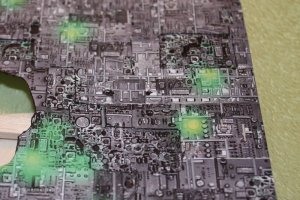
For the top I've done what I would have done with the other faces if I'd had a larger supply of thick card. I glued a face onto 1mm thick card then cut out some black sections and stuck all this onto a completely black sheet. I glued another face to 2mm thick card, removed the darker sections and small areas where black bits had been removed on layer 1 and joined them. Finally I edged some of the offcuts from the second layer and glued them on. The result is much more three dimensional:-
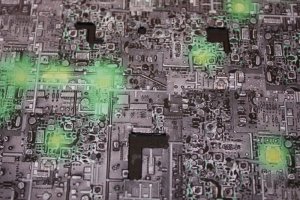
Before joining the faces I also punched small holes through most of the green areas with a darning needle; these were needed to thread through fibre optic filaments from a green LED/fibre optic hair extension kit. When the filaments were through the needle holes I placed a glob of PVA around the inside to hold them in place and clipped the outer end flush to the face. I was going to use 0.25mm fibre optic filaments for Borg fire, but it was too thin to stand up to either sanding or scraping with even a fingernail. I've ordered some 1mm filament and hopefully I'll have more success with that - otherwise it's back to the drawing board and a crash course in how to turn LEDs into beams. The result so far is this:-
And without the camera flash:-
I'm hoping the 1mm filament will solve the phaser beam problem since I'll need a few yellow ones from Federation ships and LEDs are too big to fit inside them! So the cube is now in spacedock until I get the additional parts delivered. Which reminds me - I'll need a blue LED for the Borg tractor beam...
I forgot to mention that the design I'm using is the 8" version of the Borg cube by Sirius Replicas.
You are doing a FANTASTIC JOB on these models.
I like how you are creating all of the battle damage on all of the ships. It all looks quite realistic.
I am looking forward to seeing how this all turns out.
KEEP UP THE GREAT WORK!!!
I like how you are creating all of the battle damage on all of the ships. It all looks quite realistic.
I am looking forward to seeing how this all turns out.
KEEP UP THE GREAT WORK!!!
put the blue led inside a 2'' metal tube, snug diameter, and then if you can get a clear glass bead to fit on the end, a real nice beam will come out the end in a tight outward cone shape.
great work by the way, I really like seeing your tiny stuff being built.
great work by the way, I really like seeing your tiny stuff being built.
@Rhaven Blaack Thank-you very much  I'm putting a wee bit of extra effort into this one (these ones) as the finished diorama will be displacing a few dozen Asterix characters -I know, I'm a big kid!
@spaceagent-9 Funny that you mentioned a tube - I tried a wee experiment with a rolled up tube of card and it was quite effective. I'll keep my eyes peeled for beads; that's exactly the effect I'm needing. And thank-you for all the compliments
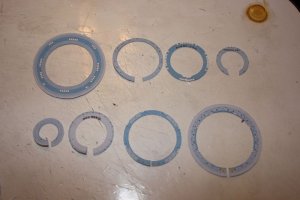
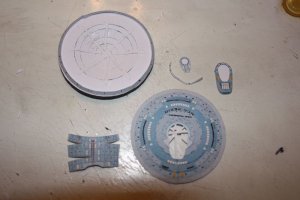
With the Borg cube in spacedock I've started on the USS Yamaguchi by Clever Santoro and following the instructions for the Enterprise C. I would like to say that this is a straightforward 'follow-the-instructions' job, but it's proving to be a bit of a nightmare due to some of the essential pieces being a micron thick - OK, slight exaggeration, but not much; there are pieces that are under 0.25 mm thick and there's no work round on this one. I've come to the conclusion that there is a masochistic streak in me - lol. The saucer is straightforward though:-
Again, I'm using thin paper strips to seamlessly connect the rings:-
There were brownish strips in the original design, but I've had to discard them as they were unworkable. Instead I've drawn them in with a fineliner pen. The surrounds for the bridge sections are approximately 0.5mm thick which is another reason why I like working with card; it doesn't get mangled with the tweezers . The saucer section is almost complete and I've started on the secondary hull and nacelle supports. The uncut piece had to have the insert glued in situ as the bottom line must be around 0.1mm thick.
The real brain damage starts tomorrow with the nacelles and more particularly the rear end of the secondary hull - who am I kidding? Brain damage? I'm loving it!
@spaceagent-9 Funny that you mentioned a tube - I tried a wee experiment with a rolled up tube of card and it was quite effective. I'll keep my eyes peeled for beads; that's exactly the effect I'm needing. And thank-you for all the compliments
With the Borg cube in spacedock I've started on the USS Yamaguchi by Clever Santoro and following the instructions for the Enterprise C. I would like to say that this is a straightforward 'follow-the-instructions' job, but it's proving to be a bit of a nightmare due to some of the essential pieces being a micron thick - OK, slight exaggeration, but not much; there are pieces that are under 0.25 mm thick and there's no work round on this one. I've come to the conclusion that there is a masochistic streak in me - lol. The saucer is straightforward though:-
Again, I'm using thin paper strips to seamlessly connect the rings:-
There were brownish strips in the original design, but I've had to discard them as they were unworkable. Instead I've drawn them in with a fineliner pen. The surrounds for the bridge sections are approximately 0.5mm thick which is another reason why I like working with card; it doesn't get mangled with the tweezers
The real brain damage starts tomorrow with the nacelles and more particularly the rear end of the secondary hull - who am I kidding? Brain damage? I'm loving it!
The Enterprise C is coming together beautifully!
As for being a "big kid", I am still a TOY-R-US kid and I have been building models (and sometimes playing with them) for over 32 years (and I do not intent to stop any time soon).
KEEP UP THE GREAT WORK!!!
As for being a "big kid", I am still a TOY-R-US kid and I have been building models (and sometimes playing with them) for over 32 years (and I do not intent to stop any time soon).
KEEP UP THE GREAT WORK!!!
I have been thinking about what you said. lets say you have a mini excelsior style ship, and you are firing phasers into the borg.
reverse the lighting! put the yellow led in the borg, anchor it, tube it to the fiber optic that's been sanded along its length, and then stick it in the excelsior type. you wont even need to stand the starship the phaser rod will do it and light up!
reverse the lighting! put the yellow led in the borg, anchor it, tube it to the fiber optic that's been sanded along its length, and then stick it in the excelsior type. you wont even need to stand the starship the phaser rod will do it and light up!
@spaceagent-9 My thoughts exactly!  If the fo filament isn't stiff enough I still have fairly thin wire to fall back on.
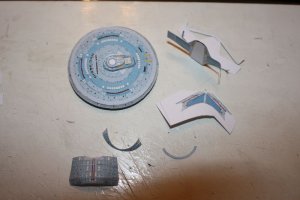
Today's building has been painfully slow. I was spot on about the intricacy of the rear end. Some pieces are so thin that they are splitting just from handling - fortunately it hasn't been in really obvious places - yet! lol
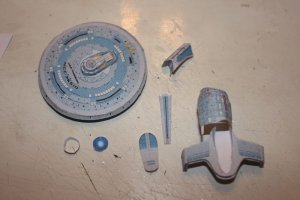
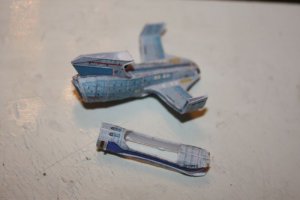
The secondary hull had to be gently eased into shape as it was fitted and I hit a bit of a problem when the instructions seemed to kind of peter out. I suppose it's easy enough to work out what goes where by referring to the ortho's that were included in the download though. Next came the nacelles:-
I've left a margin around the long blue bit for ease of attachment and to add a bit of stability for curving everything. The light blue tops have to be inset using grey borders and it was painfully slow cutting them out - they're ridiculously thin, but unfortunately they're also essential parts.
Getting one nacelle this far has taken longer than everything else put together. After this I reckon all the other ships will be a walk in the park - even the miniscule USS Bonestell - lol.
I am in awe, this model intimidates me, even thought the vector one looks real clean.
unbelievable and there should be some kind of award to give you for this one.
unbelievable and there should be some kind of award to give you for this one.


