Star Trek DS9:- Operation Return Diorama - 'micro' build log

linweseregon

Senior Member
Nov 23, 2013
269
505
123
Scotland
Now that the preliminaries are out of the way, I can begin properly. "Micro" is in inverted commas because this diorama, although composed of micro ships, is going to be around 3' x 4'. The list of ships I'm building is as follows:-
FEDERATION:-
Akira x3
Centaur - USS Centaur NCC 42043
Defiant - USS Defiant NX 74205
Excelsior x4 possibly with both variants
Federation Attack Fighter x7
Galaxy x5
Jupp - USS Jupp
Miranda x7 possibly with two variants
Sabre x2
Steamrunner x2
KLINGON:-
Bird of Prey x5
Vor'Cha x3
CARDASSIAN:-
Galor x25
Hideki x15
JEM'HADAR
Cruiser x10
Fighter x30
This isn't carved in stone though, and I might drop the numbers the closer I get to being an OAP ;)
 

Revell-Fan

Co-Administrator
Staff member
Administrator
Moderator
Aug 1, 2009
11,595
12,338
228
Vreden
The Dominion will not have a chance against this battle fleet! :)
 

linweseregon

Senior Member
Nov 23, 2013
269
505
123
Scotland
@Revell-Fan Not if I have anything to say about it! ;)

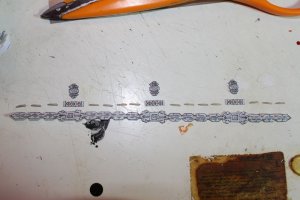
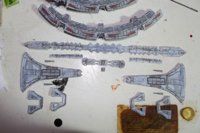
I'm starting with the model which is conspicuous by it's absence in my list: DS9. I'm using Ninjatoes' design and since the scale was given as 1:5000 I shrunk it to 63%. Unfortunately this gave me a space station 4" in diameter and I had to reprint the whole bloody lot at the original size. This was a bit of a pain as I'd double printed the design so that I could add some insets and protrusions. From now I'll be comparing the resized designs with a comparison chart cobbled together from L-Cars rather than trusting my calculations :confused:. It might take longer to get the size right by trial and error, but it's safer than just bulldozing ahead with printouts. Anyhoo, I cut the parts for the outer rim of the ring first:-
01.JPG
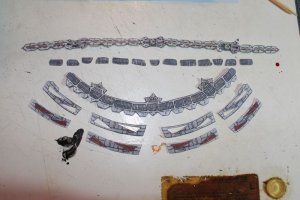
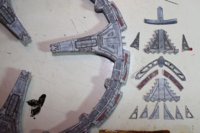
I've only shown one section; this has to be built three times. The diamonds with the red dots also had to be removed before those parts were connected. I then cut the parts for the upper surfaces of the ring and used my extra printout for insets and layers:-
02.JPG
Again, this has to be done three times.
 

spaceagent-9

Right Hand Man and Confidant
Moderator
Jul 10, 2013
3,104
3,473
143
62
pheonix
I cant even imagine yet , what kind of humungous project you got going here. is the jemhadar cruiser a public model? I wouldn't mind having one if they are for free.
 

linweseregon

Senior Member
Nov 23, 2013
269
505
123
Scotland
@spaceagent-9 Almost as humungous as your uploading of all your designs ;). I was PMed about the Jem'Hadar cruiser so I don't know if it's public or not :(. Marko (D-WHALE) might be able to tell you? :)

@kirby stewart Thank-you very much :)

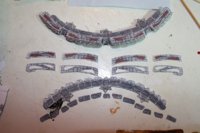
I've caught up with all the thirds of the ring, joined all the upper parts and cut the pieces for the lower half of the ring:-
03.JPG
I'm making a lot of extra work for myself, but even the addition of one more layer makes a world of difference and is well worth the effort.
 

Rhaven Blaack

!!!THE MAN BEHIND THE CURTAIN!!!
Staff member
Administrator
Moderator
Jun 12, 2009
12,493
9,857
228
Oregon
www.deviantart.com
You are off to a GREAT START on this project.
I too use the layering technique to get the desired effects that I want. It is an easy but very effective way to add detail to (most) any model.

KEEP UP THE GREAT WORK!!!
 
  • Like
Reactions: linweseregon

Revell-Fan

Co-Administrator
Staff member
Administrator
Moderator
Aug 1, 2009
11,595
12,338
228
Vreden
There are A LOT of parts which have to be built several times... This can be very daunting and exhausting at times but it is worth it. Just take your time and have a break on occasion. Looking good so far! :)
 
  • Like
Reactions: linweseregon

zathros

*****SENIOR ADMINISTRATOR*****
Staff member
Administrator
Moderator
Apr 5, 2013
13,499
9,551
228
I have the Christmas Ornament of this. This is going to be beyond words!! Linweseregon, you rule!! :)
 
  • Like
Reactions: linweseregon

linweseregon

Senior Member
Nov 23, 2013
269
505
123
Scotland
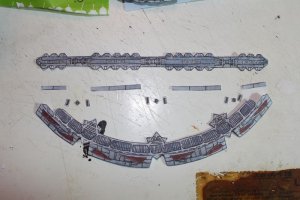
I connected the sections of the outer cargo ring and cut the parts for the runabout docking bays:-
05.JPG
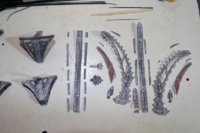
then, once the runabout docking bay arms were built, I joined everything together to form the outer ring. When this was done I cut the parts for the pylon bases:-
06.JPG
The parts for the pylon bases were duplicated six times - leading to a wee bit of repetitive strain with cutting the insets ;). On reflection, it would've been better to have recessed the runabout docking bays, but that would've meant printing page 1 another three times so I didn't bother.
 

Revell-Fan

Co-Administrator
Staff member
Administrator
Moderator
Aug 1, 2009
11,595
12,338
228
Vreden
Just a thought: Cut out the docking bay on one part, add an inverted box without cover and place a tiny runabout inside. Make it look like a runabout which is about to go up and launch. So you have hinted at the bays and displayed their purpose.
 

spaceagent-9

Right Hand Man and Confidant
Moderator
Jul 10, 2013
3,104
3,473
143
62
pheonix
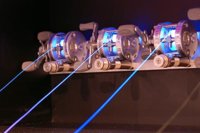
picicast07bos11.jpg I thought you would like to know about this stuff. fluorescent fishing line. check with zealot member, DJPinter about this. im sure the UK has this too. so much fishing going on it has to!
 
  • Like
Reactions: linweseregon

linweseregon

Senior Member
Nov 23, 2013
269
505
123
Scotland
@spaceagent-9 Yep, ebay over here has fluorescent fishing line (green from Hong Kong and orange from Ireland) which looks very interesting. No rods, but they'd be a bit too thick for this scale methinks... Thanks for letting me know :happy:

@Revell-Fan That would've been a great idea! The only wee problem is that the Dominion dudes are in control of DS9 so mibbe there wouldn't be runabouts on it :vulcan: ;)

All the pylon supports are now built and I've cut the parts for the pylons themselves x6:-
07.JPG
 
  • Like
Reactions: Cforrest900