SPACE: 1999 MARK IX HAWK

bgt01

Exemplary Confidant
Jan 26, 2012
576
843
93
Ohio
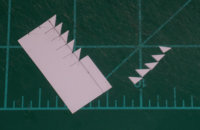
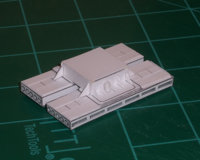
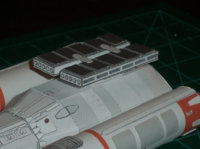
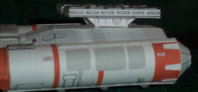
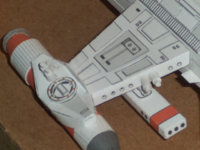
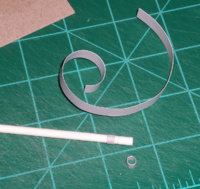
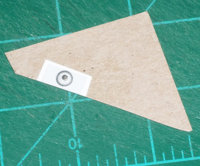
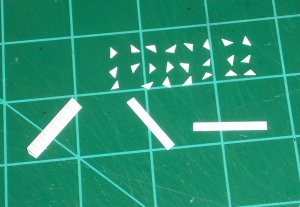
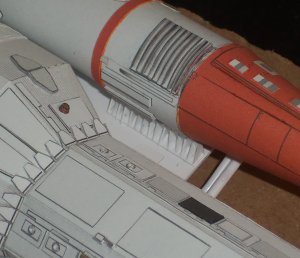
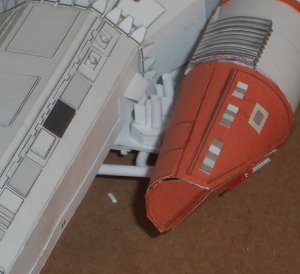
Thanks @Rhaven Blaack . Maybe I can put a small version of the band in as is. I'll have to take a look. The triangle/cones originally are intricate little parts with a groove and a good bit of curve. I thought about trying the curves, but the ends on the original parts are solid and that would mean trying to fill them somehow and doing it all a dozen times over. I went for the path of least resistance. If this was studio scale I'd sweat these parts out a lot more.

@Revell-Fan . I like the way you think!;)
 

zathros

*****SENIOR ADMINISTRATOR*****
Staff member
Administrator
Moderator
Apr 5, 2013
13,498
9,549
228
It is a really cool model your making there. You can't get this stuff anywhere else. Great news . :)
 
  • Like
Reactions: bgt01

Octoman

Active Member
Nov 15, 2013
122
225
48
Cleveland, Ohio
Great work your doing! No where NEAR enough 1999 models out there and it was such a great period show... Looking forward to more from you.

Best,

Ian
 
  • Like
Reactions: bgt01

bgt01

Exemplary Confidant
Jan 26, 2012
576
843
93
Ohio
SOLAR PANEL REBUILD

Attenion Moonbase Alpha! Mark IV Hawk build is active!

It is time to make some more progress. I picked up correcting the solar panels. My original design was missing the bottom details on the panels and the base was too wide. Using my X-acto and precision scissors I cut off the old base without destroying the panels. I built a new square base using 67 lb. cover and 2mm mounting board. Then I added the bottom of the base and the detail to the bottom of the solar panels.

Next I added the triangle frame pieces around the base using 67 lb. cover. For the smaller ones, I made 4mm squares and cut them diagonally to get 10 matching triangles. For the bigger ones I made two 5mm squares and repeated the process. All were glued in place using Super Glue gel.

On the studio model, there is a cylinder on the port and starboard sides of the panel base. I couldn’t find anything in paper that would work, so I went with styrene rod. I cut some pieces to fit and Super Glued them in place.

Finally, the whole panel assembly is glued to the hull.
 

Attachments

  • n1.JPG
    n1.JPG
    295.3 KB · Views: 23
  • n2.JPG
    n2.JPG
    241 KB · Views: 21
  • n3.JPG
    n3.JPG
    213.4 KB · Views: 25
  • n4.JPG
    n4.JPG
    235.6 KB · Views: 23
  • n5.JPG
    n5.JPG
    244.1 KB · Views: 20
  • n6.JPG
    n6.JPG
    351.3 KB · Views: 21
  • n7.JPG
    n7.JPG
    401.1 KB · Views: 21

zathros

*****SENIOR ADMINISTRATOR*****
Staff member
Administrator
Moderator
Apr 5, 2013
13,498
9,549
228
Great to see you posting "bgt01", my friend. :)
 
  • Like
Reactions: bgt01

bgt01

Exemplary Confidant
Jan 26, 2012
576
843
93
Ohio
THRUSTERS AND FRAMEWORK

Finally got some more Hawk time. I started mixing media by using styrene rod to replicate the conical wing details on the top and leading edges. Using the styrene was a natural choice. I did look for a paper or wood option but none came close to the size I needed. I had two problems with the rod.

The first problem was my little mitre boxes didn’t do a great job of helping me get straight cuts. This was my first time trying to use styrene and my learning curve was steeper than I thought it would be. Plus, these were pretty small parts I was making, which made it even more fiddly. The final result was not the best. I should have come up with some jig, but I really wanted to make some kind of progress. The consolation is the parts on the studio scale Hawk aren’t perfect either.

The second problem is really more of a preference. Naturally, the styrene doesn’t look like paper. It’s not a jarring difference, but it’s not as close a resemblance as I was hoping for.
 

Attachments

  • o1.JPG
    o1.JPG
    272.2 KB · Views: 29
  • o2.JPG
    o2.JPG
    254.3 KB · Views: 24

bgt01

Exemplary Confidant
Jan 26, 2012
576
843
93
Ohio
Next up was making the thrusters on the bottom of the main fuselage. These are gray mattress vents on the studio model. Mine are gray card stock curled into tubes and cut to size, then superglued to bases on 2mm chipboard. I eyeballed these until they were a size that went with the model. These are pretty small on my model, so I skipped replicating the vent detail inside the thrusters. I glued a small magnet into each thruster farthest to the rear in the hope I can use them as a model mount. If two aren’t enough I may add magnets to the other thrusters.
 

Attachments

  • o3.JPG
    o3.JPG
    326.9 KB · Views: 28
  • o4.JPG
    o4.JPG
    535.3 KB · Views: 23
  • o5.JPG
    o5.JPG
    225.7 KB · Views: 24
  • o6.JPG
    o6.JPG
    354.9 KB · Views: 93

bgt01

Exemplary Confidant
Jan 26, 2012
576
843
93
Ohio
Finally, I got after the bottom framework. I uses a tea candle to heat the appropriate rod and get the bends I needed. It was my first time trying this so there was a bit of trial and error, but it actually worked really well. I started with the rod connecting the boosters and worked my way back, trimming and bending until I got the sizes I needed. Once the frame was made and glued into place I build two squares out of scrap and 2mm mounting board and placed them at the end of the two pipes on the rear fuselage.

The big problem with the framework was they pipes that attach to the boosters are supposed to be straight and parallel, but my boosters are mounted so they don’t line up with the fuselage bottom. This makes the boosters too high to attach the pipes in the a straight line. Sadly, this is one of those things I never considered. Since a rebuild was out of the question, I adapted by using the candle to put a slight bend in the pipe.
 

Attachments

  • o7.JPG
    o7.JPG
    198.9 KB · Views: 28
  • o8.JPG
    o8.JPG
    769.6 KB · Views: 28
  • o9.JPG
    o9.JPG
    809.7 KB · Views: 28

zathros

*****SENIOR ADMINISTRATOR*****
Staff member
Administrator
Moderator
Apr 5, 2013
13,498
9,549
228
Wow, this is really nice!!

o6-jpg.147247
 

bgt01

Exemplary Confidant
Jan 26, 2012
576
843
93
Ohio
GREEBLIES

I added the “fin” details that go against the side boosters. I scratch built them out of 67lb. white card stock. Just a simple cut and Super Glue into place. It’s not an exact match because the original part has a curved back and mine is straight. To try and replicate that at this size would have been more trouble than it was worth. You can barely see them at this size.

Next, I made my version of the greeblie on the port side between the fuselage and size booster. I think the original part is a piece of a lunar lander model. I didn’t have a really good reference pic of this part, so the whole thing was done on the fly. The base is 2mm white mounting board sided with scrap white card stock to cut down on the “plastic” look above. The rest is various sizes of styrene rod and 67lb. white card cut into strips and squares. It’s not great, but it works and if I ever want to get done I have to balance the time I spend on these less-vital parts.

Last greeblie for the day was the small tower behind the command module. It’s also made of 2mm white mounting board sided with scrap white card. The black window and gray section on top are cut from scrap parts.
 

Attachments

  • p1.JPG
    p1.JPG
    382.4 KB · Views: 28
  • p2.JPG
    p2.JPG
    342.5 KB · Views: 29
  • p3.JPG
    p3.JPG
    235.7 KB · Views: 30
  • p4.JPG
    p4.JPG
    358.3 KB · Views: 30

zathros

*****SENIOR ADMINISTRATOR*****
Staff member
Administrator
Moderator
Apr 5, 2013
13,498
9,549
228
This ship looks commercial/studio quality! :)
 
  • Like
Reactions: bgt01

zathros

*****SENIOR ADMINISTRATOR*****
Staff member
Administrator
Moderator
Apr 5, 2013
13,498
9,549
228
Now, it's a sticky. This is one of the best examples of mixed media, keeping the model mostly paper, which gives a very realistic look, with plastic, manipulated so that the ship presents itself as one solid object, not something you even bother saying or thinking this or that isn't paper. What you see is a Space 1999 spaceship, and a damned good one, one of the best, I've seen. The absolute best of this ship, which I have never seen modeled before. This has set the standard. ;)
 

zathros

*****SENIOR ADMINISTRATOR*****
Staff member
Administrator
Moderator
Apr 5, 2013
13,498
9,549
228
Revell-Fan, PLEASE remind me to put this in line for "Model of Merit". :)
 
  • Like
Reactions: bgt01