Riviting Question

TrainClown

Member
Apr 17, 2003
861
0
16
66
Saskatchewan, Canada
Visit site
So I'm scratch building a Climax engine and I'm wondering about rivits. Has anyone developed a way to make rivits where you want them? I have an idea, but I would appreciate hearing how you guys have done it.

Rivits, got to have them. But how? :confused:

TrainClown
 

Ray Marinaccio

Active Member
Aug 4, 2003
1,940
0
36
66
Dewey Az.
Visit site
I usually emboss rivet detail onto a thin sheet of brass , aluminum (beer can) or plastic wrapper or overlay and solder or glue it in place.
I've made a few different tools to do this but it can be done by embossing each rivet with a small nail.
These are some of the home made tools.
 

Attachments

  • rivittools.jpg
    rivittools.jpg
    34.1 KB · Views: 164

jon-monon

Active Member
Aug 15, 2002
4,590
0
36
59
Cobblers Knob, IN
www.2guyzandsumtrains.com
Hiya friend, I use the little tool that is meant to roll the outline of a sewing pattern onto fabric. A Clock gear is said to be all the better. It's used to roll the ribets onto the backside of a thin sheet of styrene.

The other common method is to use a syringe filled with epoxy or a needle dipped in epoxy and painstakenly apply each ribet.

here's an example of rolled on riberts. They were applied to a sheet of styrene that was glued on to the model (the area circled in red).

Edit: the sewing tools looks like rays tool shown on the right of his photo.
 

Attachments

  • ribbets.jpg
    ribbets.jpg
    62.2 KB · Views: 155

TrainClown

Member
Apr 17, 2003
861
0
16
66
Saskatchewan, Canada
Visit site
Thanks for the help

Seeing as how I have already constructed the parts that need to be riveted, I guess I'll be doing the old dots of epoxy routine. There are some rivets I need to replace that were "accidentally" removed when I stripped the paint off the cab of one of my engines. Thank God you didn't suggest that I cast the rivets and individually glue them on! :rolleyes:

I shall experiment with rivet applicators and keep you posted on what I find.

Too bad this isn't N scale I'm working in or I might be able to get away without the rivets.

Thanks for the help,

TrainClown
 

TrainClown

Member
Apr 17, 2003
861
0
16
66
Saskatchewan, Canada
Visit site
Here's an idea

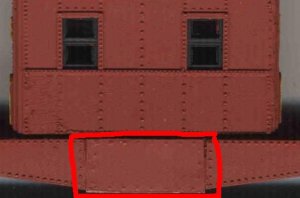
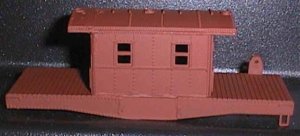
So my problem is applying a row of rivets to an existing plastic model, one that I cannot punch rivets from the inside, and I came up with this idea. I haven't tried this yet but I want to try it.

My idea is to use a stencil, of sorts, to apply a row of rivets. I think a successful stencil could be made from very heavy vinyl tape. Now I don't have any of this type on hand, but I have seen it and I think it is used as a mickey-lickey fix it for plumbing jobs. It is much thicker than masking tape. An alternative to this may be two layers of duct tape.

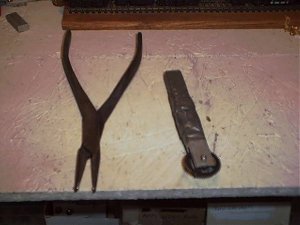
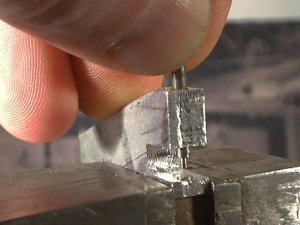
First, I would have to make a tool to punch holes in the tape the size of rivets. Merely piercing the tape would not give a uniform shape so I would have to make a punch like a leather punch, but very small.

Once I have the punch made, with my two layers of duct tape applied to a plastic cutting board, I would measure out centers for each rivet along the line on the tape. I would probably only need to use a piece of the tape about half an inch wide. Then I would go down the row with the punch and punch a little hole on the centers I marked. Once this is done, peel off the tape and apply it to the model with the row of holes going down the center line of the row of rivets. Once tape was fastened satisfactorily, I would mix up some 5 minute epoxy and squeegie it down the tape, filling the holes and wiping off the excess. Once the glue has dried, peel off the tape and there should be a row of rivets.

As I said, I haven't tried this. One problem could be the epoxy sticking to the tape better than it sticks to the model and the rivets will come off with the tape. Perhaps a release could be applied to the tape before it is peeled off the plastic cutting board. Something like Pam cooking spray. Also, this technique would wind up giving you square topped rivets rather than a dome top. Is that a problem?

Anyways, it's something I'm going to try.

Always thinking,

TrainClown
 

mhdishere

Member
Feb 27, 2003
164
0
16
60
New Jersey
Visit site
Trainclown,
If you only need a handful of rivets that were accidentally removed from a model, the easiest way may be to just drill really small holes where the rivets go, then stick in a short length of approriately sized wire held in with ACC. Again, depends on how many rivets you lost, but I think that's the method I'd use if it's just a handful.

I've also heard of people chiselling rivets off a plastic boxcar shell and gluing them in place.
 

jon-monon

Active Member
Aug 15, 2002
4,590
0
36
59
Cobblers Knob, IN
www.2guyzandsumtrains.com
mhd - a handfull must be thousands! Oh, a scale handfull :rolleyes: I get it :rolleyes: sorry... :D

TC - I used the rolled on rivets on a existing model, by rolling them onto a paper thin sheet of styrene. I made that transfer caboose and had to patch a missing piece on the old flat car
 

Attachments

  • sor1.jpg
    sor1.jpg
    56 KB · Views: 110

jon-monon

Active Member
Aug 15, 2002
4,590
0
36
59
Cobblers Knob, IN
www.2guyzandsumtrains.com
It looked so bare, so I cut out the thin styrene and rolled the rivets on it. The rivets are more of a "-" than a "." but I think if you use a clock gear or file the teeth on the sewing tool, they would come out better. Dunno if you can do this on the model in question...
 

Attachments

  • sor2.jpg
    sor2.jpg
    57.2 KB · Views: 101

TinGoat

Ignorant know it all
Trial and error..

Before you start, I would suggest that you try a couple of different methods on some scrap material.

The stencil idea might work... Instead of using the epoxy, I would try some Squadron Green Putty. It is used for filling gaps and holes.

Or...

You could forget about rivits and if anyone asks... Just tell them that the parts are welded together... :D