problem putting together pieces to train

prodigy2k7

Member
Dec 17, 2006
377
0
16
35
I got this loco...
http://www.atlasrr.com/HOLoco/hogp38403.htm

Just received it today...

Putting a few ieces together like the light visor thingy (outside windows)
and the snow plow and etc...

Im having a problem connecting the snow plow... the holes that the snow plow connects on isnt a hole at all, just a notch, it doesnt go all the way through, it it supossed to do that? it doesnt seem like it stays on properly...

Any suggestions?

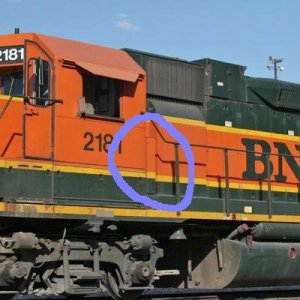
I also have 3 pieces i dont know where they go...i got a picture of them...
piecesgb9.png
Edit: I can tell its not on all the way because the couplet bar hits it (the bar that unlatches the coupler)
 

Jim Krause

Active Member
Apr 7, 2005
1,270
0
36
89
Polson, MT
prodigy: Did you buy this unit new? There should have been an exploded view of the add-on parts with the loco. Sometimes there will be parts for more than one version of a model included but I don't know if this is your case. If you are sure of the location of the piece that looks like the holes are not deep enough, you can get the appropriate size drill and a pin vise to clean the holes out.
 

prodigy2k7

Member
Dec 17, 2006
377
0
16
35
yes im sure its the right holes, there are 4 other holes that go through but thats for the footstep...i think you choose between the footstep or the snow plow right?

I got instrudctions but it has ALL the pieces, not just the ones you need to connect

I found it...
ECAFB 890228
It doesnt show where it goes, its inbetween the frame (bottom) and body (cover; top)
There is no arrow to show ehere it goes
 

Jim Krause

Active Member
Apr 7, 2005
1,270
0
36
89
Polson, MT
How about checking a photo from the Atlas website or a prototype photo from whichever railroad the model represents? Sometimes you can end up with a real guessing game that gives your ingenuity a challange. I was going to look at the website that you listed but my old puter decided to quit. I'll go have a look and get back with you.
 

prodigy2k7

Member
Dec 17, 2006
377
0
16
35
lol i tried looking and zooming in...couldnt see it :(
from front to back, the big piece seems to be in the middle somewhere according to this picture lol
 

Jim Krause

Active Member
Apr 7, 2005
1,270
0
36
89
Polson, MT
Unfortunately theres not a lot of detail concerning assembly in the two photo's. I'll do some more researching on the Atlas website.There must be someone out there in cyberland who has experience with this loco. It's a really common model.
 

Jim Krause

Active Member
Apr 7, 2005
1,270
0
36
89
Polson, MT
Is the large piece in the upper right corner of your photo the air filter compartment that goes on the long hood, behind the firemans side of the cab? Which railroad is your model?
 

LongIslandTom

Member
Apr 8, 2006
662
0
16
Long Island, NY
Heya Prodigy2K7,

The piece you circled near the top of the photo is the electrical cabinet air filter box (ECAFB) I think. If that's what it was, it goes behind the cab on the walkway on the fireman's side. Look at the photo I enclosed below (I circled the ECAFB).

The two black pieces are engine compartment vents. I don't think Bunsuf used those on their GP38s so you can leave them off.

As far as the plow goes, Atlas sometimes doesn't take into account the paint will make mounting holes smaller, which might be why the plow didn't fit. You might have to enlarge the mounting holes a bit for the plow to pop on.

Hope this helps, and I hope you enjoy your new Atlas engine! :thumb:
 

Attachments

  • bunsuf.jpg
    bunsuf.jpg
    28.1 KB · Views: 103

prodigy2k7

Member
Dec 17, 2006
377
0
16
35
ill just leave it off, i took a look there are no holes to attach it.... thanks for the tip for the snow plow ill take a look...peace

thanks tom for the loco ;)
 

LongIslandTom

Member
Apr 8, 2006
662
0
16
Long Island, NY
Yeah I think the ECAFB just gets glued to the shell via the posts that's on the box-- It's supposed to sit away from the body. That's why there are no mounting holes for it. In the future when you feel more confident, you can just put a spot of super glue on the standoffs on the ECAFB, and position it in place.

So, how do you like the way that Atlas engine runs? Hopefully you are pleasantly surprised on how smooth and quiet it is? :thumb:

BTW you are going to get a Digtrax DCC system, right? Remember you have to set a jumper on the Atlas DCC circuit board inside the engine to enable it to run under DCC.
 

prodigy2k7

Member
Dec 17, 2006
377
0
16
35
thats why :p, the thing is so delicate gosh every where u touch it bends! lol...
I cant wait to get this baby going...
 

prodigy2k7

Member
Dec 17, 2006
377
0
16
35
How do you older guys put theme small pieces together?
Im 18 and im skinny, i got average/skinny fingers for a teen, i sometimes had a hard time putting some pieces on since they were so small...
 

Ralph

Remember...it's for fun!
Jun 18, 2002
5,134
0
36
64
St. Paul, MN
Visit site
prodigy2k7 said:
How do you older guys put theme small pieces together?
Im 18 and im skinny, i got average/skinny fingers for a teen, i sometimes had a hard time putting some pieces on since they were so small...


I'm 47, not as skinny as I used to be, and always have found small parts to be my nemisis! :) Patience, tweezers, and breathing slowly have helped. :D Seriously practice helps a lot too.
Ralph
 

Jim Krause

Active Member
Apr 7, 2005
1,270
0
36
89
Polson, MT
Seriously, its a learned thing with some idea that you want to duplicate reality to a high degree. Everything in life seems difficult the first time (remember learning to tie your shoes). In my case I worked in the avaition industry where close tolerances are the norm. I built models for a living for awhile. As the other old guys mentioned, " small tools and lots of light and patience". Speaking of patience. My dog recently chewed up part of a roof for a building I'm working on. I had just spent several hours putting individual pieces of tin roofing on and had to start over. The dog is still alive. Is that a definition of patience or what?