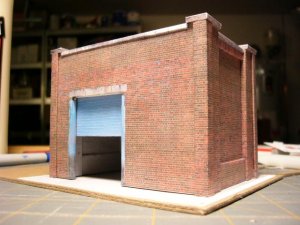
Ocalicreek builds a scalescenes.com card structure!

MasonJar

It's not rocket surgery
Oct 31, 2002
5,362
0
36
Ottawa, Canada
Visit site
Wow guys! Excellent work! :thumb: :thumb:

I wonder if your humdity concerns could be addressed by laminating the paper to styrene instead. You may be able to keep costs down by picking up scraps at a sign shop. Various thicknesses would be available so little to no layering would be needed.

Andrew
 

scottcn

New Member
Jul 8, 2006
75
0
6
coastal SC
ocalicreek said:
When I glued the cover layers on the roof base layer I got them all turned round, so the hatch above doesn't line up with the hatch printed beneath.

If you really care about it, you could easily print out another copy of the ceiling and glue it to the underside of the roof, making sure that things are lined up the right way this time :D. But, it's like you said ... who is really going to take a little periscope (or angled dental mirror) and look at the ceiling inside this shed to find out about your little "oops"?

ocalicreek said:
Check my layout thread in the future for that possibility...

Galen, I have been following the progress of your new layout. Can't wait to see your little gem of a freight shed, all lighted up, sitting pretty on that layout in the (near?) future.

MasonJar said:
I wonder if your humdity concerns could be addressed by laminating the paper to styrene instead.

I like this idea. For the structure I just built, I'm thinking about "painting" the exposed cardboard edges of the model (i.e. the bottom of the structure and also the top edges of the door openings) with white glue and hoping that the dried glue will serve as a barrier to humidity getting to the model. I know that water can soften white glue - does anybody know if humidity will "dissolve" it?

- Scott
 

Wabash Banks

Member
Mar 11, 2005
115
0
16
52
Indiana
I finished mine up as much as it is getting done now due to other projects I am working on as well. One thing that is really different, and alludes to Galen's comments on the clarity of the instrucions was the freight door. Mine is more like a cover over the top of it. It made sense to me to have it that way since the tracks are often covered over with some sort of overhang to keep them from rusting as badly.
Otherwise, the walls are not he same height, but I tried to get them correct at the top. I plan on having weeds at the bottom right next to the building so it won't be noticable.
The long wall caps didn't fit. I didn't cut them but they were too short. I am not sure what I did wrong as everything else seemed to match up correctly. I will likely pull them off and redor them which brings me to my next point...While I think it was interesting that this was entirely paper and glue, I would not build an N scale version like that again. After having made this thing twice, the smallest segments of paper in N are just too flimsy. I would make them out of styrene. Styrene will be what the caps are made out of when I am done.
I messed the roof up the same way as Galen and then I folded the top roof the wrong direction. I have no idea what I was thinking. I will print it back out and fix it in the future. When I do I think I will go with Scott's idea and ditch the suitcase and put an open hatch.
The thing is so small you can't see inside it to see if I got it matched up correctly or not.

Lighting is also a great idea for this one. I will be adding it.

All in all this is a great little building with quite a bit of character. It has been fun building it, twice now. You also have yourselves a first class thread on constructing this thing!!
 

Wabash Banks

Member
Mar 11, 2005
115
0
16
52
Indiana
Oh yeah, you guys probably want some pictures huh?? Man does the camera ever pick up problems from 3 inches away!
Here you are:

freightback.jpg


freightdock.jpg


freightfront.jpg


freightstreet.jpg


freightquarter.jpg
 

scottcn

New Member
Jul 8, 2006
75
0
6
coastal SC
Wow Dan. I can't imagine building this thing in N scale. I'm impressed! Your last shot totally makes me realize that N scale is *not* the right scale for me. My fingers are too big and eyesight too poor to work on something that's only a bit bigger than a quarter. I think I'll stick with HO

- Scott
 

ocalicreek

Member
May 4, 2005
824
0
16
48
Puyallup, WA
groups.yahoo.com
Dan - congrats on completing the structure! Yes, I can see what you mean by a cover over the door track. That seems to work just as well. Thanks for sharing your pictures and thoughts.

And I agree with Scott, N is just way too tiny for me! That last comparison shot really shows the size. Perhaps it also illustrates an advantage of this type of construction - the coloration on the brick is great for N, and the building is already 'painted' and weathered better than any preassembled plastic structure on the market today, IMO.
 

Russ Bellinis

Active Member
Feb 13, 2003
4,501
0
36
78
Lakewood, Ca.
Visit site
Me thinks that building this kit in n-scale would give one an even greater apperciation for Robin's skills! I know I don't want to try n-scale, but I'm going to save the url for future use in ho scale once we get the remodel done on our house so that I can start my model railroad again.
 

Wabash Banks

Member
Mar 11, 2005
115
0
16
52
Indiana
Thanks for the compliments guys! N scale is tough at times when you want to put the detail into it that the larger scales have, but as you said Galen, it also has it plus side in that something like this looks great. The bricks are so small and together that they really look good.
Just for entertainment purposes and showing how much can be done with N scale, here is a building I am working on for my micro layout that I am building inside a junk computer monitor. The bracing for the dock is 1/32 X 1/64, or more or less an N scale 2X4. It is made by taking a 1/32 thick sheet of basswood and shaving it REAL fine along the edge...
The building is 10X20 with a 5 foot leanto on one side and a 5 foot wide fright dock on the other. It forms a 20X20 cube in essence.
hbunder1.jpg


hbquarter1.jpg
 

ocalicreek

Member
May 4, 2005
824
0
16
48
Puyallup, WA
groups.yahoo.com
Wall caps

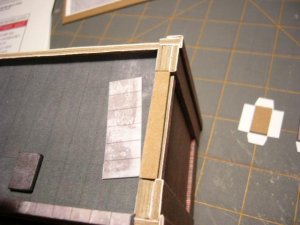
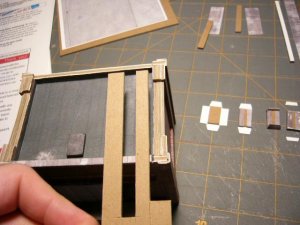
Well, the short wall thickness got me again! Here are some photos illustrating the discrepency in short/side wall thickness vs. the width of the wall cap base layer. I ended up using some scrap, as you can see, cut to length and wrapped with the printed cover layer. Fortunately it was already big enough and didn't have to be modified and reprinted in order to fit the new base layer. However, I did have to notch the short wall cap in order to fit up against/in between the buttresses.

P1040501.JPG

P1040502.JPG

P1040503.JPG

P1040504.JPG

P1040507.JPG

Next...the buttress caps!
 

Wabash Banks

Member
Mar 11, 2005
115
0
16
52
Indiana
Galen, you know, I really think I like the notched caps best! I think it has a more "fitted" look. Great job on this one!! Also great job on getting some other folks to participate on this one with an outstanding thread that is sure to be a help to anyone else who puts this model together.

Thanks for the kind words on the old west freight house. I have quite a bit more done on it. I will post a new thread when I complete it.
I got the idea for a computer monitor from Carl's Micro site. It will look great on my work desk.
 

ocalicreek

Member
May 4, 2005
824
0
16
48
Puyallup, WA
groups.yahoo.com
Dan - thanks for the fine compliments. It has been fun sharing the progress like this...keeping the camera handy and just snapping images each step of the way. I haven't used all the images, just the ones that have best shown the critical steps or other learning points I've discovered along the way. I do hope others find this helpful.

Perhaps later tonight I'll post the last set of pics showing the buttress caps and 'completed' structure. (Completed, as per instructions...well, without the clear sealant coat). I have a few more details I'd like to add and some touch-up weathering/painting. But really, I'm ready to get on to the next projects!
 

ocalicreek

Member
May 4, 2005
824
0
16
48
Puyallup, WA
groups.yahoo.com
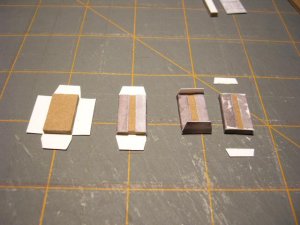
buttress caps

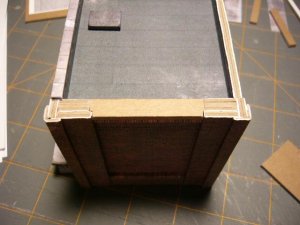
Here is a picture illustrating the construction of the buttress caps. I modified the process by cutting off the final two flaps after gluing them to the sides. Folding them beneath would have made the bottom uneven with a gap between the flaps. Perhaps if I had printed on thinner paper this would not have been a problem...who can say? I'm mostly happy with how the caps turned out. I'll be happier after I seal them and paint over the exposed edges and rough spots I had to file at the corners.

P1040498.JPG

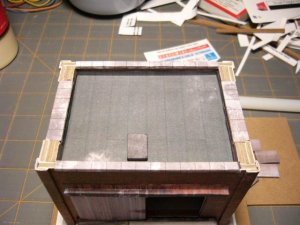
The next shot is a view from above showing the buttress caps completed and glued in place.

P1040511.JPG

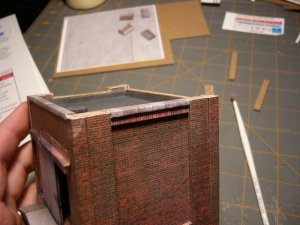
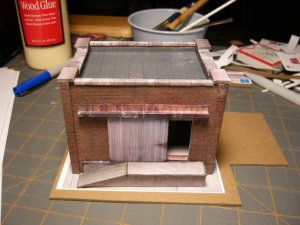
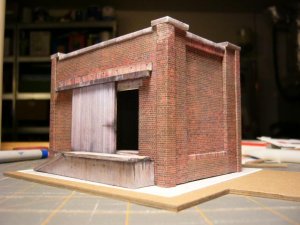
The final two shots are 'eye level' 3/4 beauty shots of the 'completed' structure (minus a good overspray of matte finish...all I have is gloss right now...Michael's here I come, and any touch-ups or additional detailing).

P1040517.JPG
P1040518.JPG
 

ocalicreek

Member
May 4, 2005
824
0
16
48
Puyallup, WA
groups.yahoo.com
I finally sprayed the structure with a couple light coats of matte finish sealer. I still plan to put a few 'finishing touches' on the building, like a gutter/drain...how is the water supposed to drain off that roof without one?...and a few others. But that's all the work for now. I'm setting it aside until I'm ready to put on those little extras.

General thoughts on construction. Hmmm. Well, I could see this kit working just as well with wood or styrene as the base material. In fact, with sytrene you'd get a cleaner cut and an easier 'cut' using the scribe and snap method. With the cover layer, you really don't know what's beneath it...it could be anything, really.

Yes, cardstock (especially cerealboard) may be cheaper than styrene or wood...but I'm not sure this kit really utilizes cardstock to its full potential as a modeling medium. It's almost more of a modeling 'tedium', having to cut all those layers, ensure they line up properly, etc.

I think knowing the intended wall thicknesses (or having a bit more wiggle room planned into the kit) would be helpful. "When you get to this point it should fit this way, or measure to be _____" That'd be nice.

Perhaps the paper I printed on was a bit thick. If I had used a thinner paper it may have creased a bit more easily. Then again, I like the texture of the paper I used.

The actual printouts themselves are fantastic. Well weathered and colored to begin with, it really has a great brick look to it. Including graffitti options was a nice touch.

I found the roll up door to be a bit clumsy to roll up, and I could see where making the creases on some of the more delicate items like corner caps in N scale would be a real challenge. But overall the folding wasn't that difficult. I feel the burnishing tool and a good paintbrush for applying the glue were the star tools of this project.

The instructions could have been clearer on the overhang for the door track. Also there were times where reading ahead paid off...this could have been helped with a little more info up front. Having the steps laid out as they were I was able to check off my progress and get a sense of accomplishment along the way.

All in all, an enjoyable project. I have learned much about working with cardstock and I look forward to other offerings from this and other companies that will work on my layouts or in the era I'm modeling.
 

scottcn

New Member
Jul 8, 2006
75
0
6
coastal SC
Galen,

Thanks for starting this thread and keeping things moving along. I've been out of town for a little while and it is good to be back and see that beauty that is your finished model. I agree with you that the shed looks great - the brickwork is beautiful. In addition to a good looking model, the finished produced is very solid - this isn't just a simple box made out of cerealboard. Excellent job to you, and to the guy(s) over at scalescenes.com!

- Scott