Novice Tutorial - Accurail Boxcars

Gary S.

Senior Member
Oct 13, 2005
1,576
0
36
Texas
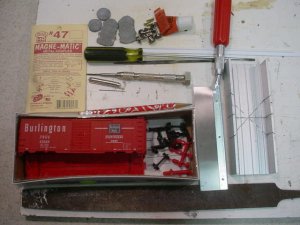
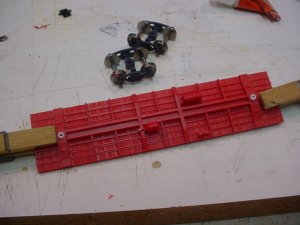
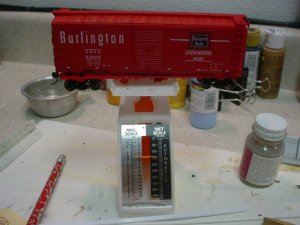
I've decided I like the Accurail kits quite a bit, no, they aren't nearly as detailed as some of the high dollar offerings like Kadees, but on the other hand, they are rugged and will stand up to repeated handling without breaking off grab irons and ladders. Plus the price is right, I often find them at the LHS on sale for 7 or 8 bucks each, and recently found some on sale for $5 each:) !

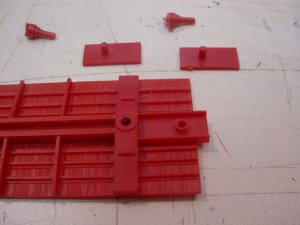
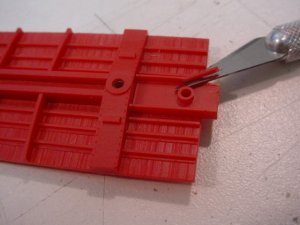
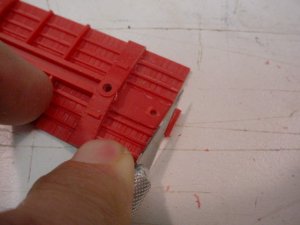
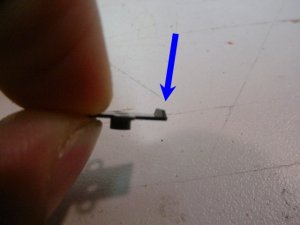
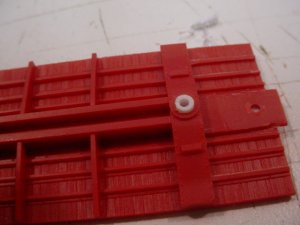
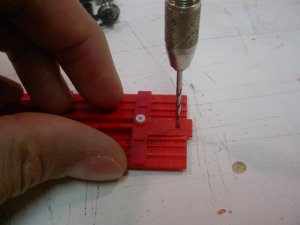
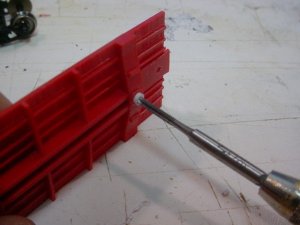
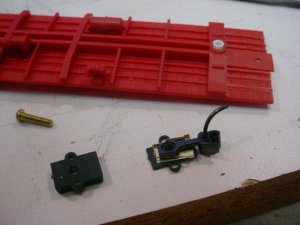
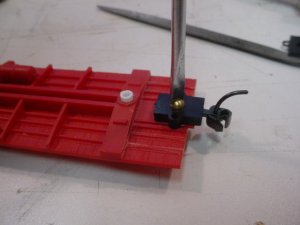
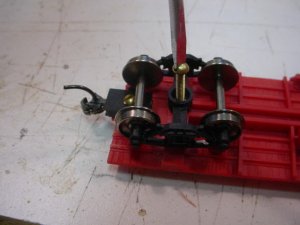
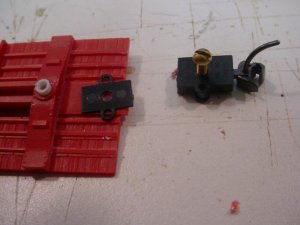
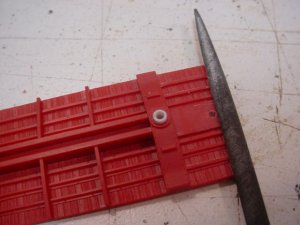
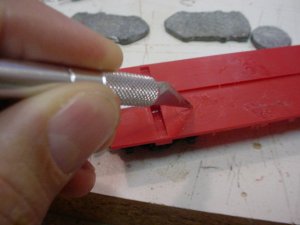
Now, there are a few things I don't like about them, in particular the friction fit draft box lid, the friction pin used to hold the trucks on, the couplers, and the plastic wheels. I'm going to do a tutorial here, aimed primarily at beginners because you expert modelers probably have better ways to do this than I do, plus, I am pretty much a beginner myself. I hope I can give some good info concerning the tools, techniques, and materials used for modifying freight cars to others who are just entering the hobby. And, much of this tutorial can be applied to any of the lower end freight cars such as Life-Like, Athearn, and Roundhouse kits.

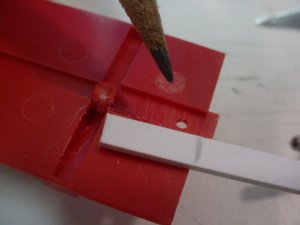
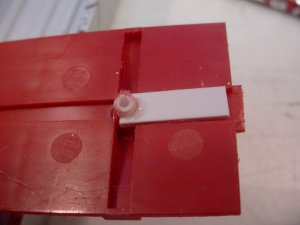
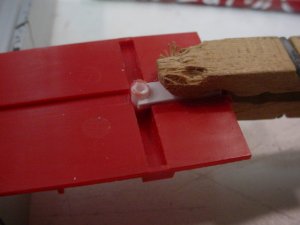
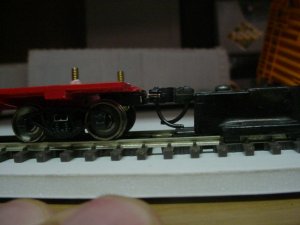
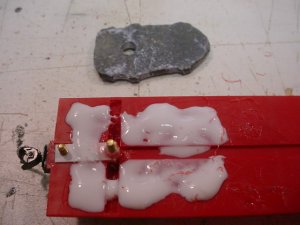
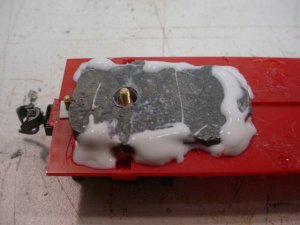
What I will do to this car is attach the trucks with brass screws, install Kadee couplers and draft boxes, add metal wheels, and properly weight the car with lead instead of the steel weight that comes with the kit.

Anyway, here goes....
 

Gary S.

Senior Member
Oct 13, 2005
1,576
0
36
Texas
One more thing before I start. I have to admit that the new Athearn RTR boxcars are pretty inexpensive and pretty good. I have seen them on-line as low as $9 each, and the LHS usually has them for a bit over $12. Considering that upgrading a $6 kit with another $2.50 for metal wheelsets, $1.50 for Kadee couplers, and maybe 50 cents for miscelaneous supplies, that is $10.50. So you have to ask if what I am about to do is worth the trouble. The Athearn RTRs come with metal wheelsets, but the couplers aren't Kadees, so I would be replacing them anyway. But the whole deal is, I enjoy messing around with this stuff, plus, these techniques can definitely be used on those $2 junkers that you find at the train shows.

This first pic shows the kit and the tools and materials needed.

Kadee #47 couplers
lead weights
pin vise with 2-56 tap and pilot bit
large file and small file
2-56 screws
razor saw and miter box
hobby knife
glue
1/8" diameter plastic tube
1/16" thick plastic strip
Intermountain metal wheelsets
 

Attachments

  • MVC-001S.JPG
    MVC-001S.JPG
    38.7 KB · Views: 174

Gary S.

Senior Member
Oct 13, 2005
1,576
0
36
Texas
Here are the friction fit pieces which just don't cut it for me. I like the security of 2-56 screws instead, so that is the main item of the tutorial.
 

Attachments

  • MVC-002S.JPG
    MVC-002S.JPG
    39.7 KB · Views: 177

Gary S.

Senior Member
Oct 13, 2005
1,576
0
36
Texas
First thing we'll do is trim off the molded on draft box. Using a hobby knife, slice off the sides and the round center part of the draft box. We'll replace this with a Kadee draft box.

At this point, I would like to give the caution of being very careful with sharp instruments, and I say this with experience. Always take proper care to not damage yourself!!
 

Attachments

  • MVC-003S.JPG
    MVC-003S.JPG
    39.3 KB · Views: 174

Gary S.

Senior Member
Oct 13, 2005
1,576
0
36
Texas
It is also necessary to trim a little bit off of the old draft box end where it protrudes out from the car. The flange on the Kadee draft box lid will not clear the long end. Use the lid to measure for the cut. Line up the hole in the lid with the center of the old draft box and cut the excess off. The length is not too critical, it can be too short, you just need to be sure it doesn't interfere with the flange on the lid.
 

Attachments

  • MVC-004S.JPG
    MVC-004S.JPG
    38.8 KB · Views: 175

Gary S.

Senior Member
Oct 13, 2005
1,576
0
36
Texas
Here is the flange of the lid if there is any question of what I am talking about.
 

Attachments

  • flange.JPG
    flange.JPG
    45.4 KB · Views: 170

Gary S.

Senior Member
Oct 13, 2005
1,576
0
36
Texas
Take a fine-toothed large file and smooth down what is left of the molded-on draft box. For now, just smooth out the rough edges left from when we cut off the sides and center pin. Later on, we may have to file some more to get the proper height for the coupler, but I have found that the Kadee #47 (just like the #5 except offset up) works well on the modified Accurail cars.
 

Attachments

  • MVC-005S.JPG
    MVC-005S.JPG
    38.8 KB · Views: 170
  • MVC-006S.JPG
    MVC-006S.JPG
    38.9 KB · Views: 168

Gary S.

Senior Member
Oct 13, 2005
1,576
0
36
Texas
Next we'll modify the attachment of the trucks. Put the friction pins into the scrap box, you may be able to use them for roof vents or some other detailing of structures.

We'll use 1/8" plastic tube and tap it for a 2-56 screw. First we need to install it into the car floor. Get a drill bit that is very slightly smaller than the tube. Drill out the hole where the truck goes.
 

Attachments

  • MVC-007S.JPG
    MVC-007S.JPG
    39.3 KB · Views: 175

Gary S.

Senior Member
Oct 13, 2005
1,576
0
36
Texas
Next cut 2 pieces of plastic tube, about 3/8" long, length isn't critical. Put some glue in the hole and insert the plastic tube, leaving a little bit sticking out of the bottom. This will extend down through the hole in the truck. We will file it to proper length later, so leave maybe 1/16" inch sticking out, the length out the other side is not critical. Take care not to get glue on the place where the truck will ride. (is this called the "bolster"?)
 

Attachments

  • MVC-017S.JPG
    MVC-017S.JPG
    39.1 KB · Views: 175

Gary S.

Senior Member
Oct 13, 2005
1,576
0
36
Texas
Now we will reinforce the place where the coupler mounting screw will go, the floor is pretty thin at this spot. We'll take a piece of plastic strip, about 1/16" in thickness, and glue it on top. What this does is give us a place to drill through and tap for the 2-56 screw. If we don't do this, it is likely that the thin floor would strip out when we tightn down the coupler box screw. Cut a piece to fit as shown.

I got fancy and drilled one end of the plastic strip and cut it so it would fit against the tube that we put in in the last step. This isn't necessary, but I figure it would help strengthen the assembly.
 

Attachments

  • MVC-009S.JPG
    MVC-009S.JPG
    39.1 KB · Views: 174

Gary S.

Senior Member
Oct 13, 2005
1,576
0
36
Texas
Next, glue the strip down and clamp it with a clothes pin. I use Testors regular model glue for this.
 

Attachments

  • MVC-010S.JPG
    MVC-010S.JPG
    37.9 KB · Views: 173
  • MVC-011S.JPG
    MVC-011S.JPG
    39.5 KB · Views: 167

Gary S.

Senior Member
Oct 13, 2005
1,576
0
36
Texas
While the glue is drying, I glued the underframe details in and put the metal wheels in the trucks.
 

Attachments

  • MVC-015S.JPG
    MVC-015S.JPG
    39.4 KB · Views: 166

Gary S.

Senior Member
Oct 13, 2005
1,576
0
36
Texas
After the glue is thoroughly dried, we will drill the holes for the coupler box mounting screws. Use the appropriate bit for a 2-56 tap. Even though the tube for the truck screw has a hole already, it wouldn't hurt to run the drill through it too.
 

Attachments

  • MVC-001S.JPG
    MVC-001S.JPG
    39.5 KB · Views: 166

Gary S.

Senior Member
Oct 13, 2005
1,576
0
36
Texas
Next, tap the coupler holes and the truck holes. Take your time, it doesn't hurt to run the tap in a little way, then back it out and clean the plastic off, then run it in some more, gradually threading it through instead of going through without stopping.

Again, make sure the glue is dry, if it isn't, the tube may come loose and spin with the tap.

For other brands of cars like Life-Like, I throw away the old trucks and add some Atlas trucks with metal wheels. I plug up the big holes where the trucks snap in, using some plastic sprue glued in. Then I drill and tap it for a screw. The Atlas trucks are designed to fit a 2-56 screw, whereas Proto2K and Athearn trucks have a larger hole and need a piece of the tube like we did on this car.
 

Attachments

  • MVC-002S.JPG
    MVC-002S.JPG
    39.1 KB · Views: 164

Gary S.

Senior Member
Oct 13, 2005
1,576
0
36
Texas
Time to put the couplers on. Like I mentioned, the Kadee #47 should give us the correct height. If not, we'll either file down the mount some more, use a #5 Kadee, or shim the draft box, or shim the trucks with fiber washers. This is where a Kadee coupler height gauge comes in handy.

And we'll put the trucks on also. I like brass screws, or stainless, as they are non-magnetic. I've found that uncoupling magnets can cause cars with magnetic materials in them to move around when near the magnets.
 

Attachments

  • MVC-003S.JPG
    MVC-003S.JPG
    40 KB · Views: 160
  • MVC-004S.JPG
    MVC-004S.JPG
    38.6 KB · Views: 166
  • MVC-005S.JPG
    MVC-005S.JPG
    38.4 KB · Views: 163

Gary S.

Senior Member
Oct 13, 2005
1,576
0
36
Texas
Time to check the coupler height. This one came out a bit high, so I'll put a shim between the draft box and underframe. The other one was hanging down just a bit, so I'll correct that by filing the underframe some to change the angle.
 

Attachments

  • MVC-006S.JPG
    MVC-006S.JPG
    39.1 KB · Views: 116
  • MVC-007S.JPG
    MVC-007S.JPG
    40 KB · Views: 121
  • MVC-008S.JPG
    MVC-008S.JPG
    39.3 KB · Views: 121

Gary S.

Senior Member
Oct 13, 2005
1,576
0
36
Texas
It takes a little fiddling to get them just right, filing, shimming, but they are looking dead on now.
 

Attachments

  • MVC-002S.JPG
    MVC-002S.JPG
    38.7 KB · Views: 115

Gary S.

Senior Member
Oct 13, 2005
1,576
0
36
Texas
Last, I will put some lead weights on. My Dad used to shoot black powder rifles and pistols, so I have access to lead bullets and balls. I just smash them flat with a hammer and glue them on with white glue. I rough up the plastic a bit, just to give the glue somethng to grab to.

I weigh the car to figure out how much lead to add.
 

Attachments

  • MVC-003S.JPG
    MVC-003S.JPG
    39.3 KB · Views: 113
  • MVC-004S.JPG
    MVC-004S.JPG
    38.4 KB · Views: 114

Gary S.

Senior Member
Oct 13, 2005
1,576
0
36
Texas
It takes about 24 hours for the glue to dry completely, so leave the car sitting level for that long, otherwise the weight will slide to the side. Double sided sticky tape would probably be a better and quicker alternative.

That concludes the tutorial, I hope there was valuable info for someone. And, if anyone can give me some pointers on my technique, please do!!!!

Thanks,
Gary