Model Of The Month: Ford Tri-Motor (Zorn - 1:33) in SCADTA colors

  • Thread starter niebla de fuego
  • Start date
N

niebla de fuego

Lower rear section, with the tail wheel. The wheel was made with the same technique of the main gear. It is also movable thanks to a hidden thin copper wire used as axle.

Trimotor_075.jpg


Details of the fairleads. I thought it was cute to add them.

Trimotor_076.jpg

Trimotor_077.jpg

Trimotor_078.jpg


After all this, now is time to face the most feared part of the model: the engines. Three engines, 27 cylinders… I will rest for a couple of days before staring them.
 
Z

Zathros

The detailing looks great, If you fill in the wingtips with Gap filling crazy glue, you can lightly sand them smooth and color them or paint them to finish them off. Great looking model. Don throw this one!!! :)
 
N

niebla de fuego

This is to prove that I’m still working on this model.


I changed the tail light. Now it is 40% shorter, and looks a lot better.

Trimotor_079.jpg


I also tried to save the threads by applying some glue. It helped, but not much. Next time I will prepare the threads before assembly. Or use another kind of thread.

Trimotor_080.jpg


I also installed the rail under the wing that was used to open the wing cargo hatch. This part is not included in the kit, so it was scratch-built. Very easy to make.

Trimotor_081.jpg


And although the landing lights are the last step in the book, I decided to add them now. I used a transparency to simulate the glass, another small plastic bead to simulate the bulb, and a printed simple background to complete the effect.

Trimotor_082.jpg
 
N

niebla de fuego

Now is time for the engines. In the following photo you can see all the three engines. The one on the left is complete. The one in the middle is in process, and the right one has not been started yet.

Trimotor_083.jpg


This is a close-up of the unbuilt engine.

Trimotor_084.jpg


Here is how it starts to take shape.

Trimotor_085.jpg


And here it is complete. I was going to use the original parts to make the manifold exhaust ring, but I lost one of them. So I had to improvise with a small rubber hose painted silver to simulate it. Of course will make the same in all three engines.


Trimotor_086.jpg


Now all that’s left is to finish the engines, and add small details.

See you soon!
(I hope)
 
Z

Zathros

Beautiful Ruben, absolutely beautiful! It is amazing that you not only redid this model, but now are building an exemplary model of it! Really incredible, your contribution to this hobby should be shouted from the mountains, and through every valley!! This, and doing the DC-3 restoration/enhancement? Incredible:)
 
N

niebla de fuego

Beautiful Ruben, absolutely beautiful! It is amazing that you not only redid this model, but now are building an exemplary model of it! Really incredible, your contribution to this hobby should be shouted from the mountains, and through every valley!! This, and doing the DC-3 restoration/enhancement? Incredible:)

Thanks for your words my friend. A good model starts with a good design,and Peter Zorn designed a beautiful kit.

After installing the door with handle, the jump seat, the engines in place with the NACA rings and the exhaust pipes, there are no more parts left in the box.

Trimotor_087.jpg

Trimotor_088.jpg

Trimotor_089.jpg

Trimotor_090.jpg

Trimotor_091.jpg

Now I only have to wait for good weather and look for a table big enough to place this bird at take some decent general photos.

My next post will include final photos and my final report/opinions/tips about this kit.
 
Z

Zathros

Ruben, Mr. Zorn's model is incredible, and for it's time, and the workmanship as to the sign holds up, but your graphics throw this model over the top.
:)
 
N

niebla de fuego

So we had a nice cloudy day today, perfect to take some photos.

This photos are a bit edited to erase some background, and are balanced to show more of the true colors of the plane.

Since most of the details were discussed during the process, I won’t comment much. Just enjoy the images.
 

Attachments

  • Trimotor_092.jpg
    Trimotor_092.jpg
    71.8 KB · Views: 20
  • Trimotor_093.jpg
    Trimotor_093.jpg
    38.8 KB · Views: 18
  • Trimotor_094.jpg
    Trimotor_094.jpg
    40 KB · Views: 20
  • Trimotor_095.jpg
    Trimotor_095.jpg
    70.2 KB · Views: 19
  • Trimotor_096.jpg
    Trimotor_096.jpg
    52.7 KB · Views: 16
  • Trimotor_097.jpg
    Trimotor_097.jpg
    98.1 KB · Views: 22
N

niebla de fuego

More photos:
 

Attachments

  • Trimotor_100.jpg
    Trimotor_100.jpg
    138.1 KB · Views: 16
  • Trimotor_101.jpg
    Trimotor_101.jpg
    95.6 KB · Views: 15
  • Trimotor_102.jpg
    Trimotor_102.jpg
    122.1 KB · Views: 16
  • Trimotor_104.jpg
    Trimotor_104.jpg
    93.9 KB · Views: 17
  • Trimotor_106.jpg
    Trimotor_106.jpg
    78.1 KB · Views: 17
  • Trimotor_107.jpg
    Trimotor_107.jpg
    102.7 KB · Views: 19
N

niebla de fuego

And more....


Sooo… does it look like the real thing? Maybe is not a perfect replica. But close enough :)
 

Attachments

  • Trimotor_108.jpg
    Trimotor_108.jpg
    68.9 KB · Views: 20
  • Trimotor_109.jpg
    Trimotor_109.jpg
    139.7 KB · Views: 18
  • Trimotor_110.jpg
    Trimotor_110.jpg
    175.6 KB · Views: 16
  • Trimotor_111.jpg
    Trimotor_111.jpg
    132.9 KB · Views: 20
  • Trimotor_112.jpg
    Trimotor_112.jpg
    144.7 KB · Views: 22
N

niebla de fuego

What’s this?
Two Tri-Motors?

Yes. It’s two of them, let’s have a closer look.

Now you know my secret: I built two “Cartagenas”. The white one was a printing error. I didn’t want to trash the printed pages so I decided to use it as test. I first built the test plane little by little. And as I understood the tricks of the parts I built the grey one correcting mistakes and improving the details.

The white Tri-Motor looks sloppy, badly build, with lots of issues. But it helped me a lot to understand the model and to face the challenges properly.

And I also decided to cut the sides open so that the interior of the cockpit and of the passenger cabin could be seen. The toilet can also be seen with all the detail you saw :)
 

Attachments

  • Trimotor_113.jpg
    Trimotor_113.jpg
    48.1 KB · Views: 20
  • Trimotor_114.jpg
    Trimotor_114.jpg
    49.7 KB · Views: 22
  • Trimotor_115.jpg
    Trimotor_115.jpg
    107.5 KB · Views: 20
  • Trimotor_116.jpg
    Trimotor_116.jpg
    57 KB · Views: 23
  • Trimotor_117.jpg
    Trimotor_117.jpg
    112.7 KB · Views: 24
  • Trimotor_118.jpg
    Trimotor_118.jpg
    104.2 KB · Views: 18
N

niebla de fuego

Trimotor_119.jpg

Trimotor_120.jpg


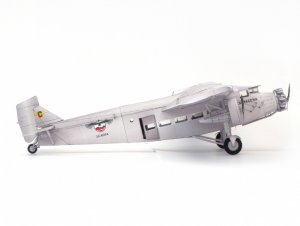
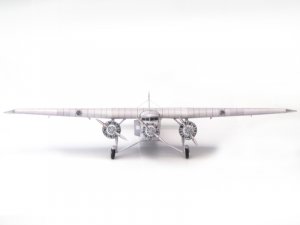
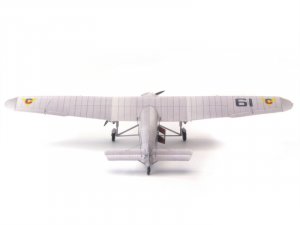
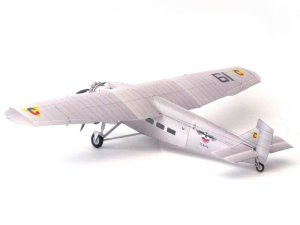
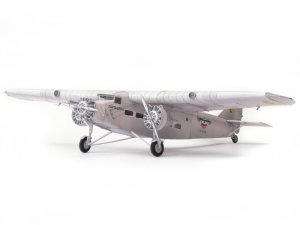
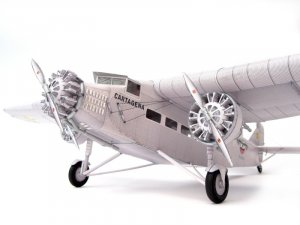
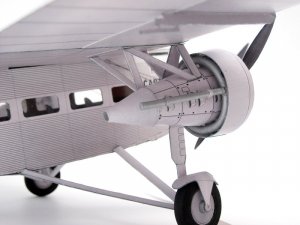
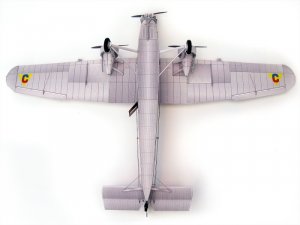
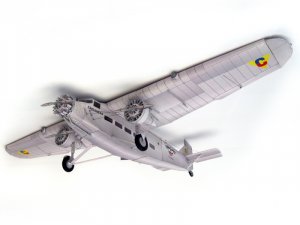
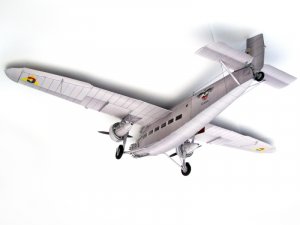
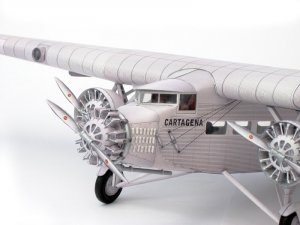
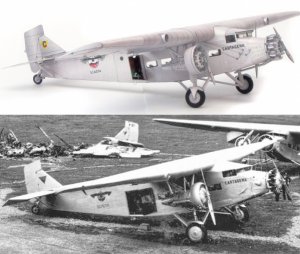
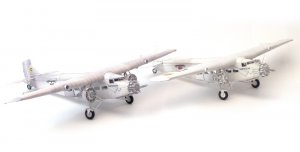
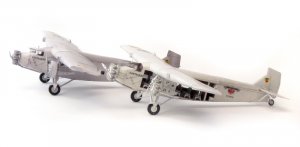
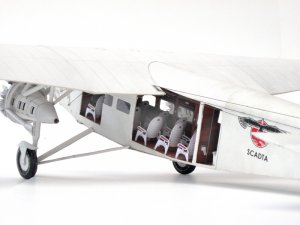
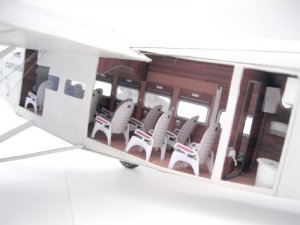
So this is it! The Ford Tri-motor designed by Peter A. Zorn Jr. in 1982. Digitally restored in 2011, and painted in the colors of the Colombian airline SCADTA in 2012


Trimotor_121.jpg


Trimotor_122.jpg


Comments

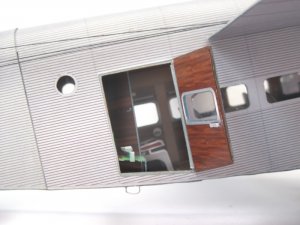
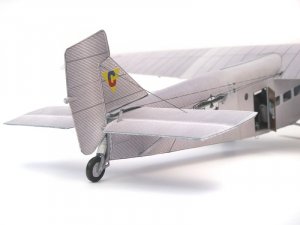
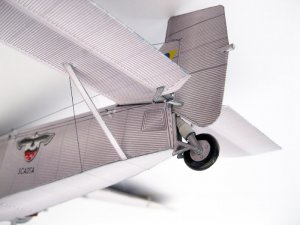
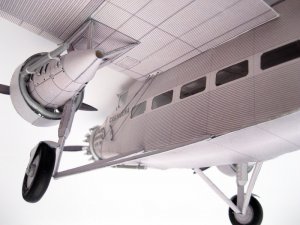
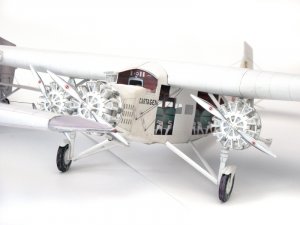
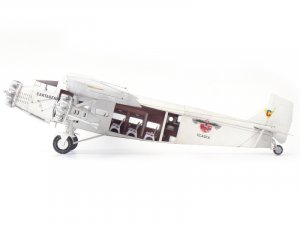
This is a beautiful kit, from a time when paper kits were drawn by hand. It may look a bit simple by today standards, and some may say that it is not a perfect replica of a Ford Tri-Motor in certain details. But the truth is that the result is impressive. Besides, the shape and proportions are very accurate. The solutions to some volumes and elements of the plane are very clever and allow getting a good representation of the real thing by means of easy assemblies. If a modeler wants to add detail, there is plenty of room to do it. There are just a couple of difficult spots, but nothing serious. It is recommended that you think beforehand where to use cyanocrilate to give more strength to certain parts. Also, plan the whole process before starting.

The fitting of the parts is good. Take into account the following: the digital version of the kit was re-drawn based on scans of the original printed book (which was painstakingly drawn by hand). So, some small differences were unavoidable in the whole process. As I cut the parts I noticed the new digital version had small differences of up to 1mm compared to the original parts. This is a minor problem, but it may affect the perfect fitting of some parts. So be careful and always test the parts before glueing. Trim if necessary; add shims of paper when needed, and glue carefully. If you exercise patience, good judgment and follow your modeling instinct you will be able to make a very good paper model of this classic plane.

Remember that you can download the Tri-Motor kit for free from http://www.papermodelers.com/forum/downloads.php?do=file&id=1080
It comes in 11 different liveries including American Airlines, TAT, Grand Canyon, TWA “City of Philadelphia”, Indiana Jones’ “Lao Che” transport, and some more.


My gratitude goes to all the people who have commented in this thread, not only here but in other forums too. The reception this model has had makes me happy. And the support of everyone is treasured in my heart. Thanks a lot for your comments, suggestions, and advices.

I shared this build in other forums, and I wish to thank them all. You can find the same thread there.

So, thanks a lot to all of you. And to all the people at:

Paper Modelers http://www.papermodelers.com
Zealot http://www.zealot.com
Kartonbau http://www.kartonbau.de
Maquetas y Modelismo en papel: http://maquetasenpapel.mforos.com/
Papercraft America: http://papercraft.mforos.com/
Mequetas de Papel: http://www.maquetasdepapel.com.ar/
Swanny’s Models: http://www.swannysmodels.com/yabb2/YaBB.pl
IPMS Bogota: www.network54.com/Forum/219512/


And last, but definitely not the least, thanks a lot to Peter for designing this beautiful kit, and for allowing it to be distributed for free. My deep gratitude.

See you in the next build!!!!!

Rubén Andrés.
 
Z

Zathros

Ruben, Thanks for this incredible thread! Excellent pictures, I downloaded them all, easier to show my friends. Excellent Amigo! :)
 

ASC Mclaren

Well-Known Member
Nov 18, 2011
884
369
58
Western Washington
Ruben, if that white build is sloppy, I can only hope to build that good. These are amazing! Because of you, I downloaded this model, I'm thinking about the Indiana Jones version.
 
N

niebla de fuego

Ruben, if that white build is sloppy, I can only hope to build that good. These are amazing! Because of you, I downloaded this model, I'm thinking about the Indiana Jones version.

Glad you liekd it, you will enjoy it :)


Ruben, I forgot one thing!! Don't throw it!!!, Please!:p
Don't worry. It won't happen :mrgreen:


I prepared a video slideshow showing the most important photos of the thread. You can watch it on youtube here:
[YOUTUBE]V3a7o92fUOU[/YOUTUBE]
 
Z

Zathros

Yay!!! Well done Ruben, and well deserved, for your fantastic build and your fantastic recolor and detailing! :thumb: :)
 

LAZGEORG

New Member
Mar 13, 2012
14
0
1
Amazing job!!!!!!So much attention to every detail!!!!You are definately an inspire to me!!!!