MechWarrior 4 Osiris
- Thread starter c_furuti
- Start date
You are using an out of date browser. It may not display this or other websites correctly.
You should upgrade or use an alternative browser.
You should upgrade or use an alternative browser.
Part 11A - Weapons III/A
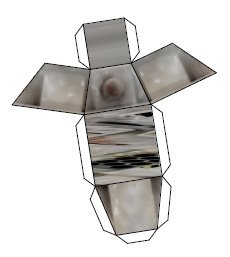
The top turret's texture suggests the part was simplified, some polygons pared off in favor of shading:
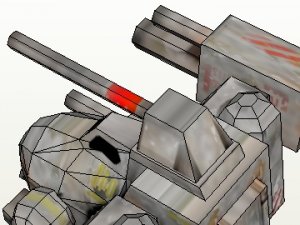
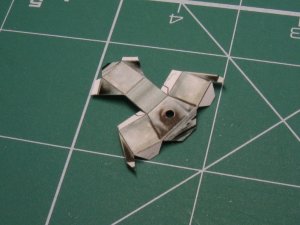
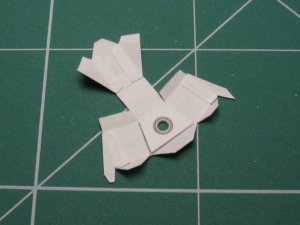
The original part, and with four triangles cut off and pasted (unlike most of my changes, this was improvised, not planned in Inkscape):
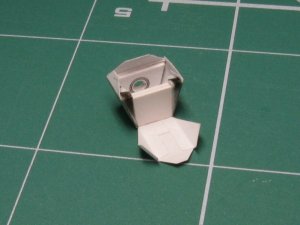
Instead of just gluing the long gun barrel, I rolled paper to make a core, which will be inserted through the hole in the front face and glued to a thick reinforcement pad:
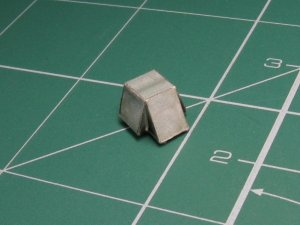
The top turret's texture suggests the part was simplified, some polygons pared off in favor of shading:

The original part, and with four triangles cut off and pasted (unlike most of my changes, this was improvised, not planned in Inkscape):


Instead of just gluing the long gun barrel, I rolled paper to make a core, which will be inserted through the hole in the front face and glued to a thick reinforcement pad:


Part 11B - Weapons III/B
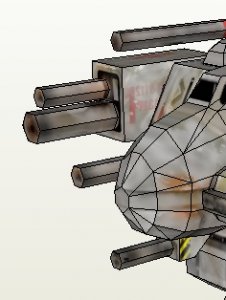
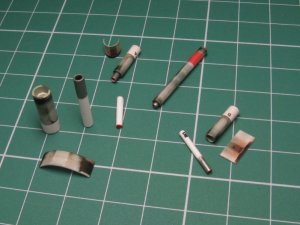
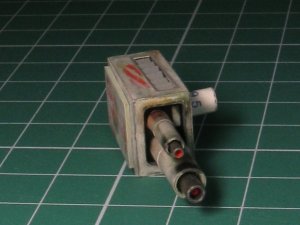
The laser guns, originally hexagonal prisms, were built cylindrical with an open bore; small tubes painted silver add some detail. I tried gloss varnish to suggest lenses; Kristal-Klear would be ideal, but I don't have it.
(strange, I just noticed there's a dark spot of paint near the top of the upper gun's bore which makes the inner edge of the tube seem badly notched. I must retouch it)
The laser guns, originally hexagonal prisms, were built cylindrical with an open bore; small tubes painted silver add some detail. I tried gloss varnish to suggest lenses; Kristal-Klear would be ideal, but I don't have it.


(strange, I just noticed there's a dark spot of paint near the top of the upper gun's bore which makes the inner edge of the tube seem badly notched. I must retouch it)
Part 12 - Weapons IV
The chin turret, reminiscent of a B-17G Flying Fortress, was originally fixed:
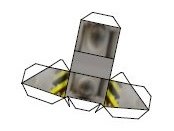
As built, the gun can rotate in two axes; I planned the articulations's geometry in Inkscape, as usual. The turret was cut with faces and tabs rearranged, after a template marking a rectangular window was glued inside.
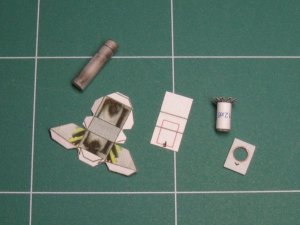
Here are the gun barrel, a T-shaped core made with CA-reinforced rolled paper, the turret, two pads (with female joints recessed), the turret's top and its male joint (the hull already has its female counterpart installed).
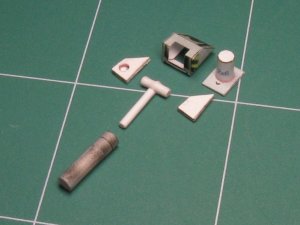
The core and everything which is visible through the window are painted dark gray:
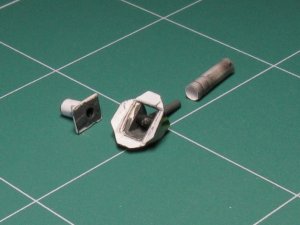
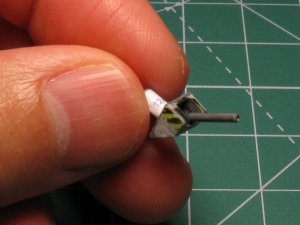
Unfortunately the turret's modified top is flat, instead of concave conforming to the hull.
I ended up substituting a thinner version of the gun barrel (not shown in the last picture).
The chin turret, reminiscent of a B-17G Flying Fortress, was originally fixed:

As built, the gun can rotate in two axes; I planned the articulations's geometry in Inkscape, as usual. The turret was cut with faces and tabs rearranged, after a template marking a rectangular window was glued inside.

Here are the gun barrel, a T-shaped core made with CA-reinforced rolled paper, the turret, two pads (with female joints recessed), the turret's top and its male joint (the hull already has its female counterpart installed).

The core and everything which is visible through the window are painted dark gray:


Unfortunately the turret's modified top is flat, instead of concave conforming to the hull.
I ended up substituting a thinner version of the gun barrel (not shown in the last picture).
Part 13 - Weapons V
The machine gun pod beside the nose is ugly and rather cumbersome to build, due to a slot at the front which weakens the part and (because I had removed the folding lines to emphasize its roundness) makes a ring hard to glue aligned.
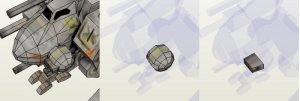
Instead of a long boxlike part inserted through a slot, I'd much prefer a short part glued on an uncut sphere.
Also, notice the strange texture mapping on the back and central face:
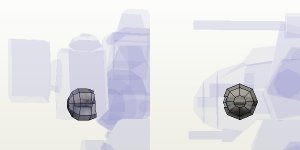
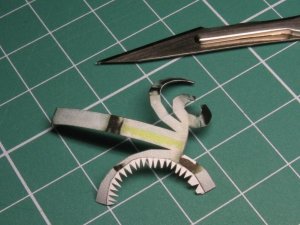
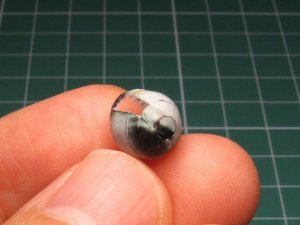
Anyway, after removing folding lines and separating the central face, I glued and smoothed the curved edges (still uncolored here).
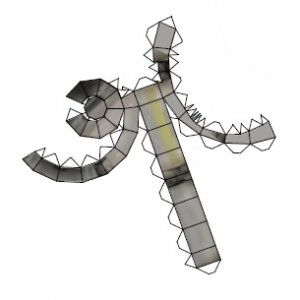
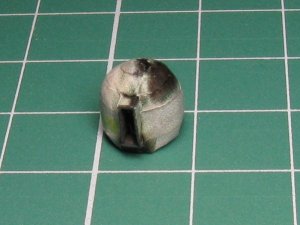
The box was slightly modified, with parallel sides and recessed front. Here, its edges were not yet colored either:
The machine gun pod beside the nose is ugly and rather cumbersome to build, due to a slot at the front which weakens the part and (because I had removed the folding lines to emphasize its roundness) makes a ring hard to glue aligned.

Instead of a long boxlike part inserted through a slot, I'd much prefer a short part glued on an uncut sphere.
Also, notice the strange texture mapping on the back and central face:

Anyway, after removing folding lines and separating the central face, I glued and smoothed the curved edges (still uncolored here).


The box was slightly modified, with parallel sides and recessed front. Here, its edges were not yet colored either:

amazing build and great description of progress.
very inspiring detail work :thumb:
thanks for sharing
very inspiring detail work :thumb:
thanks for sharing
Part 14 - Panelling
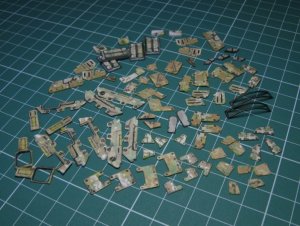
For the Warhammer IIC, a lot of detail was simulated simply by duplicating (in Inkscape) and printing parts of the PDF as thick or thin extra panels. I'll revisit that technique here, although the Osiris lacks the WH IIC's profusion of inspection panels and similar gizmos - the first picture below shows most of the WH IIC's panels. In the second picture, some of the panels are recessed, not overlaid:
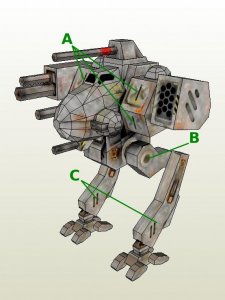
Although I don't know the purpose of the three X-ed pillow-like panels on the hull (A), the shadowed texture indicates they are raised. Other details are applied to the legs: "hubcaps" with recessed centers on the hip axis (B), and four chamfered panels with slots cut make the shin "cheeks" (C):
All are done with laminated panels:
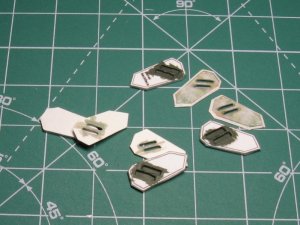
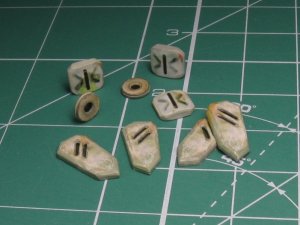
Some paint job must later be done to better match the shading around the new panels.
For the Warhammer IIC, a lot of detail was simulated simply by duplicating (in Inkscape) and printing parts of the PDF as thick or thin extra panels. I'll revisit that technique here, although the Osiris lacks the WH IIC's profusion of inspection panels and similar gizmos - the first picture below shows most of the WH IIC's panels. In the second picture, some of the panels are recessed, not overlaid:


Although I don't know the purpose of the three X-ed pillow-like panels on the hull (A), the shadowed texture indicates they are raised. Other details are applied to the legs: "hubcaps" with recessed centers on the hip axis (B), and four chamfered panels with slots cut make the shin "cheeks" (C):

All are done with laminated panels:


Some paint job must later be done to better match the shading around the new panels.

Z
Zathros
That is such a cool looking model! A lot of care in there and it shows. You have every right to be very proud of yourself.
Part 15 - New parts/A
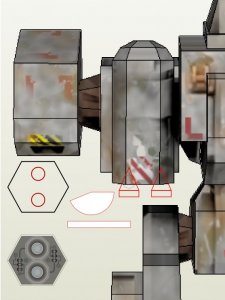
The hexagonal prisms on the rear seem adequate places for jump jets. Simple jet nozzles were "modelled" in Inkscape - from a screenshot and a profile draft, it's easy calculating the dimensions of a cone and a cylinder. Here, the cones's profiles on the model are side-by-side; later I changed to a tandem lay-out, as seen in the hexagonal bottom faces:
I didn't care about colors, because I'd use paint later. An empty ballpoint pen is almost the exact size for rounding and shaping the parts, each built with two layers of paper with a crown of triangular reinforcements between. Before and after two coats of metallic and gray acrylics:
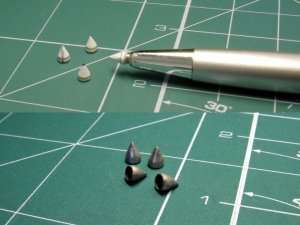
(the macro photo reveals so many imperfections - I should have sanded the painted parts :cry .
.
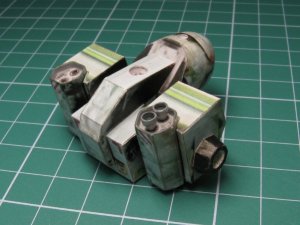
The featureless bottom faces of the prisms had in advance been redrawn, recessed and perforated:
The hexagonal prisms on the rear seem adequate places for jump jets. Simple jet nozzles were "modelled" in Inkscape - from a screenshot and a profile draft, it's easy calculating the dimensions of a cone and a cylinder. Here, the cones's profiles on the model are side-by-side; later I changed to a tandem lay-out, as seen in the hexagonal bottom faces:

I didn't care about colors, because I'd use paint later. An empty ballpoint pen is almost the exact size for rounding and shaping the parts, each built with two layers of paper with a crown of triangular reinforcements between. Before and after two coats of metallic and gray acrylics:

(the macro photo reveals so many imperfections - I should have sanded the painted parts :cry
The featureless bottom faces of the prisms had in advance been redrawn, recessed and perforated:

Part 16 - New parts/B
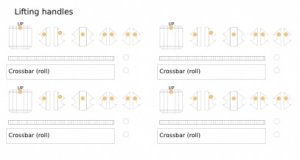
The original handles/shackles for crane hoisting, two on the rear, plus one on each side of the hip, are nicely simulated with texturing, but are simple enough to scratchbuild from a screenshot:
I drafted rough templates in Inkscape: dots mark the up side, the crossbar was done with rolled paper, and the tabless pieces are reinforcements. The striped strips are glued last, the colors help trimming by eye.
For easier assembly, I glued all pieces to their respective base and only then cut the base from the sheet, after which it was set on a 2 x 1.5in Post-it-like note for painting. The weakly adhesive note also helped avoiding loss of pieces during assembly, but I definitely need tweezers with thinner points.
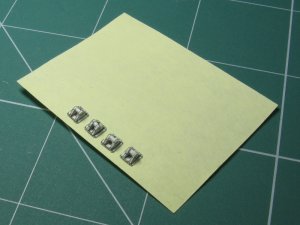
The first coat of paint was a uniform yellow-orange. The parts on the hip are darker, due to rust, the natural shadow from the hull above, or both.
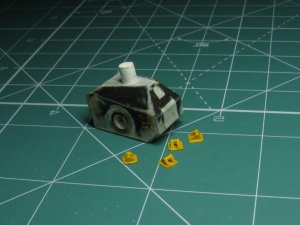
Finally the parts are glued to the model, and their shadows now look realistic from any angle. I'm not good at matching tones when mixing paints, but fortunately didn't completely ruin the job.
The original handles/shackles for crane hoisting, two on the rear, plus one on each side of the hip, are nicely simulated with texturing, but are simple enough to scratchbuild from a screenshot:

I drafted rough templates in Inkscape: dots mark the up side, the crossbar was done with rolled paper, and the tabless pieces are reinforcements. The striped strips are glued last, the colors help trimming by eye.

For easier assembly, I glued all pieces to their respective base and only then cut the base from the sheet, after which it was set on a 2 x 1.5in Post-it-like note for painting. The weakly adhesive note also helped avoiding loss of pieces during assembly, but I definitely need tweezers with thinner points.

The first coat of paint was a uniform yellow-orange. The parts on the hip are darker, due to rust, the natural shadow from the hull above, or both.

Finally the parts are glued to the model, and their shadows now look realistic from any angle. I'm not good at matching tones when mixing paints, but fortunately didn't completely ruin the job.


Z
Zathros
Thanks for all the support, hopefully I'll wrap things up this weekend.This is one badass Mech! It's getting and better! :thumb:
Part 17 - Completed and recapitulated
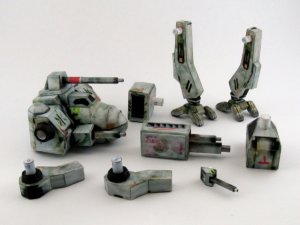
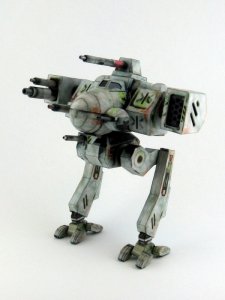
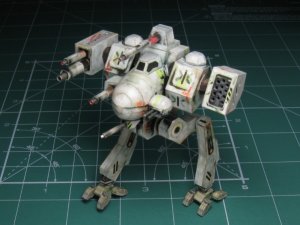
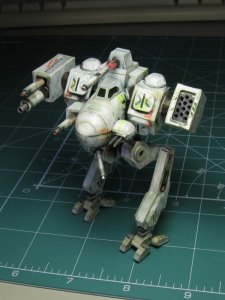
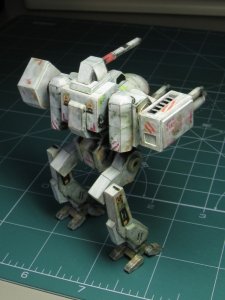
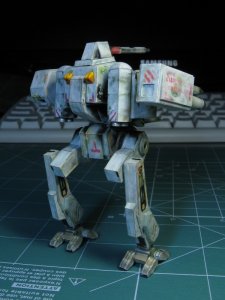
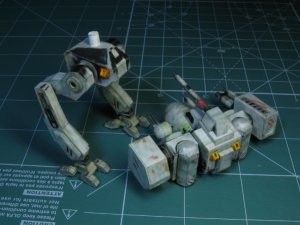
After 50 parts from the original model, at least twice more added, plus a ton of reinforcements, the result is rather heavy and stable, even in exaggerated poses (the hoisting shackles had not been weathered at the time the pictures were taken):
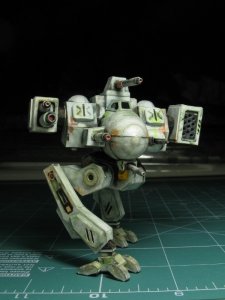
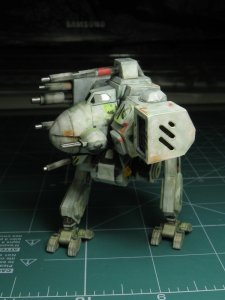
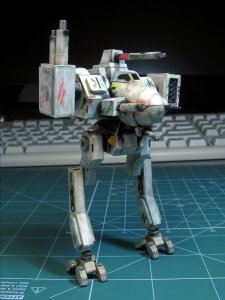
Then I touched up some rough spots and conspicuous folding lines which I had forgotten to remove in Inkscape, and this is the result:
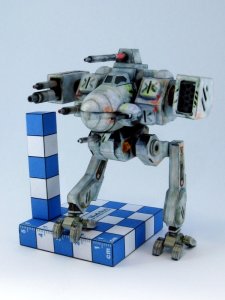
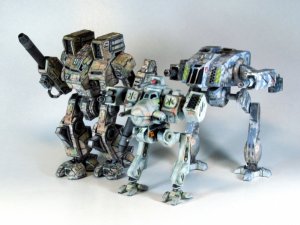
This picture presents my more recent mechs, the Warhammer IIC (Whammy/Shiftdel), Osiris (Cantaris) and MW4 Shadow Cat (Shiftdel). The latter has only 9 articulations; I first tried extended articulated parts, plastic windows and hollow missile ports on the Warhammer, while the Osiris emphasized smooth curves and some small-scale scratchbuilding. All in all, an interesting build, many thanks to Cantaris.
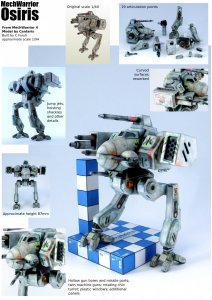
My build's features are summarized here:
After 50 parts from the original model, at least twice more added, plus a ton of reinforcements, the result is rather heavy and stable, even in exaggerated poses (the hoisting shackles had not been weathered at the time the pictures were taken):


Then I touched up some rough spots and conspicuous folding lines which I had forgotten to remove in Inkscape, and this is the result:

This picture presents my more recent mechs, the Warhammer IIC (Whammy/Shiftdel), Osiris (Cantaris) and MW4 Shadow Cat (Shiftdel). The latter has only 9 articulations; I first tried extended articulated parts, plastic windows and hollow missile ports on the Warhammer, while the Osiris emphasized smooth curves and some small-scale scratchbuilding. All in all, an interesting build, many thanks to Cantaris.

My build's features are summarized here:

Z
Zathros
Incredible. I wasn't into Mech's. Milleniumfalsehood got me looking at his when he articulated the legs, but you have taken this to a new level. I know want to build a Mech. I will be referring to this thread for a long time. On top of that, you have demonstrated some excellent building workmanship. This has to be one of the top Mechs I have yet to see. Excellent job, Well done!:thumb::goldcup::inw:aussie
Fantastic job! I really wish I had put as much work into my Catapult as you did with your Osiris. BTW, I've battled with them, both in the cockpit and as the opponent, and it's an awesome Light 'Mech. You've really done it justice. :thumb:


