

Marvin Beta Build
- Thread starter B-Manic
- Start date
You are using an out of date browser. It may not display this or other websites correctly.
You should upgrade or use an alternative browser.
You should upgrade or use an alternative browser.
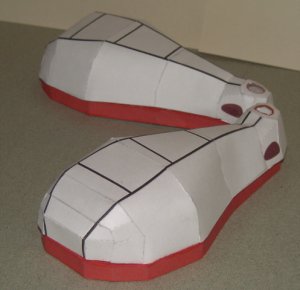
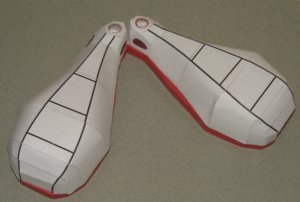
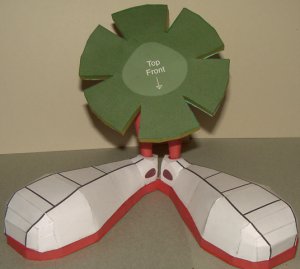
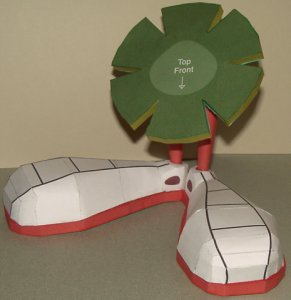
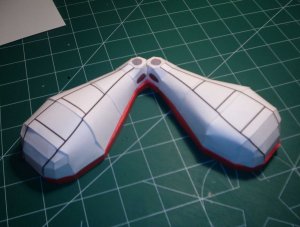
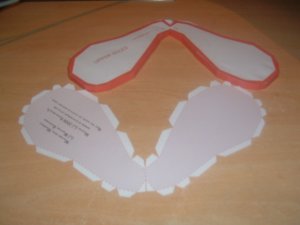
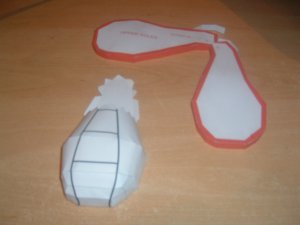
B-Manic said:I got the boots done so far. Some trimming was required, probably my novice cutting skill.
Hi B-Manic - not looking too bad
") .
.If it's the holes in the boots meeting the holes in the soles it could be that your positioning of the feet on the soles is slightly off - I get this if I don't stick put the feet on at the same time with some slippery glue and slide them into symmetrical position (I think there's a note about this in the instructions).
Make a note and I'll compare probelms at the ends of the builds.
And major thanks for the feedback. Not only does it help me, but should help other builders too.
Keep me posted...
Regards
Paul.
P
paulhbell
looking good b-manic. start mine tomorrow(monday). am i ok to use this thread to post my build as well as photos from the build.
Paulhbell
Yes of course. Post away. It will be interesting to see the builds progress side-by-side.
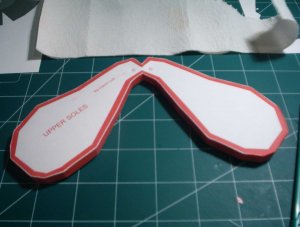
I had no problem lining up the holes. The trimming was done to the bottom edge of the upper shoe. The pieces did not form a straight line when assembled. The variation was small 1 - 2mm, thats why I attribute it to my skill level.
Yes of course. Post away. It will be interesting to see the builds progress side-by-side.
I had no problem lining up the holes. The trimming was done to the bottom edge of the upper shoe. The pieces did not form a straight line when assembled. The variation was small 1 - 2mm, thats why I attribute it to my skill level.
Would it be ok? If I posted my progress as well on a beta build? I would be very much interested in seeing the different opinions on this build as we go.
B-Manic said:Paulhbell
Yes of course. Post away. It will be interesting to see the builds progress side-by-side.
I had no problem lining up the holes. The trimming was done to the bottom edge of the upper shoe. The pieces did not form a straight line when assembled. The variation was small 1 - 2mm, thats why I attribute it to my skill level.
hmmm... I'll keep my eye on this - Great idea for a thread by the way.
In fact it might be worth making a post on the previous Marvin thread to point the other builders to this one - actually, I'm off to try do this now:grin: .
Keep up the good work.
Regards
Paul.
Sneaker
It would be great. Seeing all the betas in one thread is a great idea.
I just finished Marvin's legs. Will post pics when they are attached to feet.
It would be great. Seeing all the betas in one thread is a great idea.
I just finished Marvin's legs. Will post pics when they are attached to feet.
Legs attached
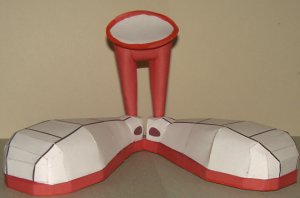
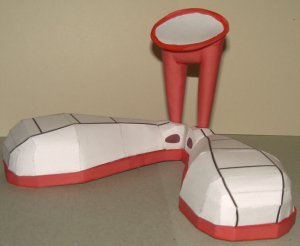
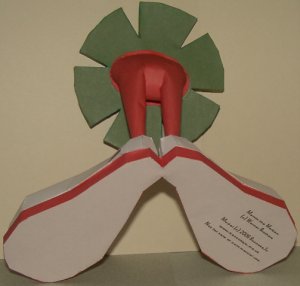
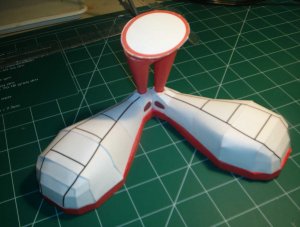
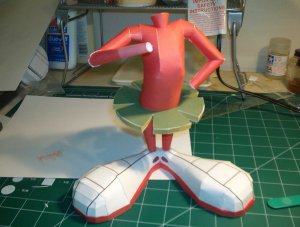
Here are legs added. They went together very easy. The fit was great. I had aligned the leg holes in the upper and lower boot with a dowel. This made attaching the legs to the boots go very smoothly.
next - the skirt - kilt ???
Here are legs added. They went together very easy. The fit was great. I had aligned the leg holes in the upper and lower boot with a dowel. This made attaching the legs to the boots go very smoothly.
next - the skirt - kilt ???
Attachments
Great stuff B-Manic
Just a quick note - the boots are designed to be flush i.e. the heels are designed to be touching (maybe this is where the cutting error crept in).
Don't get me wrong - it looks great as it is, but the other builders needn't worry if there boots do not match the photos:-D.
Maybe I've got the holes in the wrong place.
Surfduke - if you're out there ... Did the heels touch on yours?
BazookaJo said:Great stuff B-Manic
Just a quick note - the boots are designed to be flush i.e. the heels are designed to be touching (maybe this is where the cutting error crept in).
Don't get me wrong - it looks great as it is, but the other builders needn't worry if there boots do not match the photos:-D.
Maybe I've got the holes in the wrong place.
Surfduke - if you're out there ... Did the heels touch on yours?
I removed the glueing flaps from the heel portion of the upper boot. This may have resulted in a slight reduction in the size or an alignment problem. As you say it still looks OK.
Hey B-manic!
Looks like a great build so far...
I'm guessing you have taken more time to build, than I have. I had some problems with the feet as well, but I contribute that to my skills working with paper. Anyway here are some of my progress pics thus far. Forgive the qaulity of the photos, not the best camera around, but it does the trick. I am more focused on the mechanics of the build. When I complete this one, I will go back and do it all over.
As you can see in the first pic the soles went together rather well (I got lucky), However! The shoes were a bit tricky for me, as I did not get them to fit flush(pic 2).
The legs (pic 3) went together pretty good for me, and I had very little fit problems with the holes.
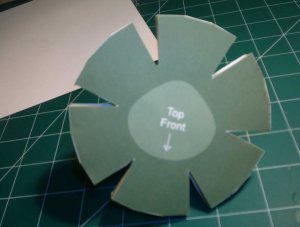
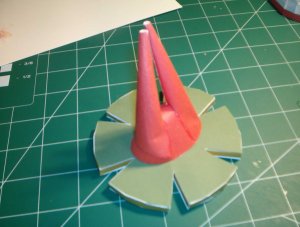
The skirt was a bear for me. anyone who is building this take your time with the formers for the skirt. I went too fast and ended up with some rough edges, even after trimming(pic4).
The legs fit well to the skirt,(pic 5) no problems here.
to be continued
Looks like a great build so far...
I'm guessing you have taken more time to build, than I have. I had some problems with the feet as well, but I contribute that to my skills working with paper. Anyway here are some of my progress pics thus far. Forgive the qaulity of the photos, not the best camera around, but it does the trick. I am more focused on the mechanics of the build. When I complete this one, I will go back and do it all over.
As you can see in the first pic the soles went together rather well (I got lucky), However! The shoes were a bit tricky for me, as I did not get them to fit flush(pic 2).
The legs (pic 3) went together pretty good for me, and I had very little fit problems with the holes.
The skirt was a bear for me. anyone who is building this take your time with the formers for the skirt. I went too fast and ended up with some rough edges, even after trimming(pic4).
The legs fit well to the skirt,(pic 5) no problems here.
to be continued
Attachments
Back again!
Next up The torso.
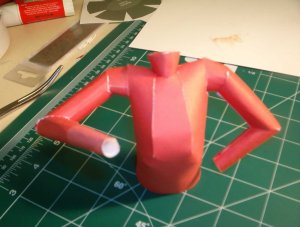
Ah the torso! (pic 6) This was a logistical nightmare for me. I went through three builds on this before I finally figured it out. But once I did, the fit was near perfect. The arms were a little bit of a problem for me as well (pic 7) I had a difficult time getting them to roll and crease correctly, as you can tell by the pic. This last pic shows the torso and arms connected to the skirt. This is dry fitted, it has not been attaches yet. One thing I did notice in the instructions, when it came to attaching the arms the instructions state to make some creases in the shoulder to facilitate a better fit of the arms, and then to form the shoulder back into place. Now I might have been real lucky, but I think if you build the torso and arms well enough, you should not have any problems with the shoulders mating up. Mine are not glued in place as of yet, so that I can tweek the final position of the arms. But like I said I might have stumbled on a fluke That worked in my favor.
Thats it for now, I will get back to building after my real world duties (work)
Again great build B-manic, and I also want to say thank you to Bazookajo for producing, what is so far is a very excellent card model. I thank you sir!
One last note I apoligize if my post is not in the correct format (newbie poster to any forum...this is my first. I am usually a lurk n learn type of person)
Next up The torso.
Ah the torso! (pic 6) This was a logistical nightmare for me.
I went through three builds on this before I finally figured it out. But once I did, the fit was near perfect. The arms were a little bit of a problem for me as well (pic 7) I had a difficult time getting them to roll and crease correctly, as you can tell by the pic. This last pic shows the torso and arms connected to the skirt. This is dry fitted, it has not been attaches yet. One thing I did notice in the instructions, when it came to attaching the arms the instructions state to make some creases in the shoulder to facilitate a better fit of the arms, and then to form the shoulder back into place. Now I might have been real lucky, but I think if you build the torso and arms well enough, you should not have any problems with the shoulders mating up. Mine are not glued in place as of yet, so that I can tweek the final position of the arms. But like I said I might have stumbled on a fluke That worked in my favor.Thats it for now, I will get back to building after my real world duties (work)
Again great build B-manic, and I also want to say thank you to Bazookajo for producing, what is so far is a very excellent card model. I thank you sir!
One last note I apoligize if my post is not in the correct format (newbie poster to any forum...this is my first. I am usually a lurk n learn type of person)
Attachments
I removed the glueing flaps from the heel portion of the upper boot. This may have resulted in a slight reduction in the size or an alignment problem. As you say it still looks OK.
looks fine + I had another look at mine and there is a slight gap between my boots - about 1.5mm so not exactly flush :roll:
The skirt was a bear for me. anyone who is building this take your time with the formers for the skirt. I went too fast and ended up with some rough edges, even after trimming(pic4).
But you and Sneaker are on fire:twisted: !!!
The skirt is a real bind, but it's the only way I could get those sharp cuts. The trick is to take time with the trimming as there are so many parts to the former it can be very easy to be a mm out here or there. That's why I oversized the skirt top and bottoms - to allow for a bit of variation.
As I said - looking good:-D
Again great build B-manic, and I also want to say thank you to Bazookajo for producing, what is so far is a very excellent card model. I thank you sir!
Thanks Sneaker
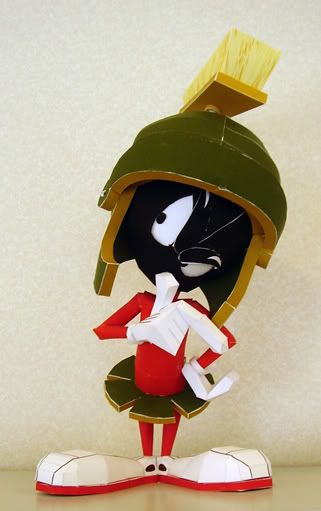
.A quick note on the shoulders - they actually fit inside the body i.e. they should only be slightly visible. They are just to give the arms a a moveable joint
Below is a photo of an older version which shows how the arms should fit
.The reason you have to crease the shoulders is to squeeze them into the sockets, after which you uncrease them inside (hope this makes sense).
Regards
Paul.
P.S. Your posts are absolutely fine in format and content.
Thanks Bazookajo!
That clarifies it greatly. I was thinking, it seemed thats how it was engineered. I will go back and re-read the instructions more carefully. I misunderstood. And the lesson here is to slow down and be patient and read the instructions carefully
That clarifies it greatly. I was thinking, it seemed thats how it was engineered. I will go back and re-read the instructions more carefully. I misunderstood. And the lesson here is to slow down and be patient and read the instructions carefully
P
paulhbell
P
paulhbell
well here we go. no problems up to now. build going smoothly. only problem is i am trying to watch the space walk and build marvin at the same time.
Yes, space walks have a way of doing that!
Looking good so far.