

logging mallett
- Thread starter papertrain
- Start date
You are using an out of date browser. It may not display this or other websites correctly.
You should upgrade or use an alternative browser.
You should upgrade or use an alternative browser.
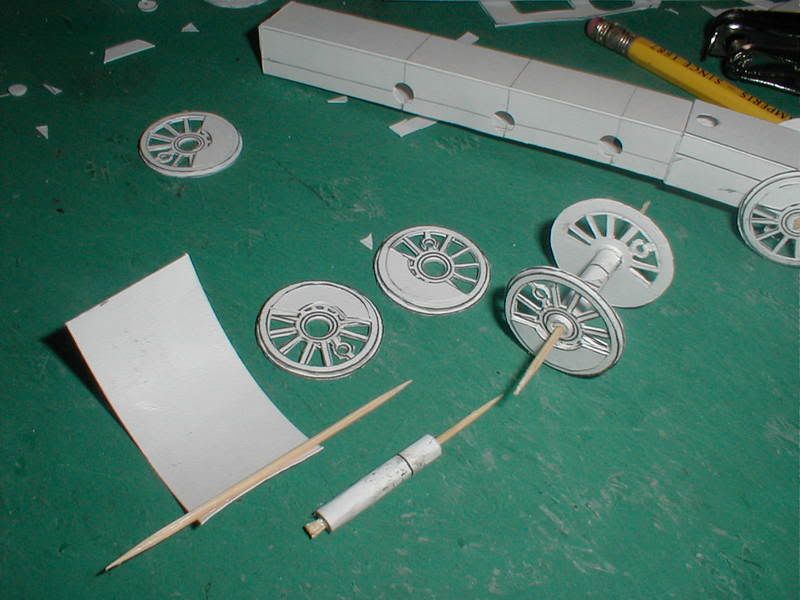
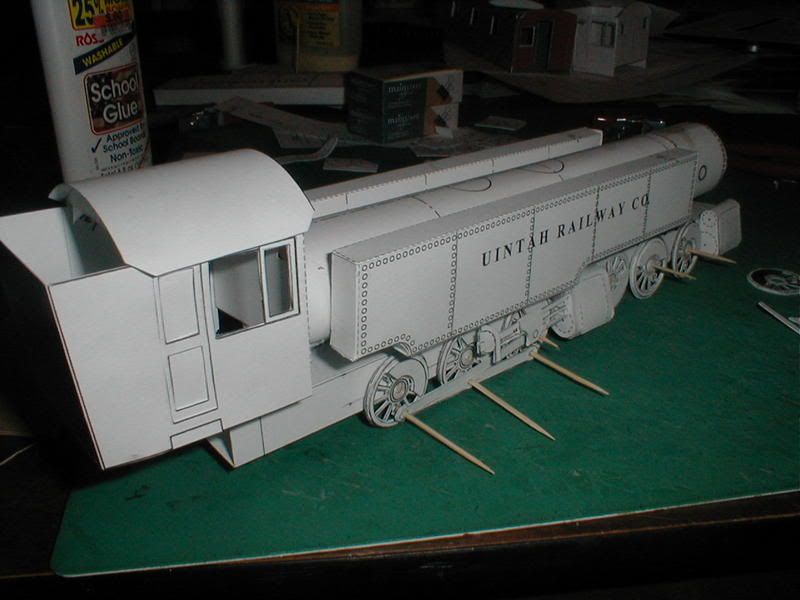
last group for this week. There is a wheel assembly build up, the cylinder revision and a very crude dry assembly of the major parts. I am going to have to narrow the tanks on the sides to make them come out right. design some brakets for that and some saddles for the tank, and get the remaining adjustments plugged into the computer. It is important to do a mock up as you go. It helps you in the fitting of parts. (Keep in mind that i am not using a 30d modeling program on this but rather a line orientated cadd system for this. Everything is designed in 2-d.) Looks like the next task will be the side rods and the front end. I am also going to be experiementing on some whys to make some of the detail parts so i can get them plugged in. 8) :grin:
The finished model is going to top out at over 16" in 1/4" scale. I will have more stuff by next weekend to post.:grin:
pt
The finished model is going to top out at over 16" in 1/4" scale. I will have more stuff by next weekend to post.:grin:
pt
C
cgutzmer
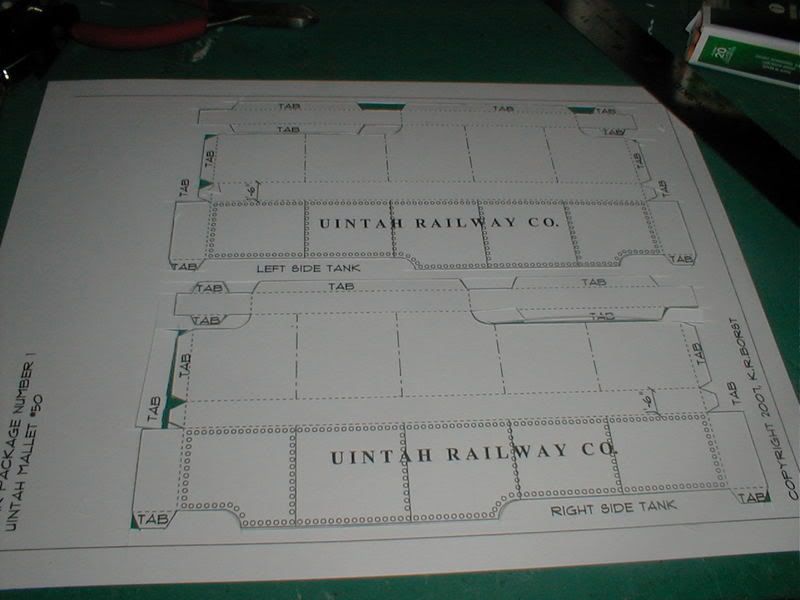
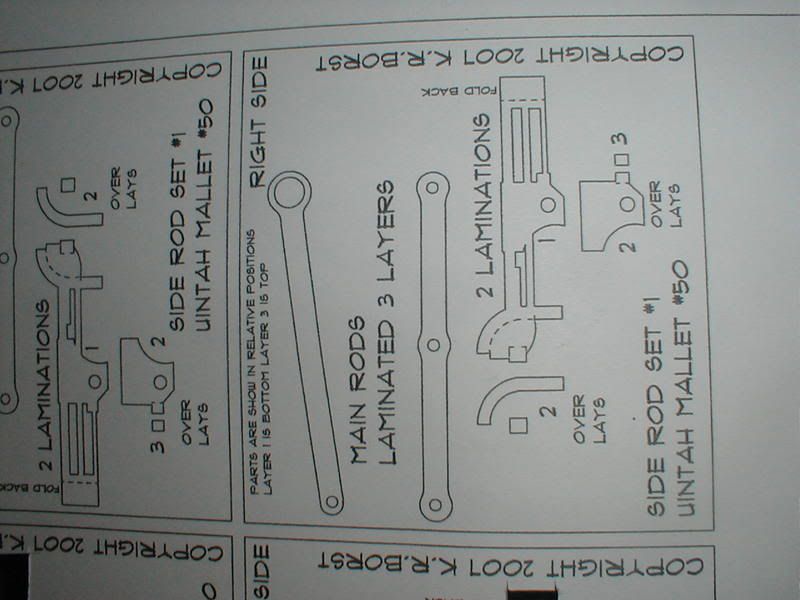
i have taken care of some of the bugs..8) ..I redesigned the tanks,the steam chests, and have gotten the side rods designed. That was a lot easier than i thought is would be:grin:
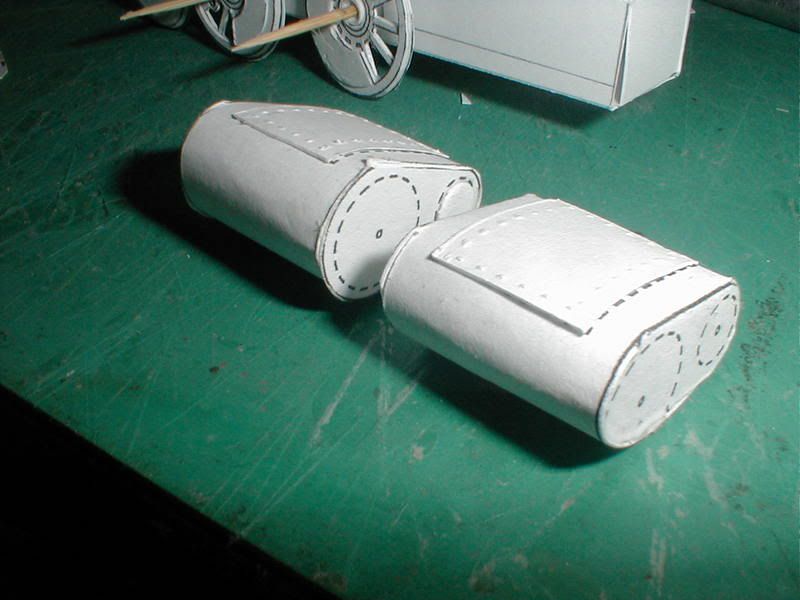
The first piccy is the tanks flat and the second is the dry fit.
I set the side rods up as a kit per 3 wheels. I had to remember that the right side and left side are actually reversed from each other ops: i will be able to use these on other engines later.
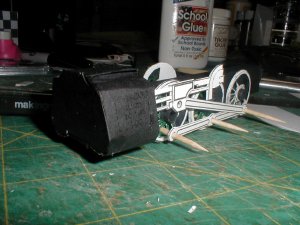
In setting up the side rods i used tooth picks to hold everything in place, I should not have cut the toothpick on the axel when i did,,,,make mental note:roll:
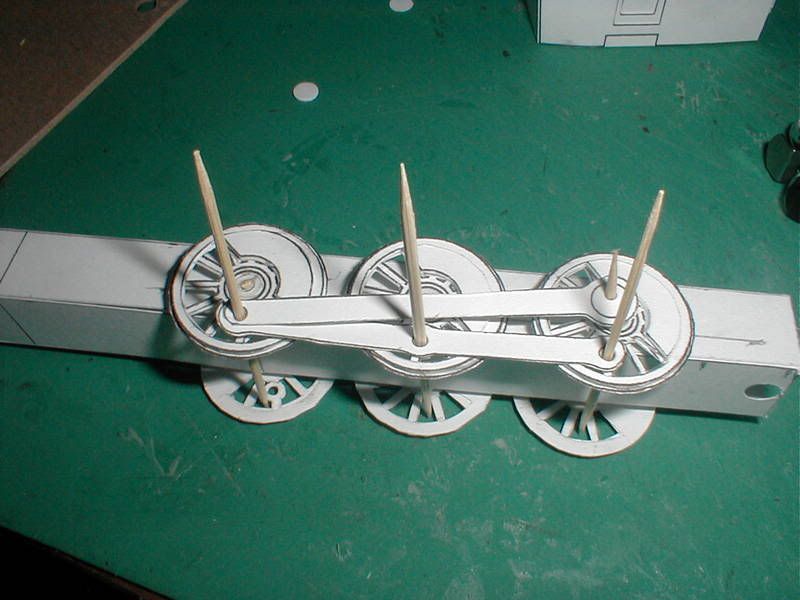
then i made up the redesigned steam chest and added the valve gear and reversing unit and glued them in place. I am very pleased with the overall appearance of the completed side rods. When they are all colored and done with more care they will show very nice, with a little planning they will all be operational:twisted:
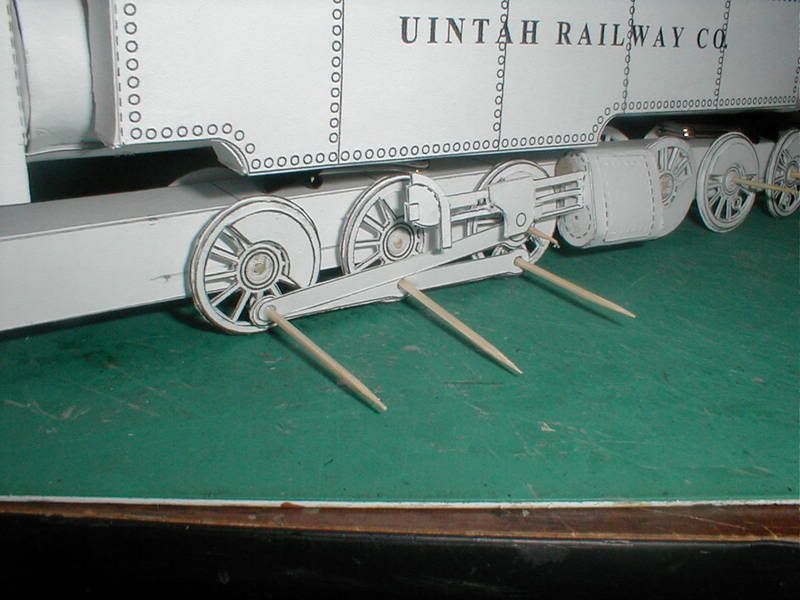
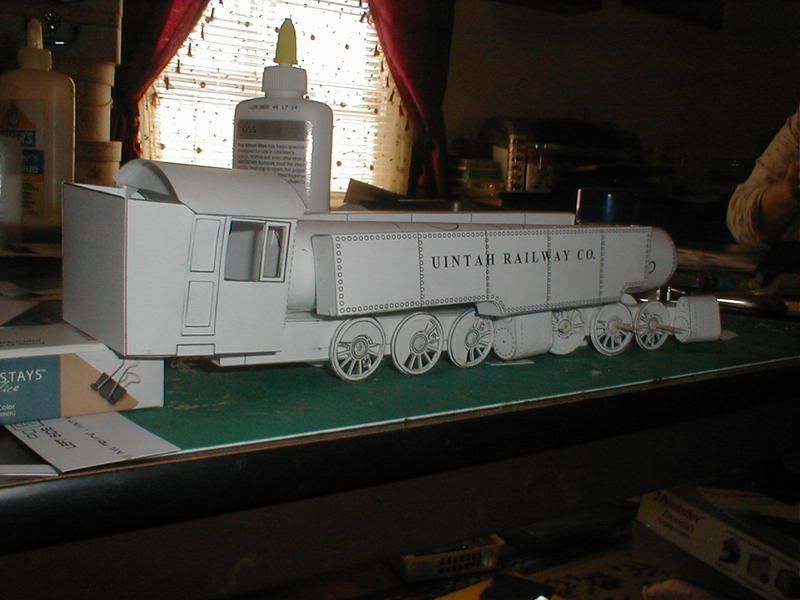
I have the boiler,cab, and water tanks set up to get a general idea of the fit and progress so far. The redesign of the tanks was what was needed. I did forget to narrow the ends I will have to go back and fix that,,,that wont be hard.
I think things are progressing and it is getting closer. :grin: Now i have to work on the top side with the stack, domes and fittings. still note sure how i am going to do all the piping on this thing so it looks good. I have thought of paper straws but i dont even think you can get them anymore,,,,maybe just a lot of rolled paper and the cut it to fit the required locations....then how to set that up so anyone can do it with a drawing,8)
more later
papertrain:grin:
The first piccy is the tanks flat and the second is the dry fit.
I set the side rods up as a kit per 3 wheels. I had to remember that the right side and left side are actually reversed from each other
ops: i will be able to use these on other engines later.
In setting up the side rods i used tooth picks to hold everything in place, I should not have cut the toothpick on the axel when i did,,,,make mental note:roll:
then i made up the redesigned steam chest and added the valve gear and reversing unit and glued them in place. I am very pleased with the overall appearance of the completed side rods. When they are all colored and done with more care they will show very nice, with a little planning they will all be operational:twisted:
I have the boiler,cab, and water tanks set up to get a general idea of the fit and progress so far. The redesign of the tanks was what was needed. I did forget to narrow the ends
I will have to go back and fix that,,,that wont be hard.
I think things are progressing and it is getting closer. :grin: Now i have to work on the top side with the stack, domes and fittings. still note sure how i am going to do all the piping on this thing so it looks good. I have thought of paper straws but i dont even think you can get them anymore,,,,maybe just a lot of rolled paper and the cut it to fit the required locations....then how to set that up so anyone can do it with a drawing,8)
more later
papertrain:grin:
Wow, Papertrain, looks great! Man, I love locos! And to get to see one come together, what a treat! Thanks for the photos!
Chris
Chris
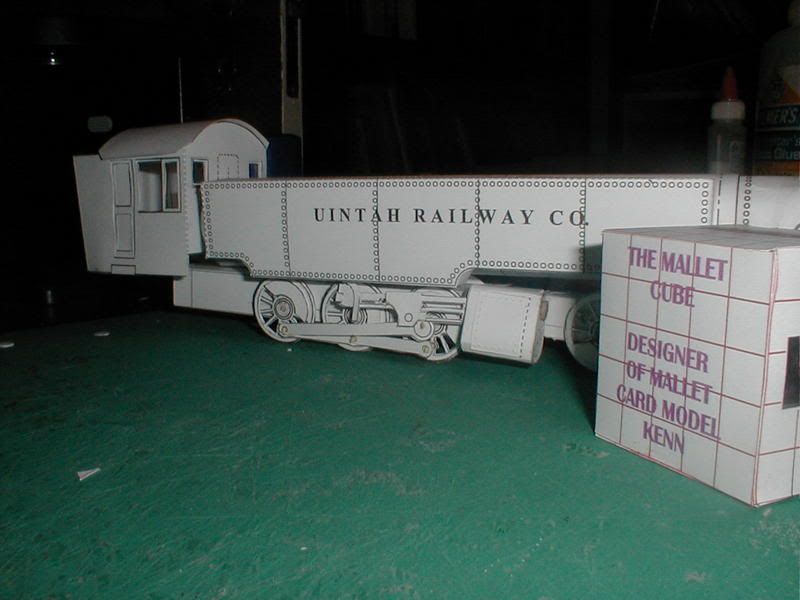
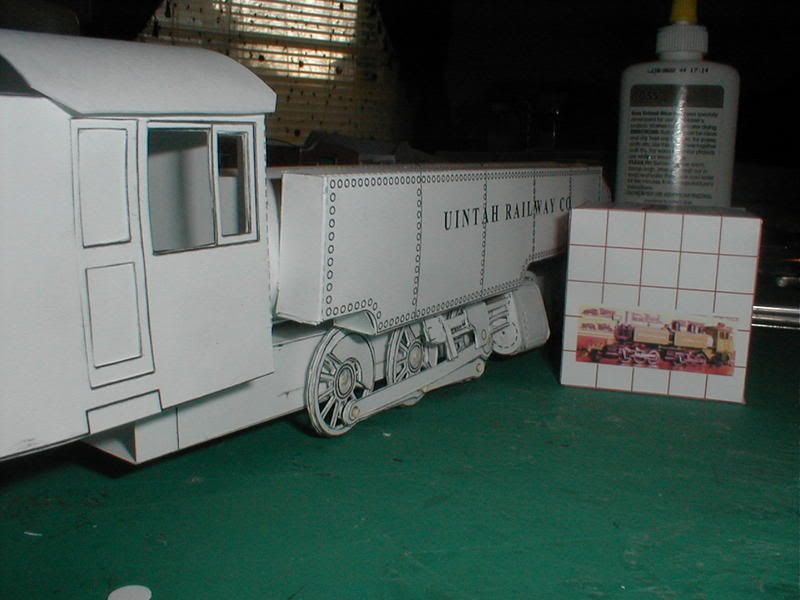
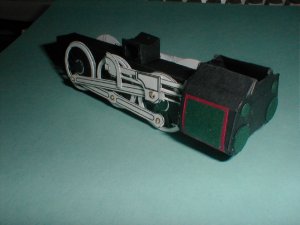
I added 2 more photos with a cube to give idea of size,,,,,,made my own cube today:grin:
pt:roll:
pt:roll:
C
cgutzmer
View attachment 8406
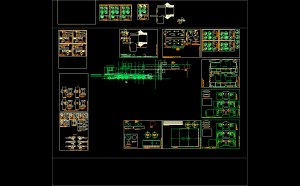
Here is a screen shot of the project to date. It shows how I am setting things up. As the number of sheets grows so does the final detail level.
I have a lot of little details to do yet.:grin:
I will post screen shots of the developement more as I get more done. I will also be posting more piccys this weekend when i buildup all the things I have designed. I hope they all work out as I plan8)
Each of the squares is 1 8x10 sheet. So far there are 11 sheets to this build. I am going to try to get more details on the sheets and to include photos of
each major assembly on the sheets. There will also be a detailed instruction and build order sheet.:roll:
papertrain:grin:
Attachments
C
cgutzmer
I was working on the ash dump and got some beautiful drawings done:grin:
View attachment 8456
i carefully cut them out and installed the parts on the engine being carefull to get them placed just so:roll: picture 2 View attachment 8459
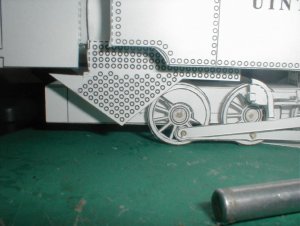
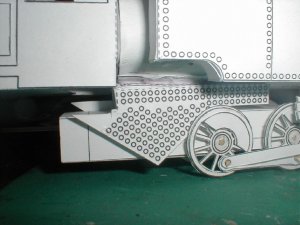
mmmm,,that is not right,:???: i did the whole thing all wrong (the ash dump is that thing with all the rivets) It is supposed to be on the inside of the wheels not the outside.:cry: So now i tear everything out and relocate them to the proper location. Now I have to go back to the chassis drawings and redo them. Don't you just love the design process?:twisted: View attachment 8462
Now that looks more like the way it is suppose to look. The point that i am making is that sometimes you find the way you set things up do not always work out the way you think they are going to. I was so intent on getting that neet piece that took care of the floor for the cab that i forgot what I was doing on the ash dump and totally blew it.8) The last picture gives you good idea of the scale of this beast.
View attachment 8461
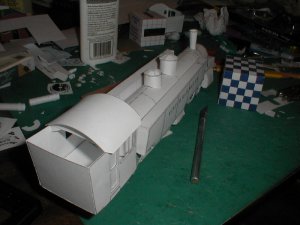
the front is taking shape and i am getting the top side roughed in. I would like to find a better way to do the rounded tops on the domes. i am not plaesed with their apperance and think there has to be a better way to do them. after 3 trys i got the sizing correct and to fit fairly well. The flange that attaches to the boiler is presenting some challanges tho. maybe instead of trying to do it with one piece i will break it down so the flange is a seperate piece... Nuff of this for now...will do more a little later this after noon:grin:
papertrain
View attachment 8456
i carefully cut them out and installed the parts on the engine being carefull to get them placed just so:roll: picture 2 View attachment 8459
mmmm,,that is not right,:???: i did the whole thing all wrong
(the ash dump is that thing with all the rivets) It is supposed to be on the inside of the wheels not the outside.:cry: So now i tear everything out and relocate them to the proper location. Now I have to go back to the chassis drawings and redo them. Don't you just love the design process?:twisted: View attachment 8462Now that looks more like the way it is suppose to look. The point that i am making is that sometimes you find the way you set things up do not always work out the way you think they are going to. I was so intent on getting that neet piece that took care of the floor for the cab that i forgot what I was doing on the ash dump and totally blew it.8) The last picture gives you good idea of the scale of this beast.
View attachment 8461
the front is taking shape and i am getting the top side roughed in. I would like to find a better way to do the rounded tops on the domes. i am not plaesed with their apperance and think there has to be a better way to do them. after 3 trys i got the sizing correct and to fit fairly well. The flange that attaches to the boiler is presenting some challanges tho. maybe instead of trying to do it with one piece i will break it down so the flange is a seperate piece... Nuff of this for now...will do more a little later this after noon:grin:
papertrain
Attachments

just a few updates from todays work on the mallet,:grin:
View attachment 8552
View attachment 8553
View attachment 8554
Most of what I did was design on the fly to find out how things need to fit so I can draw them out and make good patterns. I still and not sure how to do the piping:???: note some topside deatailing and and chassis detailing that I have worked on. Now to the drawing board to get things drawn. :roll:
I have also started to work out how the colors are going to work out and started building some colored details that I will past later8)
papertrain:grin:
Attachments
I have spent the last few days refining the plans and setting up color options for the mallet.:roll: i completely redid the way the chassis was put together and reduced the part count. Too many parts that could have been attached to each other.
View attachment 8969
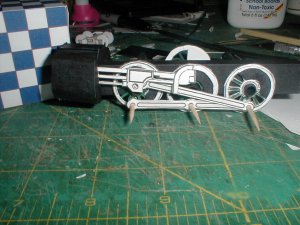
I also added some detail to the side rods and made some changes to the way things are put together that enhanced the way things fit.
View attachment 8970
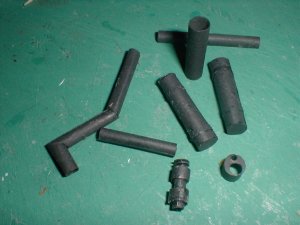
I have also been working up the tanks, fittings, piping , and upper boiler details. For these i uses the handle for the knife and various dowels to form the parts, one time around and a spot of glue,,,,,just have to rememeber to take them off before the glue sets too muchops:
View attachment 8971
I will be getting more ready this week...
papertrain :-D
View attachment 8969
I also added some detail to the side rods and made some changes to the way things are put together that enhanced the way things fit.
View attachment 8970
I have also been working up the tanks, fittings, piping , and upper boiler details. For these i uses the handle for the knife and various dowels to form the parts, one time around and a spot of glue,,,,,just have to rememeber to take them off before the glue sets too much
ops: View attachment 8971
I will be getting more ready this week...
papertrain :-D
Attachments
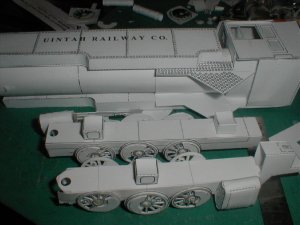
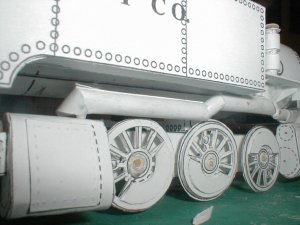
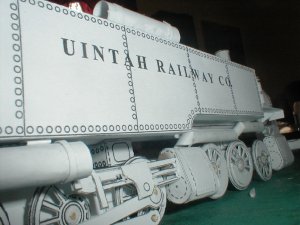
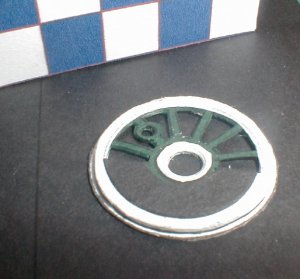
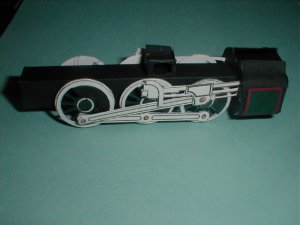
Here is the final chassis for the rear driver set. I have made many refinements to make it a better build. All the color is from just card at different layers as shown in the first picture.:roll: I have changed the way the wheels are done and think the outcome is worth the changes.8)
View attachment 9050
The next 2 shots are the fully assembled chassis. again only colored card is used.:-D I am thinking that I will want to add just one more minor detail to complete it. I will be posting front and rear chassis later. :-D If you look back to the first photos of the chassis you can see there have been a lot of changes made to get to this point.
View attachment 9049
View attachment 9051
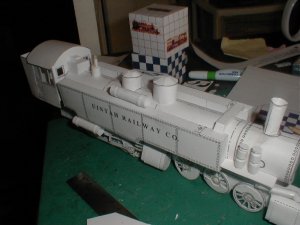
Now that all the parts for the chassis have been finish to the final form I will move to the boiler and cab. I have the plans done in final form for most of that but just need to assemble it.
In designing this project I have gone thru many changes to get here. It is a process that involves building what you have and looking at it and refining, changing, and polishing the methods to get to the final product. I have take over 200 pictures from the begining to check the appearence in photos and made modifications, then more pictures.
papertrain:grin:
View attachment 9050
The next 2 shots are the fully assembled chassis. again only colored card is used.:-D I am thinking that I will want to add just one more minor detail to complete it. I will be posting front and rear chassis later. :-D If you look back to the first photos of the chassis you can see there have been a lot of changes made to get to this point.
View attachment 9049
View attachment 9051
Now that all the parts for the chassis have been finish to the final form I will move to the boiler and cab. I have the plans done in final form for most of that but just need to assemble it.
In designing this project I have gone thru many changes to get here. It is a process that involves building what you have and looking at it and refining, changing, and polishing the methods to get to the final product. I have take over 200 pictures from the begining to check the appearence in photos and made modifications, then more pictures.
papertrain:grin:
Attachments
Amazyah
Senior Member
papertrain, it can never be said enough; You are doing an awesome job!
This baby just keeps getting better and better, every single post you make!

Russell
This baby just keeps getting better and better, every single post you make!
Russell