Imperial Russian Battleship Novgorod, or some serious circular thinking and design.

treadhead1952

Member
Mar 22, 2009
181
1
16
Las Vegas, NV USA
Hi All,

I have decided to give this little Russian Battleship in the round a try. I purchased the Gremir Models version of it a couple of years ago and it has been languishing, stashed away in my hard drive. It is a 1/200 scale model, my favorite ship scale at the moment.

For those of you not familiar with the ship, it was designed by Admiral Andrey Alexandrovich Popov and construction was started on December 17, 1871 in the New Admiralty Shipyards in Petersburg.

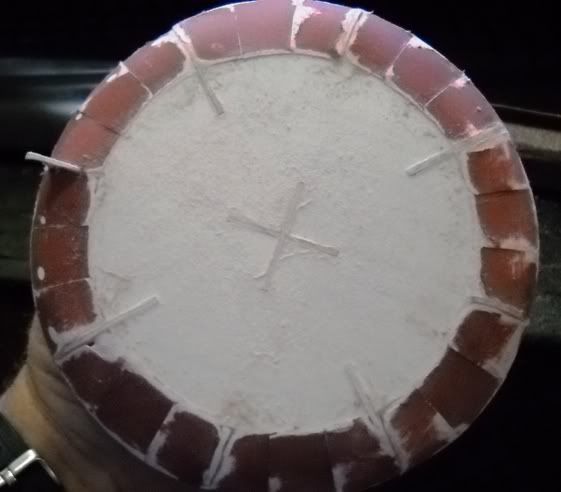
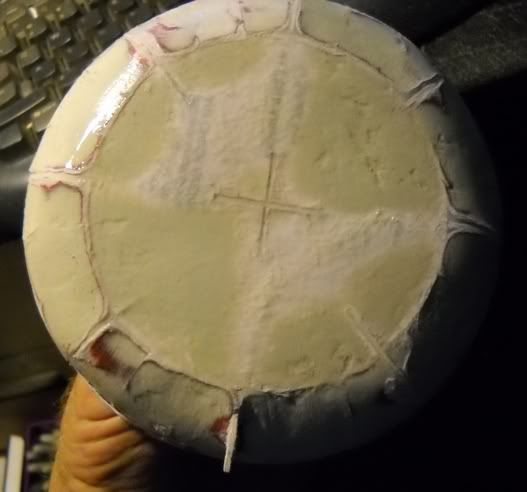
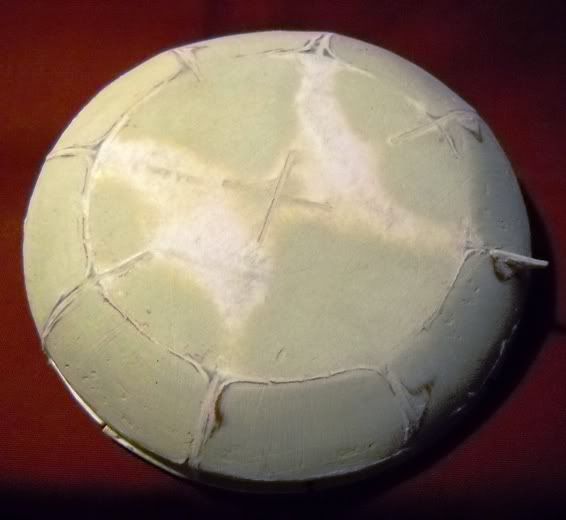
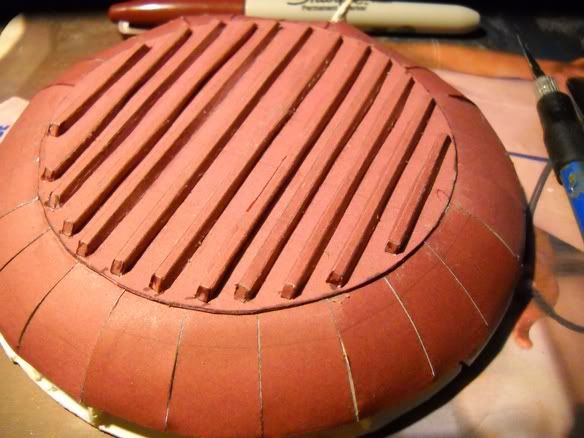
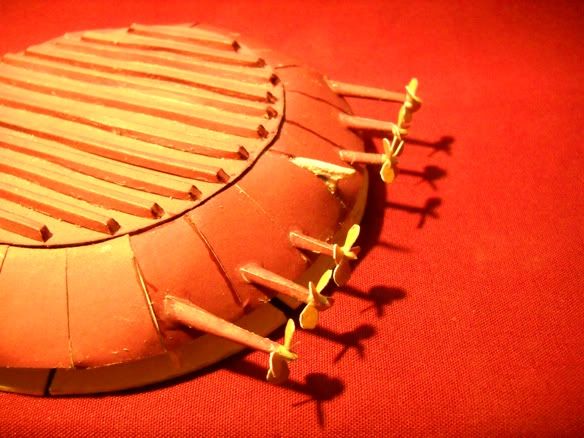
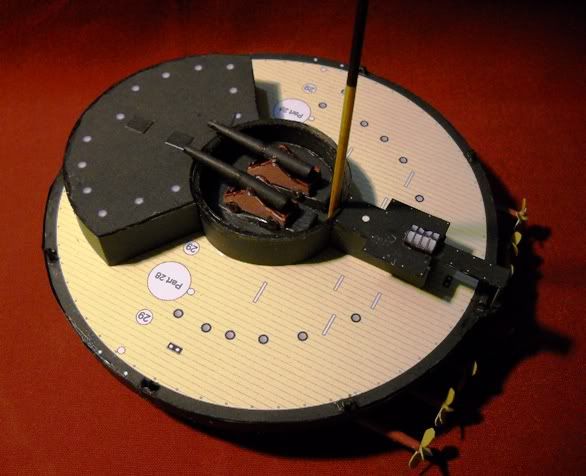
The idea was to provide as stable a platform for a pair of 280mm muzzle loading cannon as could be provided in a coastal battleship design with the maximum amount of armor for protection. To that end the ship had six propellers powered by six individual steam power plants. These were laid out three to an engine room on either side of the hull, taking up most of the below decks area. She sported 12 keels on her hull bottom in an attempt to provide directional control in operation. Unfortunately in actual use, even with 12 keels it required full opposite rudder in relation to the direction of gunfire to keep the ship from rotating with each shot. The round hull design pitched and rolled in even moderate seas despite all the attempted stabilization and power. So it was pretty much a bust, even so they built a second one and it was named after the designer as "Rear Admiral Popov". The pair of them became known as the "popovkas". They did see service in the Russo Turkish War serving in the Danube Flotilla. Unfortunately while in service there, it was discovered that they were vulnerable to plunging fire from high angle artillery despite the heavy side armor they sported. In 1903 they were converted to store ships and in 1912 finally decommissioned and scraped.

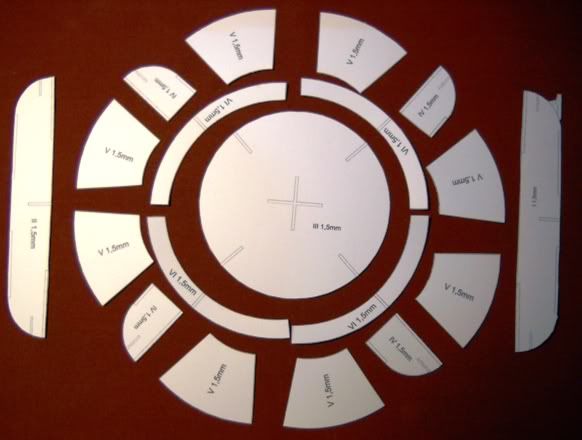
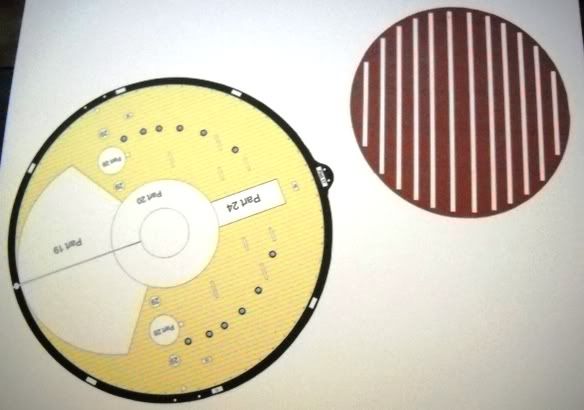
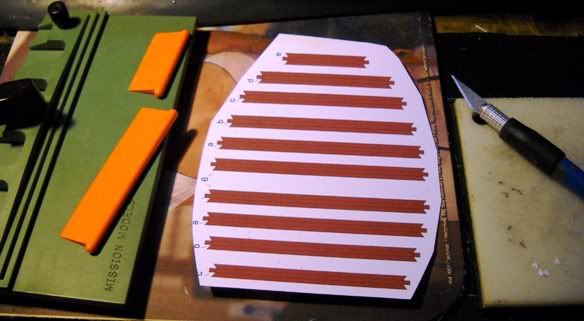
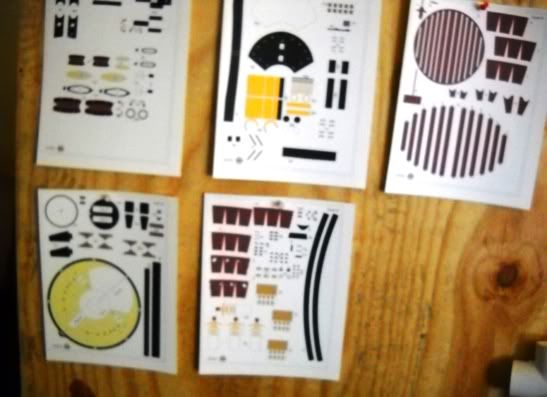
The first thing I noticed about the sheets of parts that provide the framework for the model is that all of these parts are to be laminated up to 1.5mm in thickness. Three sheets laminated together of the 110 pound cardstock I printed it out on provides 1mm so I guess a couple more will be required to get close to that mark. I am using Krylon Spray Adhesive to laminate the sheets together. I am also going to try something new for me for this model, using some of Krylon's Preserve It, Ultraviolet proof spray to stabilize the colors over the long term and hopefully act as a sort of plasticizer to the card. I have heard from other modelers that this makes cutting sharp edges easier and helps to prevent bleeding of edge coloring. I use Faber-Castell Pitt Pens for most of my edge coloring, but sometimes for some colors I have to use my collection of Sharpie markers and these do bleed, even with 110 pound cardstock.

Here is a shot of the parts as they dry from the Preserve It spray job so you can see what I have to start with for this one.

EmNovgorod001.jpg
 

treadhead1952

Member
Mar 22, 2009
181
1
16
Las Vegas, NV USA
Hi All,

I got busy today cutting out all the hull form parts from the two pages of 1.5mm laminated cardstock. This gave my Titanium Coated scissors a trial, but nothing too difficult. Once cut out and laid out, I still had even more cutting and trimming to do as can be evidenced by all the little lines on the parts.

EmNovgorod002.jpg


And therein lies a little bit of confusion. Some of the lines are meant as guides to part location while others are meant to be cut out. The first three parts were the first to go under the knife and everything was going fine. When I got to part #IV, I had three sets of lines, top, side and bottom. I had already cut out the four outer troughs on part #III for these to mate to so I first thought that perhaps they were supposed to be notched together. Not so, the bottom part is just an indicator showing where it is to go I guess. I trimmed the other three parts on the top and sides and glued the trimmed off bottom piece back on the first one. When I started to assemble all the parts the 1/8th circle parts #V that go on the top over the cross pieces were falling a bit below the upper parts. I trimmed them as closely as I could on the line but they required a shim to bring things up level, one place even needed two.

EmNovgorod003.jpg


After gluing the first four part #V in place I discovered that I would need to shim up three more to bring things up level all around. Once the glue had set up I did run a little coarse sand paper around the top upper edge all around to make sure everything lined up properly for the outer hull sheathing to come. It does make for a rather sturdy little hull form keyed and glued together as it is. I also sanded the bottom down a bit as the cross pieces protruded a bit there but nothing too great. I just want the outside parts to go on properly and smoothly all around.

EmNovgorod004.jpg


EmNovgorod005.jpg
 

knife

Member
Jun 23, 2007
91
0
16
I've started on this kit twice, but never completed it. I would think twice about laminating more than a couple of sheets together. It's pretty hard to cut and fold more than a two layer lamination. At one time, one of the smokestacks was a different color than the others, I don't know if they fixed this in your kit. The base takes a long time to get right, all those keel pieces will drive you crazy getting them straight and aligned properly. The prop shafts are also a bit fiddly. I will probably reattempt this boat after I get the ironclad bug out of my system. It's in the right era to go with the rest of my fleet.
 

knife

Member
Jun 23, 2007
91
0
16
I wouldn't laminate more that a couple of sheets together. Otherwise it is too difficult to cut and bend. I started this vessel twice, but never completed it. From my memory, the base will drive you crazy bending, mounting, and aligning all the little keel pieces. The prop shafts are also a little finnicky to get looking right. Once completed, the model makes an interesting addition to any fleet. I will probably retry this kit after I get the ironclad bug out of my system.
 

knife

Member
Jun 23, 2007
91
0
16
Sorry for the double post, I'm working on a 386 machine running Windows 98, slow slow slow.
 

treadhead1952

Member
Mar 22, 2009
181
1
16
Las Vegas, NV USA
Hi Knife,

Still in the wilds of Oregon?sign1

Well, actually I had another post in here but for some reason it flashed a message telling me that my post had to be approved by a moderator before it would appear on the forum??? I was logged in and everything, it accepted my original thread posting so I wonder what was up with that?

I have already laminated the hull parts to five sheets of 110 pound card stock thickness, cut them out and assembled the hull inner form. It did take a bit of adjustment to get the top plates, the 1/8th circle ones lined out so that they would be flat all the way round and line up properly. I have some dandy Titanium coated Fiskar scissors that will chop through card stock like it was a single sheet of note book paper that I can thank for that.
 

knife

Member
Jun 23, 2007
91
0
16
Well, your model will certainly be strong. I almost bought a pair of Fiskar scissors yesterday, but have no way to get them past TSA on the way home (no checked baggage). I look forward to your build, be sure to post lots of pictures!
 

treadhead1952

Member
Mar 22, 2009
181
1
16
Las Vegas, NV USA
Hi Knife,

Yeah, Fiskars are definitely some nice scissors, these have the rubber liner coating on the inside of the grip rings as well as the Titanium coating on the blades, they are sort of gold colored and sharp as all get out.

Lets see if the forum board will let me post my photos like I did the last time. This first one is all the parts after being laminated and cut out from the two carrier sheets.

EmNovgorod002.jpg


The next one is when I was in the process of figuring out how the various parts fit together before I glued it all up. The four part #IV pieces have three lines on them, top, side and bottom. I tried cutting the bottom piece out thinking that it may be designed to key into part #III's outer ring slots. I soon found out that it was just an indicator line, so I had to glue that part that I cut out back in place then trim out the side and clip off the top lines. Once I got them all trimmed out and ready to go, I discovered that the part #V 1/8 circle pieces set down a bit too low in 7 of the spots. A quick lamination of a single piece of 110 pound card and one spot with a double 110 pound card fixed things where they were all level all around.

EmNovgorod003.jpg


All my figuring and gluing got me to this stage, a rather sturdy little circular hull form. I did sand the edges around to make sure that the hull side plates would fit properly when it came time to apply them. I also had to sand the bottom down a bit since the parts that went into the keyed ways stood just a little proud there.

EmNovgorod004.jpg


EmNovgorod005.jpg


I will probably laminate the deck and the hull bottom to one sheet of card to add some thickness there but most of the rest will probably just be a single thickness of 110 pound card stock. The flag will have to be printed out on a sheet of typing paper so I can get it to hang right off the line to the mast.
 

treadhead1952

Member
Mar 22, 2009
181
1
16
Las Vegas, NV USA
Hi All,

I got my deck and the bottom of the hull laminated to another piece of 110 pound cardstock to give them a bit more stiffness to cover any faux pas that I may induce in my construction abilities first.

EmNovgorod006.jpg


The next thing I did was to trim out the little three legged hull side pieces that are meant to go around the lower section of the hull. There is a black strip that goes over the top of these and the round bottom panel covers the opposite end of the hull side pieces so you do have a little fudge room in the application. When I was cutting the parts out and trimming them by cutting the angles out of the centers I tried to be as careful as I could and managed to only clip one of the three piece sections into a one and two piece part, but that turned out okay anyway as it gave me a leg up on the actual application of these parts. Having the single petal of that piece made it the first one to get glued in place up next to the rudder support that is a part of the hull former. Once I got it fudged in place I could see that all of these pieces could benefit from being pre-curved before attempting to install them.

EmNovgorod007.jpg


In case any of you out there aren't familiar with the fast and easy way to curve a card part, here is how I accomplish this task. I use an old mouse pad as the base to lay the parts out on and find a solid round section of something, in this case a piece of brass tube, in a pinch a section of styrene tube or even a round ink pen body could be used. Laying the part down with the outside part down that you want to curve and the inside part that you want it to be radius-ed around up, press the tube or rod or pen body down over the part and roll it back and forth a few times over the part. The "give" that the mouse pad has imparts a nice easy curve in the part. You can continue this process in ever shrinking sized tubes if you want to create a piece of card that you can easily roll up into a tube, but since we just want to make a slight curve in the panel, this will do.

EmNovgorod008.jpg


Once I got the parts all curved, it was easy enough to glue them all in place around the base. I worked from one side to the other so that the previous section would have a little time to set up before I started adding more glue and the next part. While I will admit that it ain't pretty with all the glue remnants and stains, that is okay. I will be sanding this down, probably do a little filling with some putty and then a bit more sanding to make it look a lot better. Once that is all done, I can add another layer of the kit parts down on a much smoother base to eliminate all the humps and bumps. As you can see, even though I did sand the formers down, there is still a little issue with some of them being just a bit high. I also laid the bottom plate on top so you can see that it does indeed cover the terminal end of all of those pieces to hide them quite nicely. It won't get glued in place until I am happy with the appearance of those parts.

EmNovgorod010.jpg
 

treadhead1952

Member
Mar 22, 2009
181
1
16
Las Vegas, NV USA
Hi All,

Tinkering at this one a little when the opportunity presented itself during the course of the day saw some progress made. I sanded it down first with some coarse sand paper after the glue had dried overnight. All sanding was done with a block in an effort to keep things even. You can see that there were a few places that were sanded right on through and even more that were barely touched, those being the lowest spots.

EmNovgorod011.jpg


I sprayed on a coat of some cheap hair spray to seal the paper fibers down once I got it sanded and let that dry before applying the first coat of putty, in this case Squadron White Putty. I used a wide bladed putty knife so it would bridge between the high spots as I worked my way around. Once it had hardened up, not really a long time as these are just skin coats meant to fill in the low areas, I would sand them back down and spray on another coat of hair spray. Once that would dry I could do it again.

EmNovgorod012.jpg


After about three fills it was looking pretty good all the way around and I called it quits. This will be getting another layer of the hull side plates glued down over it and is just meant to be a substrate to make for a smooth application of the hull plates. I did make sure to sand the top section of card that forms the ring that the top of the hull side plates are glued to down to card with no putty covering it.

EmNovgorod013.jpg


Now I get to cut out all those lovely three petal parts out again and try not to turn them into one and two petal parts in the process. sign1
 

treadhead1952

Member
Mar 22, 2009
181
1
16
Las Vegas, NV USA
Hi All,

Back to work on this little one. Well let's see, I clipped out the hull side plates and got them trimmed out, did the same thing again, only clipped one of the three petal sections into a one and two petal piece. But then, like the last time that worked out okay. I saved the miss cut section for last and discovered in all my smoothing I somehow shrank it down just a little and had to trim the one petal piece down just a little bit to fit it in place.

Then it was on to the keels. These were actually pretty straight forward to deal with. I scissored the main pieces out then turned to an old tool that I used to form Photo Etch for my ship and plane and armor models to help get some nice straight folds for the keels, an Etch Mate. Turning the head piece of the Etch Mate around so that I had a nice long surface to use to fold the parts up on as well as using the longer folding blade provided with the Etch Mate made short work of this little task. I used a hobby knife to trim out the very end sections of each keel before folding and that made the pieces easy to line up on the tool.

EmNovgorod014.jpg


In a little bit I had my now improved hull form covered with the hull plates and all the keels placed. I did use a Sharpie to color the white bits that showed up on the ends of each keel but that was a minor issue. All in all, this part of the build was simple, just a bit repetitious.

EmNovgorod015.jpg


Now it is on to the six propeller blades and their mounting shafts. I clipped out the blades, there are four blades to each propeller printed on three individual sheets that need to be folded over and glued up to get enough thickness. The six centers also need to be clipped out and rolled as do the shafts that these are all mounted to. I did clip out one of the long shafts just so I could see how much trouble it is going to be, actually, not much. I rolled it on the Mouse Pad first to get a bit of curve to the piece then rolled it in between my fingers and formed it around a drill bit that was about the size of the small end opening. So other than some repetitious cutting and shaping, this should all be done in short order.

EmNovgorod016.jpg
 

treadhead1952

Member
Mar 22, 2009
181
1
16
Las Vegas, NV USA
Hi All,

I have managed to get some more work done on this little project. I assembled the propellers, shaft extensions, rudder and it's housing then applied them to the aft end of the ship. Being a round ship, this was determined by the white markings printed on the hull plates.

EmNovgorod019.jpg


The next thing to do was to get busy on the deck. I built up the forward deck house first as its' part numbers were next in sequence. To give it a bit of support, I added several cut out sections of card to equal its' height to the position and then glued the bulk head wall part to that. The roof panel and a couple of little cutouts went on the top and then it was time to turn my attention to the main open topped turret. The way that this is constructed it with a pair of walls, a full sized outer one and a half sized inner one glued to a open centered round disc. This allows for the correct height for the floor of the turret where the cannon are located. I pre rolled the walls to make assembling them easier then attached them to the top disc. The floor panel required a bit of trimming to sit down inside the turret but that was okay. Once it was glued in place I added a few discs of card to the bottom to give it a solid mounting to the deck rather than depend on the edges of the turrets' outer wall for a glue joint.

The artillery was next on the listing of parts to assemble. The main barrels are two piece affairs to give them the proper shape of a solid cylinder with a tapered barrel. There was no end for the back of the barrels so I just punched out a black disc to do that little chore. To make up the carriages for the guns I glued the inner and outer pieces to some styrene kit box cut outs for a bit more width. This looks a bit better than just the two card panels from the kit. With the main parts of the guns built up I added the four wheels for each and set them aside while I constructed the two wedges that mount to the floor of the turret for the cannon to set up on. before adding the cannon, I went over the turret inside and out with a black Sharpie to cover up any white showing here and there. After letting it dry, I did it one more time before I glued the cannon down onto the wedges.

The after deck house was assembled and its' two section roof panel was added. A final touch was to make up the mast of the ship from a wooden Fondue stick. I cut it down to the size in the instructions then sanded it to shape. I painted the top part of it black as illustrated and then glued it in place in the back of the turret. As it glues down to the bottom and side wall as well as having four guide wire hold downs that should be sturdy enough.

EmNovgorod023.jpg


The stacks, vents and other deck fittings will be next.