60103, learning was the whole fun of it! And the fact that it was his layout we experimented with made it even better! LOL
") Eddie
Eddie, it was surprisingly easy to do, we were pleased! Here's the basic order (or dis-order depending on your point of view) of what we did:
1) Using a piece of 2" blue foam, we traced the countour of the corner we were going to scenic.
2) We cut it out using the foam hot wire cutter and put in a slope and variation while we were at it.
3) Using the angles pieces that we cut away, we glued them to the top of the foam using Liquid Nails. This "continued" the slop a little higher than the 2" of the foam.
4) We rolled up newspaper into balls and held them together with masking tape. We taped this down onto the foam in a random "natural" formation until we got the shape we liked. We used lots of tape to fill in the holes.
5) Plaster soaked paper towels laid over the top to make a shell. At this point we had to call it a night, as this takes a while to dry.
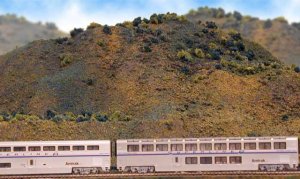
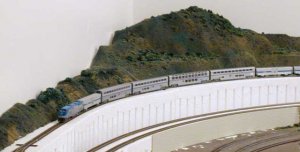
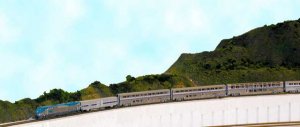
6) The next day, I brought over my 1 gallon can of chocolate colored paint and while I brushed it on thickly, he sprinkled on the fine ground foam from two canisters in a random pattern. We used a dark green, and an earth blend to spice things up.
7) Once we got the base of fine ground foam, we then sprinkled on some course turf in various spots and then soaked the area with elmers/water/alcohol mixture.
8) As a final step, we sporadically added clump foliage in various colors in areas we felt shrubs would grow... like on flat areas or the edges of cliffs we wanted to "soften". (We left some flat areas on the hillside because we plan to put an abandoned mine there. That's probably our project for this coming saturday, in addition to "foresting" the area with super trees.)