Gauge Layout party No. 4

trains1972

Member
Sep 1, 2004
143
0
16
51
philadelphia, pa
pg.photos.yahoo.com
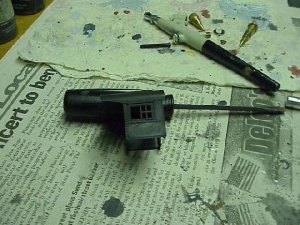
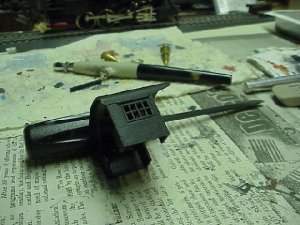
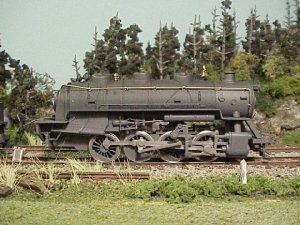
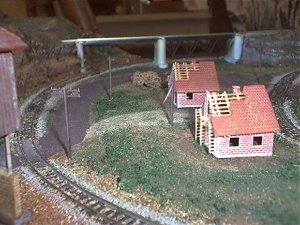
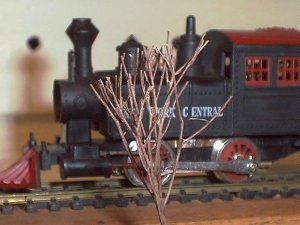
I just got some money together to get some building kits. I tried to use wood but nothing came out looking like a real building. I got 14 kits plus some materail to use on the streets and side walk. So far I have three building for the city done. One has been done for a while and the other was half finished waiting on black paint. I plan to work on the streets and sidewalks tomorrow. Here are pictures of the two finished building the first one was all ready posted.
IM001766.jpg

IM001765.jpg


IM1764.jpg

IM001764.jpg
 

trains1972

Member
Sep 1, 2004
143
0
16
51
philadelphia, pa
pg.photos.yahoo.com
I got a kit that had 13 buildings in it and that just about covers the first three blocks. I got five more buldings to paint and build for the third block and that is it. I don't think I am going to get the city done before the layout party is over. Here is pictures of what I got done this weekend. What do you think?
IM001779.jpg

IM001780.jpg
 

Freelancer

Member
Oct 24, 2002
309
0
16
Utah
www.yardlimit.com
Nice work trains1972! You are truck'n right along there. I wouldn't be surprised if you could get it done before the layout party ends.

As for me, well...I have been stuck on one stupid building for the past two weeks now. Can't decide on a color, nothing seems right. The worst part about it is that I have to get about five more done before November!

Freelancer
 

TomPM

Another Fried Egg Fan
Oct 15, 2002
3,335
0
36
61
Drexel Hill, PA
www.trainweb.org
To me the plastic coal load that came with the tender looked way too toyish. I spread a layer of tacky glue over the load and then a layer of Woodland Scenics coal. Here are some pictures of the tender with the upgraded coal load. The only thing left is to add a fireman and if I come across any other details.
 

Attachments

  • gpf1g.jpg
    gpf1g.jpg
    64.9 KB · Views: 115
F

Fred_M

Good work guys. I really love them silver clouds 1972. :D
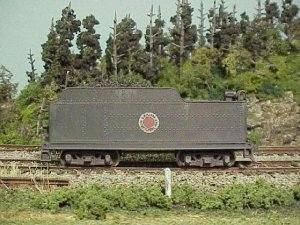
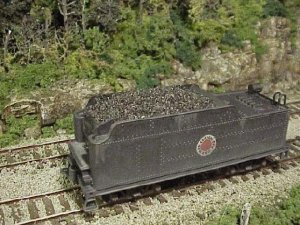
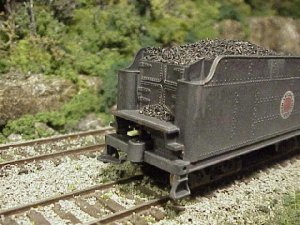
. But really, you all are doing great! and getting lots done. Tom, that coal makes a ton of difference. Is Ray gonna use miracle grow? LOL I been building a speakeasy over in scratch and bash so you can visit me there if you wish. I shouldn't post the same pixs here. Can't wait ti Alls Hallow's Eve. It's one of my top 10 favorite hollidays. I read about an new sign making procedure in a group I belong to. Seems you print a sign mirrored on bond paper and then apply it to wood by appling a solvent to the back while rubbing it on wood. I gave it a shot tonite using testors liquid glue and was happy with the results. This printer here at home is out of yellow so I will try it again tomorrow and take a picture if it works as well as I think it will. Fred
 
A little late with my update, but I was away for 2 days, so forgive me. ;)
I'm stumbling through the scenery process. Basically, I've never done much before, so this is all new turf (pun intended :D ). I spent a few hours trying stuff, not being happy with it, doing some more, fighting with my spray bottle, not being happy, and then finally quitting.
After I calmed down a bit and came back to assess it, I decided I was an idiot and it looked pretty good. :rolleyes:
mod3.JPG

It's actually much more realistic (especially the rocks) than it looks in the picture...shrinking it to a manageable size has the pixels all messed up. My only concern is, though I can't 'blow' any of the turf off, if I bump a spot it doesn't take much to take it off. What am I missing?
(another pic follows)
 
I spent about an hour or so tonight ballasting the little siding in the back, since it won't be very visible I wasn't too worried about doing it 'wrong'. While I don't look forward to ballasting an entire layout, I have to admit it was rather calming. :) Here is a shot of the entire module at present:
mod2.JPG

A Walthers Vulcan Steel building goes in the black area with the overhead crane over the short siding. Another single story factory will be along the mainline in front of the bigger mountain. A road will divide it sort of diagonally in the center. There will be a control tower or something in the Y where the siding splits off, and possibly a garage or gas station in the back. I also want to add a small structure along the front next to the outer mainline, probably a little warehouse or speeder shed or something.
I still need to finish some of the technical aspects of the module like the under-table wiring and connections.
 

TomPM

Another Fried Egg Fan
Oct 15, 2002
3,335
0
36
61
Drexel Hill, PA
www.trainweb.org
Looking real good Ddavidv! :thumb:

I removed the cab from the locomotive body of the 0-8-0 switcher so I could have better access to the windows to install glazing. Also it was easier to work on removing the number. For removing the number I applied some Walthers Solvaset and let it soak in for a few minutes. I then dried it with a paper towel. Next I used an ink eraser and gently rubbed the number off. On one side you can see where the number was. I will most likely hit the cab with a coat of black (Folk Art Licorice) to blend things in. I need to get to LHS to get new numbers.
 

Attachments

  • gph1g.jpg
    gph1g.jpg
    60.9 KB · Views: 121

TomPM

Another Fried Egg Fan
Oct 15, 2002
3,335
0
36
61
Drexel Hill, PA
www.trainweb.org
Now I began the weathering of the locomotive proper. I set up a couple of pieces of EZ-Track and hooked up the power pack. Using an old piece of a culvert I ran the locomotive in a stationary position. I then airbrushed Folk Art Charcoal Gray across the wheels and rods while they were moving. The results are shown:
 

Attachments

  • gpi1g.jpg
    gpi1g.jpg
    65.7 KB · Views: 105