

Don't see to many of these anymore...
- Thread starter Conrail
- Start date
You are using an out of date browser. It may not display this or other websites correctly.
You should upgrade or use an alternative browser.
You should upgrade or use an alternative browser.

How to avoid that:
1.) Paint the sucker.
2.) Shoot it with Glosscote.
2a.) You might want to brush Glosscote under the area where the decals will go.
3.) Trim the decals closer than humanly possible with sharp, fine scissors.
4.) Apply the decals. Use a setting agent such as SolvaSet. Pierce the decals with a pin and let it get underneath. Blot with a clean cotton cloth. (Do NOT use paper towels, Kleenex or toilet paper. The paper fibers wil transfer and make a mess.)
5.) Brush Glosscote over the decal, pierce it if necessary to allow the lacquer to creep underneath. Blot it well --- with CLOTH.
6.) Backfill with the same colour you applied originally. Use a very fine brush and paint over the clear decal film.
7.) Shoot the whole model with Dullcote. The colour areas will merge and there will be no film visible.
8.) Weather as desired.
Try it. It works. No more decal silvering.
Cheers
Scott Fraser
Calgary, Alberta
Looks good to me Conrail
To add to the above post:
If you use Micromark:
http://www.micromark.com/html_pages/instructions/82400i/decal_finishing.html
To add to the above post:
Applying Decals by Andy Slater
The word 'decal' is an abbreviation of 'decalcomania' which means "a process of transferring designs from specially prepared paper to the surface of glass, porcelain, etc." or, "a picture or design used in or made by this process". Strictly speaking therefore it includes a number of things other than the water-slide variety commonly supplied with plastic kits. However that is what we will be talking about here.
The first thing to realise about decals is that they work best on a flat, glossy surface and the trick therefore is to get them to conform to the contours of the model. This is aided by the use of decal-setting solution, which softens the decal and draws it down onto the surface of the model, but even this may not be enough to solve the problem of silvering.
Silvering is likely to occur if you put a decal on top of a matt painted surface because the decal film can't conform to the microscopically rough surface of the matt paint and tiny air bubbles are trapped under the film producing a frosted look. The solution is to apply gloss varnish, or even paint the model with gloss paints, before applying the decals. You can then apply matt varnish after the decals have been applied if you want a matt finish to the model.
Water-slide decals are printed onto a clear carrier film that holds the coloured inks together when the decal is removed from the backing paper. This carrier may cover the entire surface of the decal sheet but is more usually spot printed such that it is just a little larger than the decal image. In either case the decal should be cut from the sheet and then, where possible, the excess carrier should be trimmed away from the edges of the decal. It is suggested that this be done as a two part process i.e. remove the decal from the sheet and then trim it, with sharp scissors as this minimises the possibility of bending the decal and cracking the inks.
The decal can now be immersed in lukewarm water for a few seconds after which it should be set aside for about a minute by which time it should have separated from, and will move freely upon, the backing paper.
Some decal-setting solutions recommend applying a few drops to the model before the decal is applied (so read the instructions on the brand you're using). The decal can now be transferred to the model. Use tweezers to hold the decal, still on the backing paper, over the position where it is to be applied and use a moist paintbrush to ease it into place as you slide the backing paper away.
Quickly adjust the position of the decal using the wet brush. You will find that you have more control if the model is held such that the surface to which you are applying the decal is held horizontal. More setting solution should now be applied so that the entire decal is wet.
Note that after the decal comes into contact with decal setting solution it is important to minimise the amount that you touch it as the solution will have begun to soften it making it even more likely to tear.
Provided that all is well, use a dry cotton bud at the edge of the decal to remove any excess setting solution and leave it to dry.
If something does go wrong it is best to remove the decal while it is still wet. Decals are often sold separately and it should be possible to locate a suitable replacement. If however the decal has dried before a significant problem is spotted, removing it without damaging the paintwork may be difficult. This may be achieved by brushing on some decal setting solution and then, after letting it sit for a few minutes, using some tacky masking tape to remove it. Failing this you may well have to resort to sanding and repainting!
When the decal is dry use a damp cotton bud to clean up any stains from water and setting solution.
The final step is to coat the decal with varnish to protect it and negate and possibility of it lifting at a future date. A coat of gloss varnish may help to even out the surface and hide the clear film even if the final finish on the model will be achieved with a coat of matt varnish.
A word of warning regarding decal-setting solutions:
There are a number of brands and not all decals are born equal either. It is possible that your decals and chosen setting solution will not get on together and it is therefore good practice to always do a test by attaching an unimportant decal to something other than your model to check compatibility.
Problems and Solutions
Silvering
Clear parts of the decal appear frosted because the decal has been applied to matt paint and tiny air bubbles are trapped between the decal and the paint. This should not happen if the advice given above regarding application to a gloss surface and using setting solution has been followed.
Melting
If the decal setting solution is too strong it will soften the decal too much causing it to melt. Dilute the setting solution or try another brand.
Stains
Stains are most probably caused by accumulations of decal adhesives. Use a cotton bud to absorb excess liquid while the decal is still wet and use a damp cotton bud to clean up when the decal is dry.
Bubbles
Bubbles under the decal can be dealt with by pricking with a sharp pin or knife, applying setting solution, and using a damp brush to push them down.
Ink Runs
These are caused by the setting solution dissolving the inks. Try another brand or don't use any setting solution at all.
http://www.themodelmakersresource.co.uk/articles/article011.html
If you use Micromark:
http://www.micromark.com/html_pages/instructions/82400i/decal_finishing.html
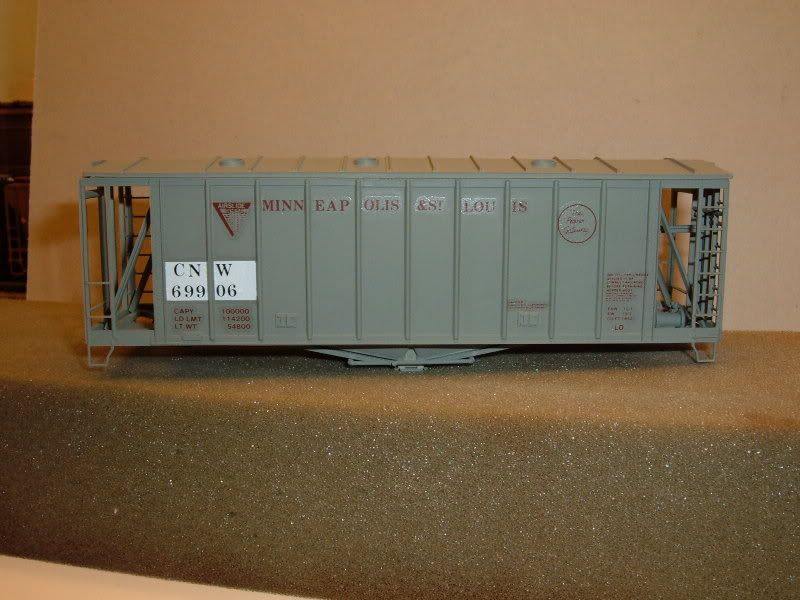
Ahh the decals I have been doing the same trying different ways to apply them.
I tryied putting them on over a clear base and had the setting solution dissolve?
and leave a ring around the decal. I continued on the next set of cars I did not
use a clear base and here is how they look, I am going to apply Dull-cote when I am done with the cars. Hopfully I will be able to remove some of the
clear decal film.
Conrail you F unit looks really good, I am hoping to get some done for the Milw Rd soon.
I couldn't get the striped decals on the nose for my life so I decided to paint them on. I ordered some stuff to make the decals less stiff and stick better. I have about 10 boxcars to decal so I need to get this worked out. I hope the box cars turn out better. The F unit is just an old Bachman I plan to use as a switcher so it was a "safe" practice target.
Believe it or not, but you can use Micro-Sol to remove the decals after dull-Coteing too. Just brush some over the decal and within a minute the Dull-Cote will dissolve and the decal will soften and can be gently scraped off, or you can put on more solution and wipe it off with a dry flat brush.
Jerry
Jerry
Good to know in case I screw up on of the box cars. I may try the FA again later but I'll have to head over to champs website and pick up some more heralds. The heralds on the F unit now are from a Walthers set and a little bigger than they should be anyhow.
By the way... I made every single layer of those shingles on the switch tower by hand. Took hours. Yep I'm proud. Turned out decent for a 6 buck model. I still have to whip up some windows and a few interior items but it's funny how good you can make something cheap look.
By the way... I made every single layer of those shingles on the switch tower by hand. Took hours. Yep I'm proud.
Turned out decent for a 6 buck model. I still have to whip up some windows and a few interior items but it's funny how good you can make something cheap look.