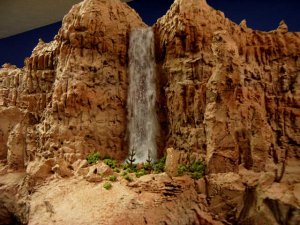
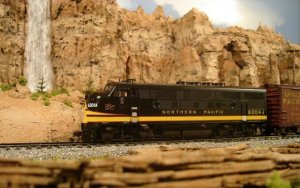
Don't laugh too hard...It's my first attempt!

Nazgul

Active Member
Jan 22, 2006
992
0
36
63
Ohio
Thank you guys: prodigy2k7, Kurt, Lynn, Pete, Herb, and Russell :thumb:

Russell....I've been called many things:eek:ops: but NEVER a superstar!...LOL!!!!!
I can honestly say that I have never had the pleasure of "hanging out" with a better group of people than I have since I found The Gauge. ...and you, Russell, are among the very best!:thumb:

Some pictures I haven't shown...
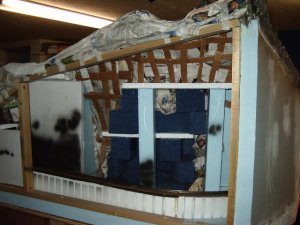
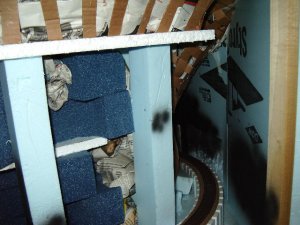
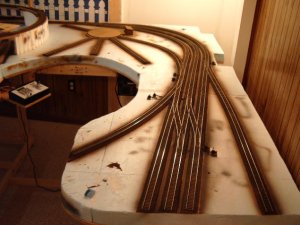
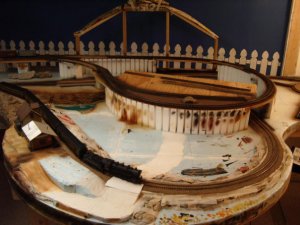
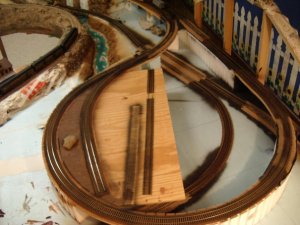
My layout rolls away from the wall and that allows me access to the mountain tunnel in-case of derailment and also for track cleaning.

Here's a couple of pics of what it looks like (it ain't pretty!:D ):
Twin River RR 262 small.jpg

Twin River RR 263 small.jpg

Here's a close up of the bridge track (I like the irregular shape and grain pattern of the Micro Engineering track):
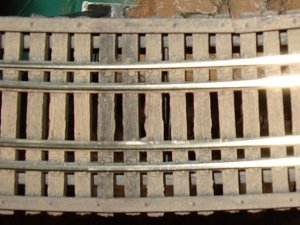
Copy of Twin River RR 264.jpg

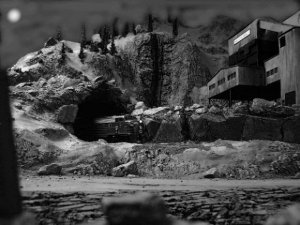
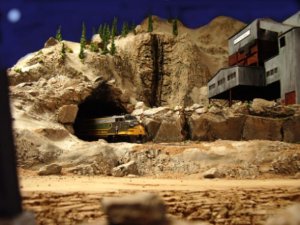
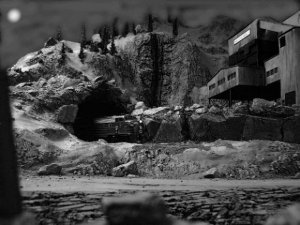
midnight on the Twin River
Copy of Twin River RR 257 B&W.jpg
More tomorrow................:thumb: :wave:
 

green_elite_cab

Keep It Moving!
Apr 4, 2005
1,876
0
36
34
Hainesport NJ
thats awesome! how did you make the sky? i need to learn how to do that for my pictures.... i can think of very few railroads that run through scenic concrete and drywall like mine does, lol.
 

wickman

Member
Dec 8, 2005
546
0
16
62
Ontario canada
Thats a great shot of the nite run. :thumb: :thumb:
It's always nice to see whats going on behind the nice scenery , amaing what we can use to build a mountain or mole hill:wave:
 

UP SD40-2

Senior Member
Apr 29, 2006
2,709
0
36
58
Congratulations Steve!!!

Steve:wave:, HAPPY ANNIVERSARY!!!:D this has been a TRULY FANTASTIC THREAD!!!:thumb: I cant wait to see what the next year on here brings;):D. THANK YOU!!!:D

CRIPES Steve:eek:, that night shot is SLAP AWESOME!!!:thumb: :thumb: :thumb: :thumb: :D

:D -Deano
 

Nazgul

Active Member
Jan 22, 2006
992
0
36
63
Ohio
part 1 of 2

thanks... green_elite_cab, Lynn, Deano, Kurt, joesho:thumb: :thumb: :thumb: :thumb: :thumb:
The shot was one of many "happy accidents" that we all stumble into from time to time:D

how did you make the sky?
GEC...I'll try to answer your question
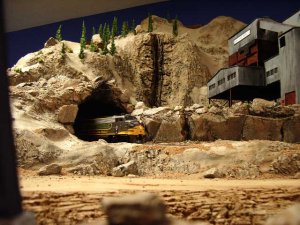
Here is the original pic:
Twin River RR 257 small.jpg

I use the freeware "Serif Photo Plus" to re-size my pics and it also has an MS Paint-like tool....The wall color was blue so I used the "color pick-up" tool to make the ceiling blue as well. Then I lightened the blue color and used the "air brush" tool to lighten the sky. I left some random areas the darker original color. Next I used the air brush with white and a wide spray pattern and made the moon (one quick click and it made a non solid sphere that looked like the moon through the clouds):
Twin River RR 257 2.jpg

when I was done...I felt it looked too fake (too Bright) so I used the Black and white edit feature in "HP Photo Smart Premier" that came with my cpu and got this:
Copy of Twin River RR 257 B&W2.jpg
See....nothin' to it!sign1 ....I don't know if it helps you or not...but it was done free and that's always a good thing... but it is time consuming.

Next.....Part 2
 

Nazgul

Active Member
Jan 22, 2006
992
0
36
63
Ohio
Part 2

I thought I would show some pics of the right side of the layout. I don't post them because there ain't much to see:D but I thought it would refresh people's memories and give a better sense of the entire layout....

First up, the yard area: to the outside of the far right track will be some shallow industrial buildings that will provide a little switching action. The track on the far left that curves around to the turntable is the caboose track....There I go again mentioning the TT (forget I said anything:D )
Twin River RR 218 small.jpg

the next two shots are of the center peninsula. you can see I have a parking area and a road that leads from the station to..........We'll talk about that in a few days. ;)

Twin River RR 220 small.jpg

All of the short ballasted areas are going to eventually become tunnel openings. As you can see, there are going to be quite a few of them:)
Twin River RR 224 small.jpg
So...not really a lot done here....YET!


Here's another video...this time showing the continuous running aspect of the layout (sorry about the quality:cry: ) thought it would help give a realistic feel of the size and what the trains look like running (too fast:D ) on it:
http://s147.photobucket.com/albums/r310/nazgul-np/?action=view&current=IMGP1485.flv


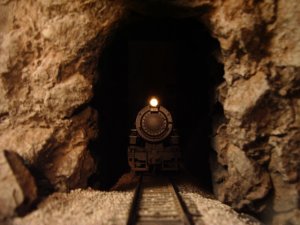
I'll leave you with another shot I took.....

Emerging from the tunnel
Twin River RR 275 small.jpg

More tomorrow
Take care:wave:
 

steamhead

Active Member
Apr 16, 2005
2,360
0
36
75
Brownsville, TX
You build an amazing layout, teach a bunch of us how to do a lot of things, uncover the secrets of the sponge car (among other things), find time to do photo magic....What else can you pull off on the second year...???

Congrats on the first year...Let's hope the second is as inspiring as the first...!!!sign1
 

cnw1961

Member
Jan 7, 2006
846
0
16
65
Germany
Interesting pics from the right side of your layout. They reveal that you still have a lot to do – good for us :D .
 

Nazgul

Active Member
Jan 22, 2006
992
0
36
63
Ohio
Part 1

Today for the anniversary...I'm going to try my hand at a full blown tutorial:eek:ops: I even have a few shots of my hand (like all good tutorials should have:D )

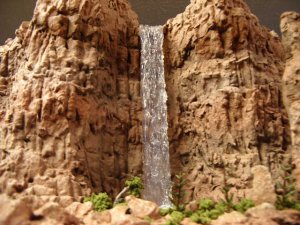
While making a desert scene for Deano's diorama...I tried different materials to make a waterfall and actually found, what I think, is a better way to make one than the materials/method I used on mine (the end product is certainly better).

How to make a waterfall
MATERIALS NEEDED:
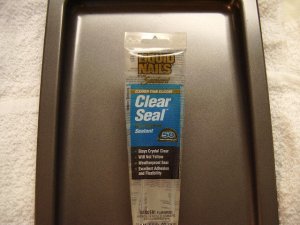
1) Liquid Nails “Clear Seal”
Waterfall 001.jpg
(it does not dry “milky”) It worked great for me. You could try a substitute….but why would you…LOL!
2) A non-stick cookie sheet (don’t use your wife’s)
3) Cotton balls (use your wife’s)
4) hairspray (your call)
5) Toothpick
6) Craft Knife
STEPS:
1) Prepare the area. This includes finishing (texture and color) all the terrain around and BEHIND the future waterfall. What method you use is entirely up to you (in this case I used Sculptamold and paint)
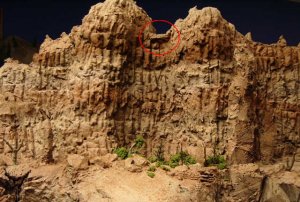
In the photo below, you will notice(in the red circle) that I made the edge, where the water will spill over, protrude further out than the rest of the rock face. This will allow the "water" to fall without interruption all the way to the bottom. This would not be necessary if you planned on a series of smaller falls spilling into each other on the way down.
Scenery 331 small 2.jpg

Part 2 next...
 

Nazgul

Active Member
Jan 22, 2006
992
0
36
63
Ohio
Part 2

2) Measure the length and width of the falls. Add a half inch to the width and a full inch to the length to account for shrinking (I didn’t notice any).

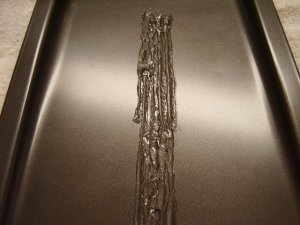
3) Run beads of the sealant to the proper length and width.
Waterfall 002.jpg
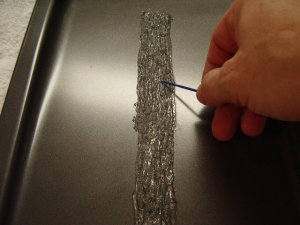
4) Work it with a tooth pick in downward strokes to pull all the separate beads together and rough up the surface.
Waterfall 004.jpg
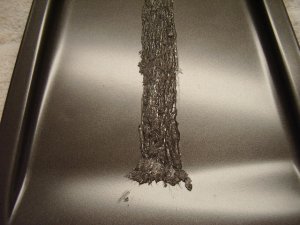
5) Pull the sealant out to the sides at the bottom. This is where your falls will strike the surface of the lake/stream etc.
Waterfall 005.jpg
When finished let dry a few days. It remained tacky even after waiting but that actually helped with the installation.

6) Carefully peal the “water” from cookie sheet (it may stretch a little…don’t worry about it) and cut to size.

7) The backside of the sealant will be very tacky…use that to attach it in place.
Make sure the waterfall is taunt and straight. I used, small pieces I trimmed off, at the bottom to simulate the “splash” of the falls entering the water.
Scenery 355 small.jpg
Scenery 352 small.jpg
Now, you can stop right here (especially on a short waterfall) or take it to the next level and add the spray effects...

Part 3 next...


Nazgul

Active Member
Jan 22, 2006
992
0
36
63
Ohio
Part 3

Spray effects...

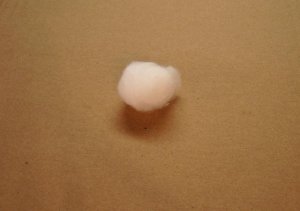
8) Take cotton ball
Waterfall 006.jpg

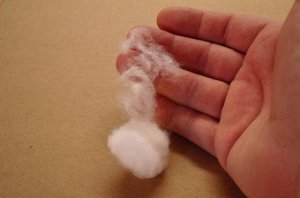
And pinch a little between your fingers and pull it carefully away (keeping it attached)
Waterfall 007.jpg

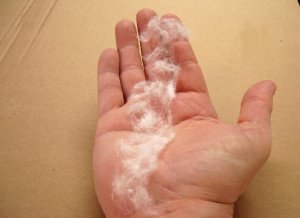
Keep going back to the ball itself and repeating until you have a lengthy, wispy looking piece of cotton.
Waterfall 008.jpg

Place on the fall. Move it around and see where you like it. It should stick on its own, at least temporarily,(if not use a FEW TINY SPOTS of white glue to help).
Make as many as necessary and don’t forget about the sides of the waterfalls (this really helps make it look like the water has volume and isn’t flat!)
9) Once everything is where you want it…spray with hairspray (a few light coats are better than one heavy…bet you heard that before…LOL)
Sometime in the future the cotton may become dusty or discolored…you can always pull the cotton off and replace it….good as new!
Looks good in person….looks good in pictures!
Scenery 010 small.jpg

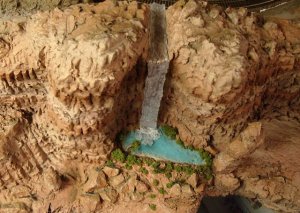
Deano took this bottom picture...can't ya tell!...LOL
Deano, your pics are flat out THE BEST!!!!:thumb:
diorama waterfall 1.jpg

There are many ways to do one of these...this is ONE way:)
But I will say one thing for this method...It is very easy and almost "Steve Proof"!:D

More tomorrow
Take care:) :thumb:
 

cnw1961

Member
Jan 7, 2006
846
0
16
65
Germany
Steve, you are an artist :thumb: :thumb: :thumb: . Thank you for this tutorial :wave: . After seeing this tutorial, I am looking for a way to have a waterfall on my urban layout. What is the minimum height for a building to justify a waterfall? Hmmm, or perhaps a leaking water tower? sign1
 

UP SD40-2

Senior Member
Apr 29, 2006
2,709
0
36
58
Outstanding Tutorial!!!

Steve!!!:wave:, OUTSTANDING TUTORIAL!!!!!:thumb::D. VERY WELL DONE!!!:thumb: :thumb: :thumb:
BTW, your vid was NICE!, and that shot of the steamer coming out of the tunnel is SLAP AWESOME!!!:thumb: GREAT JOB!:D -Deano
 

MilesWestern

Active Member
Sep 20, 2005
1,800
0
36
34
CA
protopaintwest.googlepages.com
I've read just about every article on Waterfalls, from straight cotton swabs to tin foil to hot glue, and none of them looked even REMOTELY AS GOOD AS THIS ONE!!

Now if you do one other thing with the article, YOU MUST PUBLISH IT!!
(I'm absolultely NOT KIDDING.MR, RMC, or other Magazines will pay you $$ for that.)
 

steamhead

Active Member
Apr 16, 2005
2,360
0
36
75
Brownsville, TX
GGGRRRREEEEAAAATTTTT...!!! You make it look so easy, I might even try my hand at it. I'm sure I can find a spot for one when I get around to doing the center peninsula on the layout.

That's the waterfall on Deano's/your module, right??? Lucky Deano...!!! :thumb: