Don't laugh too hard...It's my first attempt!

ocalicreek

Member
May 4, 2005
824
0
16
48
Puyallup, WA
groups.yahoo.com
Steve...I swear every time I see a picture from your layout with the waterfall in the background I can just hear it roaring! Now I can hear that loco panting too! Great job...I'm assuming you airbrushed? Did you rotate the drivers between passes? Also, have you cleaned the wheel treads yet?

Not that you need to, but if you want more info check out John Pryke's work in MR on weathering steam locos...or purchase his book. I'm with him every step of the way except painting the base coat a 'gray' color. IMO, Black is black...it's the base color to start with (gloss) and then any gray effects from soot, dust, grime, etc. can be added. It's the old photos & movies from that period that make black locos look gray, not the paint itself. Are we modeling the photo, or the engine itself? (Unless it's Pennsy 'Brunswick Green')

Anyway, down off the soapbox, as one who has recently spent time wiping down drive rods on an actual steam locomotive...let's put it this way...they were an oily, grimy black when I started and closer to white when I finished, but even still the tint that remained was brown...of course, they were painted white with portions left polished steel, a handsome loco indeed (Chehalis Centralia Ry #15). Don't forget the grease on anything that moves! Grease, even when grimy, still retains a shimmer or shine.

Keep up the great work - you are an inspiration for us all. I'm still trolling through old MRs for planning ideas...I'll update my post with a new sketch next week sometime.

Galen
 

cnw1961

Member
Jan 7, 2006
846
0
16
65
Germany
Good job, Steve. I was quite nervous before I used my airbrush on my Mikado for the first time. But I think you’ll agree, that it gets easier after you started. You’re on the right track :thumb: :thumb: :thumb: .
 

Nazgul

Active Member
Jan 22, 2006
992
0
36
63
Ohio
gottaBreal......thank you:thumb:

Kurt...thanks....It does get easier after "you get your feet wet" Your Mikado came out awesome!:thumb: :thumb:

Galen:
I'm assuming you airbrushed? Did you rotate the drivers between passes? Also, have you cleaned the wheel treads yet?

I did use the "disposable airbrush" TM :D . I also had my younger son at the controls to rotate the drivers as I painted. At the time of the pictures I had not cleaned the treads...Today I sprayed it with dullcoat and will do the cleaning on the treads and also the pickups on the tender. I will attend to the other details after I put the decals on.

I don't know about being an inspiration but I thank you for the complement. What I find inspiring are modelers, who know more than I ever will and could easily pick apart my work, choosing not to. Instead they encourage and "gently" guide myself and others in the right direction. They teach "why things are the way they are" on a real railroad. I truly would be lost without all my mentors (and the word is meant):thumb: :thumb:

After getting over my initial trepidation when starting this layout...I really haven't been afraid to tackle any of the jobs that needed to get done...until this last one. Somehow the thought of weathering an expensive locomotive really made me nervous. I put it off even though I wanted to do it. It wasn't until Kurt did his Mikado that I finally said "the heck with it...what's the worst that can happen...it gets a lousy paint job!" and dove in. Plus I needed a break from scenery!:D :D Now... I did get some excellent advice from someone here on the gauge who answered some of my many questions about the steps needed to weather and decal. I would mention his name but it would only embarrass this person who is a Union Pacific nut! thanks Deano....I mean nameless faceless person!;)

I didn't intend to rant on like this but any frequent visitor to this thread knows that I may get on a talking jag at any moment....It's the price you pay:D
thanks everyone!
 

Herc Driver

Active Member
Apr 18, 2005
1,474
0
36
North Carolina
Whoa whoa whoa!!! Back that steamer up! That was your first weathering work??? You're first ??? Man, that is impressive! All the scenery is looking really great and now you have a great looking steamer to go with it. Good job! Really well done.
 

Nazgul

Active Member
Jan 22, 2006
992
0
36
63
Ohio
Herc Driver
Thank you so much:thumb:
As a frequent visitor to your gallery, I am familiar with the high standards you set for yourself and your work....your kind words and encouragement mean a lot.
Thank you
 

Nazgul

Active Member
Jan 22, 2006
992
0
36
63
Ohio
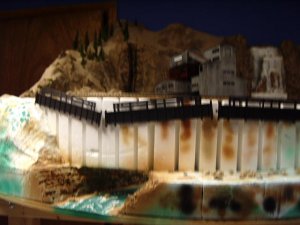
I just finished the Steel viaduct!!!!!
You know something?...I think I'm getting the hang of this modeling thing:thumb:
This kit was soooooo easy! and I think it looks awesome!:thumb: :thumb:


I was so exited when I took this picture, my hand was shaking! But I soon calmed down...I wanted to capture this masterpiece for posterity!
Scenery 240.jpg

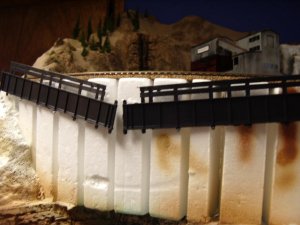
A little gap-age...you can hardly notice:thumb:
Scenery 241.jpg

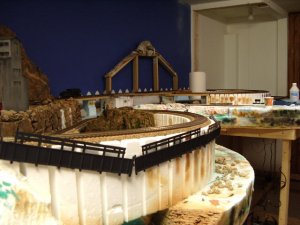
I'm usually not a rivet counter but I wanted this project to be "RIGHT"!
Scenery 242.jpg


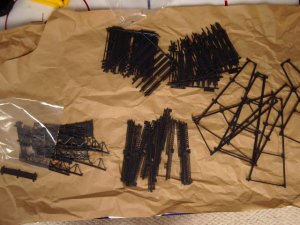
I have only one question...What am I supposed to do with all these "extra" parts?:confused:
Scenery 243.jpg
 

Nazgul

Active Member
Jan 22, 2006
992
0
36
63
Ohio
GBR
I've been thinking the same thing...If I had been smart enought to really think ahead, I wouldn't have to, but....
At least I didn't drop feeders on that section of track or glue it down:thumb:
 

cnw1961

Member
Jan 7, 2006
846
0
16
65
Germany
Steve, you’ve reached the highest level of modeling skills. I have never seen a bridge like this before. Don’t care about the "extra parts", they are for beginners. sign1 What do you want to do to get a less artistic but more realistic bridge? If you use styrene, it should be easy to build curved girders. Then you could still use the "extra parts" for the piers. I wouldn’t change the style of the viaduct, because besides the fact that you need a curved bridge and the viaduct you bought ist straight, I think you made a very good choice. This steel viaduct will look great on your layout. Hey, and model railroading without any problems would be boring :D .

EDIT
No need to build curved girders. I just saw in yor steel viaduct thread that Wayne has the solution for your problem.
 

Nazgul

Active Member
Jan 22, 2006
992
0
36
63
Ohio
Here's the deal:
The 210' ft viaduct (which I bought) can only be built (according to instructions) for a 30" radius or larger curve. The curve I plan to use it on is 20". So in order to use it...I will have to curve the girders. The girders are pretty pliable so that part won't be a problem. My first thought was to cut a piece of plywood in a 20" radius the width of the inside dimensions of the finished bridge, paint black and "mold and glue" the girders to it. Fairly easy...but you loose the detail of the X-bracing that you would see from underneath. I honestly can't imagine anyone seeing that (except possibly a camera shot looking up).
Second option would be to bend two metal flats on edge to the appropriate radius, glue the girders on them and still probably be able to use the X-bracing.
Ideas or suggestions????
I did order the bridge flex track that I THOUGHT came with it:curse: ..but I have plenty to figure out before I need that....
 

Starman

New Member
Sep 21, 2006
90
0
6
65
Hey Nazgel,
I live in ohio too and maybe i can help you somewhat but i am new at this too.
 

cnw1961

Member
Jan 7, 2006
846
0
16
65
Germany
Steve, could you post a pic of the inside of the girders and of the x-bracing ? It might help to see how the bridge is supposed to be assembled to come up with an idea on how to change the construction.
 

steamhead

Active Member
Apr 16, 2005
2,360
0
36
75
Brownsville, TX
Steve,

That lil' 0-8-0 is looking awful nice...! I got one of those babies (unlettered) and will eventually have to do some weathering & lettering on it. It looks so nice & shiny right now, but I'll have to bite the bullet and "grimmy" it up.
That steel bridge is awesome!!! If you don't use those "extra" parts, I'm sure I can put them to good use.:D
 

fsm1000

Member
Jun 4, 2006
467
0
16
63
Coquitlam BC
fsm1000.googlepages.com
Hey guys don't let him fool you. He is actually 90 years old and been doing modeling since american flyer came out. LOL
Has made over 200 layouts and has a small team of people working for him making stuff for his layout. :D

Looks great guy. Keep this up and you will be teaching us guys who [supposedly] know better LOL

Looking good. :)
 

Nazgul

Active Member
Jan 22, 2006
992
0
36
63
Ohio
I'll have you know...I'm not a day over 86!:D :D :D
Too funny!!!!


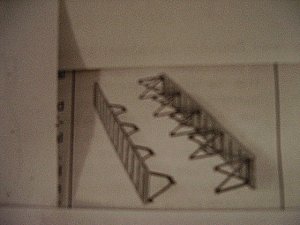
here's a blurry pic of how the X-bracing works:
Scenery xbraces.jpg

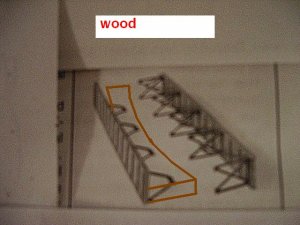
lousy pic of 'Wood" fix:
Copy of Scenery xbraces.jpg

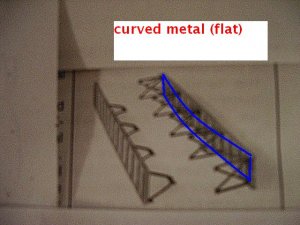
Lousy pic of "Flat metal on edge" fix:
Copy (2) of Scenery xbraces.jpg

perhaps this will show what I was thinking......perhaps not:rolleyes:
anyway, these were the first two "solutions" that came into my headhamr
 

ocalicreek

Member
May 4, 2005
824
0
16
48
Puyallup, WA
groups.yahoo.com
Having not built one of these before (but hoping to someday) I can't really give you any detailed advice.

That said, here is my advice - go find a prototype and look at it! I've never seen a bridge with actual curved girders, but I have seen curved bridges with straight girders.

Yes, yes I know that real bridges have broad radii, but remember we are modeling in a high ratio of compression and I bet ME and CV have taken that into account.

Practically, wait till you get the bridge ties then place them under the rail (actually install them OR use twist ties to hold them under the actual flex track). See how that looks and let that guide your decision process.

Now, get over to my planning thread and help me out. I'm having tremendous planner's block right now.

Galen
 

MilesWestern

Active Member
Sep 20, 2005
1,800
0
36
34
CA
protopaintwest.googlepages.com
Yes, Galen's correct, you can't have curved girders, and you wont see them either. The way a gircer bridge is built would cause a major loss in structural stability if the loadbearing girdes was curved. Think of any truss, suspension, deck, girder bridge...none of them make a curve in the middle f the span, maybe a bit of a turn at each abutment, piling or tower, nut never in the center, because the lateral force of the outward curve has nothing to support it, so it's bend over itself and break, causing a very nasty wreck. Just something to keep in mind. :thumb: