I covered my WS grades with paper towel coated in the WS scenery stuff -- the thick latex paint whatever it's called. I mixed the stuff with acryllic paint and then coated a small piece of paper towel (industrial grade) on both sides and applied it. After a few months or years I repainted it a different shade of green. (This was my listout section so there's no texture down the sides.)
Don't laugh too hard...It's my first attempt!
- Thread starter Nazgul
- Start date
You are using an out of date browser. It may not display this or other websites correctly.
You should upgrade or use an alternative browser.
You should upgrade or use an alternative browser.
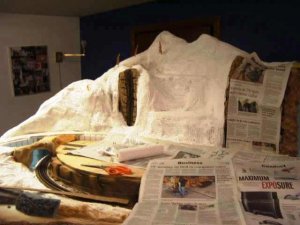
Did a little more plaster cloth on the mountains
All the talk about ballast got me thinking about color and size. All I had on hand was WS fine buff. Size looks good....not sure about the color...I always pictured gray but I'm no longer sure. I want to decide so I can at least ballast the tunnel entrances allowing me to close them in. With the rocks and rockfaces being brown, I'll probably go with the buff ballast...........or the dark brown................or the gray...................
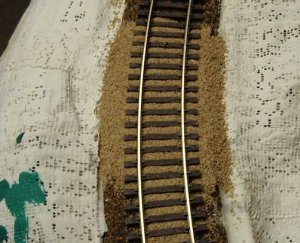
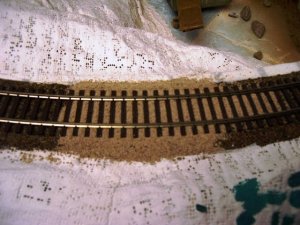

All the talk about ballast got me thinking about color and size. All I had on hand was WS fine buff. Size looks good....not sure about the color...I always pictured gray but I'm no longer sure. I want to decide so I can at least ballast the tunnel entrances allowing me to close them in. With the rocks and rockfaces being brown, I'll probably go with the buff ballast...........or the dark brown................or the gray...................


Steve: my take on ballast is "what looks right to you". I had some scaleN ballast that ended up looking like plaster, it was so fine. I think some texture is needed. Also, size should vary -- mix in a bit of less fine and even finer.
Colour depends on what you're modelling. I assume that WS has seen ballast in all the colours they provide. It also varies along the railroad and different railroads in the same location can have different colours.
Colour depends on what you're modelling. I assume that WS has seen ballast in all the colours they provide. It also varies along the railroad and different railroads in the same location can have different colours.
The mountain is looking great , just a thought though in the past week or so I did all the plaster cloth work on my layout .The cloth was from Dickblick it was a big box , I found it not as good as the woodland scenic cloth but that didn't surprise me. But getting to where this is going I found the plaster cloth needed a painting of plaster of paris for me to apply the bragdon mold castings or any rock casting I used , it worked out much better cuz there was a stronger base afterward. And 40 pounds of hydrocal later I've had to switch back to the plaster of paris. 

I did the same sort of thing on the last layout using plaster of paris and paper it gave a real nice texture60103 said:I covered my WS grades with paper towel coated in the WS scenery stuff -- the thick latex paint whatever it's called. I mixed the stuff with acryllic paint and then coated a small piece of paper towel (industrial grade) on both sides and applied it. After a few months or years I repainted it a different shade of green. (This was my listout section so there's no texture down the sides.)

Hi Steve, been watching your progress, and enjoying your work:thumb:
I had a good look at your plaster cloth, I have used it a lot on my new L/O, after soaking it a few seconds before application, then applying it to the scene area. I always have a vessel of water ( I use the discarded laundry powder scoops) and a small paint brush.
After running a wet finger to break up the impregnated plaster in the cloth, I use the wet brush to really spread it. It will set really hard then
When dry add plaster coating it and it will look great.
Thank you everybody for your timely suggestions and opinions. I will try varying the size of the ballast and also will brush on additional plaster over the cloth. My basement is carpeted and there aren't many flat areas to put a tray of water. So, to avoid as much mess as possible, I put my dry plastercloth where I want it and then wet it with a spray bottle. Then I work it with my hand. In the future, I'll try Chris' suggestion and use a wet paint brush to help spead the plaster around. I learned a lot of valuable info in 4 posts....thanks everyone!
Steve, I don`t put it on dry, I dunk it first in a pail of water, keeping it a moving so any water runs to and fro on the cloth as I bring it to the area, then I spread the cloth out then work on it as before.
Try it, a bit messy but man it works:thumb:
Try it, a bit messy but man it works:thumb:
Steve, have to say the layout looks great so far. Makes me a lil jealous, even though I'm modeling an area that has lush vegetation, rolling hills, and a lot of flat area. Well, plan to, if you saw my laout, you would ask "what vegetation?"
Viperman,
I saw, on another thread that you replied to, that you are running trains on a lay out for you and your small son and that you plan a bigger one when he is older. If that's correct, your present layout should be great to experiment with and hone your skills. Why not post your progress? Start a thread and show your work. You'll learn things and so will we. I know I wouldn't be as far along as I am if I didn't post progress and more importantly ask questions.....However, with a child that age, you probably have precious little time for scenery....It's more important (and fun) to share time watchin' trains with the little guy! Seems to me you don't need to be jealous of ANYBODY! :thumb:
I saw, on another thread that you replied to, that you are running trains on a lay out for you and your small son and that you plan a bigger one when he is older. If that's correct, your present layout should be great to experiment with and hone your skills. Why not post your progress? Start a thread and show your work. You'll learn things and so will we. I know I wouldn't be as far along as I am if I didn't post progress and more importantly ask questions.....However, with a child that age, you probably have precious little time for scenery....It's more important (and fun) to share time watchin' trains with the little guy! Seems to me you don't need to be jealous of ANYBODY! :thumb:
I have I think 19 shots of the layout in the gallery. From the time I got it with track laid and mounted on 2 4x8s (for free), to where I have changed the track plan to, and started to build the base for scenery. I will take pictures with my dad's camera in the morning, since I forgot mine this weekend. I will try to start a thread soon in the ho forum of my progress, and see if I can post, or at least link to, the old photos, along with adding new
lol, i know the feeling. let me guess, the scenic cement is casuing the stones to bubble up and get misplaced or ruined? best way to fix that is to have a container of water and detergent mixed together, and then soak the ballast with it, then apply the scenic cement. that way, it will flow into the crevasses almost instantly.
Steve, right there with you buddy. Started mine today. Cab's got it right, get yourself a cheap spray bottle filled with H2O and a drop or two of dishwashing detergent. Wet ballast, and drizzle glue mix in. Flows in rather nicely. But. . .
BALLASTING STILL STINKS!
BALLASTING STILL STINKS!
My biggest problem is the fact that I "partially" closed in a tunnel entrance.
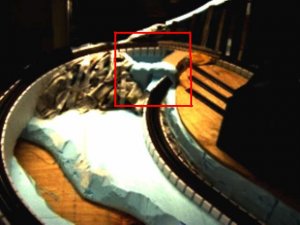
I left (I thought) plenty of access room.....HA! There is no such thing as a partially enclosed access with PLENTY of room for ballasting. I couldn't get my big ol' gorilla mitts in there and get the ballast where it needed to go. What a pain...the good news is, only 1 more entrance is "partially" covered......:cry:....on second thought, there is no good news.

I left (I thought) plenty of access room.....HA! There is no such thing as a partially enclosed access with PLENTY of room for ballasting. I couldn't get my big ol' gorilla mitts in there and get the ballast where it needed to go. What a pain...the good news is, only 1 more entrance is "partially" covered......:cry:....on second thought, there is no good news.
To Paint or Not to Paint
The Rails.
You asked me if I was going to paint the rails after ballasting, and I said I didn't know. Well, probably not now after this breakthrough.
I used a spray bottle with water and soap to wet down the ballast before gluing. I looked at the areas I did over the weekend, and it looks like the water oxidized on the sides of the rails, dulling down the silver coloring. That may be all it needs. Steve, did your rails turn as well?
I don't know, Nickel Silver shouldn't oxidize..... ive got my nickel silver track wet and nothing happened to it. its probably residue. besides, rail rarely looks like dulled silver on the sides, you should probably take a small paint brush and paint polly scale rust on the sides fo the rails.
Ballasting alone/with paint
Chris, I can honestly say I didn't see a noticeable difference in the rail after ballasting and gluing. I decided to paint a section of the rail that will be hidden in a tunnel to see if painting the rail was worth the time and effort.
Before paint:
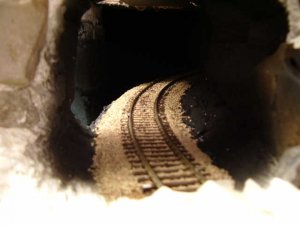
After paint:
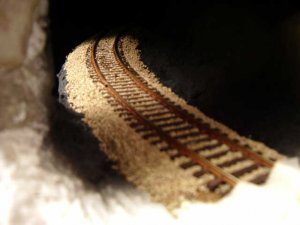
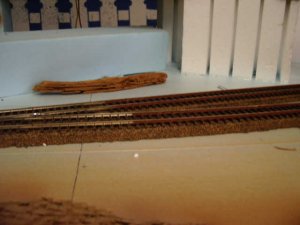
Here is a section of track showing both at once:
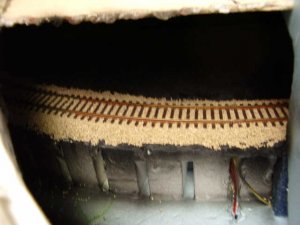
I have decided to paint the rails...how much the level of realism increases can not be overstated. However, this is my permanent layout for the foreseeable future and if yours is not, it may not be worth it. Try a section and decide.
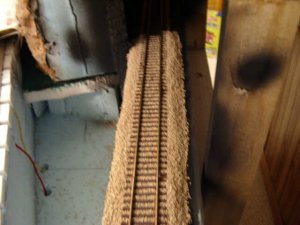
A couple more ballasting pics:
Chris, I can honestly say I didn't see a noticeable difference in the rail after ballasting and gluing. I decided to paint a section of the rail that will be hidden in a tunnel to see if painting the rail was worth the time and effort.
Before paint:

After paint:

Here is a section of track showing both at once:

I have decided to paint the rails...how much the level of realism increases can not be overstated. However, this is my permanent layout for the foreseeable future and if yours is not, it may not be worth it. Try a section and decide.
A couple more ballasting pics:


