Diorama finishing – keep from having the wet look

Status
Not open for further replies.
Dec 6, 2007
128
0
16
rbdhd.t35.com
I wanted to know what tricks are used to keep from having scenery look like it’s when you glue the scenery materials like grass and dirt. I’ve found that the scene looks like it just rained but I was hoping to get the scene to look like a dry summer day. Anyone have tips or would like to share how they’ve overcome this problem I would love to hear about it.
Thanks,
Dave
 

ytter_man

Member
Jun 12, 2008
151
0
16
Montana
I dont think i've ever had this problem. Is your glue dilute enough? Did you spray enough alcohol or wetting agent on the material prior to gluing?
 
Dec 6, 2007
128
0
16
rbdhd.t35.com
Good points, I don't know what is a good ratio of water to glue and I didn't know it's best to first spray the materials before gluing. I like the idea of alcohol but I'm not sure if I should replace all the water with alcohol or just some part.
Dave
 

Sippy

New Member
Aug 7, 2009
15
0
1
Use a tufted doormat.

Depending on the scale it could either pass as a wheat field or tall grass.
 

doctorwayne

Active Member
Sep 6, 2005
3,516
0
36
Canada, eh?
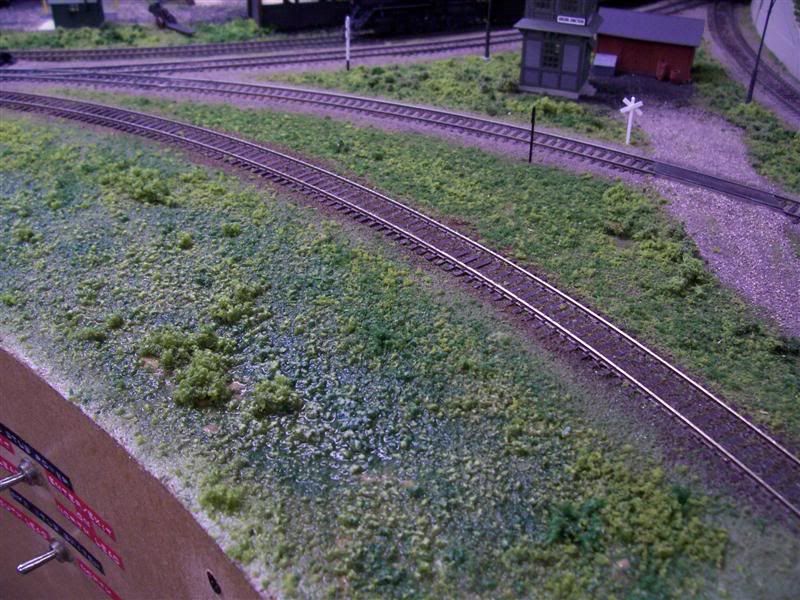
First, apply and arrange all of your ground cover (ground foam, ballast, dirt, whatever - use at least 2 or 3 different shades of ground foam, unless you're creating a lawn or field of a single crop. Even then, adding a little lighter coloured material atop the darker stuff will impart "sunlit" highlights.) You can make it as thick as required - I have areas where the ballast and ground cover is over 1" deep in some areas (the result of poor planning when building the original plaster terrain). :rolleyes::eek:ops: Make sure that everything is where you want it, as touching the area after you've wet it will make a mess.
I use "wet" water (tap water with a few drops of liquid dish detergent added - you can also use alcohol as a wetting agent with the water, but with all but the hardest water, the detergent works fine. I prefer to save the alcohol for a celebratory drink after the scenic work is completed.) :p:mrgreen: First thoroughly wet the area, using a good-quality sprayer that will give you a fine mist. Aim the first few spritzes upwards, letting the droplets merely fall onto the area. Spraying directly at the area will blow the foam all of the place. Once the area has been dampened, you can spray it directly. And I do mean wet the area thoroughly!
GERNTurfMasterGrassBlaster030Medium.jpg


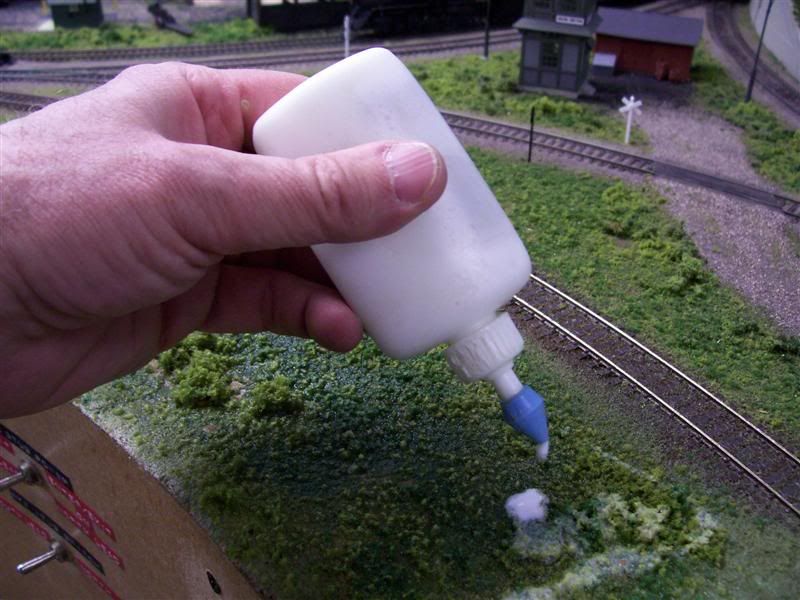
Now, you can apply your glue mixture. Some modellers prefer matte medium over white glue, but, having used both, I prefer white glue. Used properly, the results are the same in both appearance and performance. The difference is in the price: roughly $10.00 for 8 ounces of matte medium versus about $18.00 for a gallon of white glue. In either case, mix you choice with hot water from the tap (hot water makes for faster mixing);) in about a 50/50 mix - 60/40 or 40/60 works well, too, so there's no need to be too fussy. I use a plastic dropper bottle (source unknown) to apply the dilute glue mixture - it applies drops when inverted, and even more drops if squeezed slightly. Many use an eye-dropper, which will also work, but it requires constant re-filling. Don't skimp on the glue application - you need to apply enough so that it penetrates down through your scenic materials and right to the base (plaster, extruded foam, or whatever) on which the scenery lies. The wet water which you applied earlier enables this process. If your glue mixture causes the foam to "ball up", you haven't wet the area thoroughly. The glue should be drawn right into the foam as soon as it touches.
GERNTurfMasterGrassBlaster031Medium.jpg


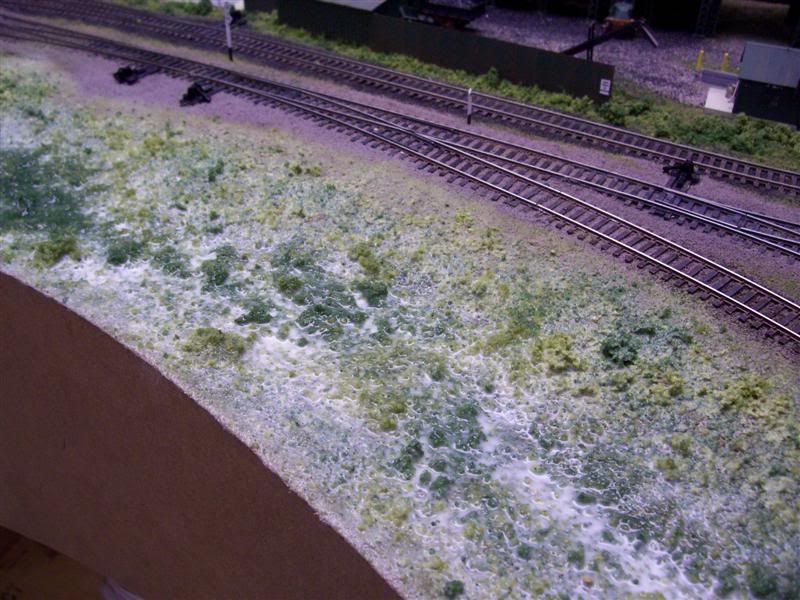
Don't be alarmed when the ground foam appears to "wilt" under the glue application, either, as it will spring back as it dries:
GERNTurfMasterGrassBlaster034Medium.jpg


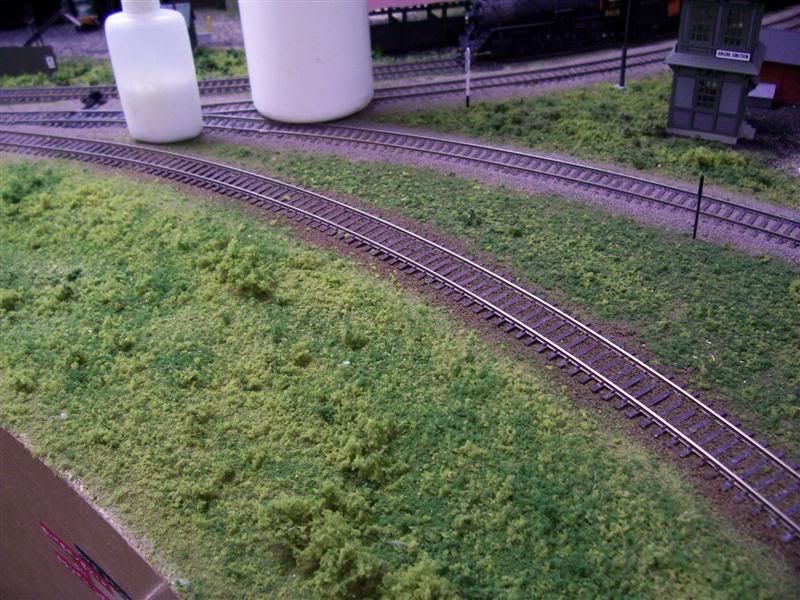
Drying time will vary, depending mostly on the depth of the material applied, sometimes taking up to several days. Once dried though, the material should look as if it's loose, but be bonded firmly to your layout or diorama. Mine will withstand direct vacuuming with a shop vac.
GERNTurfMasterGrassBlaster028Medium.jpg


Wayne
 
Dec 6, 2007
128
0
16
rbdhd.t35.com
Wayne,
Great post, I wanted to know if you have a problem with the ballast or dirt looking wet when you soak it with the wet glue. I noticed the ground foam looks good but the dirt is and ballast is still wet looking. I'm adding to those areas after it's dry and that works but the little that's added will blow away in the smallest wind.

aaah-chew- aaahh shlt there goes the hill ha ha ha

Dave
 

doctorwayne

Active Member
Sep 6, 2005
3,516
0
36
Canada, eh?
In the last photo above, only the ground cover between the edge of the layout and the closest track was added in the session shown - the ballast and other ground cover was done several years earlier.

If your ballast, etc. looks wet, chances are that you didn't apply sufficient "wet" water before adding the glue mixture - the purpose of the wet water is to allow the glue mixture to flow readily, not just down into and through the loose scenic material, but also around each individual particle. It sounds to me as if too much of the glue mixture simply sat atop the scenic material, eventually drying as a shiny coating.
As I mentioned earlier, don't skimp on the "wet" water: it is every bit as important as the glue mixture or the scenic material, and is the cheapest part of the process. ;):-D

I generally prefer to do all of the ground cover work in an area in a single operation - ballasting, trackside embankments, and, sometimes, even nearby fields, and all of the layers of material, too. That includes fine, medium , and coarse foam and/or ballast, rock fill where necessary, and clump foliage, too. Only trees, fences, and pole lines are added later. The photo below is an example of this (the field to the right of the track, on the far side of the road, has yet to be done, as I need to install some wire fencing on those posts).
TrainBrain001.jpg


Wayne
 
Status
Not open for further replies.