Captain Kirk's Chair from Perry's Planet

bgt01

Exemplary Confidant
Jan 26, 2012
576
843
93
Ohio
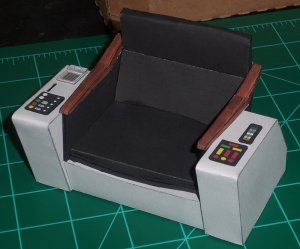
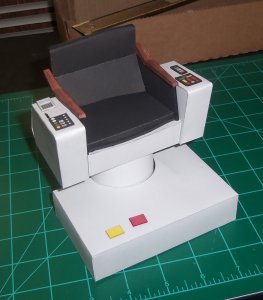
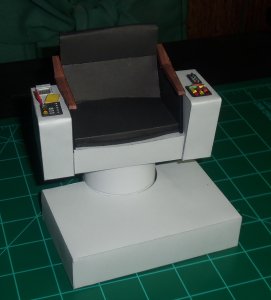
When a man is going boldly, he wants a comfy chair to do it in. Thanks to Perry's Planet, I got a chance to build just such a chair…only smaller. This is my attempt at building Captain James T. Kirk's command chair from the U.S.S. Enterprise.

(Note: All parts are scored before folding.)
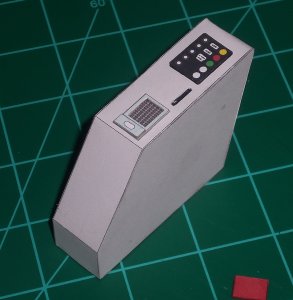
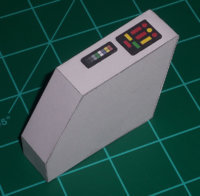
CHAIR ARMS
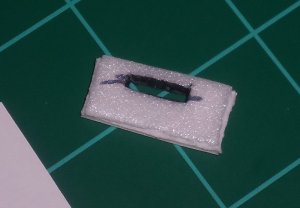
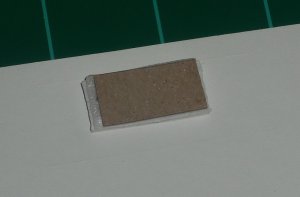
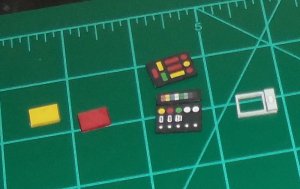
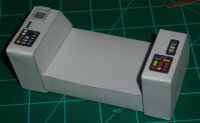
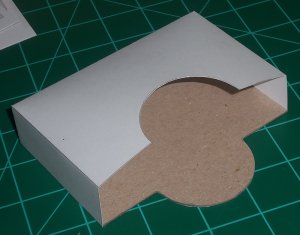
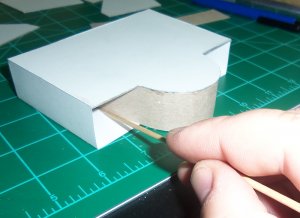
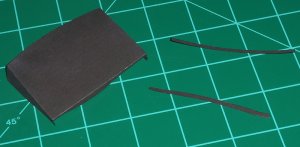
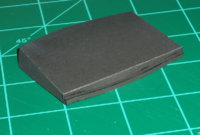
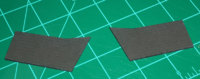
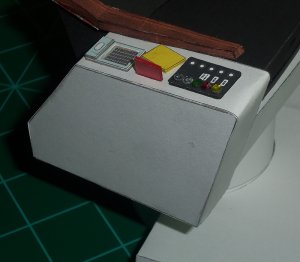
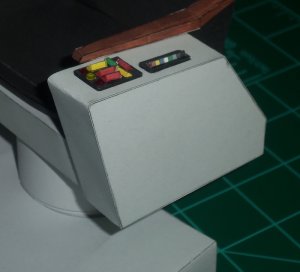
I wanted the micro tapes to go into the slot on the arm. I cut out the slot and made a hollow spot for the tape to rest in. I cut a slightly bigger slot into a small piece of foam core, colored the inside black with a Sharpie, glued a piece of chipboard to bottom and then glued the whole thing underneath the slot.

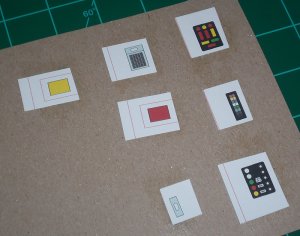
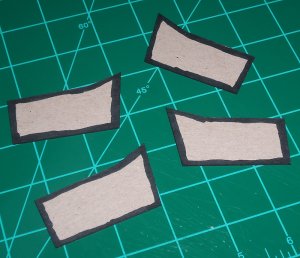
I glued all the detail pieces to 1mm chipboard, cut them out and edge colored them. I only glued 1 side of the micro tapes to the chipboard, then glued the other side of the tape to the other side of the chipboard. Otherwise the tapes would have been too thick. I cut out the grill mesh area of the intercom for a recessed look.

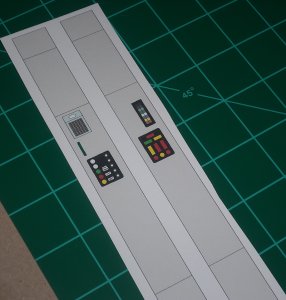
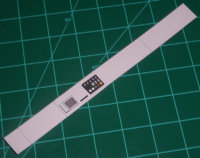
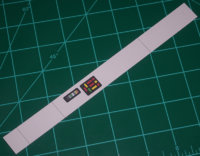
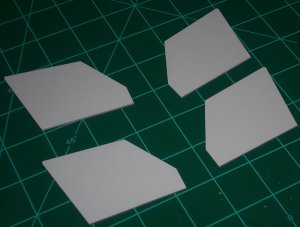
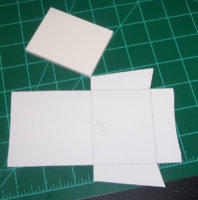
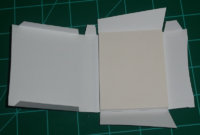
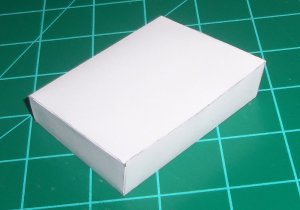
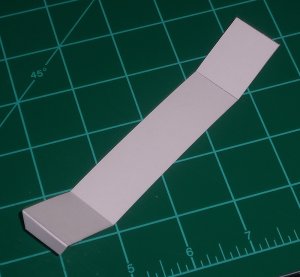
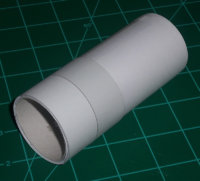
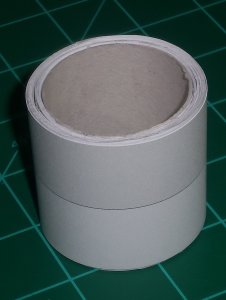
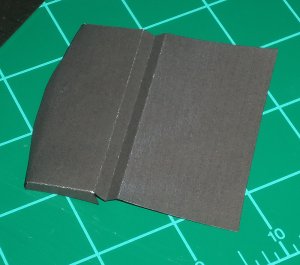
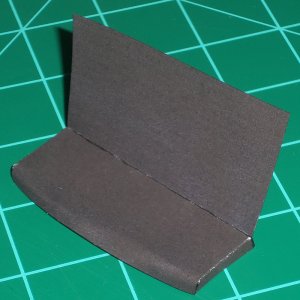
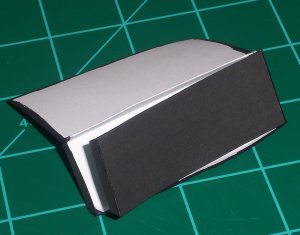
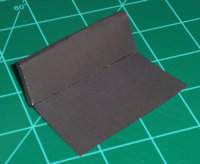
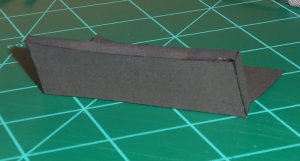
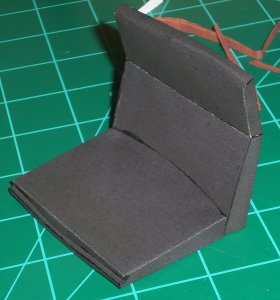
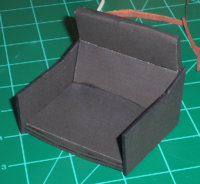
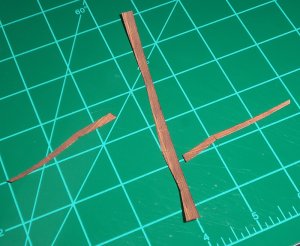
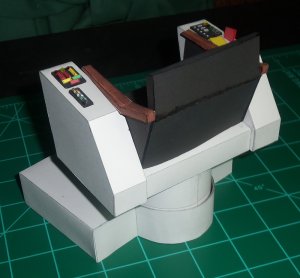
I glued the chair sides to 1mm chipboard and edge colored it with silver Sharpie. I edge glued the top/bottom strips to the sides. The chipboard added strength and kept the sides nice and straight.
 

Attachments

  • 1.JPG
    1.JPG
    481.3 KB · Views: 28
  • 2.JPG
    2.JPG
    321.8 KB · Views: 26
  • 3.JPG
    3.JPG
    266.8 KB · Views: 25
  • 4.JPG
    4.JPG
    422.6 KB · Views: 26
  • 5.jpg
    5.jpg
    278.2 KB · Views: 26
  • 6.JPG
    6.JPG
    385 KB · Views: 25
  • 7.JPG
    7.JPG
    373.7 KB · Views: 23
  • 8.JPG
    8.JPG
    345.5 KB · Views: 23
  • 9.JPG
    9.JPG
    474.5 KB · Views: 22
  • 10.JPG
    10.JPG
    462.3 KB · Views: 26

bgt01

Exemplary Confidant
Jan 26, 2012
576
843
93
Ohio
SEAT BASE
I cut out the seat base and added a square of foam core on the bottom for strength and to keep the bottom level. I added some tabs made from scrap card stock in some key spots for gluing. I edge glued at the front where the seat curves down. I used gel Super Glue for a good hold. Then the sides got glued to the base.
 

Attachments

  • 11.JPG
    11.JPG
    377.4 KB · Views: 21
  • 12.JPG
    12.JPG
    272.2 KB · Views: 20
  • 13.JPG
    13.JPG
    298.6 KB · Views: 21
  • 14.JPG
    14.JPG
    295.8 KB · Views: 16

bgt01

Exemplary Confidant
Jan 26, 2012
576
843
93
Ohio
BASE
The base top got cut out and I added some tabs at the corners. I glued the base bottom to 1mm chipboard for strength and levelness, then edge colored it with silver Sharpie. When I glued the 2 parts together, I got worried about the lack of support and getting a good curve where the post goes. I cut a piece of 1mm chipboard and glued it inside and around the post curve. I used a BBQ skewer to get glue inside. I used gel Super Glue for a strong edge hold. Then I cut out the last edge piece, added some tabs at the ends to make it easier to glue, and glued it down.
 

Attachments

  • 15.JPG
    15.JPG
    295.5 KB · Views: 17
  • 16.JPG
    16.JPG
    377.7 KB · Views: 16
  • 17.JPG
    17.JPG
    383 KB · Views: 16
  • 18.JPG
    18.JPG
    338.4 KB · Views: 18
  • 19.JPG
    19.JPG
    349.7 KB · Views: 20
  • 20.JPG
    20.JPG
    417.7 KB · Views: 15

bgt01

Exemplary Confidant
Jan 26, 2012
576
843
93
Ohio
POST
I wanted the seat post to be strong in case I ever run across a Mego Kirk to sit in it. And I wanted it to fit well in the hole at the base. So, I used a toilet paper tube for the core and wrapped layers of 20lb copy paper around until I got the right thickness. I cut off the excess paper and glued the outer piece on.
 

Attachments

  • 22.JPG
    22.JPG
    389.7 KB · Views: 16
  • 23.JPG
    23.JPG
    557 KB · Views: 17
  • 24.JPG
    24.JPG
    360.9 KB · Views: 16

bgt01

Exemplary Confidant
Jan 26, 2012
576
843
93
Ohio
SEAT CUSHION
The seat cushion is a little finicky because of it's curves and small parts. And since it's black you can't really see the fold marks on the printed part. But if I can get a decent result then anyone can! I cut out all the parts and edge colored them all with black Sharpie. I also colored some of the back of the parts. For the cushion bottom I carefully edge glued the small strips on with gel Super Glue. The seat back gets an accordion fold to separate the top and bottom sections. I had to work the curve at the top with a wooden dowel until it folded enough to edge glue the top and sides. Again, I used gel Super Glue. The back of the seat is 2 parts and both were edge glued on with gel Super Glue. Then the back got glued to the bottom.

I glued the side pieces to 1mm chip board, cut them out. colored the backs and edges with black Sharpie, and glued them together. This got the parts the right thickness and I didn't have to use the thin edge strips that come with the model.
 

Attachments

  • 25.JPG
    25.JPG
    274.7 KB · Views: 19
  • 26.JPG
    26.JPG
    342.3 KB · Views: 16
  • 27.JPG
    27.JPG
    434.4 KB · Views: 17
  • 28.JPG
    28.JPG
    503.4 KB · Views: 18
  • 29.JPG
    29.JPG
    372.4 KB · Views: 15
  • 30.JPG
    30.JPG
    411.7 KB · Views: 17
  • 31.JPG
    31.JPG
    285.9 KB · Views: 15
  • 32.JPG
    32.JPG
    455.1 KB · Views: 18
  • 33.JPG
    33.JPG
    543.2 KB · Views: 15

bgt01

Exemplary Confidant
Jan 26, 2012
576
843
93
Ohio
SEAT ARMS
I cut out the chair arms and edge colored them with brown marker. I opted to use the slow but simple method for these and edge glued them together. I went a little at a time and used gel Super Glue so they'd be strong and I wouldn't have to hold the parts long. I started where the arms curve up toward the chair back and worked my way across the tops and down the ends, meeting at on the bottom just like the parts are cut. I glued the arms to the seat with regular craft glue so I'd have time to position them correctly.

I glued the cushion section to the chair base with regular craft glue so I'd have a chance to make any adjustments needed.
 

Attachments

  • 34.JPG
    34.JPG
    472.6 KB · Views: 18
  • 35.JPG
    35.JPG
    255.4 KB · Views: 18
  • 36.JPG
    36.JPG
    476.3 KB · Views: 18
  • 37.JPG
    37.JPG
    483.4 KB · Views: 18
  • 38.JPG
    38.JPG
    496.4 KB · Views: 18
  • 39.JPG
    39.JPG
    425 KB · Views: 18
  • 40.JPG
    40.JPG
    402.4 KB · Views: 18

bgt01

Exemplary Confidant
Jan 26, 2012
576
843
93
Ohio
FINAL PICS WITH DETAILS
I used a liberal amount of craft glue to mount the seat to the post. Then, the whole thing went together like a champ. To give the chair more detail, I glued 12mm Glamour Glitz crystals (available at Hobby Lobby) where the dome-shaped resin lights were. Then I printed out some extras of the left side panels and made more raised details. I made a triangular pieces to look like the rocker switches and the resin lights on that side. However, I couldn't find anything to use for the white plunger buttons on the right arm. If anyone has an suggestions, let me know.

All in all, I think it came out pretty well. Thanks to Perry for making a great model. If only I could sit in it!
 

Attachments

  • 41.JPG
    41.JPG
    492.7 KB · Views: 35
  • 42.JPG
    42.JPG
    380.9 KB · Views: 32
  • 43.JPG
    43.JPG
    364.9 KB · Views: 30
  • 44.JPG
    44.JPG
    411.7 KB · Views: 31
  • 45.JPG
    45.JPG
    378.2 KB · Views: 31

Rhaven Blaack

!!!THE MAN BEHIND THE CURTAIN!!!
Staff member
Administrator
Moderator
Jun 12, 2009
12,493
9,857
228
Oregon
www.deviantart.com
The chair looks GREAT!!!
As for the white buttons (not trying to sound bland), raise the gray circle around the white button and then do the same with the whit button itself with a few layers of cardstock, or make little cylinders that match the diameter of the buttons, cut them to the height that you want, cap them off and there you have the buttons.
 

Octoman

Active Member
Nov 15, 2013
122
225
48
Cleveland, Ohio
I've been studying the details of the original bridge set for decades now and this is a VERY fine model! The details like the wood grain arm rests are wonderful and really bring an air of authenticity. I'm planning on building one "as is" and then (if necessary) resizing it to fit the Art Asylum classic Star Trek figures. What did you use for references? The "McMasters" bridge blueprints?

This is really well done. Thanks for sharing it and the excellent tutorial.

Best,

Ian
 

zathros

*****SENIOR ADMINISTRATOR*****
Staff member
Administrator
Moderator
Apr 5, 2013
13,499
9,551
228
I want a full size one that reclines, right in front of my 200" inch drop down LCD projector screen. Very nice model build indeed! :)