E
ekuth
So, it being a while since I've actually posted any of my builds, and finally locating my camera, here's a few of the models I've built over the past year or so.
Next up, R2-D2 by Sunichi Makino.
Difficulty: Medium-Advanced
Assembly: Medium-Advanced
Directions (out of 5): 4.5
Overall Rating(out of 5): 4.5
First impressions:
Another of Makino's models, R2 is laid out in typical Makino fashion: strong, crisp graphics and use of colors, good parts arrangement and *tiny* parts.
Don't let the 4 page size of this model (3 parts and one instruction) fool you; R2-D2 is a complex build involving careful folding and assembly of very small parts.
There's alot of tricky parts of this build; most notable being the half dome of R2's head. Makino takes what I call the "layered eggshell" approach to circles- bands of increasingly small size that form the eventual curves needed.
One's choice of build strategy here will have a big effect on the finished product- start from the inside out or the outside in? Personally, I start from the inside (top, or smaller pieces) and work my way down.
I built the dome using standard weight paper, to allow for the flexibility required in shaping. All other parts were done in my standard heavy weight cardstock.
Assembly of R2 is complex, but follows a logical layout. The best strategy here is to complete each sub assembly set before moving on to the next area. The legs/feet can be interesting, as you have folds going in several directions on very small surface areas. Scoring and prefolding is a must, as is dry fit placement before final gluing.
The instructions for R2 are a little more detailed than usual on Makino's models- but due to the complexity of the model (R2's head, legs and feet are all posable) it's needed.
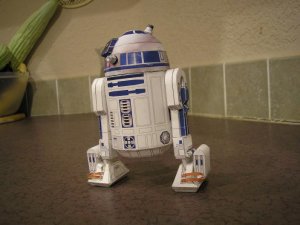
Speaking of the legs and feet, Makino provides an optional build part of the middle leg... you can either leave it out altogether, make it a temporary part or remove it altogether. A nice touch that adds to the model's versatility.
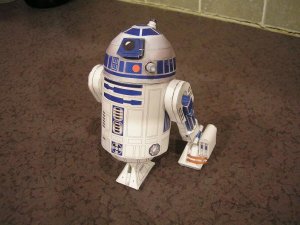
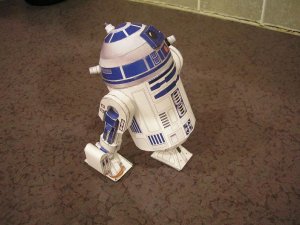
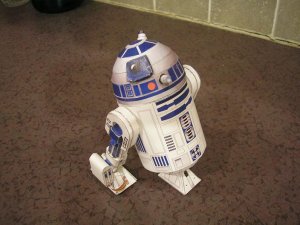
The amount of detail Makino adds here is nothing short of superb- the finished product comes out looking great. R2 sat on my desk at work for more than a year and never failed to elict "that's paper?!?!" from customers and co-workers. No one could resist picking him up and playing with him.
The model is a sturdy build, which seems to be another Makino hallmark; my R2 has held up suprisingly well.
Pics:
Front view, top:
Front/Side view:
Whatcu lookin' at Willis?!?!
Middle leg removed:
Top view, looking down (detail view):

Next up, R2-D2 by Sunichi Makino.
Difficulty: Medium-Advanced
Assembly: Medium-Advanced
Directions (out of 5): 4.5
Overall Rating(out of 5): 4.5
First impressions:
Another of Makino's models, R2 is laid out in typical Makino fashion: strong, crisp graphics and use of colors, good parts arrangement and *tiny* parts.
Don't let the 4 page size of this model (3 parts and one instruction) fool you; R2-D2 is a complex build involving careful folding and assembly of very small parts.
There's alot of tricky parts of this build; most notable being the half dome of R2's head. Makino takes what I call the "layered eggshell" approach to circles- bands of increasingly small size that form the eventual curves needed.
One's choice of build strategy here will have a big effect on the finished product- start from the inside out or the outside in? Personally, I start from the inside (top, or smaller pieces) and work my way down.
I built the dome using standard weight paper, to allow for the flexibility required in shaping. All other parts were done in my standard heavy weight cardstock.
Assembly of R2 is complex, but follows a logical layout. The best strategy here is to complete each sub assembly set before moving on to the next area. The legs/feet can be interesting, as you have folds going in several directions on very small surface areas. Scoring and prefolding is a must, as is dry fit placement before final gluing.
The instructions for R2 are a little more detailed than usual on Makino's models- but due to the complexity of the model (R2's head, legs and feet are all posable) it's needed.
Speaking of the legs and feet, Makino provides an optional build part of the middle leg... you can either leave it out altogether, make it a temporary part or remove it altogether. A nice touch that adds to the model's versatility.
The amount of detail Makino adds here is nothing short of superb- the finished product comes out looking great. R2 sat on my desk at work for more than a year and never failed to elict "that's paper?!?!" from customers and co-workers. No one could resist picking him up and playing with him.
The model is a sturdy build, which seems to be another Makino hallmark; my R2 has held up suprisingly well.
Pics:
Front view, top:

Front/Side view:

Whatcu lookin' at Willis?!?!

Middle leg removed:

Top view, looking down (detail view):


