Akari

redhorse

Member
Dec 28, 2007
104
0
16
McKinney, TX
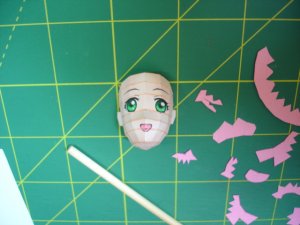
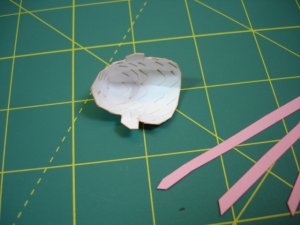
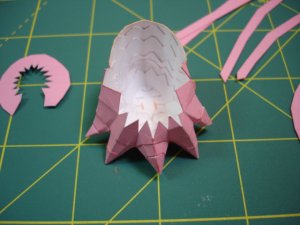
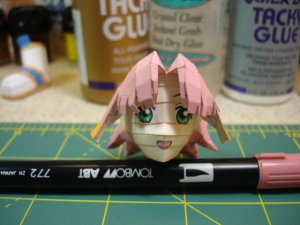
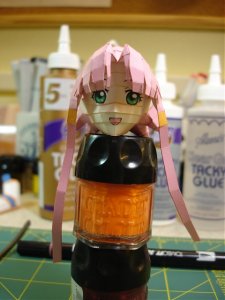
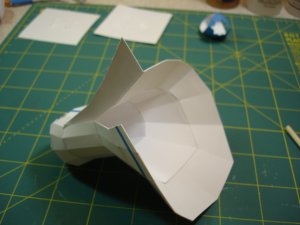
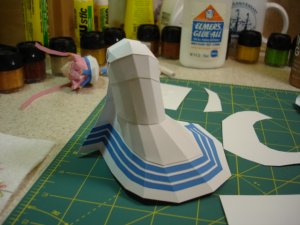
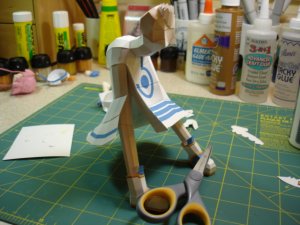
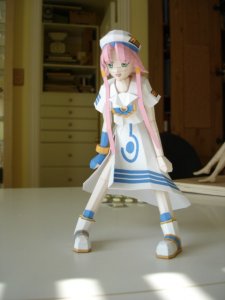
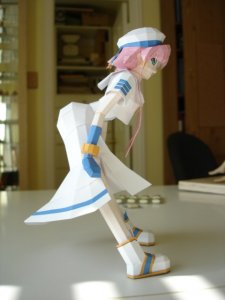
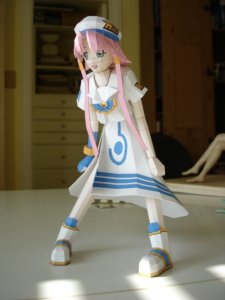
I wasn't sure where to put this, but this looks as good a place as any. I was going through all the downloads on my hard drive and found this, which I had in a folder labeled "Akari". I don't know where she comes from, but I liked her and decided to build.

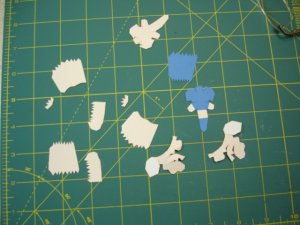
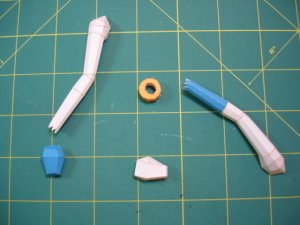
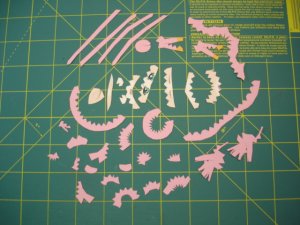
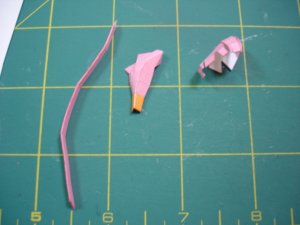
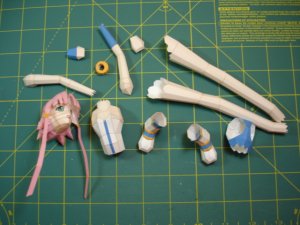
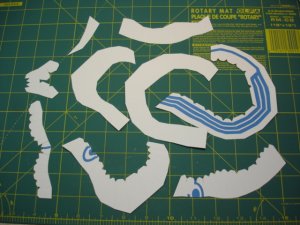
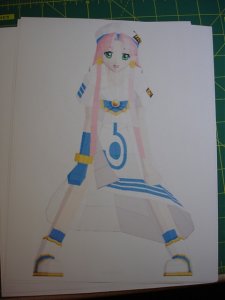
This is the first time I ever printed anything from Pepakura and I like that I can shrink the fold lines and also click anywhere on the 3-D view and see where the part is on the sheets.

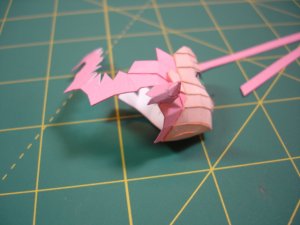
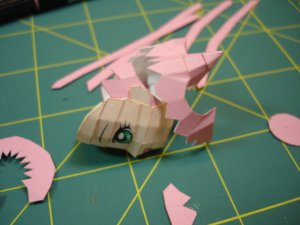
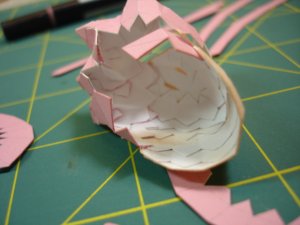
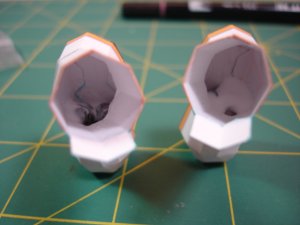
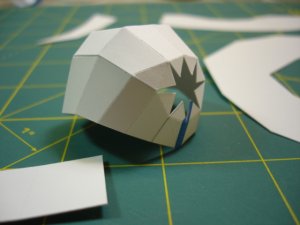
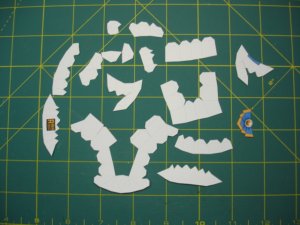
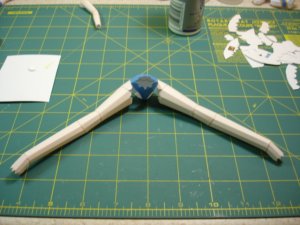
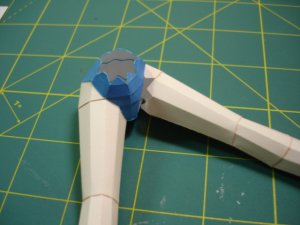
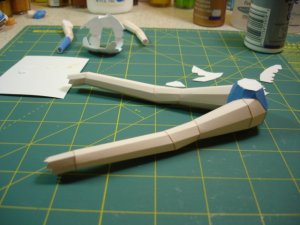
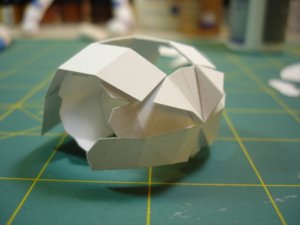
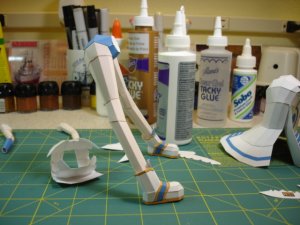
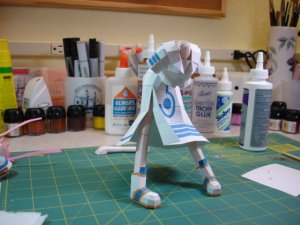
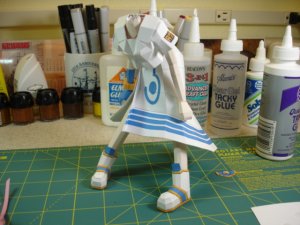
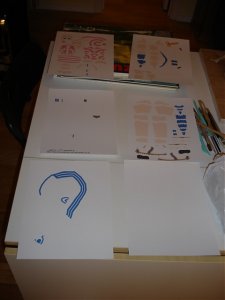
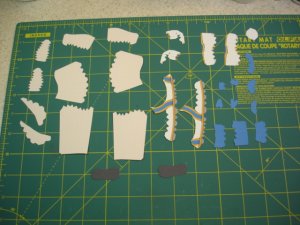
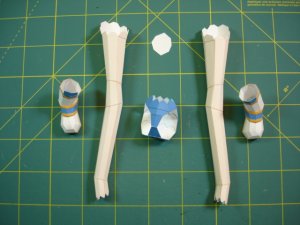
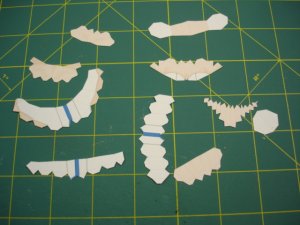
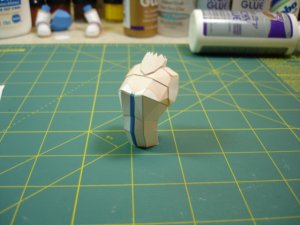
There are 6 sheets and it's more complicated than I thought it would be...
 

Attachments

  • 06-11-08 001.jpg
    06-11-08 001.jpg
    53.1 KB · Views: 35
  • 06-11-08 002.jpg
    06-11-08 002.jpg
    51.9 KB · Views: 21

redhorse

Member
Dec 28, 2007
104
0
16
McKinney, TX
And here is my progress so far. With all the polygons I think she looks a bit like an insect.
 

Attachments

  • 06-11-08 003.JPG
    06-11-08 003.JPG
    148.5 KB · Views: 11
  • 06-11-08 004.JPG
    06-11-08 004.JPG
    156.3 KB · Views: 10
  • 06-11-08 005.JPG
    06-11-08 005.JPG
    154.3 KB · Views: 13
  • 06-11-08 006.JPG
    06-11-08 006.JPG
    142.9 KB · Views: 9

Lex

Dollmaker
Dec 1, 2006
645
1
36
Oxford, UK
Very nice build so far!! It's been a while since we had a figurine build like this! Definitely looking forward to this thread! Also "Akari" is a main character from the manga/anime series Aria, quite a dated one but nevertheless worth watching! :D
 

redhorse

Member
Dec 28, 2007
104
0
16
McKinney, TX
Thanks for the link Lex. After all the time I'll put into Akari I'll have to go watch the video :mrgreen: I'll need the relaxation!

cdavenport - I've never built one of these anime girls yet, but from what I can see, the tabs need to be left on. Normally I cut them off, but these are built up with lots of thin strips. They are pretty much necessary for support. I'm not crazy about the edge coloring on the face and I think I'll just leave the edges white next time around.
 

redhorse

Member
Dec 28, 2007
104
0
16
McKinney, TX
Now for the next step. She needs some arms, a nice amount of parts and not too difficult.
 

Attachments

  • 06-16-08 001.JPG
    06-16-08 001.JPG
    144.7 KB · Views: 11
  • 06-16-08 002.JPG
    06-16-08 002.JPG
    143.7 KB · Views: 13

redhorse

Member
Dec 28, 2007
104
0
16
McKinney, TX
And then we go to the head. Not that many parts, doesn't look that difficult.... I swear, it took around 16 hours by the time I was finished. One of my other hobbies is sculpting 80mm figurines, I'll post a picture later on in the thread. This paper head was more difficult than that - I didn't know that was possible. The hair was the worst part, I know anime girls are known for big hair, but this was ridiculous. The little parts went everywhere, backwards and forwards.

Although, I do love challenges in my hobbies :mrgreen: Probably part of the reason I don't like much of a challenge in my so called career, hobbies are more important in my opinion - just don't let my boss see that :twisted:

I'm taking back the insect looking thing, I think she looks like more like a trilobite at this point! Especially from the inside...
 

Attachments

  • 06-16-08 003.JPG
    06-16-08 003.JPG
    151.3 KB · Views: 10
  • 06-16-08 004.JPG
    06-16-08 004.JPG
    144.5 KB · Views: 9
  • 06-16-08 005.JPG
    06-16-08 005.JPG
    166.6 KB · Views: 11
  • 06-16-08 006.JPG
    06-16-08 006.JPG
    153.8 KB · Views: 9
  • 06-16-08 007.JPG
    06-16-08 007.JPG
    162.1 KB · Views: 9
  • 06-16-08 008.JPG
    06-16-08 008.JPG
    156 KB · Views: 13

redhorse

Member
Dec 28, 2007
104
0
16
McKinney, TX
And a couple more pics of the hair.

I don't know if she'll stand up properly, so on the way home today we had to stop at Wal-Mart for a variety of stuff and bought some split shot for the feet. I hope this is enough to keep her balanced, I may put some more in the ankles once they are glued in...
 

Attachments

  • 06-16-08 009.JPG
    06-16-08 009.JPG
    142.8 KB · Views: 12
  • 06-16-08 010.JPG
    06-16-08 010.JPG
    152.8 KB · Views: 13
  • 06-16-08 011.JPG
    06-16-08 011.JPG
    163.4 KB · Views: 9
  • 06-16-08 012.JPG
    06-16-08 012.JPG
    164.1 KB · Views: 7
  • 06-16-08 013.jpg
    06-16-08 013.jpg
    77 KB · Views: 9
  • 06-16-08 014.JPG
    06-16-08 014.JPG
    145.2 KB · Views: 12

redhorse

Member
Dec 28, 2007
104
0
16
McKinney, TX
And the final shot of glue and splitshot inside the boots.

I guess now it's onto her flowing gowns and hat...
 

Attachments

  • 06-16-08 015.JPG
    06-16-08 015.JPG
    141.7 KB · Views: 10

redhorse

Member
Dec 28, 2007
104
0
16
McKinney, TX
It's been a while since my last update on Akari. The weather's been great which has been nice for grilling steaks and sailing, but not so good for paper modeling...

I got back to the cutting mat this weekend and here are the results.

First, a shot of all the body parts.
 

Attachments

  • 06-28-08 001.JPG
    06-28-08 001.JPG
    149.8 KB · Views: 11

redhorse

Member
Dec 28, 2007
104
0
16
McKinney, TX
And now, we move on to the skirt. For some reason there is an inside and outside. I guess that's to cover up the tabs. The hardest part was getting the insides glued on.
 

Attachments

  • 06-28-08 023.JPG
    06-28-08 023.JPG
    158.7 KB · Views: 9
  • 06-28-08 024.JPG
    06-28-08 024.JPG
    136.6 KB · Views: 10
  • 06-28-08 025.JPG
    06-28-08 025.JPG
    119.3 KB · Views: 10
  • 06-28-08 026.JPG
    06-28-08 026.JPG
    102.7 KB · Views: 10
  • 06-28-08 028.JPG
    06-28-08 028.JPG
    149.6 KB · Views: 6
  • 06-28-08 027.JPG
    06-28-08 027.JPG
    163.6 KB · Views: 11

redhorse

Member
Dec 28, 2007
104
0
16
McKinney, TX
Now it's time to build her top. It quickly became apparent that I would have to assemble the figure while putting the top on. Then the arms go on after the top and finally the head and the little bow.

This was a pretty fun little kit, but a lot more involved than I thought it would be at the start.
 

Attachments

  • 06-29-08 001.JPG
    06-29-08 001.JPG
    155.3 KB · Views: 11
  • 06-29-08 002.JPG
    06-29-08 002.JPG
    144 KB · Views: 9
  • 06-29-08 003.JPG
    06-29-08 003.JPG
    162.2 KB · Views: 7
  • 06-29-08 004.JPG
    06-29-08 004.JPG
    154.6 KB · Views: 13
  • 06-29-08 005.JPG
    06-29-08 005.JPG
    138.4 KB · Views: 8
  • 06-29-08 006.JPG
    06-29-08 006.JPG
    148.5 KB · Views: 12

redhorse

Member
Dec 28, 2007
104
0
16
McKinney, TX
She's finished now and standing on her place on the bookcase. Here are the last pictures. Hope you enjoyed the build!
 

Attachments

  • 06-29-08 007.JPG
    06-29-08 007.JPG
    158.5 KB · Views: 13
  • 06-29-08 008.JPG
    06-29-08 008.JPG
    152.2 KB · Views: 10
  • 06-29-08 009.JPG
    06-29-08 009.JPG
    160 KB · Views: 12
  • 06-29-08 010.jpg
    06-29-08 010.jpg
    57.4 KB · Views: 10
  • 06-29-08 011.jpg
    06-29-08 011.jpg
    56.6 KB · Views: 11
  • 06-29-08 012.jpg
    06-29-08 012.jpg
    58.6 KB · Views: 15

bill516

New Member
Sep 28, 2005
43
0
6
Sheffield UK
Nicely done Jim. If you ever get around to making another of this type character could I suggest to you to use paper instead of card. Slightly thicker than you qwould normally use for letters etc, as the paper is thinner than card the joins do not show up as much as they do with card.

Paper does have a drawback though, if you use too much glue it gets soggy very quickly and you have to wait for the glue to dry before trying to do anything else with the piece in question. Another plus with paper is it folds and bends easier than the card, so you dont need to bother with scoring, or in fact bending it to the 'squared off' anime look, you can just bend or roll it to give a more natural look. Of course it is a personal choice some people like the anime look.

Looking forward top your next model.

btw your model is one of Mizuirogakuen's old models sadly no longer available but he does have new models for download http://moekami.hp.infoseek.co.jp/main/main.html
 

redhorse

Member
Dec 28, 2007
104
0
16
McKinney, TX
Hi Bill, thanks for the comments and the tips. It did seem that a thinner paper might have worked more easily once I was about half way into it. I've got something here that's basically high quality ink jet paper that might work.

I've downloaded a bunch of these over the last few months and probably will build another. But for now, I'm working on a small submarine...