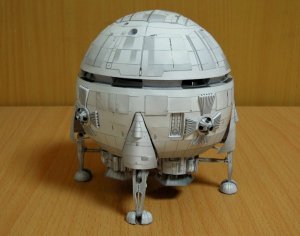
2001 ASO USSC Discovery One

Revell-Fan

Co-Administrator
Staff member
Administrator
Moderator
Aug 1, 2009
11,595
12,335
228
Vreden
I always knew that tackling UHU's Discovery would be a very ballsy project! ;) Well, I had never doubted that you would not have the balls to do it. :D Awesome! thumbsup

BTW, these balls might be very useful in future projects, too. Speaking of "future", do you remember the "Comet" from "Captain Future"? She is of a similar design. :)
 

zathros

*****SENIOR ADMINISTRATOR*****
Staff member
Administrator
Moderator
Apr 5, 2013
13,499
9,551
228
The were in such a hurry after discovering the second monolith, they basically stuck an Aries on the tip, so you will find the building of this model very familiar. You have really shown how water forming can really make compound shapes. I hope more people take this technique on. So many paper models could be made to look so much better with this technique. You would not believe what it does for ship (as in boat) hulls!!
 

DanBKing

Dan the Man
Feb 29, 2012
1,817
1,587
113
Netherlands
WOOOAH! I didn't think life could get any busier or crazier than it has been the last two weeks.... PFFFF!

I decided on Thursday that the coming weekend was going to be a relaxing one, and was gonna get some more work done on Discovery..... So, Friday morning I got out of bed before the first sparrow fart, and headed off to work 2 hours earlier than normal, with the plan that I could then leave 2 hours earlier! Well, that didn't quite work out to plan....... :(
It was about 20 minutes before my due time to leave, when all of a sudden the whole building starting shaking........ Not an earthquake, more like the sound of a large 18-wheeler ploughing through the place...........:eek:
As I've mentioned before, I work for a document archive company, well, in the warehouse all the pallets of boxed documents are stored in racking, 10 meters high. We use reach trucks to move the pallets. These trucks can reach a maximum of 10,2 meters, thereby placing pallets at 10 meter heights. On average, most pallets weigh in the region of 800 kilograms (just under 1800 lbs.)
Anyway, one of the reach truck drivers was putting a pallet back at maximum height when the truck blew a hydraulic hose........
Of course, with no hydraulic pressure left, the forks and pallet dropped like a dead weight, slamming down onto the top most cross beam of the racking.
The resulting stresses and forces on the beam caused it to bend in the middle and rip it out of its mountings which then completely collapsed onto the next level. This vertical domino effect took out 4 levels of racking, causing 16 x 800 kg pallets to fall between 6 and 10 meters (20 - 33 ft)...........

And the reach truck and driver was directly below it ...........

The drivers are trained to stay in the protective cage of the truck in an emergency and that probably saved his life....
It took 8 of us, 20 minutes or so, to dig him out from under nearly 13 metric tons of paper and smashed boxes, pallets and steel work from the racking. What made the task worse, was everything was coated with dangerously slippery hydraulic oil.....
Thank god he was uninjured, albeit VERY shaken up and when we had gotten him out, his first words were: "I need a f*****g whiskey...":)

Our experience was not as extreme as this in this vid, but it shows how quick something like this happens and escalates....

Anyway, I ended up leaving work 7 1/2 hours later than I should of done.......... Definitely not a good way to start the weekend.......:(:mad:

Anyway, back on topic..... :p

I DID manage to find 1/2 an hour here and there to do a little on Discovery though .....

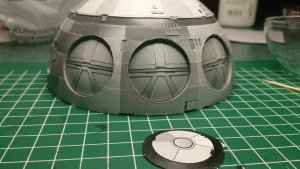
I got all the detail work done on the pod bay doors and fitted them to the frames.....

General_302.JPG

I'm not 100% happy with them, but that's how they are ..... All left to do now is fit the top 'cap' to the lower sphere and do some touch-ups and fixes and the bottom half will be ready to marry to the upper ....:)

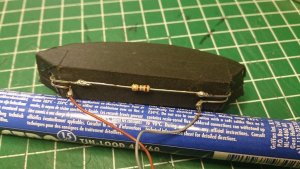
And speaking of the upper half, I picked up the LED's I wanted and wired up the lightbox that will fit behind the cockpit windows.
I lightly sanded the LED's to minimise the spot light effect of the lenses on them. This diffuses the light a bit.
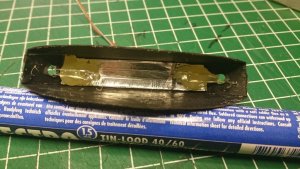
The LEDS were then simply glued into the light box with hot-glue.

General_303.JPG

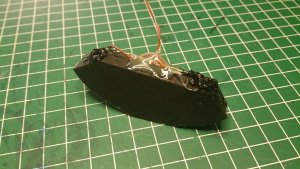
I connected everything together with the required resistor in the circuit....

General_304.JPG

I then sealed up all the holes where light could leak out, with black RTV type silicone. I also hot-glued the wires to the back of the light box to provide a little more mechanical rigidity.

General_306.JPG

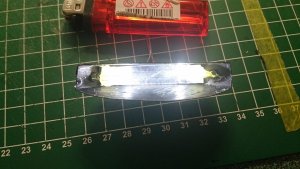
The light colour and quality is much better in comparison to my test run earlier.

General_305.JPG

I will post some more hopefully later this evening or tomorrow...

Stay tuned.......

(@zathros Insert 'WAVE' smiley here .....;))
 

Revell-Fan

Co-Administrator
Staff member
Administrator
Moderator
Aug 1, 2009
11,595
12,335
228
Vreden
(@zathros Insert 'WAVE' smiley here .....;))

Here it is:

wave.gif

I have saved several threads when the look of the forum was updated, just in case something got lost during the transition... I saved a couple of smileys with them. ;)

Thank goodness no-one was hurt in the accident. Phew, that was quite some start into the weekend.

Great job on the Discovery! thumbsup
 
Last edited:

Revell-Fan

Co-Administrator
Staff member
Administrator
Moderator
Aug 1, 2009
11,595
12,335
228
Vreden
WOW! I'm honored to be 'Stuck!' :happy:

So, best I 'stick' with it and get 'stuck' in.....

Thanks very much everybody! thumbsup
Well, I just needed a quote to add another smileys from days past for @zathros to upload it to the collection:
20.gif 357.gif 35.gif roll1.gif violin1.gif 146.gif36.gif 53_002.gif 68.gif agree1.gif
 

DanBKing

Dan the Man
Feb 29, 2012
1,817
1,587
113
Netherlands
I stamped my foot down at life and demanded some time for the Discovery..... I got my way ... :D

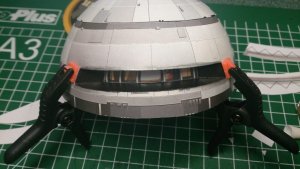
I eventually got the window sub-assembly attached to the upper sphere........ Damn, what a nightmare that was.. :eek:
It took me most of yesterday evening to get the thing fitted correctly. If it was out of position by the slightest fraction, it effected the whole sphere in shape or one way or another.
I figured the best way would be to attach the two side frames first.... It took at least 5 attempts...... :sour:
I used the beermat jig to accurately align the top and bottom edges.
It was one hell of a fiddly job, with various curses included. :shamefullyembarrased:
General_307.JPG

The texturing around the window is a little lacking in comparison to the studio model and I wanted to add that with raised detail. Also a handy way to help cover up some colour bleed above the window. o_O
I used a spare copy of the relevant part and marked and then cut out a random pattern of slots....
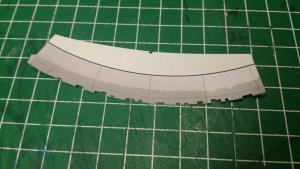
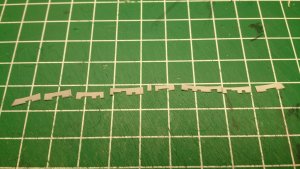
General_308.JPG General_309.JPG

I made a set for above and below the window and then glued them on ....... I see that some of them are a little wonky, but I'll rectify that later on final touch-ups.
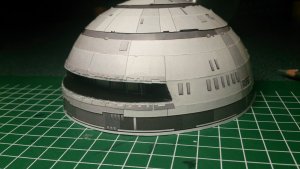
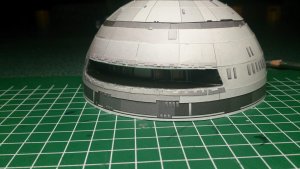
General_315.JPG General_316.JPG

I also fitted the top cap of the upper sphere and apart from final touch-ups, fitting of the light box, and detailing of the centre darker band, (which I will do after marrying the two halves of the sphere,) that pretty much completes construction of the two halves. All that is next to do, is join the two halves together, which, I hope, I will get done this evening at some point.

On pre-planning for the next critical part of the build, the joining of the sphere to the neck, I devised a way of keeping everything round, perpendicular and square to its relation.

UHU02 provides a 2 piece ring assembly to aid in attachment of the sphere. This ring must fit perfectly to the edge of the joining flange without any waviness, it must be perfectly round, the edge flat and must be kept perpendicular to the flange.
Mmmm, I don't have enough fingers for that, so, JIG Time!:rolleyes:

By placing the neck assembly with the joining flange downwards on a smooth surface, if you lightly press down on the spine coupling, it naturally splays out the joining flange to its maximum and uniform circumference. I then measured the diameter of the flange at 10,4 cm on my model.
NOTE: The lengths of the provided ring pieces are too long and need to be trimmed and adjusted to perfectly fit the joining flange. Knowing the diameter of the joining flange, calculating the circumference, and therefore the (close to) strip length of 32,7 cm was simple. It makes a good starting point anyway.

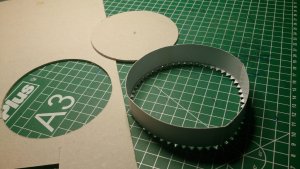
So, I cut out a 10,4 cm diameter ring from thick card. I used a compass cutter for this. (@zathros Did you ever make yours ?;))

General_311.JPG

I then persuaded the thick card ring into the support ring. As it turned out, the thickness of the blade of the cutter compensated for the thickness of the paper of the support ring. :)
I wasn't worried about any waviness on the back of the support ring, only the joint face was important..

General_312.JPG

Then, on a flat surface, I pushed the ring assembly into the cut out hole of the thick card.....
A perfect gluing jig.. :)

General_313.JPG

I lightly glued up the tabs and the inside of the joining flange and placed this accurately into position over the jig and pressed down as before, (as when measuring, to splay the flange,) and let the glue tack up a bit.
Before the glue dried too much, (because the jig is cardboard ...;),) I removed the jig by pushing downwards gently, away from the join. I left the inner ring in its place and it wont be removed either.
Then, using something suitable to apply pressure in the correct places, in this case, a coffee pad tin did the job, I added a little weight, locked the cat out of the room and left it to dry for the evening.
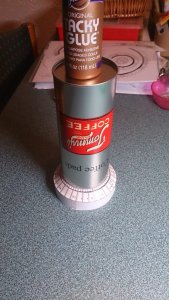
General_314.JPG

We'll see if that works out......... :rolleyes::cool:

See you all soon, if all goes well ...... ;):)

wave-gif.143608
 
Last edited:

spaceagent-9

Right Hand Man and Confidant
Moderator
Jul 10, 2013
3,104
3,473
143
62
pheonix
what a really great job!! I see you use press molding also- I use a 2 liter flat bottom bottle filled with water, I adjust the weight by filling or emptying it. nice work on water bending those hatches too! you really make the model live. thank you for sharing your build.
 
  • Like
Reactions: DanBKing

micahrogers

Moderator "Where am I, and how did I get here?"
Staff member
Moderator
Jul 12, 2012
3,773
4,643
113
Shannon GA
The water forming, the press to shape everything is coming together beautifully on this.
 
  • Like
Reactions: DanBKing

zathros

*****SENIOR ADMINISTRATOR*****
Staff member
Administrator
Moderator
Apr 5, 2013
13,499
9,551
228
A fantastic representation of this fantastic ship. I hope your proud, I feel proud you represent this forum, and have blessed us with this build. :)
 
  • Like
Reactions: DanBKing

DanBKing

Dan the Man
Feb 29, 2012
1,817
1,587
113
Netherlands
Thank you for the kind comments, I am also pleased with how well it is coming together!
We are on the homeward stretch now!:)


I feel proud you represent this forum, and have blessed us with this build. :)

And this build is EXCLUSIVE to Zealot! I have not posted anything to any other forums, not even Facebook! :);)

I did not quite manage to finish getting the sphere halves joined together last night. But, I should get that done this evening.
I'll post some pics once it is done.
 

DanBKing

Dan the Man
Feb 29, 2012
1,817
1,587
113
Netherlands
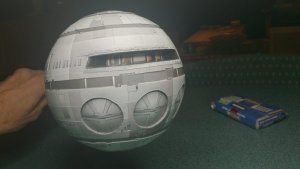
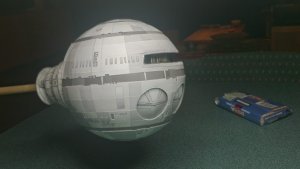
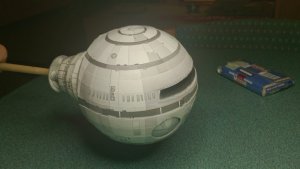
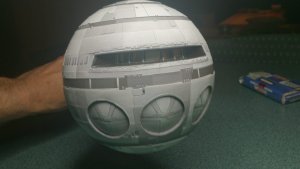
There has been a marriage!!!!!!!!!!!!

I finally have a ball!! :D:D

I just have to fit the lighting tomorrow and do the detail work around the dark equatorial band, and it is complete.

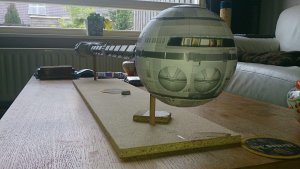
The neck assembly worked out well it seems and I test fitted it to the sphere. I have a lot of adjusting to do at the back of the sphere, but it is looking to be a nice fit.

Whatcha all think of the current state of affairs then ?

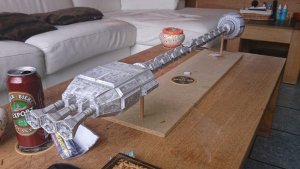
General_317.JPG General_318.JPG General_319.JPG General_320.JPG

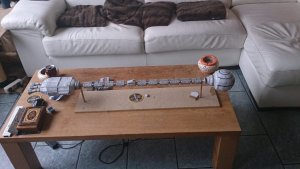
Earlier in the evening, I took the rest of Discovery model from under its protective wrappings to have a look at what repairs and other things that still needed to be done.
But, when I got the halves of the sphere together, I just couldn't help my self, but to have a 'Just to see what it looks like' test fit of all the major sub-assemblies...

General_321.JPG General_322.JPG General_323.JPG


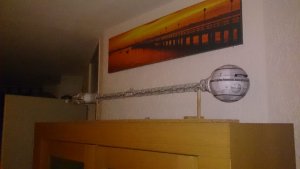
And I have now decided where the models permanent home will be. I just need to make the display case for it yet........ ;):)

General_324.JPG


I'll be back over the next day or two with some updates.

Take care, one and all.
wave-gif.143608
 

DanBKing

Dan the Man
Feb 29, 2012
1,817
1,587
113
Netherlands
This is HUUUUUUUUUUUUUUUUUUUGE!!!!!!!!!!!!!! :)

Yeah, that's for sure!
Model length, 120cm.
The length of the display case will have to be no more than 130cm long to fit on top of the cupboard where I want it.
With the lighting ideas that I have for the display case, it should really make the model look fantastic up there.
Almost made to measure! ;):)
 

Revell-Fan

Co-Administrator
Staff member
Administrator
Moderator
Aug 1, 2009
11,595
12,335
228
Vreden
WOOOW!!! Sorry if it eluded me, but did you enlarge the pattern or is it the original size provided by UHU?
 

Cforrest900

Well-Known Member
First of all, this build is incredible. Props to you for the amazing work you've showcased in this thread. I've tried (twice now) to build this model, but I have issues with the cone-shaped part that joins onto the back of the sphere not fitting. Any ideas as to what's going wrong?
 

DanBKing

Dan the Man
Feb 29, 2012
1,817
1,587
113
Netherlands
First of all, this build is incredible. Props to you for the amazing work you've showcased in this thread. I've tried (twice now) to build this model, but I have issues with the cone-shaped part that joins onto the back of the sphere not fitting. Any ideas as to what's going wrong?

In what way is it not fitting ?
 

zathros

*****SENIOR ADMINISTRATOR*****
Staff member
Administrator
Moderator
Apr 5, 2013
13,499
9,551
228
Posting pics can get a lot of help, some good, some not, but you'll probably get the right answer. :)