“Moonbase Alpha Main Mission Study Model

Octoman

Active Member
Nov 15, 2013
122
225
48
Cleveland, Ohio
Hello Zealot!
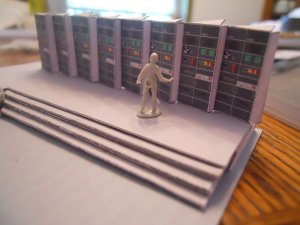
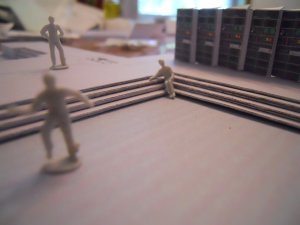
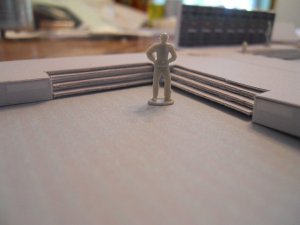
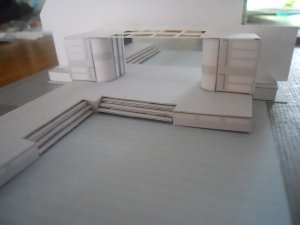
Thought you might be interested in this study model I’m making for a scratch built, plastic diorama of Main Mission from “Space 1999.” Round 2/MPC recently rereleased the “Space 1999” kits including the Moonbase Alfa diorama. I wanted to light the "Main Mission" diorama included with the base itself and it became clear pretty quickly that scratch building something in the same scale would be much easier than trying to modify the kit pieces. About the only thing worth keeping from it are the tiny figures which turned out to be around 1/107th scale (okay, whatever!) so that's the baseline for the build.
The first thing I did was look for available accurate blueprints… Guess what? THERE AREN’T ANY!!!
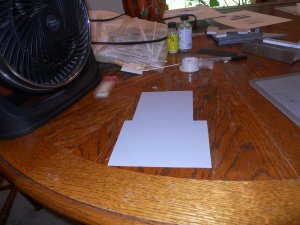
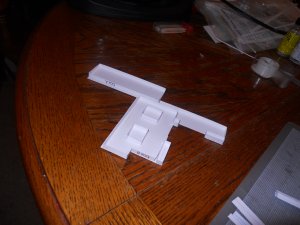
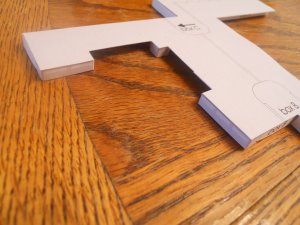
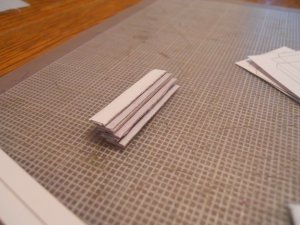
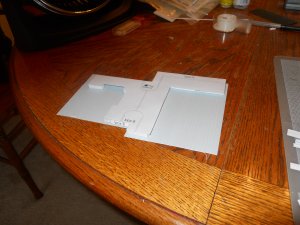
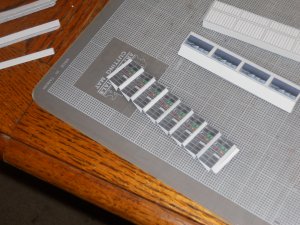
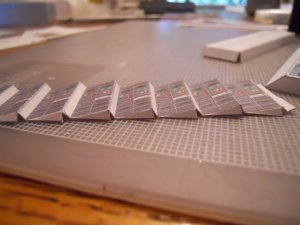
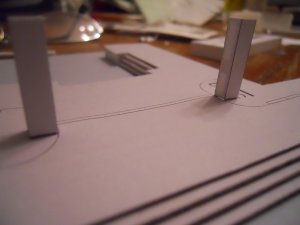
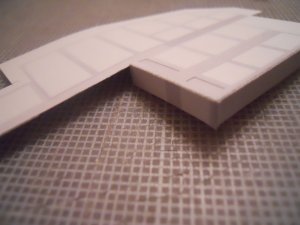
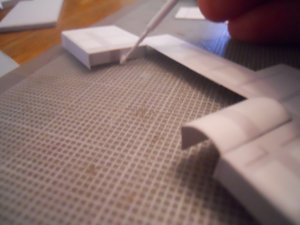
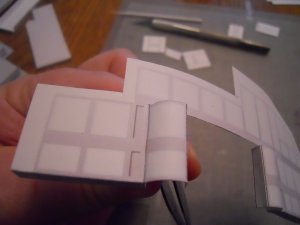
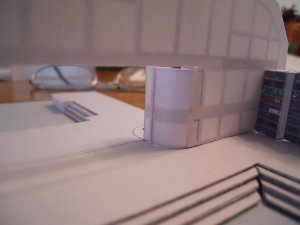
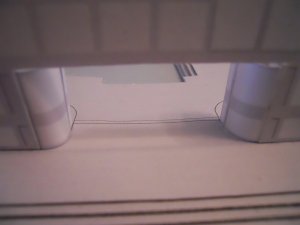
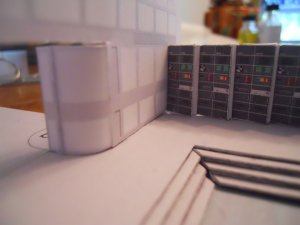
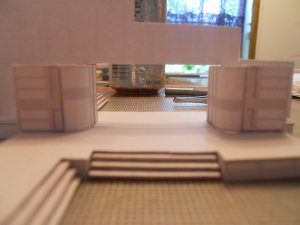
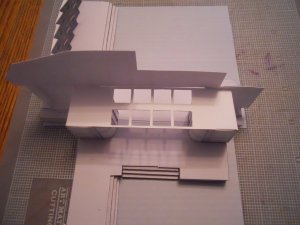
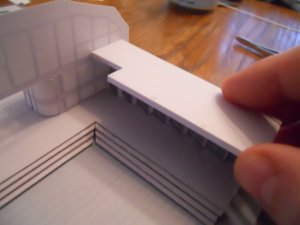
So I went back through my archives and found a bunch of CG panel art from 15 to 20 years ago and using some set dimensions I found online; I made templates. These templates were all in scale so I could print them out and start gluing plastic strip over them, which I will then glue over frosted, clear plastic sheet but I noticed as I was working that I needed to decide how the parts would fit together, how the ceiling components would be removable for viewing and so forth. The templates were all in color because I was using someone else artwork and it occurred to me that all I would have to do is add some tabs and folding boxes in Corel Draw and I could put together a dandy study model for figuring everything out in 3D! The following offering is the assembly of that model.
 

Attachments

  • Main Mission measured.JPG
    891.3 KB · Views: 51
  • MM wall mockup 01.JPG
    1.4 MB · Views: 32
  • MM wall mockup 02.JPG
    2.3 MB · Views: 32

zathros

*****SENIOR ADMINISTRATOR*****
Staff member
Administrator
Moderator
Apr 5, 2013
13,499
9,551
228
This study model is paper? Looks like quite a fine project. Will you be using PVC?
 
  • Like
Reactions: Octoman

Octoman

Active Member
Nov 15, 2013
122
225
48
Cleveland, Ohio
Yes, the study model is cardstock. The artwork isn't mine (if it were, it wouldn't be so elaborate because it's for a scratch build), I just adapted it to make templates but they look so good that the study model looks much more like a paper kit. The actual model I'll be building will be mixed media. I'm using evergreen styrene plastic strip to create the panels which I will then paint and glue over some frosted plastic (I believe that is PVC as it's used to make stencils) for the lighted areas. It's in a very tiny scale...smaller than HO so it won't be that much bigger than the diorama that comes with the R2/MPC kit but the detail will be much better. I have to say, I'm having so much fun with the study model that I'm considering redoing the artwork, re-engineering it and doing a more elaborate, larger scale card model. I was thinking 1/48 or 1/35 scale. The latter would be quite large (over a foot long if I'm not mistaken) but it might be worth it. I could even add some options for lighting it.
I'm going to start putting details of the scratch build on Hobbytalk or CultTVman's sight (or both) when I've finished the study model.

Best,
Ian
 

zathros

*****SENIOR ADMINISTRATOR*****
Staff member
Administrator
Moderator
Apr 5, 2013
13,499
9,551
228
I always like bigger models, personally, but they do pile up. Mixed media is the way to go, whatever works!! :)
 
  • Like
Reactions: Octoman

Octoman

Active Member
Nov 15, 2013
122
225
48
Cleveland, Ohio
Ha! 1/18th might be a little on the large side! You'd have to mount the cardstock on foamcore! It'd be impressive though! Okay, if I do create a kit of this (and I'm thinking I will) I'll go with 1/35 scale. Man, I could cram a lot of detail into that!

All of the stairs are in place as well as the computer wall under the mezzanine. This model is already helping me figure out what NOT to do on the plastic version. I put together full stair cases before gluing them to the base and they did not match up at the 45 degree angle. Solution: install them one tier at a time on both sides. The figures in the photos are from the R2/MPC kit.
 

Attachments

  • DSCN0249.jpg
    DSCN0249.jpg
    561 KB · Views: 35
  • DSCN0250.jpg
    DSCN0250.jpg
    524.2 KB · Views: 34
  • DSCN0251.jpg
    DSCN0251.jpg
    541.6 KB · Views: 33

bgt01

Exemplary Confidant
Jan 26, 2012
576
843
93
Ohio
This is a great project! I've developed a real soft spot for Space: 1999. I really like the tech because in a lot of ways it seems more achievable that other sci-fi hardware. I think you are doing really nice work. I've got a plan of my own for a future Moonbase Alpha scratch project ;) and you are right, blueprints of any kind are scarce questionable. All the episodes are on Hulu at hi rez so that's what I'm using for a lot of reference. Can't wait to see what else you come up with.
 
  • Like
Reactions: Octoman

Octoman

Active Member
Nov 15, 2013
122
225
48
Cleveland, Ohio
Many thanks, bgt01!
I liked the look of the show as well, especially the first season and I've certainly learned a lot about the sets while researching this project; For instance, the actual color of the sets is a very light, almost off-white beige color just as the uniforms were but the film and lighting used during production most often washed that out so it looks white or grey.
I'm working up a set of blueprints as part of the model display (the templates I've made are pretty much blues unto themselves) They probably won't be perfect but I guarantee they're closer to the actual set than anything I've seen out there. I'd be happy to send you copies when they're done.

If you are like me and was dropped on your head at birth, you will require things like study models to save yourself from the endless frustration of "trial and error." This study model has already helped me so much in that regard. The scale of the model is so small that putting tabs for making boxes or trying to bend cardstock into columns is extremely difficult at best...especially if you have huge hands with fingers like Bratwurst! Great for giving massges but not so much for finely detailed work... I started off making the raised floor a modified box, which caused all kinds of problems. I redesigned it as a flat surface suspended by several boxes, some with artwork and some simply for support. I had the same problem with the half rounded panels that lead into the command office. Originally they were just one section that would bend around some inward jigs. Turns out it's REALLY hard to bend cardstock in a quarter round shape at a small scale. Solution: Once again, break it all up into components that fit together. I made posts out of the panels on either end of the quarter rounds, wound the rounded piece around my hobby knife and flattened out the tabs on it (see photos). I will install these later today and post more photos soon.

Thanks for the interest.

Best,
Ian
 

Attachments

  • DSCN0252.jpg
    DSCN0252.jpg
    521 KB · Views: 17
  • DSCN0253.jpg
    DSCN0253.jpg
    534.4 KB · Views: 17
  • DSCN0254.jpg
    DSCN0254.jpg
    570 KB · Views: 16

Revell-Fan

Co-Administrator
Staff member
Administrator
Moderator
Aug 1, 2009
11,595
12,338
228
Vreden
Space is currently in syndication on German free TV. This is a splendid opportunity for me to watch it because I haven't seen the show before. Moreover, this time the episodes are uncut and digitally restored. I was fairly surprised when I saw the end credits of one episode in stereo; luckily I have recorded it.

The project is coming along very nicely. I wish you good luck with it. I'll be following this closely. :)
 
  • Like
Reactions: Octoman

Octoman

Active Member
Nov 15, 2013
122
225
48
Cleveland, Ohio
Wow! Thanks for the excellent comments and support. I'm really having a good time with this... Since it's a study model and doesn't have to be perfect, I'm progressing pretty quickly. When I do the paper kit (I'm definitely going to do that now and make it available here) it's going to go slower as I will be tweaking the parts for fit and color...but in the meantime:

I installed the half columns on the Main Mission side of the model and will do that on the Command Office side next. The right side went together perfectly but I noticed some bulging on the left. Not certain why this happened but it could be anything from a misalignment of the part to a measuring error some where. This is going to be REALLY tricky on the plastic scratch build. Still haven't decided exactly how to do it.
 

Attachments

  • DSCN0255.jpg
    DSCN0255.jpg
    535.1 KB · Views: 18
  • DSCN0256.jpg
    DSCN0256.jpg
    509.7 KB · Views: 18
  • DSCN0258.jpg
    DSCN0258.jpg
    507.4 KB · Views: 19
  • DSCN0260.jpg
    DSCN0260.jpg
    490.9 KB · Views: 18
  • DSCN0261.jpg
    DSCN0261.jpg
    507.9 KB · Views: 19

Octoman

Active Member
Nov 15, 2013
122
225
48
Cleveland, Ohio
Oh, and Hawk; You nailed it. The Catacombs and the Eagle modeling forum are the two sources I used the most. Both are excellent sources for anyone interested in Space 1999.
 

Octoman

Active Member
Nov 15, 2013
122
225
48
Cleveland, Ohio
Okay,
moving right along... I've attached the columns on both sides of the middle wall and added the ceiling piece over them. On the actual set, this ceiling piece is actually lighting but on the scratch build I'm doing (and likely the larger paper kit I'll be offering) the light panels are cut out so you can see the model.
 

Attachments

  • DSCN0266.jpg
    DSCN0266.jpg
    535.4 KB · Views: 15
  • DSCN0267.jpg
    DSCN0267.jpg
    558.2 KB · Views: 13
  • DSCN0268.jpg
    DSCN0268.jpg
    612.8 KB · Views: 14
  • DSCN0271.jpg
    DSCN0271.jpg
    471 KB · Views: 16

Octoman

Active Member
Nov 15, 2013
122
225
48
Cleveland, Ohio
Next up;
Attach the remaining walls in the control room and then; the mezzanine!
You can see the cut out for the stairs on the left side and on the underside, the eight "can lights" (it WAS the 1970's) that illuminate the computer stations. They're just graphics here (to mark location) but I'll be making tiny ones for the scratch build out of silver beads and tiny washers and then lighting them with fiber optics.
I'm using 1/16th inch plastic rod for the polls and I don't actually have the stairway worked out yet because it's COMPLICATED! But, I'm going to spend some time this weekend working them out. DSCN0278.jpg DSCN0279.jpg DSCN0280.jpg DSCN0281.jpg
 

Attachments

  • DSCN0282.jpg
    DSCN0282.jpg
    518.1 KB · Views: 17