Building my own Y wing(s)

dnalor

Well-Known Member
Oct 28, 2011
917
186
58
Belgium Europe
back again....well never been far, but it progresses slowly.
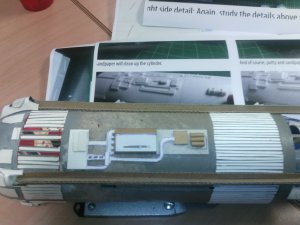
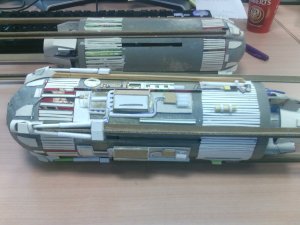
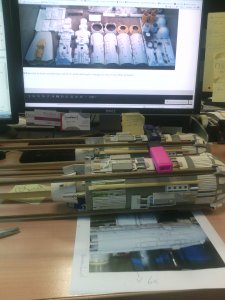
Now that the snowspeeder is ready i have taken the engins of the y wing to my work to build there.
At home i have'nt got the time anymore..
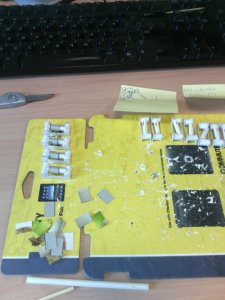
But it is still under constrction :)

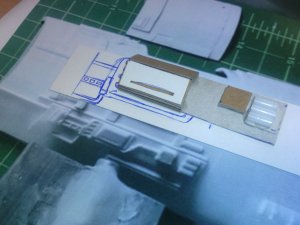
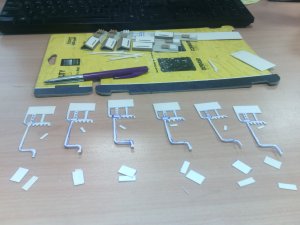
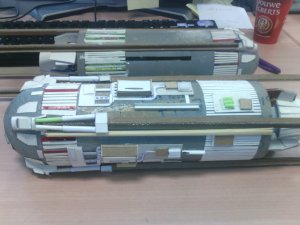
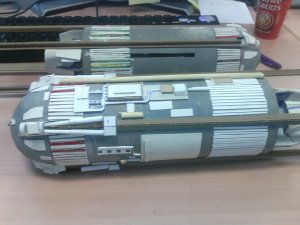
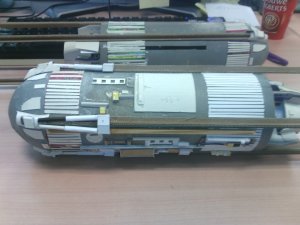
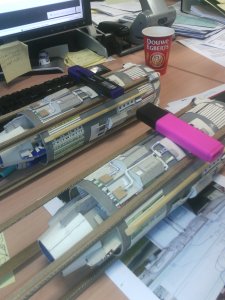
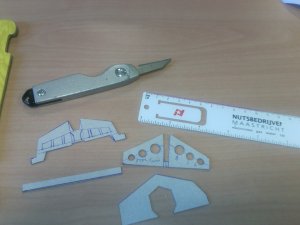
at the moment i'm working on the details of the 2 right engines.
 

Attachments

  • IMG_20140626_122726.jpg
    IMG_20140626_122726.jpg
    736.4 KB · Views: 40
  • Like
Reactions: zathros

dnalor

Well-Known Member
Oct 28, 2011
917
186
58
Belgium Europe
9259

yes this it the last one of this piece..
now glue them together...

Also, the next picture is how they will be installed on the right engine..(3 parts for each engine)
 

Attachments

  • IMG_20140704_123624.jpg
    IMG_20140704_123624.jpg
    699.3 KB · Views: 43
  • IMG_20140704_124410.jpg
    IMG_20140704_124410.jpg
    709.3 KB · Views: 42
  • Like
Reactions: zathros

dnalor

Well-Known Member
Oct 28, 2011
917
186
58
Belgium Europe
the engines are starting to get ready...
i only need to build up one side..and some little greeble-ing..
 

Attachments

  • YWING PAPERCRAFT ENGINE RIGHT.jpg
    YWING PAPERCRAFT ENGINE RIGHT.jpg
    772.1 KB · Views: 32
  • Like
Reactions: zathros

dnalor

Well-Known Member
Oct 28, 2011
917
186
58
Belgium Europe
Yes slowly the engines get ready..
I have completed the right engines of the 2 ywings.
and I just started with the 2 left engines..

after that I need to make the rudder part for the 4 engines.
 
  • Like
Reactions: zathros

dnalor

Well-Known Member
Oct 28, 2011
917
186
58
Belgium Europe
Here are the pictures of the 4 sides of the right engines..
i hope that when i spray paint them white/grey that it will look better..
but this should be it.
 

Attachments

  • IMG_20140908_124700.jpg
    IMG_20140908_124700.jpg
    996.3 KB · Views: 33
  • IMG_20140908_124711.jpg
    IMG_20140908_124711.jpg
    750.5 KB · Views: 33
  • IMG_20140908_124719.jpg
    IMG_20140908_124719.jpg
    763.4 KB · Views: 32
  • IMG_20140908_124726.jpg
    IMG_20140908_124726.jpg
    745.4 KB · Views: 47

zathros

*****SENIOR ADMINISTRATOR*****
Staff member
Administrator
Moderator
Apr 5, 2013
13,499
9,551
228
Geez, I must have forgot to hit "Post". I posted earlier, which those engines greebled out the way they are, this model will be fantastic. Unglaublich!! :)
 

dnalor

Well-Known Member
Oct 28, 2011
917
186
58
Belgium Europe
:) thanks guys..
yesterday i found pictures of the 4 sides of the other engine..
and i hope i can start today with the building of the details.
 

dnalor

Well-Known Member
Oct 28, 2011
917
186
58
Belgium Europe
the building goes slowly..
this is how far i am.

it took me some time to get good pictures from all the sides of the engine..
the easie part is that there are many repeating parts...
the sad part..i still have to build all of them :)

at the picture i'm building the largest greeble part of the 2 engines.
 

Attachments

  • IMG_20140926_124509.jpg
    IMG_20140926_124509.jpg
    652.6 KB · Views: 37

dnalor

Well-Known Member
Oct 28, 2011
917
186
58
Belgium Europe
After cutting the large details..
i started with the glueing...
some easy parts are created when glueing..
and i try to fit all the details on it like on the real deal..

when i have done the large parts..i go over it with the small panel details....
 

Attachments

  • IMG_20141015_123701.jpg
    IMG_20141015_123701.jpg
    892.3 KB · Views: 78

dnalor

Well-Known Member
Oct 28, 2011
917
186
58
Belgium Europe
Wel it looks like i started on november 25 2012...
it could be correct...i'm building a very long time..
every working day a half hour.

an slowly it becomes a y wing :)
 

dnalor

Well-Known Member
Oct 28, 2011
917
186
58
Belgium Europe
Still working on the Ywings..
but it goes slow.
at the moment i'm building the back engine rings.

on the yellow picture i'm glueing the shock absorbers.
on the other picture i'm constucting the vanes
 

Attachments

  • IMG_20141128_124205.jpg
    IMG_20141128_124205.jpg
    724.5 KB · Views: 27
  • IMG_20141216_124736.jpg
    IMG_20141216_124736.jpg
    637.4 KB · Views: 19

dnalor

Well-Known Member
Oct 28, 2011
917
186
58
Belgium Europe
:) I almost finished the engine rings..
I have installed them to the main engine rods.
glued the shock absorbers to the rings.

I still need to glue some little plates to the rings and then it's ready.
and can I glue them to the main body.
 
  • Like
Reactions: bgt01