1945 Scammell Pioneer SV2S

zathros

*****SENIOR ADMINISTRATOR*****
Staff member
Administrator
Moderator
Apr 5, 2013
13,496
9,548
228
I do have to say that your solution for a steering box was ingenious. It will be borrowed (copied) by many!! I plan to use a wood screw, which will form the threads around the gear, (a separate process), for a tight fit, Lord knows where you got that worm and gear from!!!!


steering-parts-jpg.143975
 
  • Like
Reactions: Rhaven Blaack

Gandolf50

Researcher of obscure between war vehicles...
Staff member
Moderator
Jan 28, 2013
1,332
1,585
96
New Mexico USA
Finally Getting back on this beast!! Still looking for parts and such as everything was boxed up for a time...but found what I needed..set the engine in place.. as a reference point to set the cab and radiator and all of the additions that are in the works there, as well as see what I will have to modify as those elements are going in place, I can see already will have to make a small mod to the cab and raise it slightly to allow it to go a little further back ( Pictures to follow as the parts go together )! Right now I started working on the cab to get it finished, which means all the interior needs to be finished first...so I can get the nasty curved roof in place...( That is going to be a Royal Pain) added some stock to upper sections of door openings and cab as they were WAY to thin and would not hold up to the bent roof section when it gets glued in place...was looking at the interior and first off started on the seats ( the kit seats are your basic stack of boxes. Really bad!!!

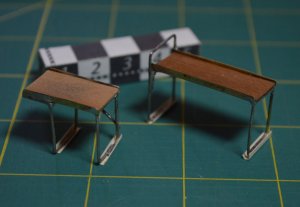
So...I did a bit of looking and found some originals and fabricated them out of wire and brass sheet, with veneer for the ply seat base,
New-Seats.JPG

in the process now of a canvas seat, cushion core out of Styrofoam so that it can be shaped and the canvas weathered etc..
More to follow soon...
 

zathros

*****SENIOR ADMINISTRATOR*****
Staff member
Administrator
Moderator
Apr 5, 2013
13,496
9,548
228
Like I wrote in that other post. Man, that is some fine craftsmanship! :)
 

Gandolf50

Researcher of obscure between war vehicles...
Staff member
Moderator
Jan 28, 2013
1,332
1,585
96
New Mexico USA
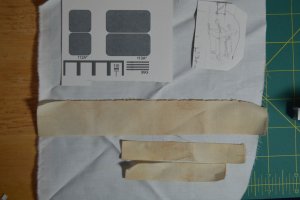
Thanks! All! In the proces of getting the seat cushions done..white fine cotton, weathered with a tea bag ( used, I won't sacrifice a fresh one for any-thing)!

Cloth-Sketch-Trash.jpg New cloth, then tea weathered strips Up Left-model driver seat (ackk) and a sketch for the shifter size and arrangement...

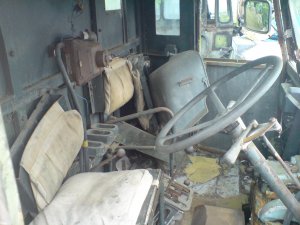
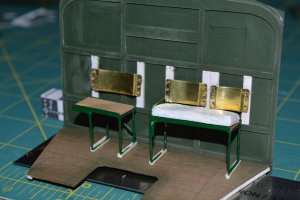
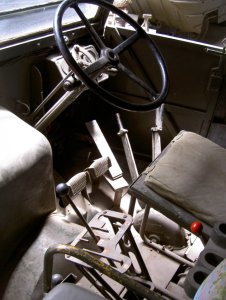
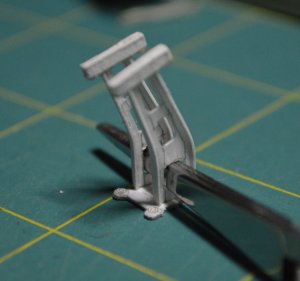
Found a few interior pix and noticed the seat back arrangement and the simple process of steel pin on the wall and set of holes on the seat back sheet metal to adjust the height of the back,
DSC00004.jpg
Seat-Build.jpg sooo.... made them up yesterday,...needs some paint and such, did not put the slanted sides on them but can change that easily enough..more concerned with the seat cushions for now..

Then I have to work on this bad boy...shifter arrangement lower center!
Scammell-poste-de-conduite_1.jpg
I have grave doubts as to it being shift-able, but depending on how I end up constructing it...it just might be...Why be timid now??
 

zathros

*****SENIOR ADMINISTRATOR*****
Staff member
Administrator
Moderator
Apr 5, 2013
13,496
9,548
228
I'm sure we'll somehow see you driving it someday!! :)
 
  • Like
Reactions: Gandolf50

Gandolf50

Researcher of obscure between war vehicles...
Staff member
Moderator
Jan 28, 2013
1,332
1,585
96
New Mexico USA
Did a little more work this AM as it was raining again...Monsoon season is running late this year!

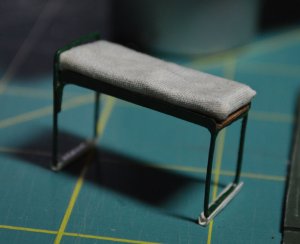
Made up one seat cushion for the bench seat, with the tea stained fabric...looks OK, but will more than likely add a bit more grime as the cab goes together, it is a wrecker after all!

Bench-seat.jpg ...under layer is a slice of Styrofoam, compressed to show butt prints..

Have to use eye-ball measurement and guess-ta-mation for the shifter arrangement..as I have Zilch for the measurements so used the height of the bench seat and artistic proportions to make one up...

Shifter.JPG
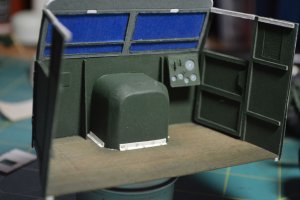
while was working on these things..had the cabin setting up on the bench, as I have started gluing it up. Got the floor glued in this morn...

Cabin-Glueup.jpg ...noticed also in the interior shots I found there is a transmission cover , this side of the engine cover, so will include that as well as the wood block foot rest for the accelerator ( anyone notice that?) also it gave me a few good views of the hand brake and other levers, so will work on those also...or to put in other words..start scratch building more stuff... next time!
 

zathros

*****SENIOR ADMINISTRATOR*****
Staff member
Administrator
Moderator
Apr 5, 2013
13,496
9,548
228
I believeyou got that as good as humanly possible. It's functional beauty. The use of used 'Tea Bags", gives a new meaning to "teabagging", on the seats!! ;)
 
  • Haha
Reactions: Chuffy70

ViperPilot

New Member
Aug 21, 2016
42
35
0
61
Simply outstanding work, and a very resourceful way to use common household items!

Hope the 'digits' are cooperating; looks like they are!

Alan Claphands
 

Gandolf50

Researcher of obscure between war vehicles...
Staff member
Moderator
Jan 28, 2013
1,332
1,585
96
New Mexico USA
I believeyou got that as good as humanly possible. It's functional beauty. The use of used 'Tea Bags", gives a new meaning to "teabagging", on the seats!! ;)

The rest of my tea just went up my nose, reading this....;)
 

Gandolf50

Researcher of obscure between war vehicles...
Staff member
Moderator
Jan 28, 2013
1,332
1,585
96
New Mexico USA
Simply outstanding work, and a very resourceful way to use common household items!

Hope the 'digits' are cooperating; looks like they are!

Alan Claphands
Thanks for the support!!
I love recycling what-ever I can...but if I could, I would use laser cut parts if I could get them! Cost for shipping alone is as much as a model, I even looked into a laser at one time to set up a laser cut service of my own, price was do-able at the time, but getting the model files and creating the laser cut parts became the problem, the next time I checked out a cutter, the price had doubled! Hands work about as well as can be expected, just have to live with the fact that I will drop stuff constantly, and have to use tweasers and third hands weights and every-thing else to be able to hang on to these tiny parts!
 

ViperPilot

New Member
Aug 21, 2016
42
35
0
61
You and me both, Gandolf! Gotta try to keep that dexterity going as best we can. Good idea about the 3rd Hand... might have to modify one myself!

Alan
latest
 

Gandolf50

Researcher of obscure between war vehicles...
Staff member
Moderator
Jan 28, 2013
1,332
1,585
96
New Mexico USA
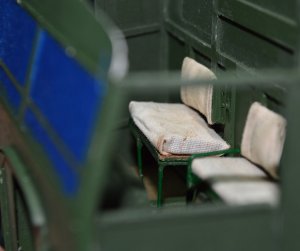
Got the seats, seatbacks and cushions all together, will still stitch up the corners of the cushions to make them look proper....Note: on this scale I have to pull a single thread from the fabric I used to sew up the corners! If I were to use regular sewing thread it would look like a hunk of rope!
Here is a test shot of the seats in place through the passenger window...

Interior-TestView.jpg

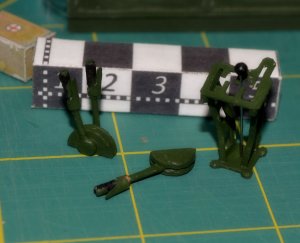
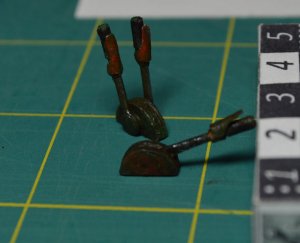
Still trying to get all the little bits and pieces for the interior done...here are some of the brake levers and the shifter tree, with prime coat...before final shaping and weathering..still have a few shifters to add to the tree, as well. Interior-Parts-B.jpg ..till next time..

"Getting closer to the full day of trying to glue the roof on this beast! It's going to be harder that the 53 Chevy Truck I chopped 2" that was like cutting egg shell, and getting it back together took months !! "
 

Rhaven Blaack

!!!THE MAN BEHIND THE CURTAIN!!!
Staff member
Administrator
Moderator
Jun 12, 2009
12,485
9,832
228
Oregon
www.deviantart.com
These details look so realistic! I am ABSOLUTELY AMAZED with the amount of work, effort, and energy that you are putting into this model.
 

zathros

*****SENIOR ADMINISTRATOR*****
Staff member
Administrator
Moderator
Apr 5, 2013
13,496
9,548
228
The shifter and levers looks awesome!! :)
 

Gandolf50

Researcher of obscure between war vehicles...
Staff member
Moderator
Jan 28, 2013
1,332
1,585
96
New Mexico USA
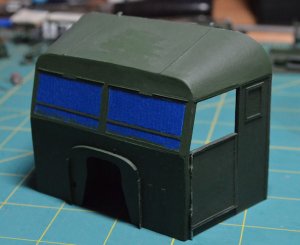
Little more progress...glued on the roof, and I must say " it was actually easy as pie"! not what I was expecting that's for sure!! Got everything ready including several strips of painters tape, pretested shape, did a little tweaking here and there and glued away! ....
Roof-On.jpg
Bit more sanding, and paint ( still have to decide if I am going to camouflage it with that terrible "Mickey Mouse " pattern ) !

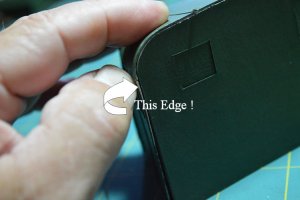
Then I did a test fit with the back wall...nasty nasty nasty!!! Another case of not so great design and my modifications! Might be OK with basic kit version ( I did check with Wak and the original Beta build...and it is also bad, they didn't fix things after beta build!!) problem is this...side walls are supposed to fit over back wall, but there are no cover strips so the ends of the side walls are exposed..since I thickened the walls as they were so wimpy, it now looks nasty!
Cab-BackWall.jpg
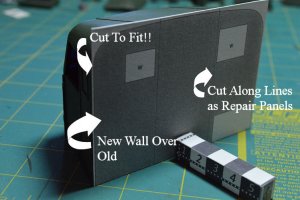
I could glue and fill and paint but it will never look very good...at least not to my satisfaction! so...Here is my fix..printed up a new back wall to go over the whole thing...including the sides...then I can take the rivet strips that go up the sides and over the top at that edge and cover the edge of the new wall section, as it should have been to begin with.
Back-Wall-Fix.jpg

I will cut it in 3 sections along the lines shown ( as repair panels, or as I have seen in some just the way some were skinned!) I can then cover those lines with rivet strips and be good to go! ( Hopefully ) !!

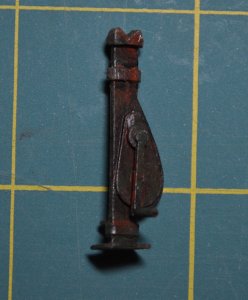
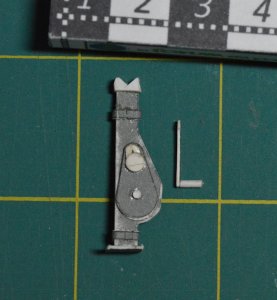
While being disgusted, frustrated and all that..worked up a standing jack...for the beast!
Standing-Jack.jpg
will put the handle on after jack has been sanded and painted...
till next time...
 

zathros

*****SENIOR ADMINISTRATOR*****
Staff member
Administrator
Moderator
Apr 5, 2013
13,496
9,548
228
Nice texture on the cab. :)
 

Rhaven Blaack

!!!THE MAN BEHIND THE CURTAIN!!!
Staff member
Administrator
Moderator
Jun 12, 2009
12,485
9,832
228
Oregon
www.deviantart.com
WOW!!! These look GREAT! I really like the weathering! You did a GREAT JOB on it! I have to say that that is one technique that I have never learned how to do. I envy people (like yourself) who can do this and get such FANTASTIC result!
KEEP UP THE GREAT WORK!!!
 

zathros

*****SENIOR ADMINISTRATOR*****
Staff member
Administrator
Moderator
Apr 5, 2013
13,496
9,548
228
I love all the "bits 'n pieces" you have made. This will be the model of merit, when your done, it is an eye catcher fore sure. It's also one of the finest build threads I've ever read. :)
 

Gandolf50

Researcher of obscure between war vehicles...
Staff member
Moderator
Jan 28, 2013
1,332
1,585
96
New Mexico USA
Moving along..trying to get this beast done...
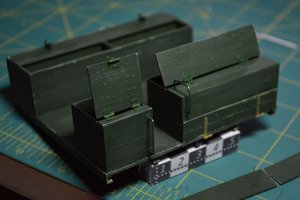
I worked some on the rear box/ jib/winch area...trying to get the majority of it complete so it can go on as a single unit.....and of course started to run into trouble...the progress type...new changes/additions and the like...It is really a burden being OCD sometimes!! Anyway..decided to split the boxes on right side into two parts...couldn't see trying to open a lid the length of the rear area, as it was pictured in the model...so got that started..and also had to add more hinges... ..still have to figure a solution to replace the actual pin type hasp in the real thing..scale is just way to small!! Added some weathering to see what effect it will be..

Box-Back.jpg

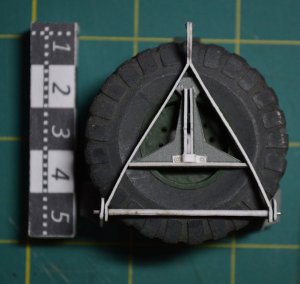
While waiting for stuff to dry started on the spare tire assembly that also holds up the jib..and ran-into more problems...NO DETAILS!....the part on the outside was ok..a few additions / bolts ect and it will be ok...but behind the tire to 1) attach and 2) stop the tire from falling off the carrier! Only 1 detail found from maintenance manual that was un-decipherable! I have an idea, what was there ..but just not sure..and couple days of every type of search..gave me 1) modern rigged solutions 2) no carrier at all or 3) Picture had spare tire in the way all the time!! So with just a few hints and just plain giving up..worked out a compromise solution just to get things moving again... ( You have to remember this...all the while I am struggling with these type of things...I am looking at other parts of the model, and coming up with new changes/additions/ more and more stuff!!! acckk)

so here is my solution....
Spare-tire-assm.jpg
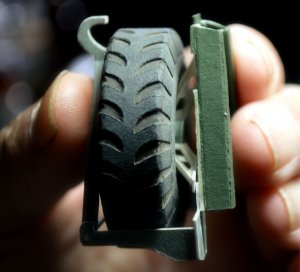
..covered the .030 wire with a wrap of copy paper to thicken it up..and give a glue surface to the sides of the Y arms...

Spare-tire-assm-2.jpg
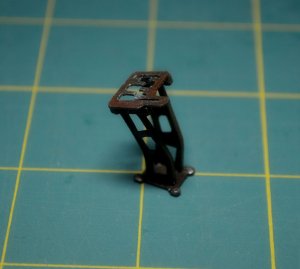
Behind is a thin I beam tripod to support the rim of the tire and stop it from rolling off/ and would be a bolt plate to tie down the spare! It has since been fitted and angles adjusted...just waiting for paint till it gets some glue to it!! Hopefully next time I will have the jib in place!